 Notch
- Difficulty
- Easy
- Time
- 2.8–5.3 hours
- Cost
- $$$
About this build
A very strong and easy to make assembly table that can easily be modified to fit yours needs. Add drawers, enclose the bottom with doors, its near endless what you could do with it.
Tools
Essential
- Circular Saw
- Drill / Driver
- Impact Driver
- Jigsaw
- Miter Saw
- Random Orbit Sander
- Thickness Planer
Materials
| Item | Qty |
|---|---|
| Board, 2x4 96" | 4 board |
| Board, 4x4 96" | 2 board |
| Plywood, 3/4" Thick Full Sheet | 1 board |
| 3" Screws | 80 each |
| 1 5/8" screws | 12 each |
| 3" Locking Casters | 4 each |
Overall cost: $$$. Lumber prices vary by region, species, and season, so we give a band rather than a figure we would only be pretending to know.
Cut list
| Part | Qty | T × W × L |
|---|---|---|
| Apron front and back | 4 | 2" × 4" × 47" |
| Apron Sides | 4 | 2" × 4" × 20" |
| Legs | 4 | 4" × 4" × 29" |
| Table Top | 2 | 3/4" × 24" × 48" |
| Base Deck | 1 | 3/4" × 23" × 47" |
What to buy
Buy 8 boards at 8 ft.
4" × 4"
2 boards
2" × 4"
3 boards
3/4" × 24"
2 boards
3/4" × 23"
1 board
Assumes 8 ft stock, a 1/8" saw kerf, and buying each part at its own width. Change the board size or kerf on the full board plan →
Instructions
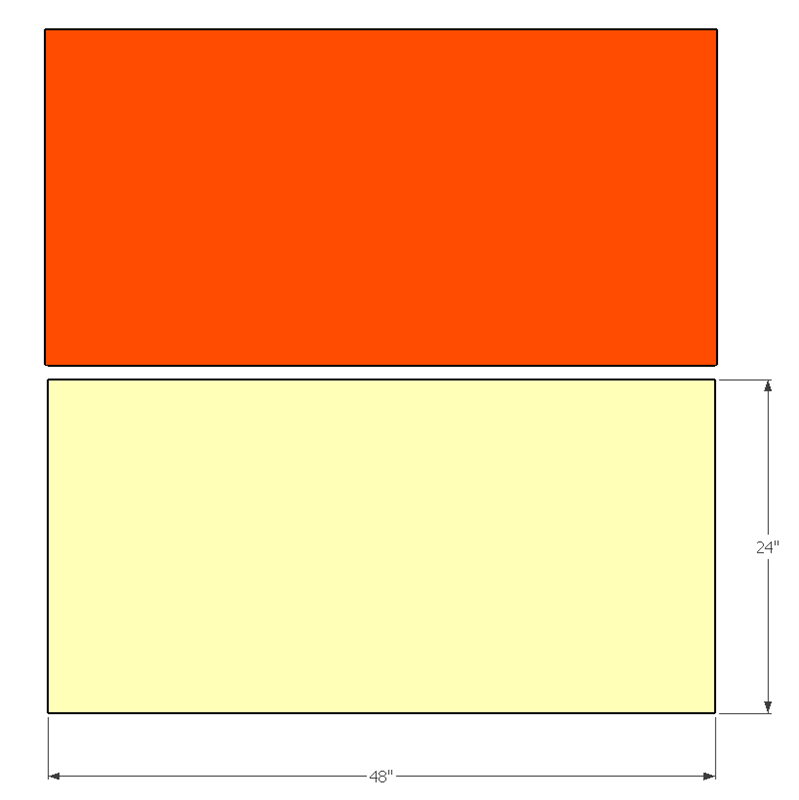
1Table top
Take two pieces of plywood 48"x24"x3/4" and glued them together.
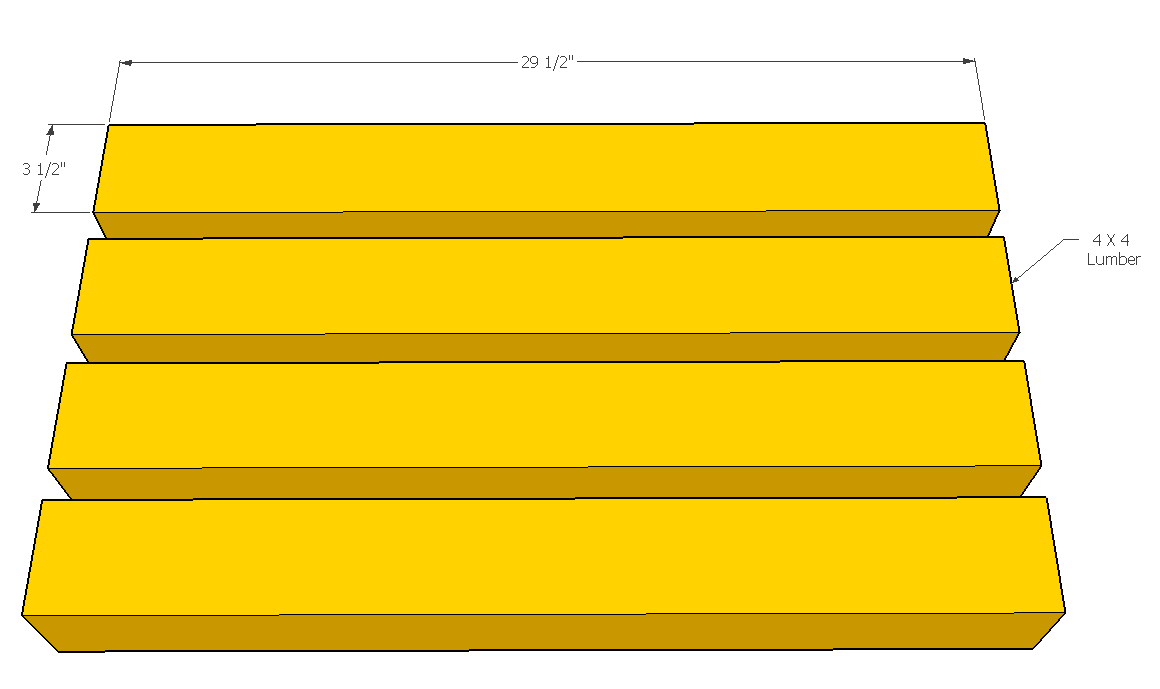
2Legs
Cut 4 - 4x4 to 29 1/2"
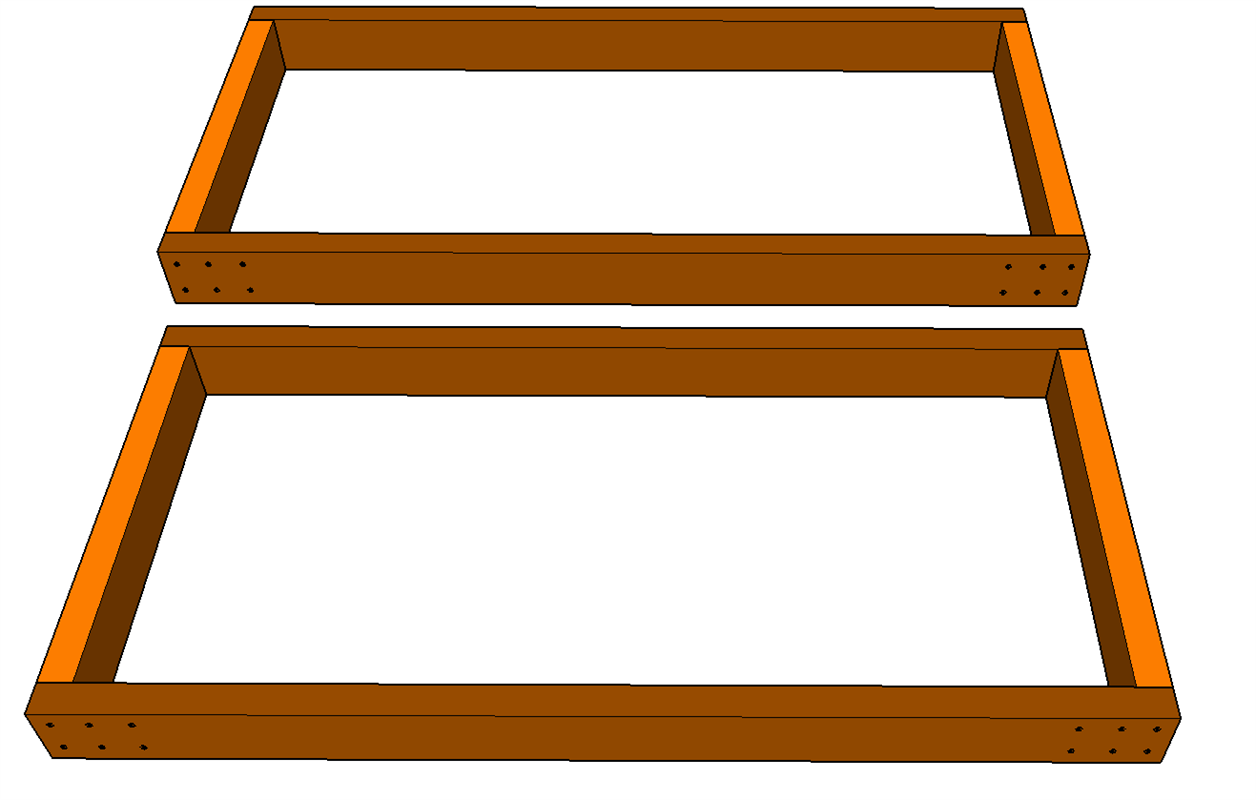
3Aprons
4 - 2x4x47 4 - 2x4x20 Creat two Apron frames
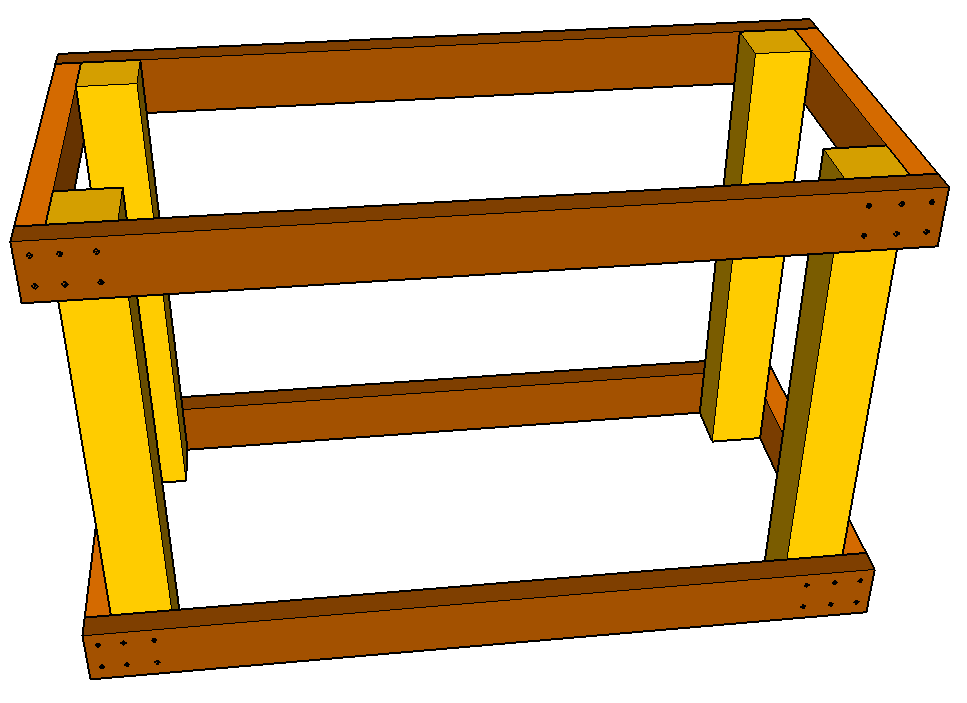
4Assembly
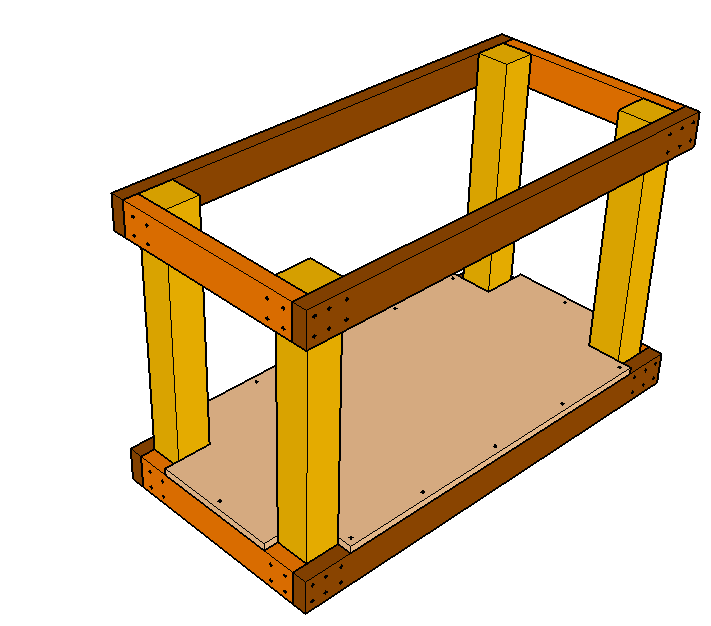
The legs and aprons are put together with glue and screws
5Base deck
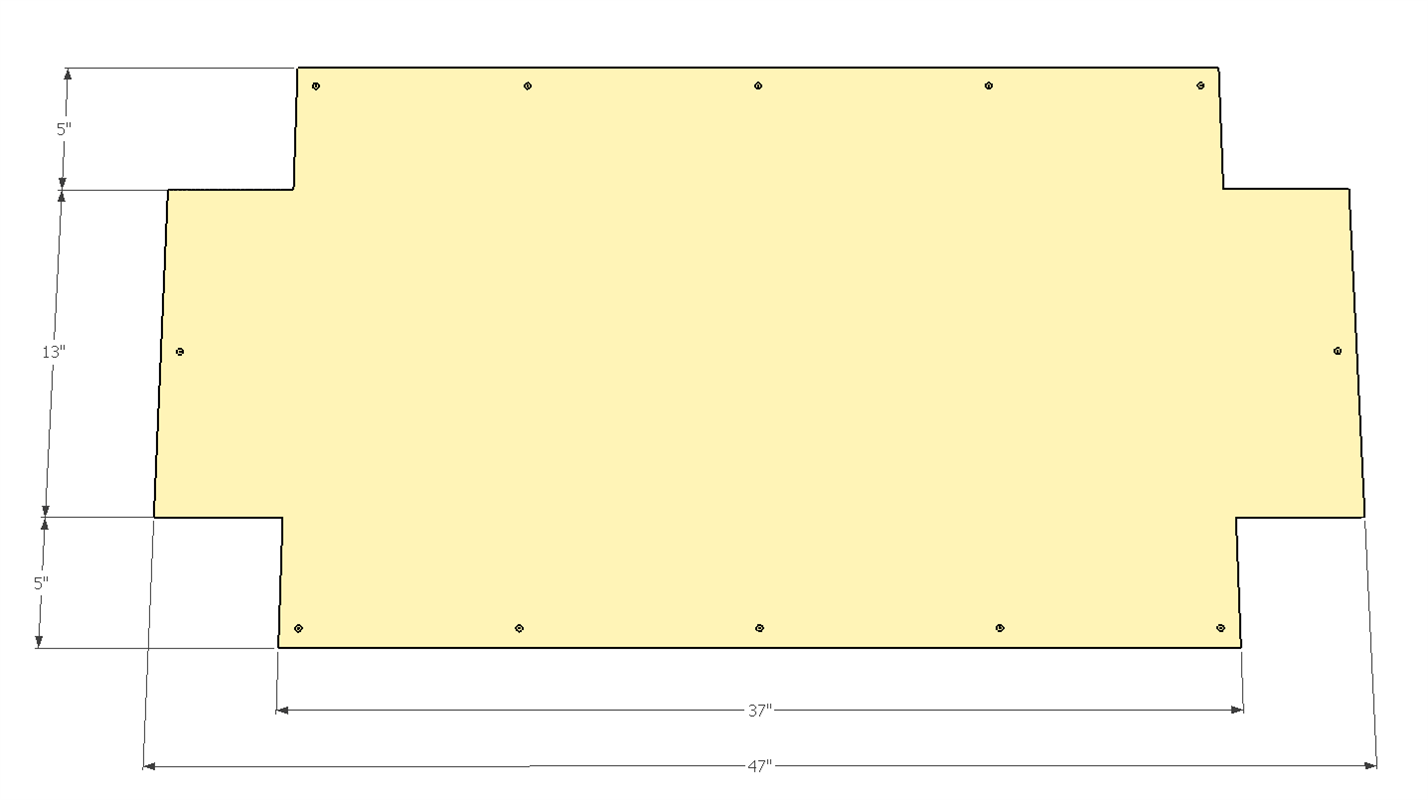
Cut the base deck to fit on the bottom aprons
6Assembly
slide the base deck in from the side at and angle, then rotate into place.
7Casters
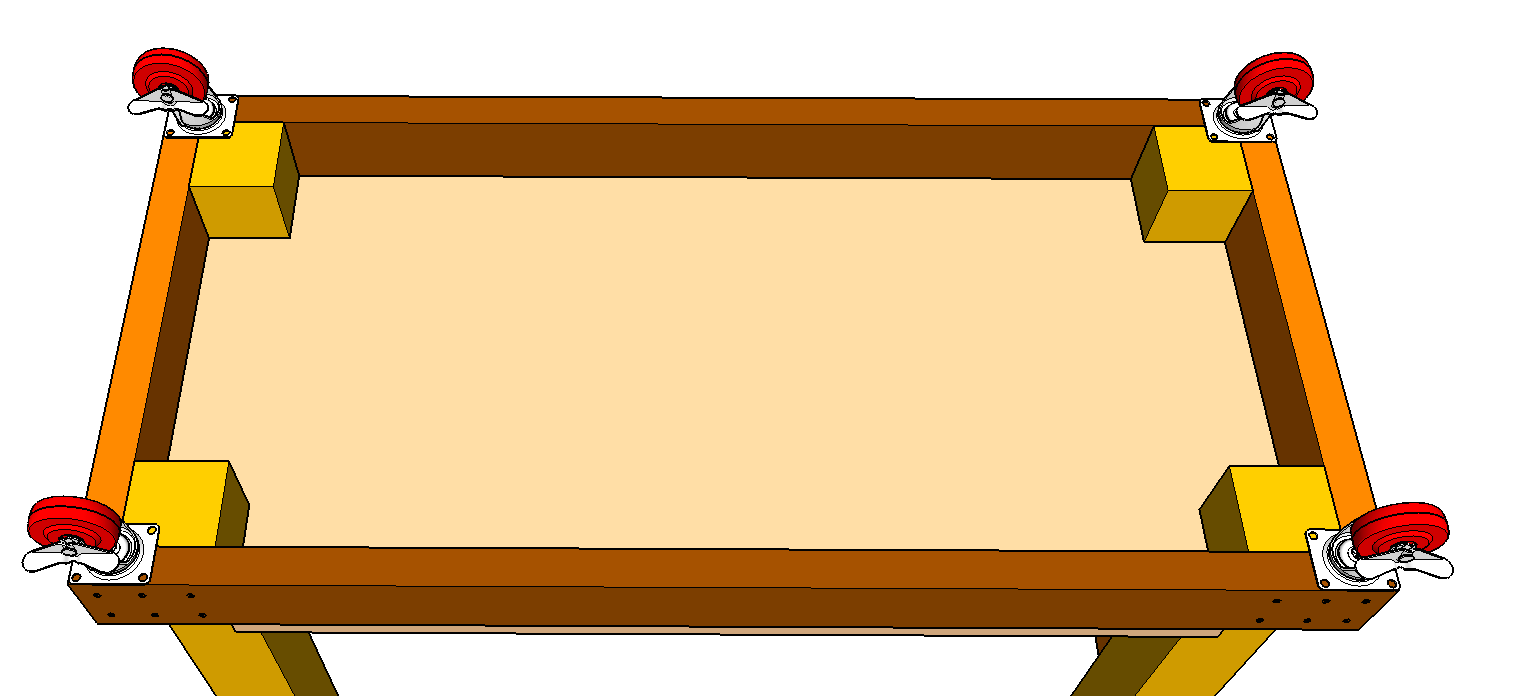
Place Casters on each corner
8Table Top
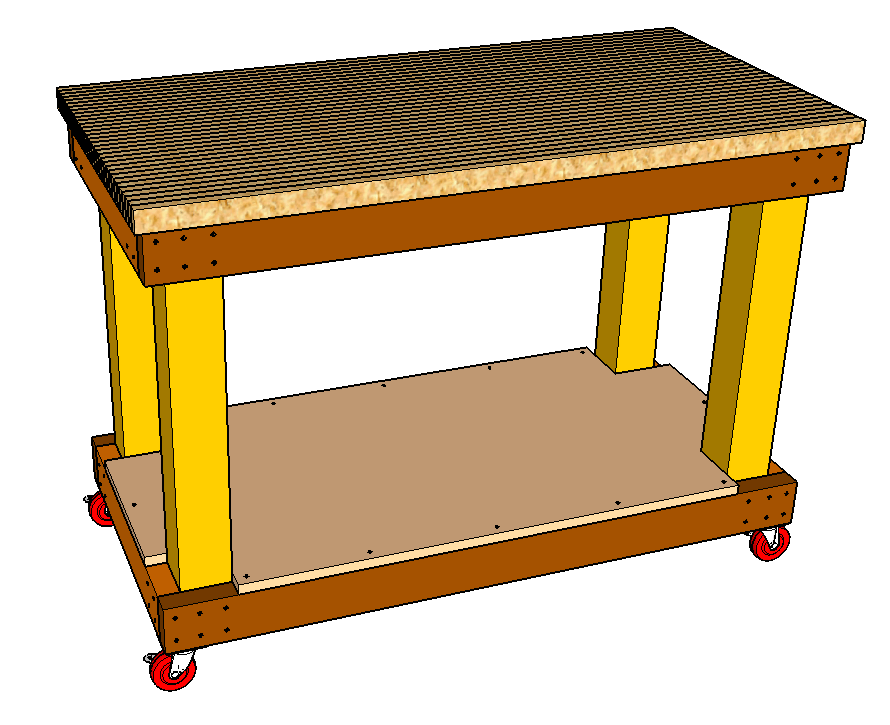
Set table top in place centered on the frame. Predrill and countersink the screws into the frame.
Tags
- Outfeed Tables
- Beginner
Reviews & builds
No reviews yet
Sign in to review this plan or share your build.
No reviews yet. Be the first to build this.