Notch
NotchUse your browser's Print (Ctrl/Cmd + P) and choose Save as PDF. This page works offline once you've opened it with a signal.
Traditional Bookshelf with Modern Legs
Looking to build a simple DIY bookshelf but want to give it a modern twist?!
- Difficulty
- Easy
- Time
- 3.3–6.5 hours
- Cost
- $$
Cut list
| Part | Qty | T × W × L | Material | ✓ |
|---|---|---|---|---|
| Top | 1 | 3" × 12" × 37" | — | ☐ |
| Base | 1 | 3" × 11" × 36" | — | ☐ |
| Shelves | 2 | 3" × 11" × 36" | — | ☐ |
| Sides | 2 | 3/4" × 12" × 36" | — | ☐ |
| Legs | 4 | 3/4" × 2" × 3" | — | ☐ |
| Leg Spans | 2 | 3/4" × 2" × 10" | — | ☐ |
| Leg Middle | 1 | 3/4" × 2" × 32" | — | ☐ |
| Back | 1 | 1/4" × 36" × 36" | — | ☐ |
| Top/Bottom Face | 2 | 3/4" × 1" × 37" | — | ☐ |
| Side Face | 2 | 3/4" × 1" × 34" | — | ☐ |
Materials
| Item | Qty | ✓ |
|---|---|---|
| 3/4" plywood, 4'x8' | 1 board | ☐ |
| 1/4" plywood, 4'x4' | 1 board | ☐ |
| 3/4" board, 3/4"x3 1/2" x 8' | 1 board | ☐ |
| 1 1/4" Kreg Screws | 32 each | ☐ |
| 1" brad nails | 1 each | ☐ |
| Wood glue | 1 each | ☐ |
| Paint or stain | 1 each | ☐ |
Overall cost: $$. Lumber varies by region, species, and season, so we give a band rather than a figure.
Tools
- Drill / Driver
- Miter Saw
- Pocket Hole Jig
- Random Orbit Sander
Instructions
1. Build Frame
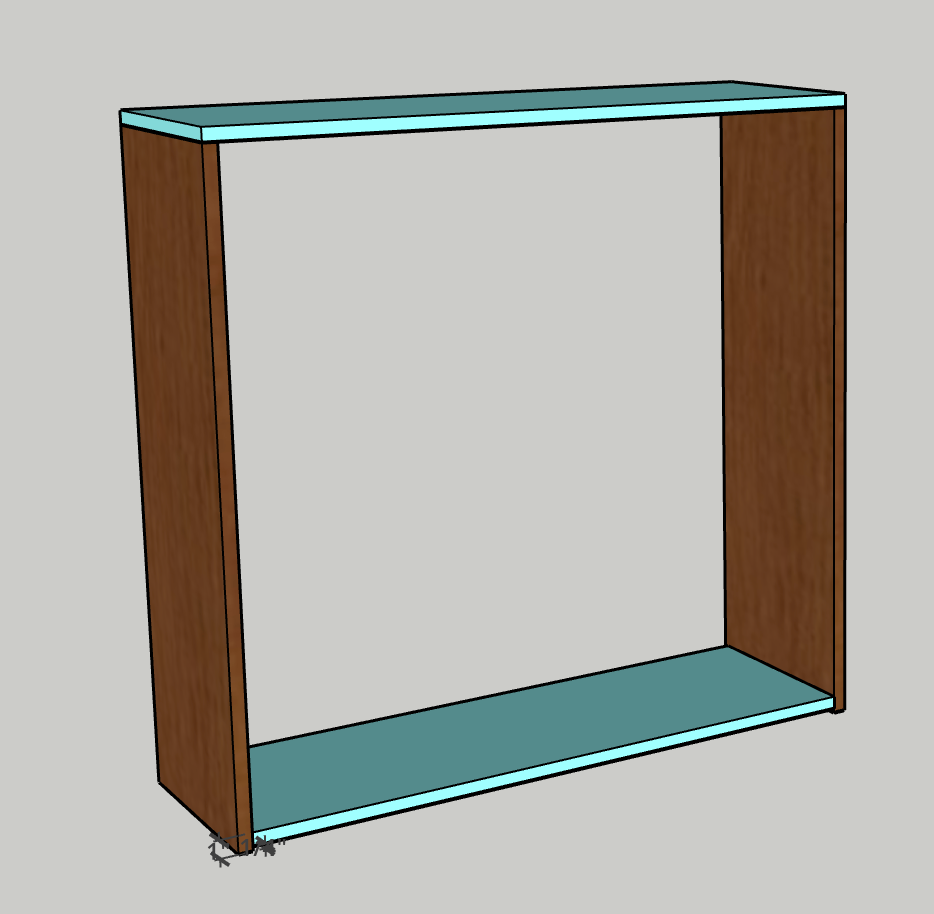
- Drill three pocket holes on one end of each Side. - Drill three pocket holes on both ends of the Base. - Using wood glue and pocket hole screws, attach the two Sides into the bottom of the Top on the ends. - Using wood glue and pocket hole screws, attach the Base between the two sides so that it is 1/4" up from the bottom.
2. Drill Shelf Pin Holes
Using a shelf pin jig, drill shelf pin holes up and down the front and back of both of the Sides.
3. Attach Back
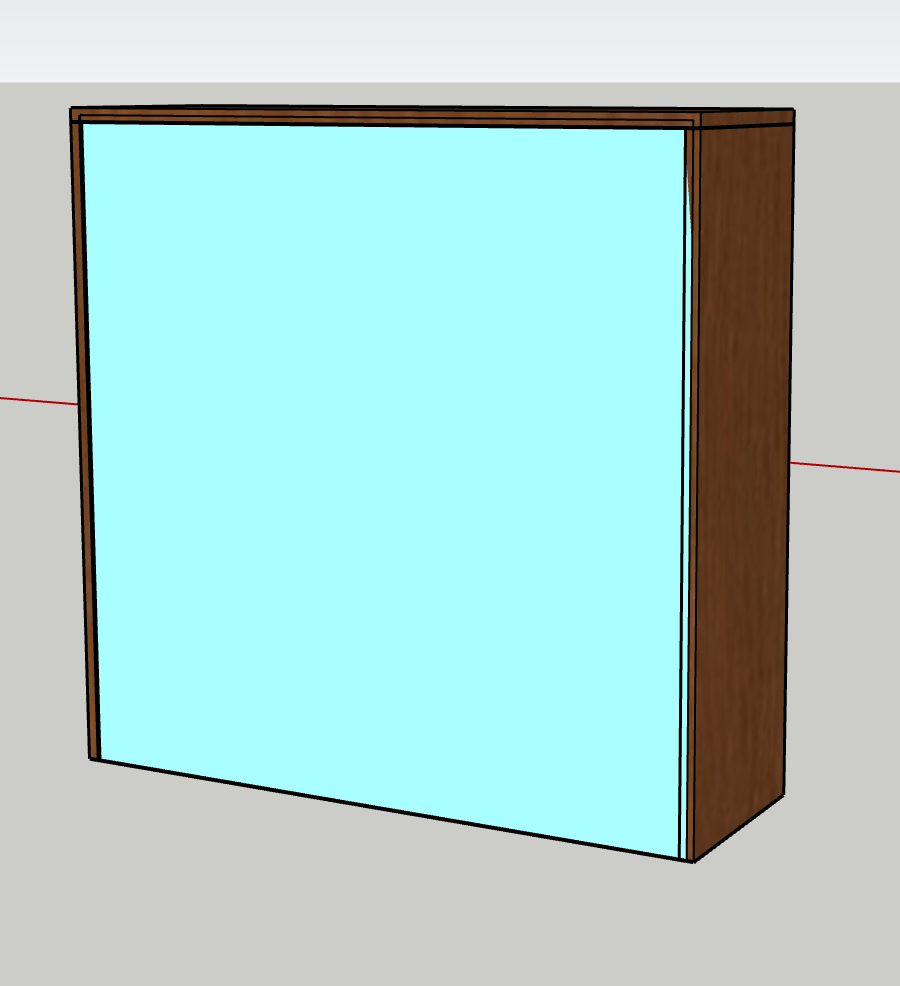
- If you want the Back to be inset and not visible from the sides and top, use a router to carve out a 1/4" deep groove around the inner back side of the frame. - If you don’t have a router or don’t care if the Back is visible, you can skip this. - Using wood glue and 1" nails, attach the Back into the frame.
4. Attach Legs
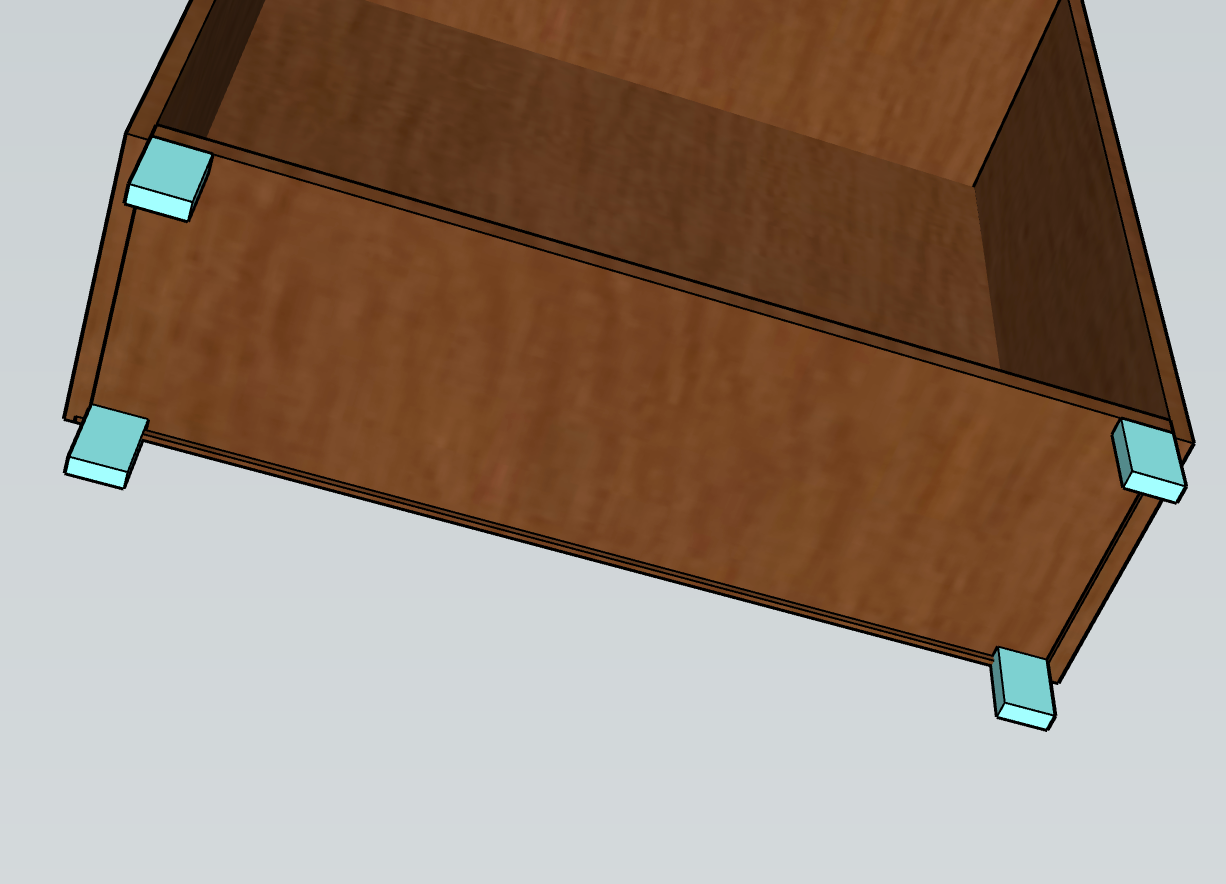
- Drill two pocket holes in one end of each Leg. - Using wood glue and pocket hole screws, attach the Legs into each corner of the Base, making sure the pocket holes face the back.
5. Add Leg Supports
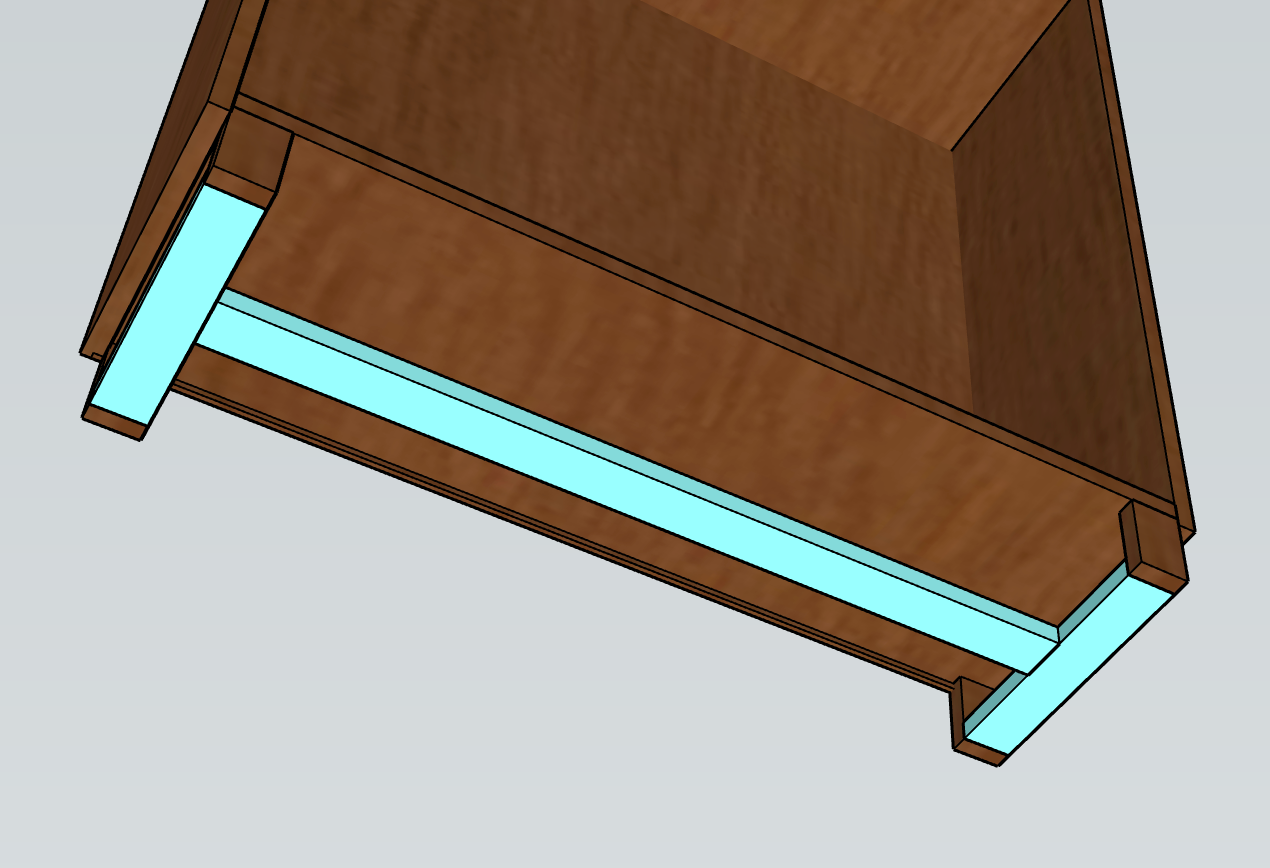
- Drill two pocket holes in each end of the Leg Spans and the Leg Middle. - Using wood glue and pocket hole screws, attach the Leg Spans between the front and back Legs on each side, flush against the bottom of the Legs. - Using wood glue and pocket hole screws, attach the Leg Middle centered between the two Leg Spans.
6. Attach Face Frame
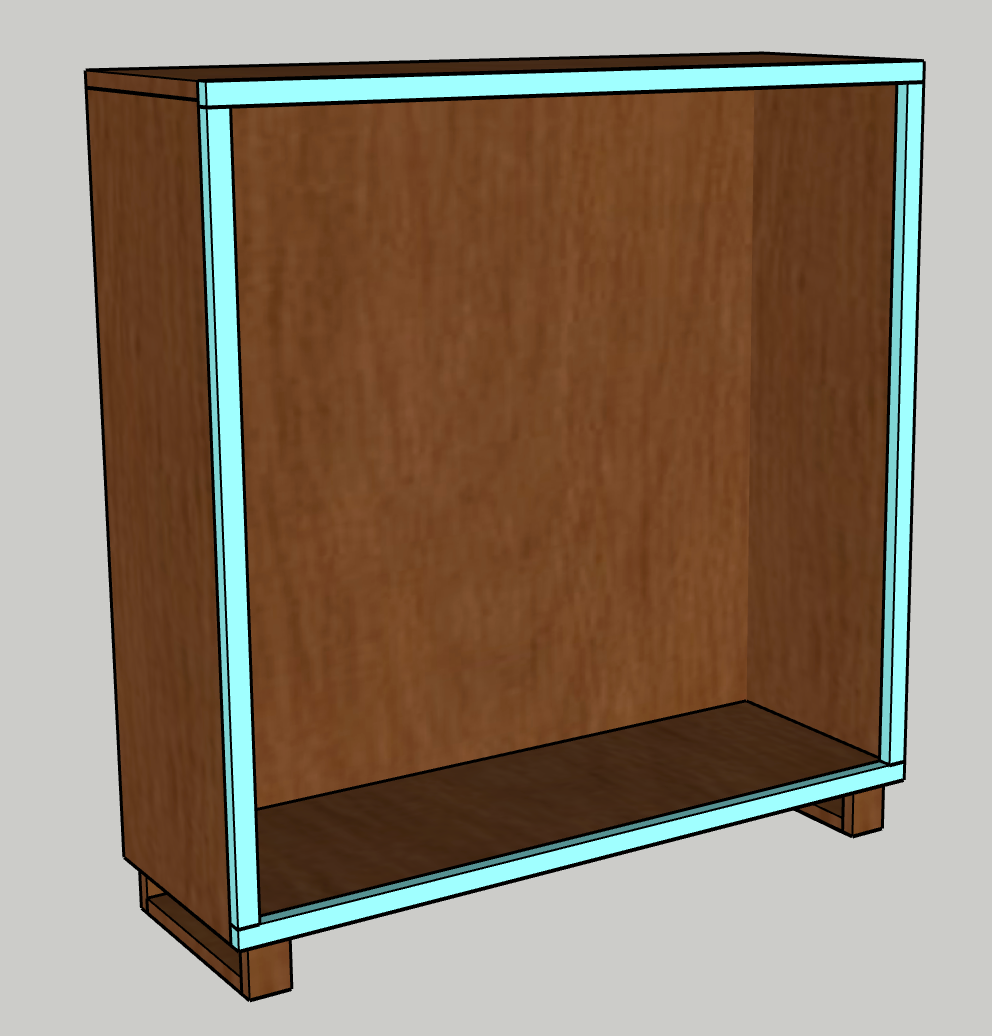
- Using wood glue and nails, attach the Top Face flush along the front edge of the Top and Sides. - Using wood glue and nails, attach the Side Faces flush along the outside edge of the Sides. There will be a little overhang into the bookshelf. - Using wood glue and nails, attach the Bottom Face flush along the front edge of the Bottom and Sides.
7. Stain or Paint
- Add whatever stain or paint you want for your aesthetic. Apply to the body and the shelves that haven’t been installed. - Add a coat of polyurethane to help protect the shelves from wear and tear.
8. Install Shelves
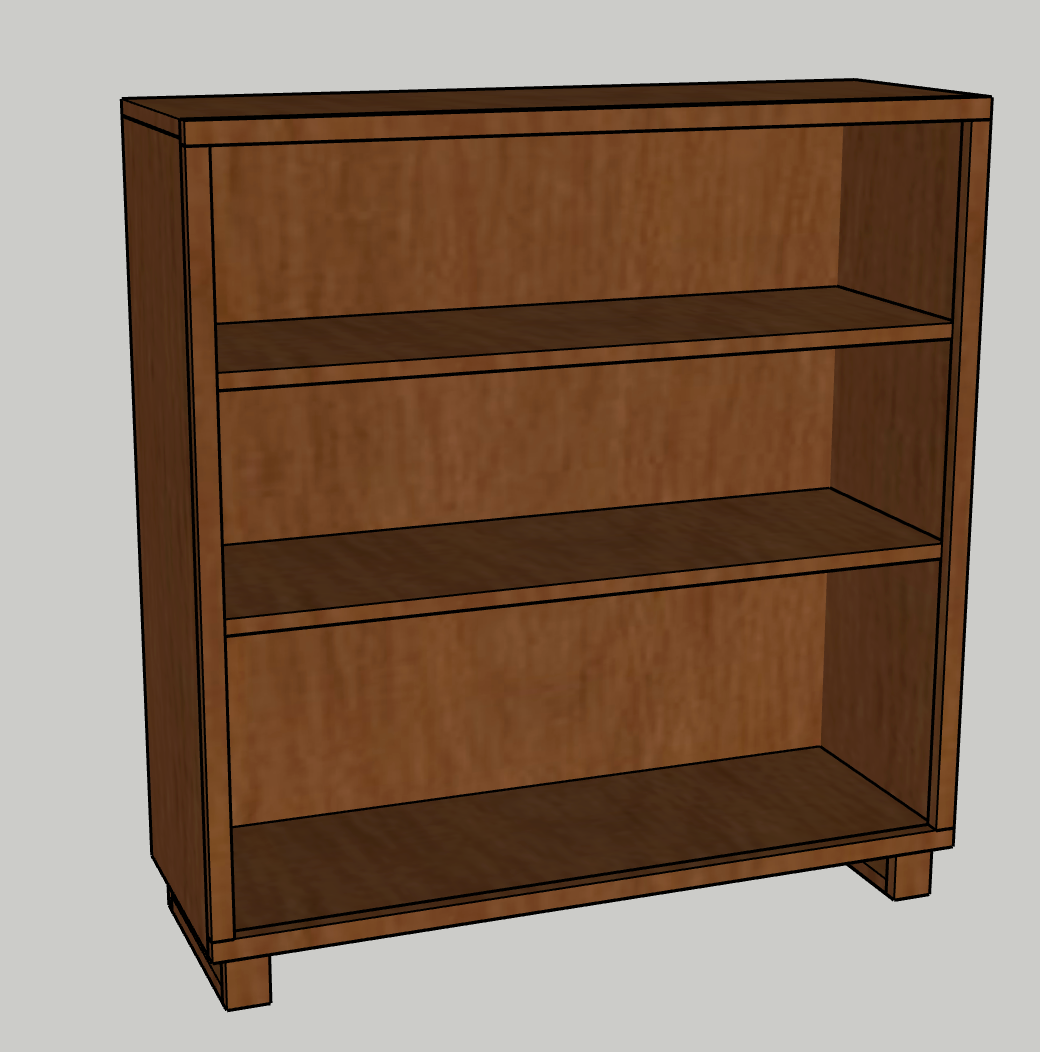
- Select your desired height for your shelves and insert four shelf pins at level height in each corner. - Inserting at a slight angle, slide each Shelf into place on top of the shelf pins.
9. Enjoy!
Enjoy your handiwork and tag @CharlestonCrafted on Instagram with a picture!