Notch
NotchUse your browser's Print (Ctrl/Cmd + P) and choose Save as PDF. This page works offline once you've opened it with a signal.
tall cupboard
A simple farmhouse style storage cabinet with fixed and movable shelves ready to handle anything you have to store.
- Difficulty
- Intermediate
- Time
- 3.5–7 hours
- Cost
- $$$
Cut list
| Part | Qty | T × W × L | Material | ✓ |
|---|---|---|---|---|
| Sides | 2 | 3/4" × 17" × 77" | — | ☐ |
| Top, middle, bottom | 3 | 3/4" × 16" × 26" | — | ☐ |
| Top | 1 | 3/4" × 18" × 29" | — | ☐ |
| Movable shelves | 3 | 3/4" × 16" × 26" | — | ☐ |
| Long trim | 2 | 3/4" × 2 1/2" × 4" | — | ☐ |
| Top trim | 1 | 3/4" × 2 1/2" × 8" | — | ☐ |
| Bottom trim | 1 | 1" × 5" × 22" | — | ☐ |
| Backing | 5 | 3/4" × 5 1/2" × 2" | — | ☐ |
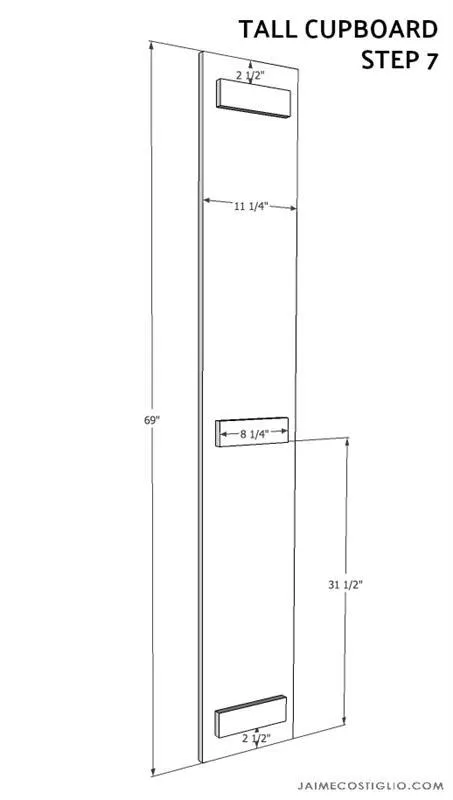
| Doors | 2 | 3/4" × 11 1/4" × 69" | — | ☐ |
| Door support | 6 | 3/4" × 2 1/2" × 4" | — | ☐ |
Materials
| Item | Qty | ✓ |
|---|---|---|
| Plywood, 3/4" Thick Full Sheet | 2 board | ☐ |
| Board, 1x3 96" | 3 board | ☐ |
| Board, 1x5 72" | 1 board | ☐ |
| Board, 1x12 72" | 2 board | ☐ |
| Tongue & groove, 1x6 96" | 5 board | ☐ |
| 1 1/4" pocket hole screws | 50 each | ☐ |
| 1 1/4" wood screws | 25 each | ☐ |
| 1 1/4" finish nails | 50 each | ☐ |
| Full wrap hinges | 6 each | ☐ |
| Knobs | 2 each | ☐ |
Overall cost: $$$. Lumber varies by region, species, and season, so we give a band rather than a figure.
Tools
- Brad Nailer
- Circular Saw
- Drill / Driver
- Jigsaw
- Miter Saw
- Pocket Hole Jig
- Random Orbit Sander
- Tape Measure — optional
Instructions
1. dimensions
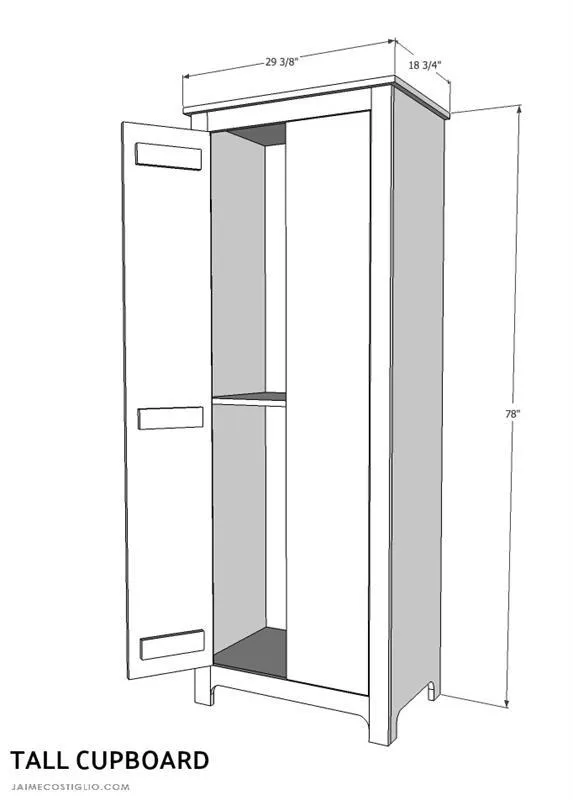
overall dimensions: 78"h x 29 3/8"w x 18 3/4"d
2. step 1
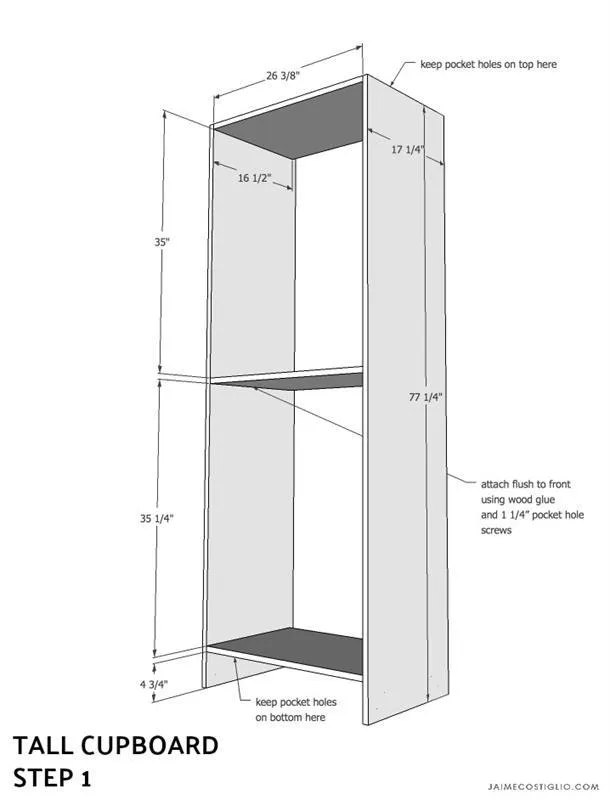
Step 1: Build the carcass. Attach the top, middle shelf and bottom to the sides using wood glue and 1 ¼” pocket hole screws. In the top and bottom be sure to predrill pocket holes for later attaching the face frame.
3. step 2
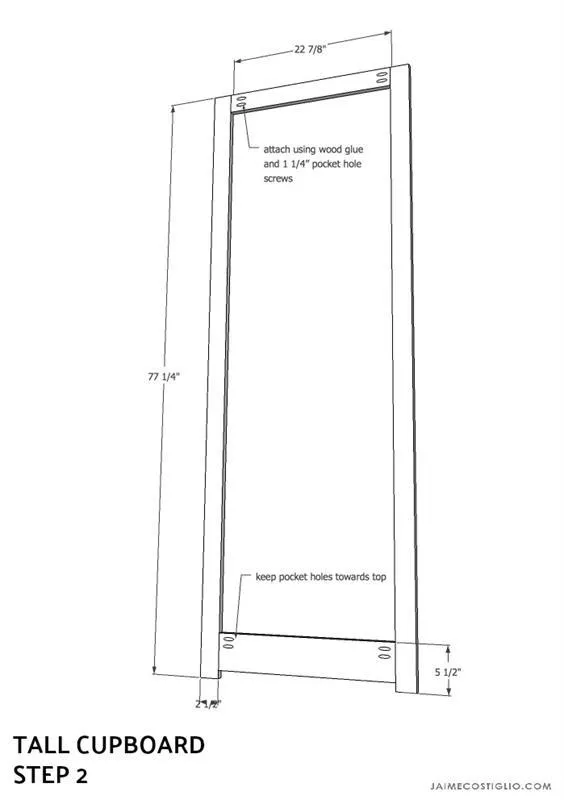
Step 2: Construct the face frame. Attach the short trim pieces to the long trim using wood glue and 1 ¼” pocket hole screws.
4. step 3
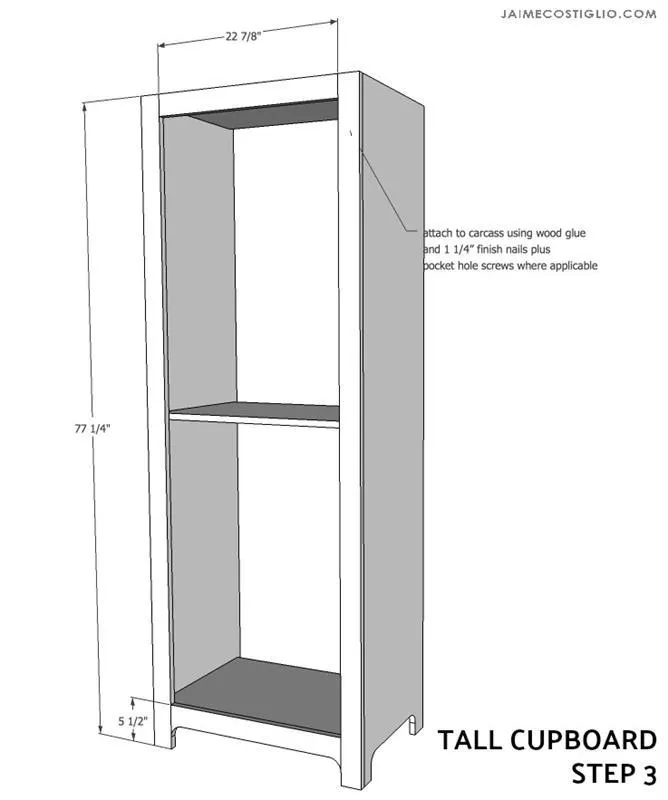
Step 3: Attach face frame to carcass using predrilled pocket holes. Use wood glue and 1 ¼” pocket hole screws plus 1 ¼” finish nails on the sides
5. step 4
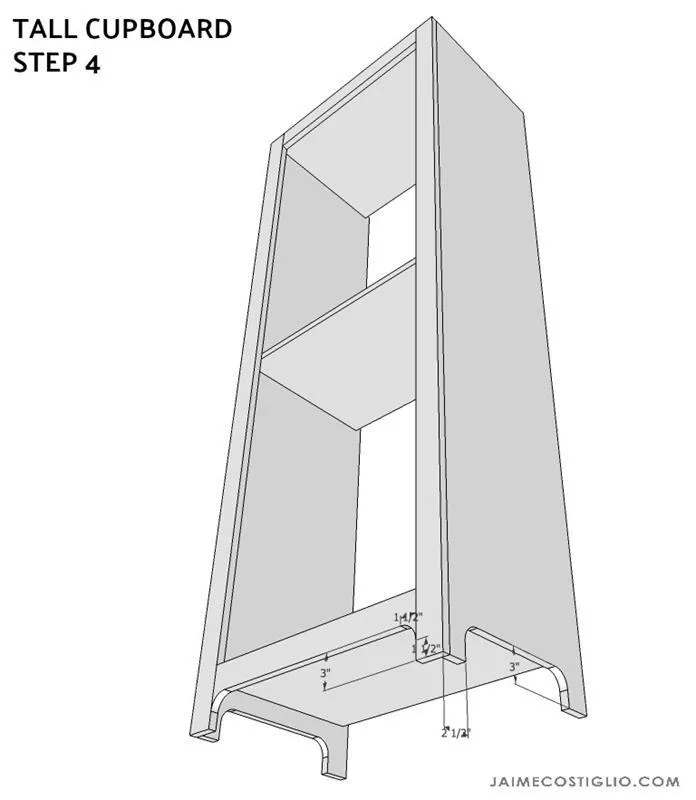
Step 4: Use a jigsaw to cut decorative curved trim at bottom.
6. step 5
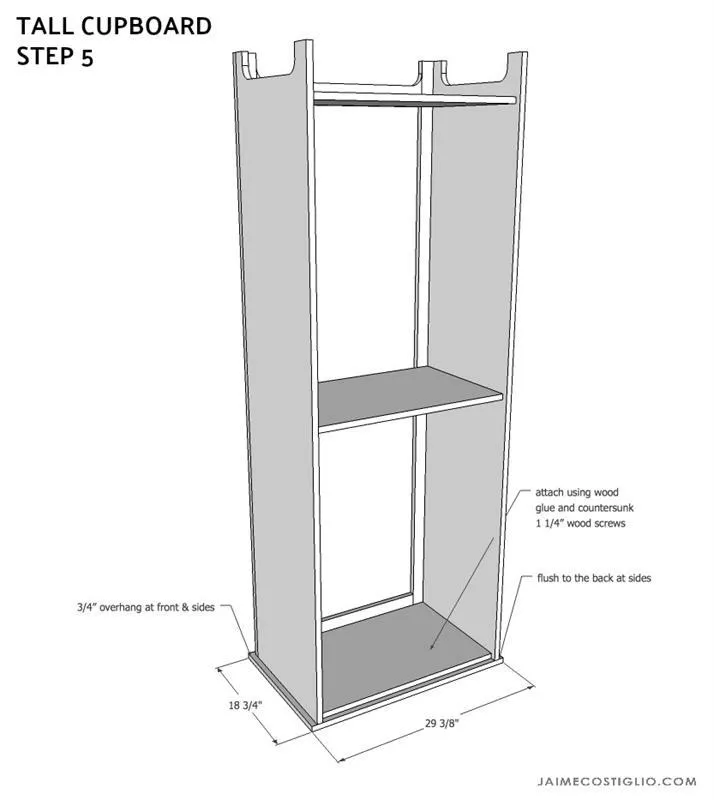
Step 5: Attach the top the to carcass using wood glue and countersunk 1 ¼” wood screws. Keep top flush at back sides and ¾” overhang on front and sides.
7. step 6
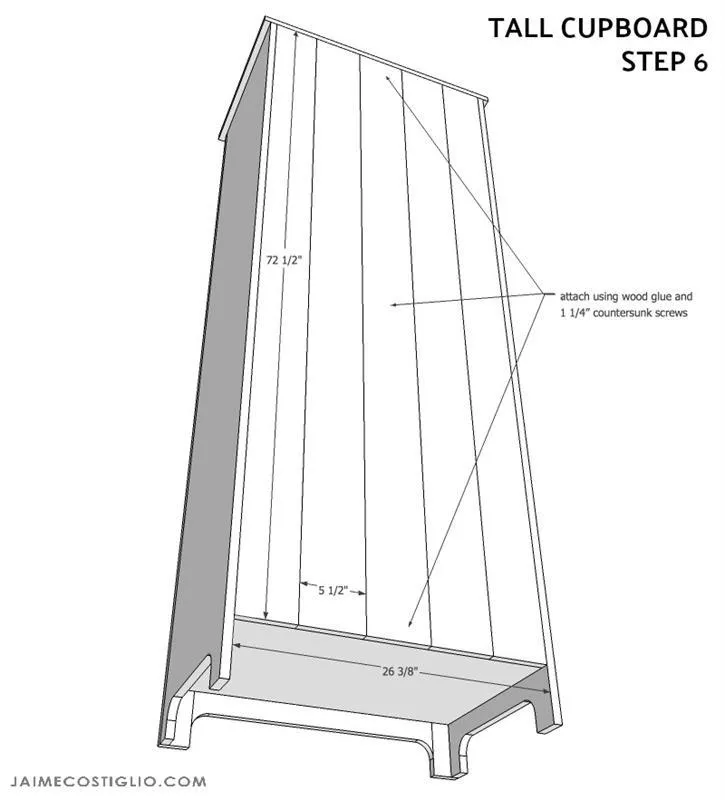
Step 6: Layout tongue and groove backing pieces. Assure equal spacing and secure using wood glue and 1 ¼” countersunk wood screws.
8. step 7
- Step 7: Make doors.
- Attach cross supports to door interior using wood glue and 1 ¼” finish nails.
- Check middle shelf placement before attaching middle cross support, support must be attached either above the middle shelf or below in order for door to close properly.