 Notch
Notch- Difficulty
- Intermediate
- Time
- 3.5–7 hours
- Cost
- $$$
About this build
A simple farmhouse style storage cabinet with fixed and movable shelves ready to handle anything you have to store. Use it in your office for all those extra papers and supplies, the dining room for easy access to dishes used less frequently, or the play room for all the kids games and toys.
Tools
Essential
- Brad Nailer
- Circular Saw
- Drill / Driver
- Jigsaw
- Miter Saw
- Pocket Hole Jig
- Random Orbit Sander
Optional / nice to have
- Tape Measure
Materials
| Item | Qty |
|---|---|
| Plywood, 3/4" Thick Full Sheet | 2 board |
| Board, 1x3 96" | 3 board |
| Board, 1x5 72" | 1 board |
| Board, 1x12 72" | 2 board |
| Tongue & groove, 1x6 96" | 5 board |
| 1 1/4" pocket hole screws | 50 each |
| 1 1/4" wood screws | 25 each |
| 1 1/4" finish nails | 50 each |
| Full wrap hinges | 6 each |
| Knobs | 2 each |
Overall cost: $$$. Lumber prices vary by region, species, and season, so we give a band rather than a figure we would only be pretending to know.
Cut list
| Part | Qty | T × W × L |
|---|---|---|
| Sides | 2 | 3/4" × 17" × 77" |
| Top, middle, bottom | 3 | 3/4" × 16" × 26" |
| Top | 1 | 3/4" × 18" × 29" |
| Movable shelves | 3 | 3/4" × 16" × 26" |
| Long trim | 2 | 3/4" × 2 1/2" × 4" |
| Top trim | 1 | 3/4" × 2 1/2" × 8" |
| Bottom trim | 1 | 1" × 5" × 22" |
| Backing | 5 | 3/4" × 5 1/2" × 2" |
| Doors | 2 | 3/4" × 11 1/4" × 69" |
| Door support | 6 | 3/4" × 2 1/2" × 4" |
What to buy
Buy 10 boards at 8 ft.
1" × 5"
1 board
3/4" × 18"
1 board
3/4" × 17"
2 boards
3/4" × 16"
2 boards
3/4" × 11 1/4"
2 boards
3/4" × 5 1/2"
1 board
3/4" × 2 1/2"
1 board
Assumes 8 ft stock, a 1/8" saw kerf, and buying each part at its own width. Change the board size or kerf on the full board plan →
Instructions
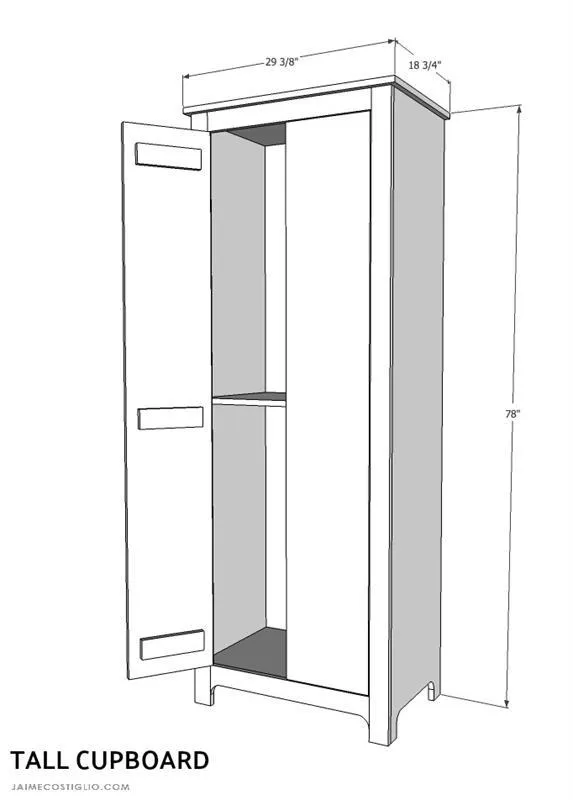
1dimensions
overall dimensions: 78"h x 29 3/8"w x 18 3/4"d
2step 1
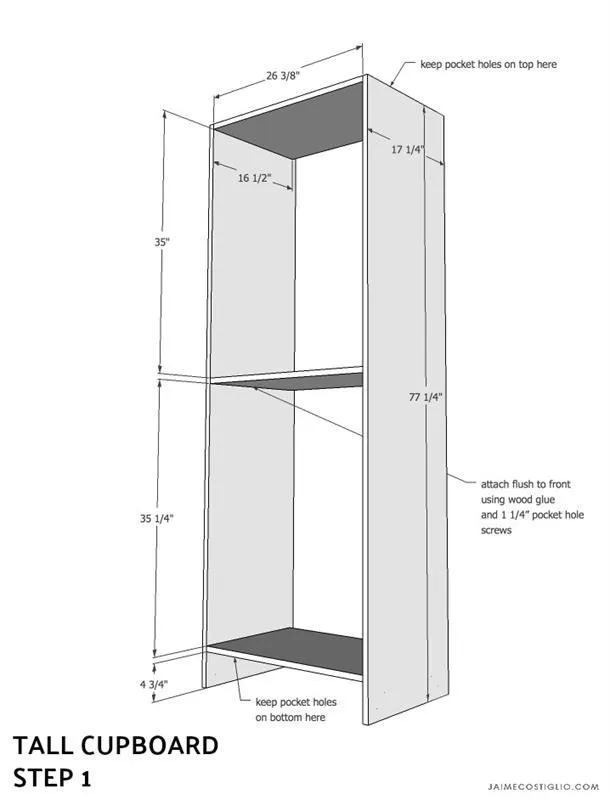
Step 1: Build the carcass. Attach the top, middle shelf and bottom to the sides using wood glue and 1 ¼” pocket hole screws. In the top and bottom be sure to predrill pocket holes for later attaching the face frame.
3step 2
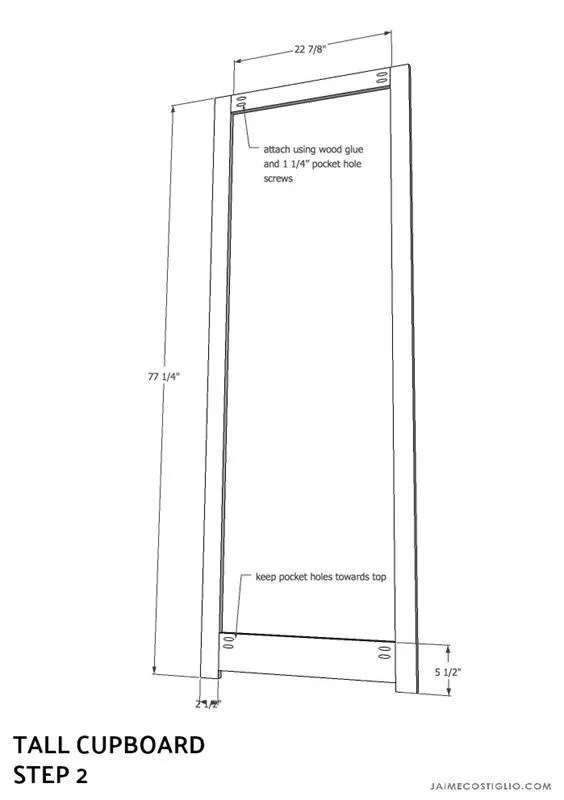
Step 2: Construct the face frame. Attach the short trim pieces to the long trim using wood glue and 1 ¼” pocket hole screws.
4step 3
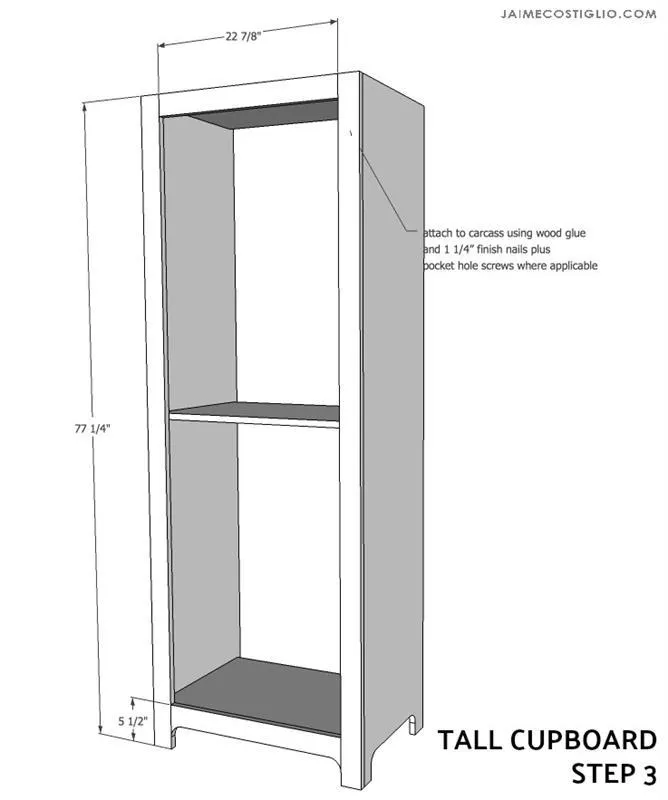
Step 3: Attach face frame to carcass using predrilled pocket holes. Use wood glue and 1 ¼” pocket hole screws plus 1 ¼” finish nails on the sides
5step 4
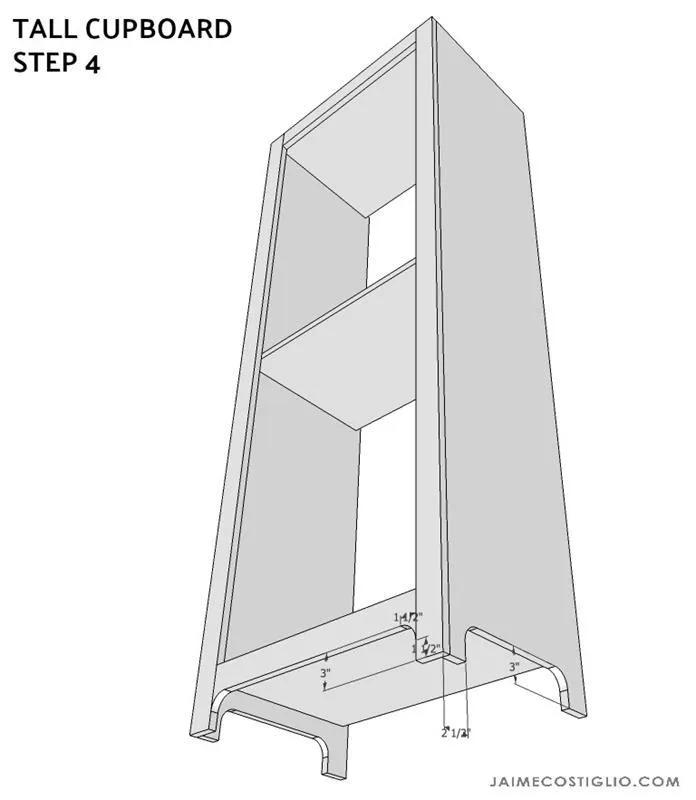
Step 4: Use a jigsaw to cut decorative curved trim at bottom.
6step 5
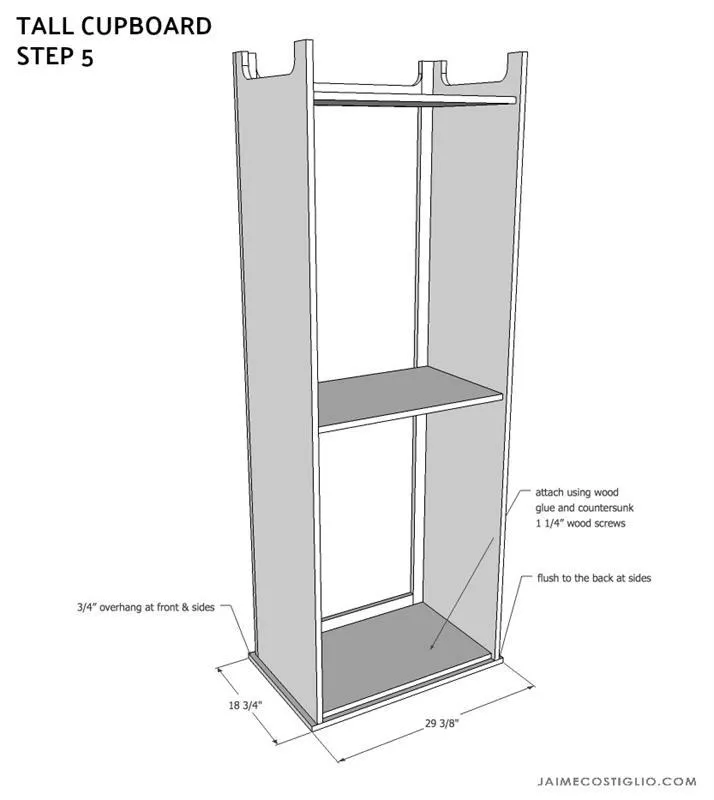
Step 5: Attach the top the to carcass using wood glue and countersunk 1 ¼” wood screws. Keep top flush at back sides and ¾” overhang on front and sides.
7step 6
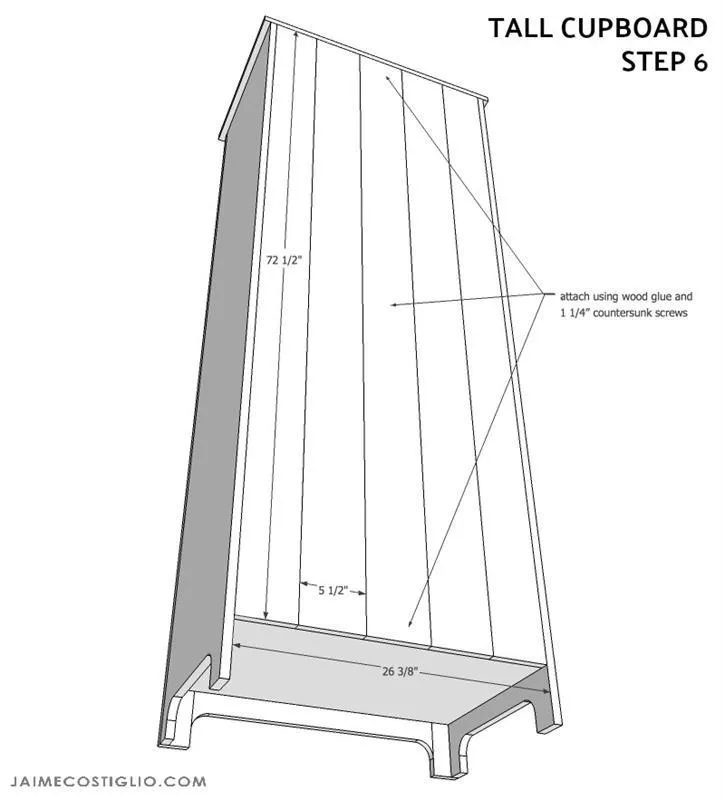
Step 6: Layout tongue and groove backing pieces. Assure equal spacing and secure using wood glue and 1 ¼” countersunk wood screws.
8step 7
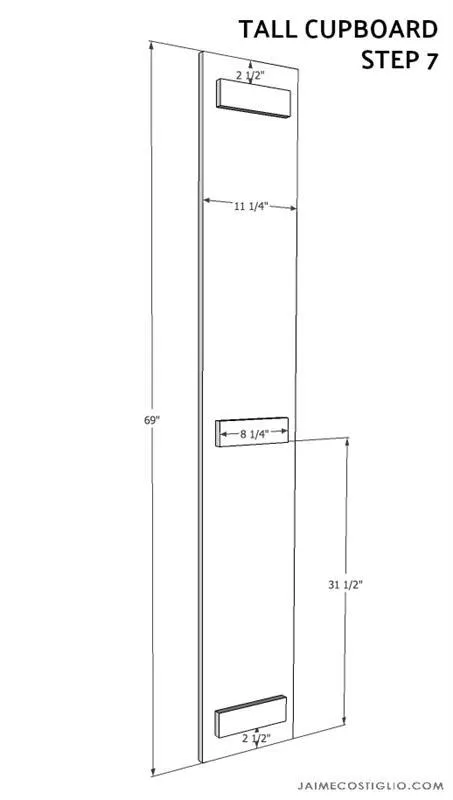
- Step 7: Make doors.
- Attach cross supports to door interior using wood glue and 1 ¼” finish nails.
- Check middle shelf placement before attaching middle cross support, support must be attached either above the middle shelf or below in order for door to close properly.
Tags
- Built Ins and Cabinets
- Intermediate
Reviews & builds
No reviews yet
Sign in to review this plan or share your build.
No reviews yet. Be the first to build this.