Notch
Notchtall cupboard
Step-by-step build — 8 steps. Also available as a print sheet.
1dimensions
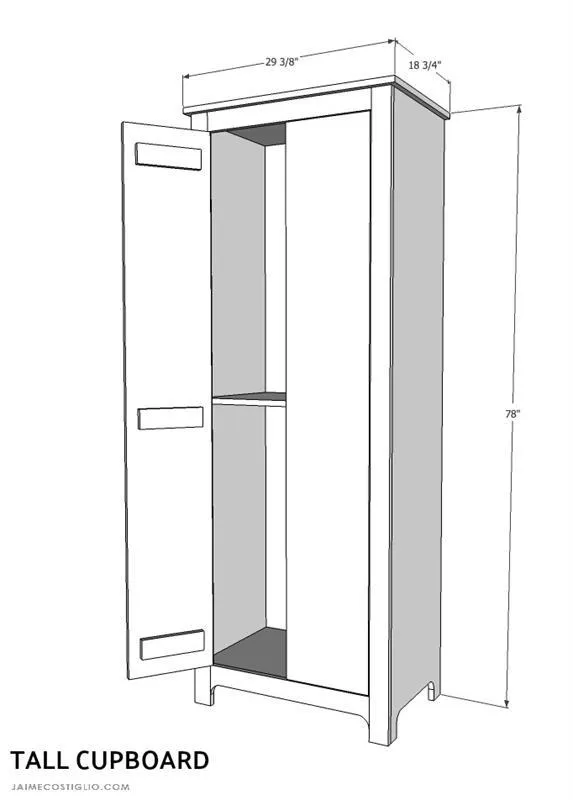
overall dimensions: 78"h x 29 3/8"w x 18 3/4"d
2step 1
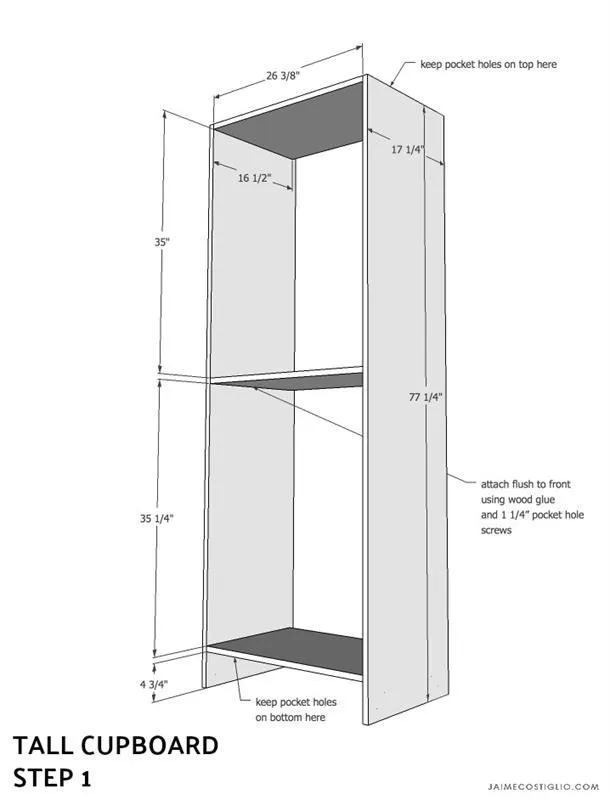
Step 1: Build the carcass. Attach the top, middle shelf and bottom to the sides using wood glue and 1 ¼” pocket hole screws. In the top and bottom be sure to predrill pocket holes for later attaching the face frame.
3step 2
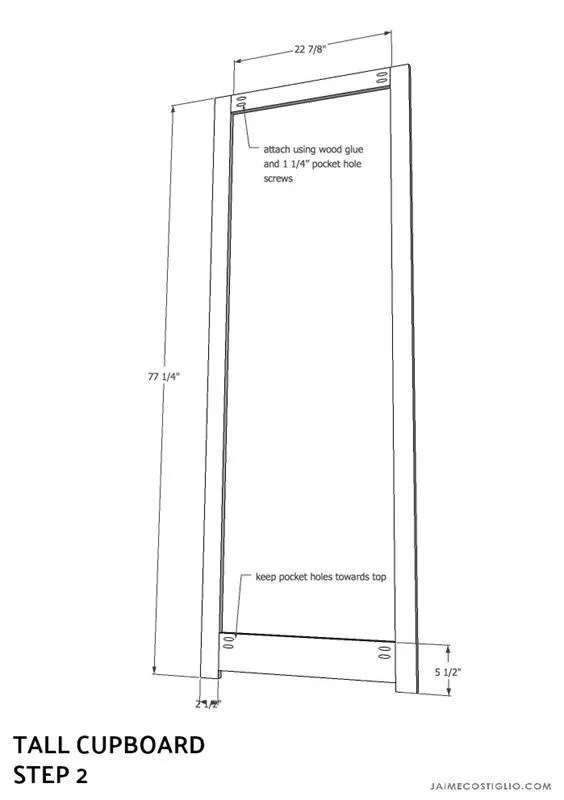
Step 2: Construct the face frame. Attach the short trim pieces to the long trim using wood glue and 1 ¼” pocket hole screws.
4step 3
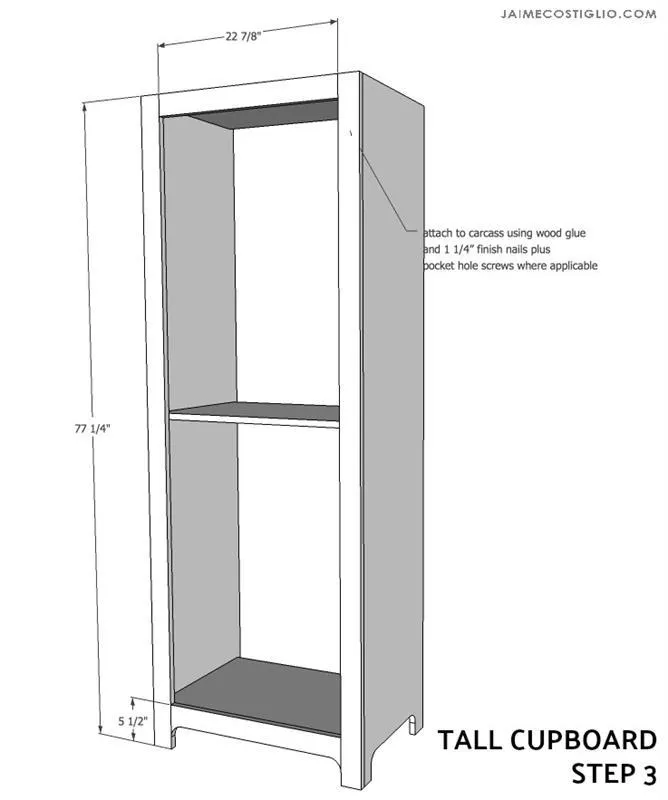
Step 3: Attach face frame to carcass using predrilled pocket holes. Use wood glue and 1 ¼” pocket hole screws plus 1 ¼” finish nails on the sides
5step 4
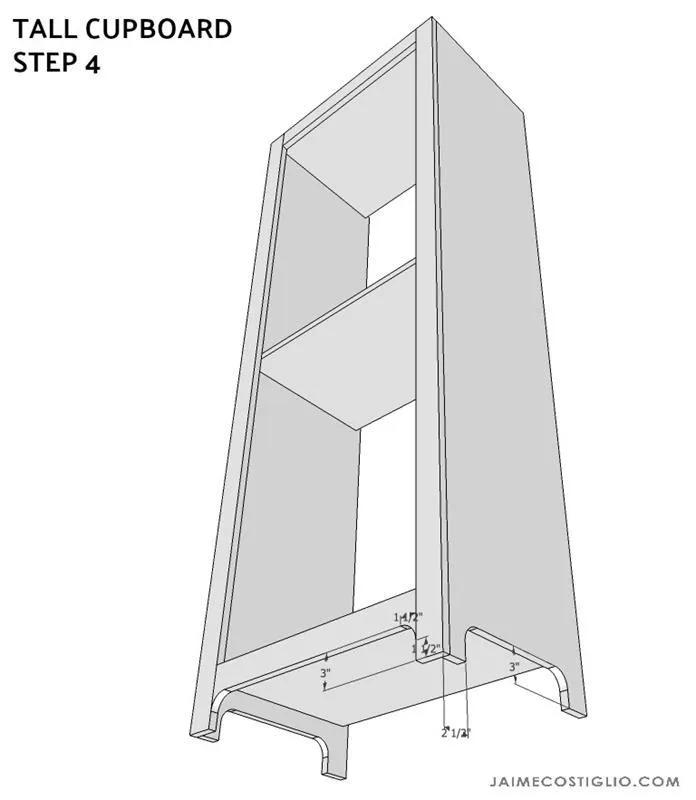
Step 4: Use a jigsaw to cut decorative curved trim at bottom.
6step 5
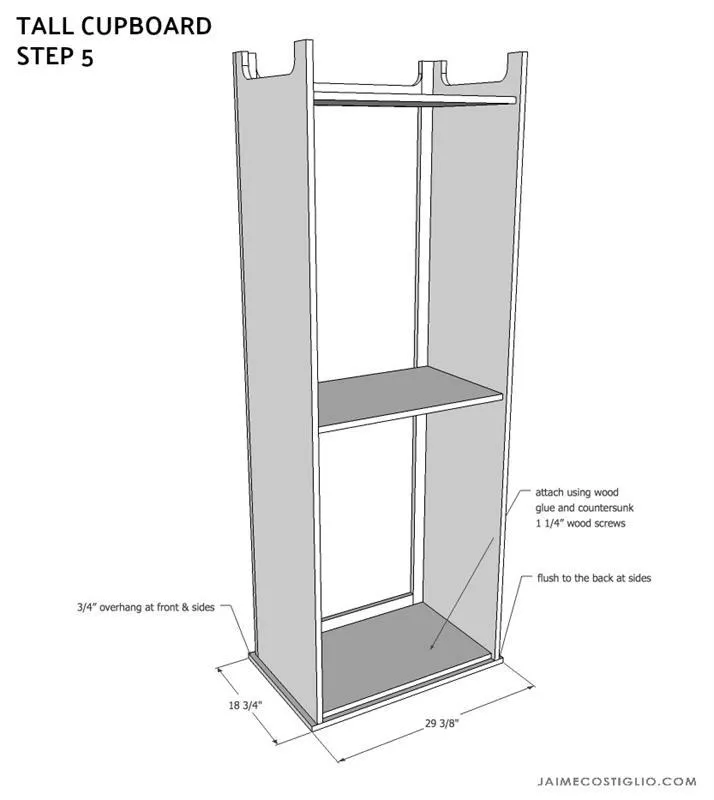
Step 5: Attach the top the to carcass using wood glue and countersunk 1 ¼” wood screws. Keep top flush at back sides and ¾” overhang on front and sides.
7step 6
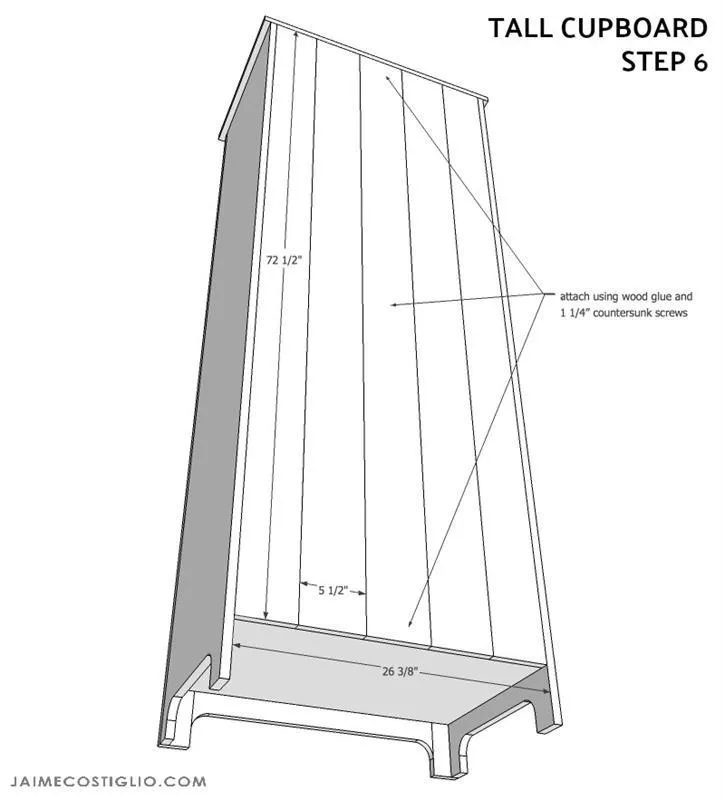
Step 6: Layout tongue and groove backing pieces. Assure equal spacing and secure using wood glue and 1 ¼” countersunk wood screws.
8step 7
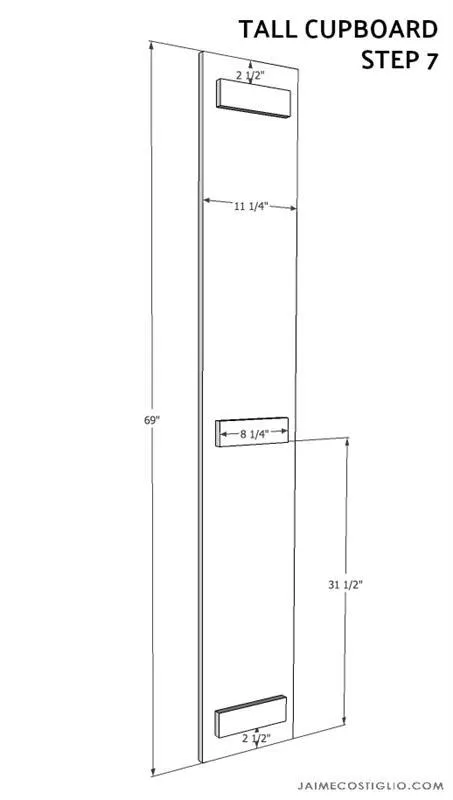
- Step 7: Make doors.
- Attach cross supports to door interior using wood glue and 1 ¼” finish nails.
- Check middle shelf placement before attaching middle cross support, support must be attached either above the middle shelf or below in order for door to close properly.