Notch
NotchUse your browser's Print (Ctrl/Cmd + P) and choose Save as PDF. This page works offline once you've opened it with a signal.
storage mirror
This mirror with storage is the perfect solution for nearly any spot in your home.
- Difficulty
- Easy
- Time
- 2.5–5 hours
- Cost
- $$
Cut list
| Part | Qty | T × W × L | Material | ✓ |
|---|---|---|---|---|
| Backing | 1 | 3/4" × 12" × 15" | — | ☐ |
| Base | 1 | 3/4" × 3 1/2" × 8" | — | ☐ |
| Frame bottom | 1 | 3/4" × 2 1/2" × 12" | — | ☐ |
| Base sides | 2 | 3/4" × 2 1/2" × 45" | — | ☐ |
| Base front | 1 | 3/4" × 2 1/2" × 13" | — | ☐ |
| Frame sides | 2 | 3/4" × 1 1/2" × 13" | — | ☐ |
| Frame top | 1 | 3/4" × 1 1/2" × 13" | — | ☐ |
Materials
| Item | Qty | ✓ |
|---|---|---|
| Plywood, 3/4" Thick 16" x 13" | 1 board | ☐ |
| Board, 1x4 12 1/8" | 1 board | ☐ |
| Board, 1x3 72" | 1 board | ☐ |
| Board, 1x2 72" | 1 board | ☐ |
| 1 1/4" finish nails | 30 each | ☐ |
| 12" square mirror | 1 each | ☐ |
| Wood glue | 1 each | ☐ |
| Construction adhesive | 1 each | ☐ |
Overall cost: $$. Lumber varies by region, species, and season, so we give a band rather than a figure.
Tools
- Brad Nailer
- Circular Saw
- Miter Saw
- Random Orbit Sander
Instructions
1. dimensions
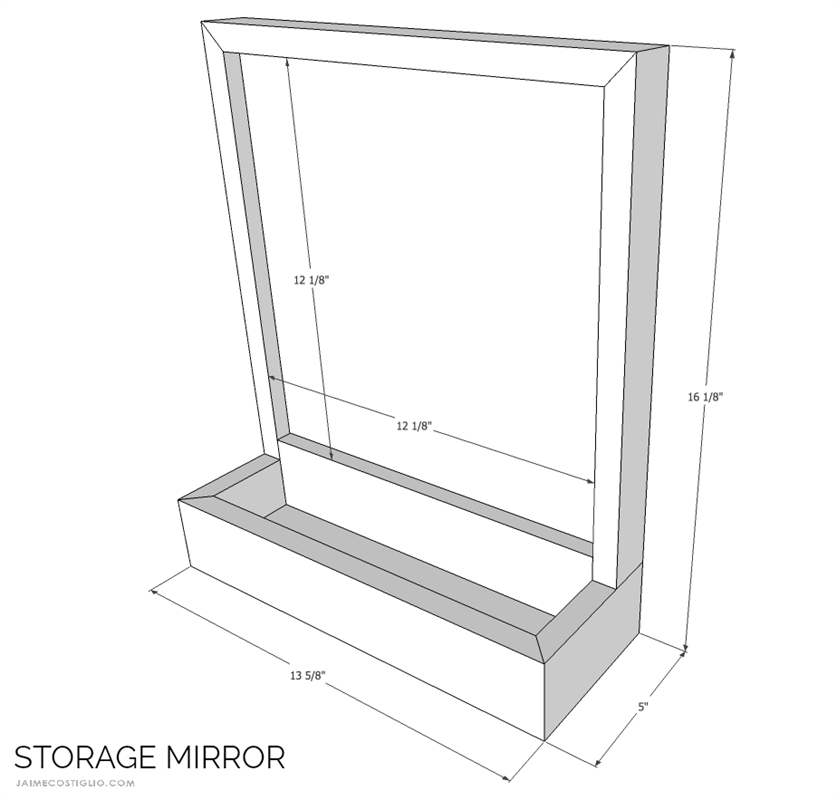
mirror dimensions
2. Step 1
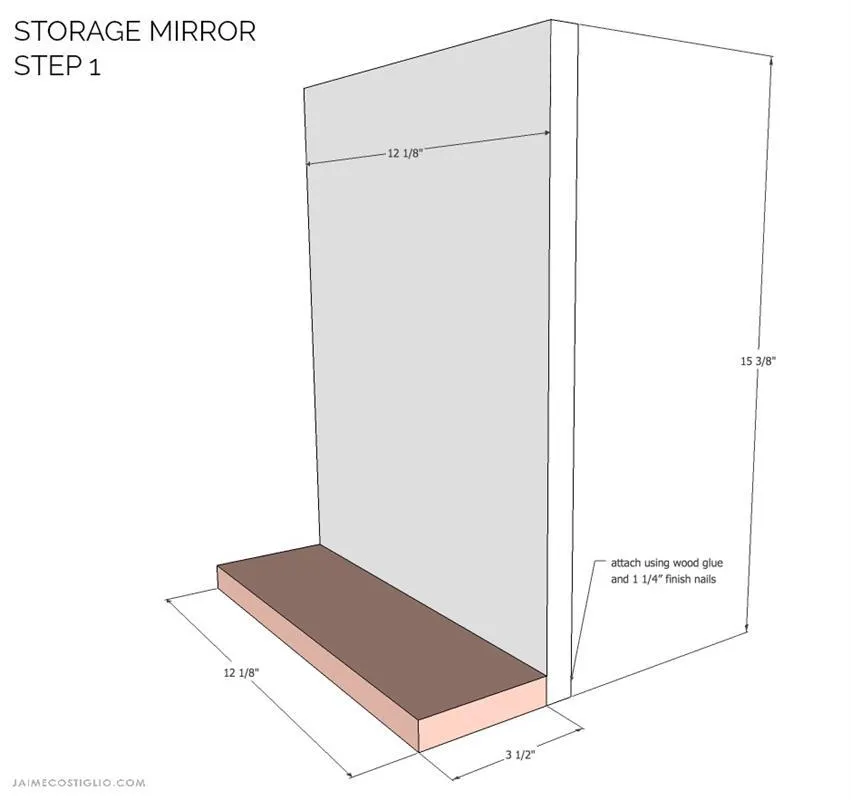
Step 1: Attach the base to the backing using wood glue and 1 ¼” finish nails.
3. Step 2
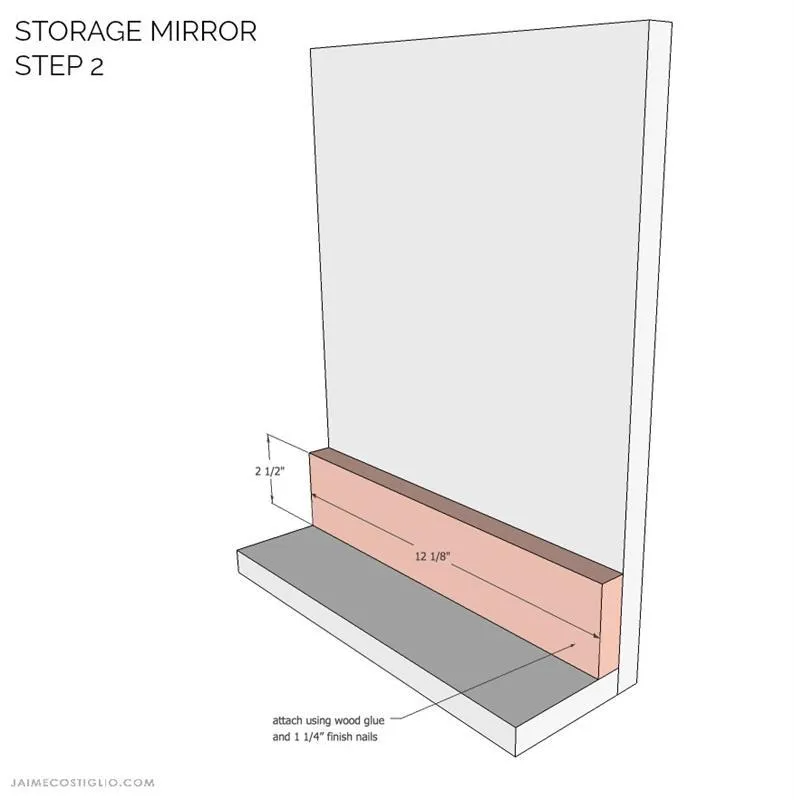
Step 2: Attach the frame bottom to the backing using wood glue and 1 ¼” finish nails.
4. Step 3
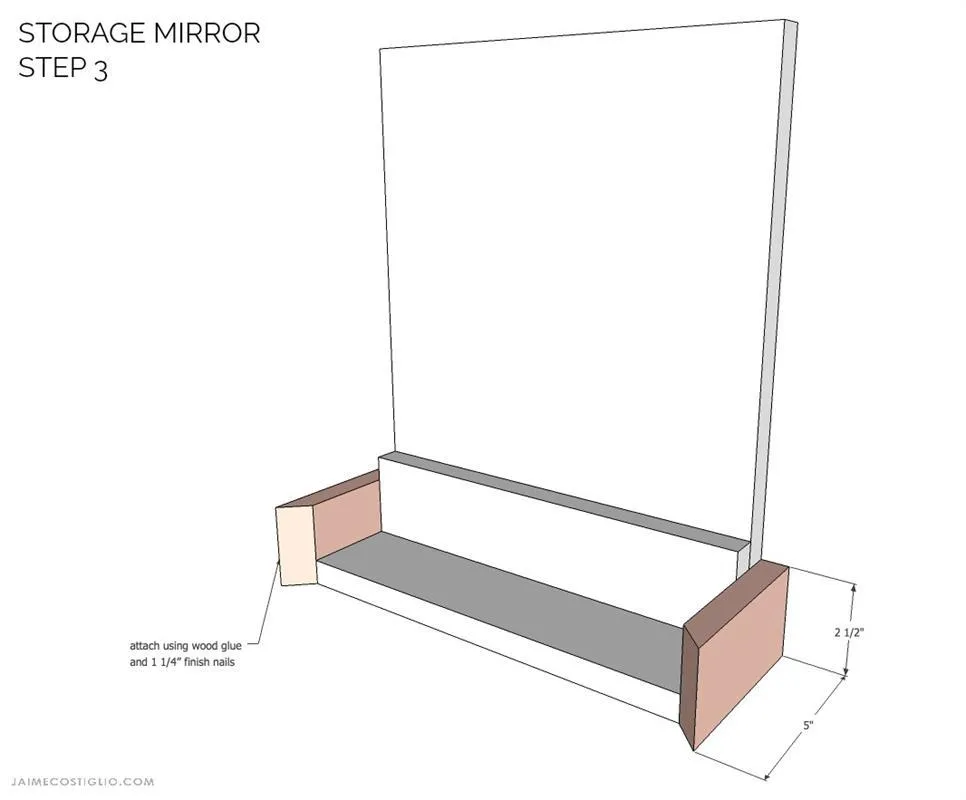
Step 3: Attach the base sides to the base and backing using wood glue and 1 ¼” finish nails.
5. Step 4
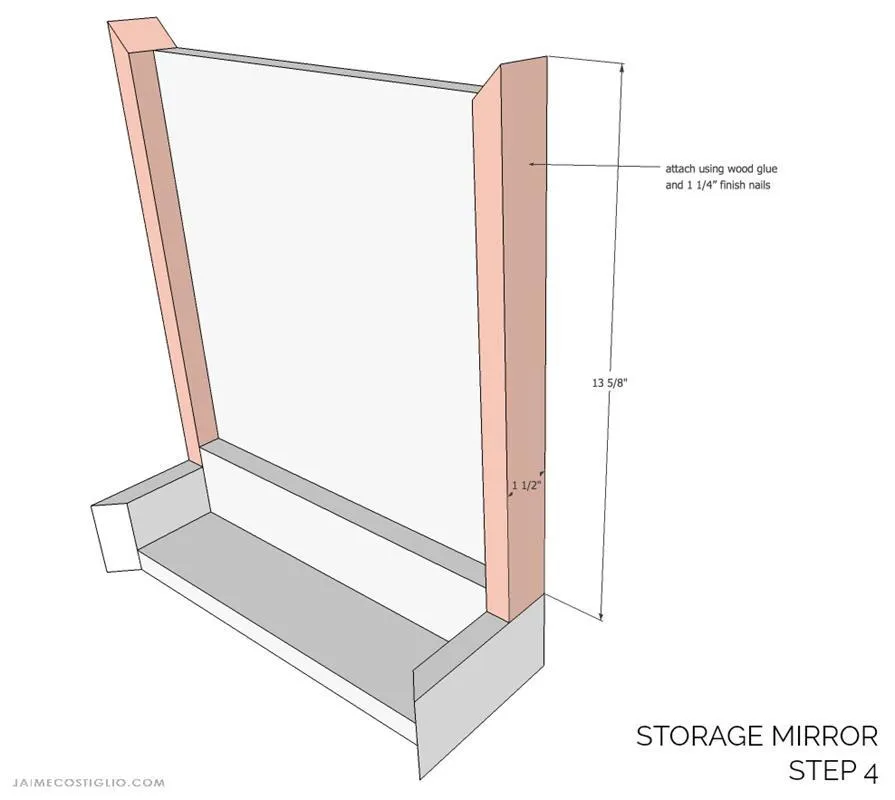
Step 4: Attach the frame sides to the backing wood glue and 1 ¼” finish nails.
6. Step 5
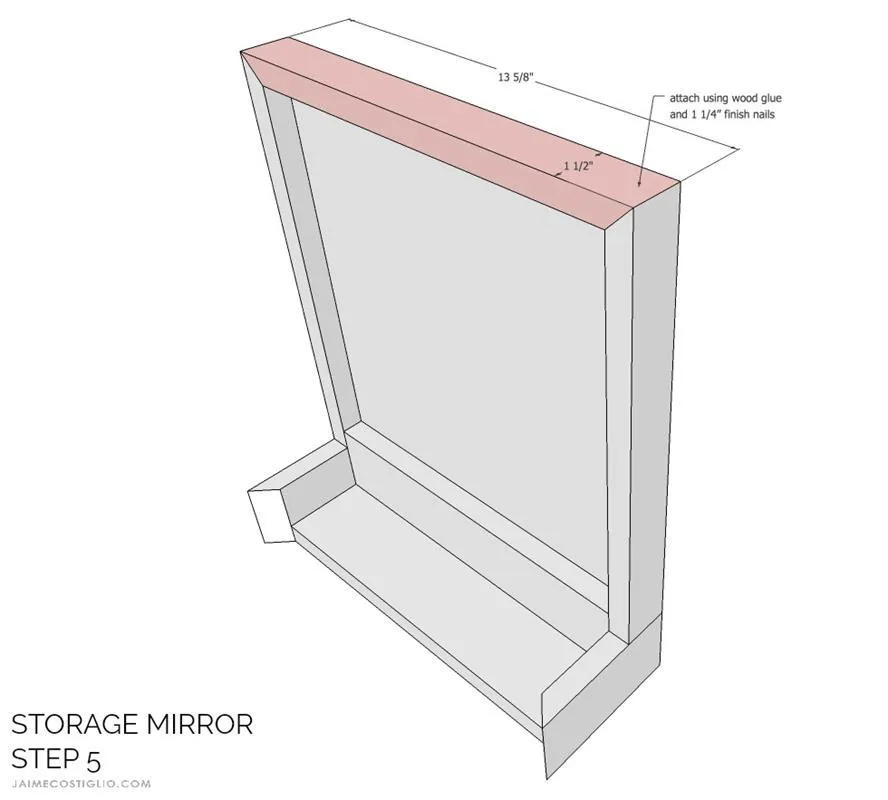
Step 5: Attach the frame top to the backing using wood glue and 1 ¼” finish nails.
7. Step 6
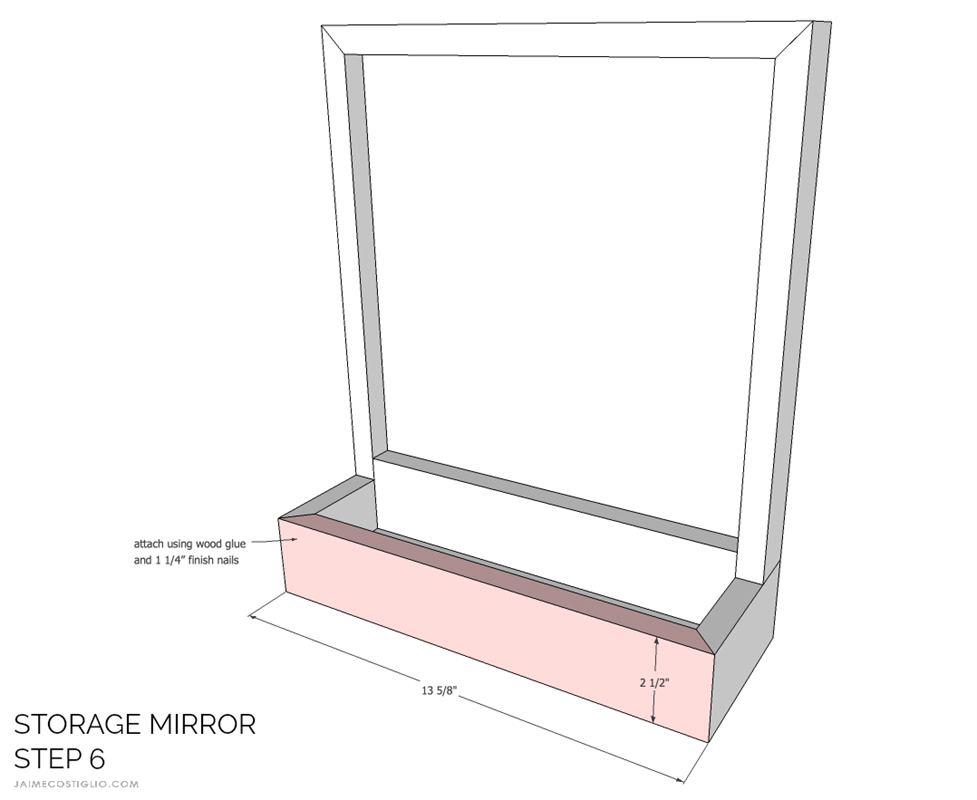
Step 6: Attach the base front to the base and sides using wood glue and 1 ¼” finish nails.