 Notch
Notch- Difficulty
- Easy
- Time
- 2.5–5 hours
- Cost
- $$
About this build
This mirror with storage is the perfect solution for nearly any spot in your home. Hang it above a dresser to keep perfume, lotions and clutter at bay. Or position it to hold make up and beauty supplies in the bathroom. In the foyer for a quick check before heading out, bonus a home for your keys
Tools
Essential
- Brad Nailer
- Circular Saw
- Miter Saw
- Random Orbit Sander
Materials
| Item | Qty |
|---|---|
| Plywood, 3/4" Thick 16" x 13" | 1 board |
| Board, 1x4 12 1/8" | 1 board |
| Board, 1x3 72" | 1 board |
| Board, 1x2 72" | 1 board |
| 1 1/4" finish nails | 30 each |
| 12" square mirror | 1 each |
| Wood glue | 1 each |
| Construction adhesive | 1 each |
Overall cost: $$. Lumber prices vary by region, species, and season, so we give a band rather than a figure we would only be pretending to know.
Cut list
| Part | Qty | T × W × L |
|---|---|---|
| Backing | 1 | 3/4" × 12" × 15" |
| Base | 1 | 3/4" × 3 1/2" × 8" |
| Frame bottom | 1 | 3/4" × 2 1/2" × 12" |
| Base sides | 2 | 3/4" × 2 1/2" × 45" |
| Base front | 1 | 3/4" × 2 1/2" × 13" |
| Frame sides | 2 | 3/4" × 1 1/2" × 13" |
| Frame top | 1 | 3/4" × 1 1/2" × 13" |
What to buy
Buy 5 boards at 8 ft.
3/4" × 12"
1 board
3/4" × 3 1/2"
1 board
3/4" × 2 1/2"
2 boards
3/4" × 1 1/2"
1 board
Assumes 8 ft stock, a 1/8" saw kerf, and buying each part at its own width. Change the board size or kerf on the full board plan →
Instructions
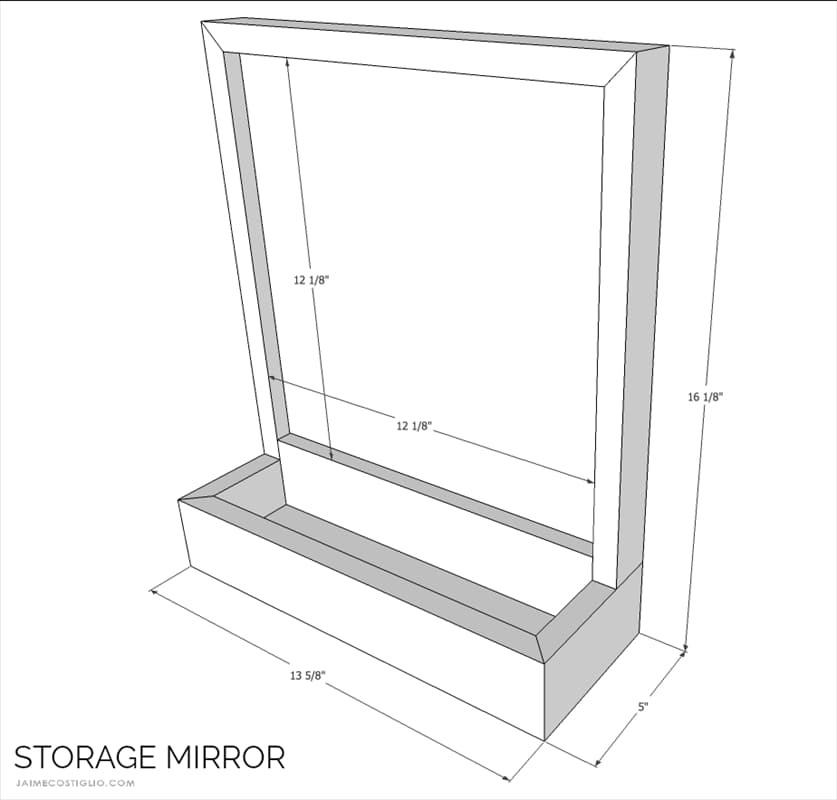
1dimensions
mirror dimensions
2Step 1
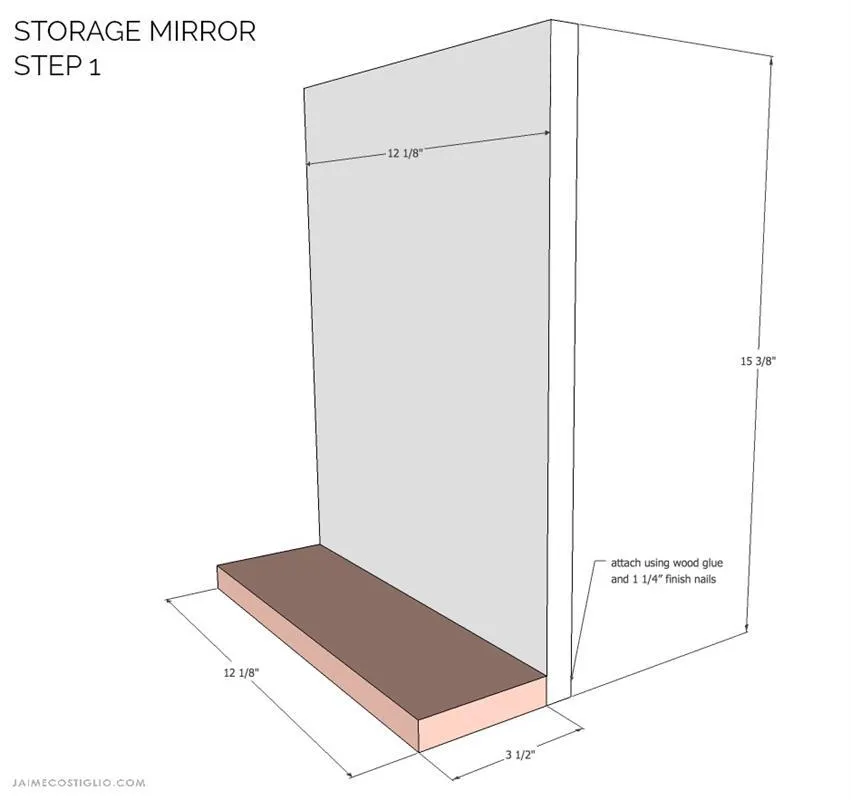
Step 1: Attach the base to the backing using wood glue and 1 ¼” finish nails.
3Step 2
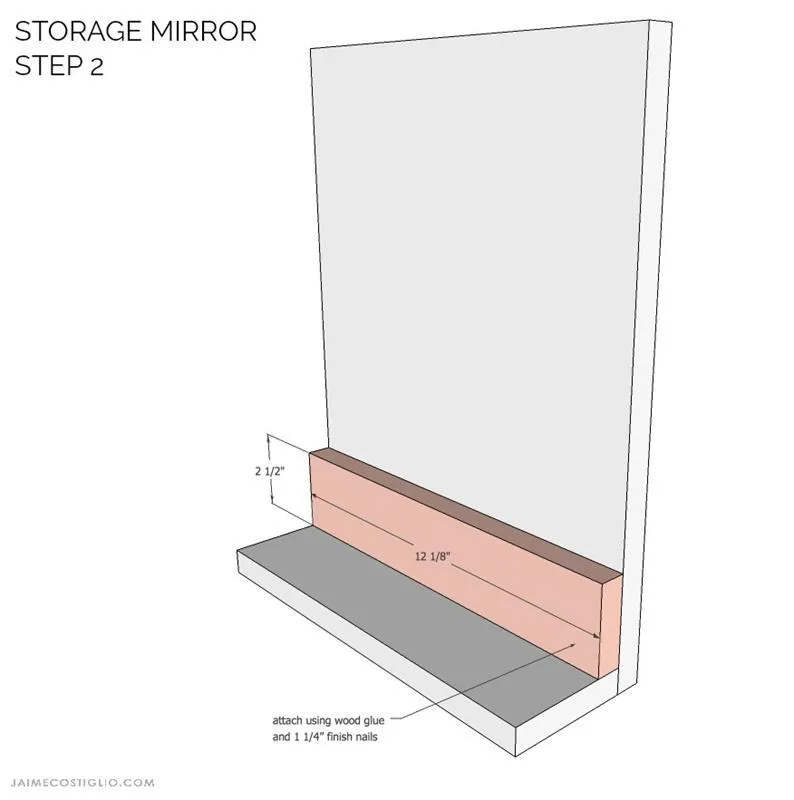
Step 2: Attach the frame bottom to the backing using wood glue and 1 ¼” finish nails.
4Step 3
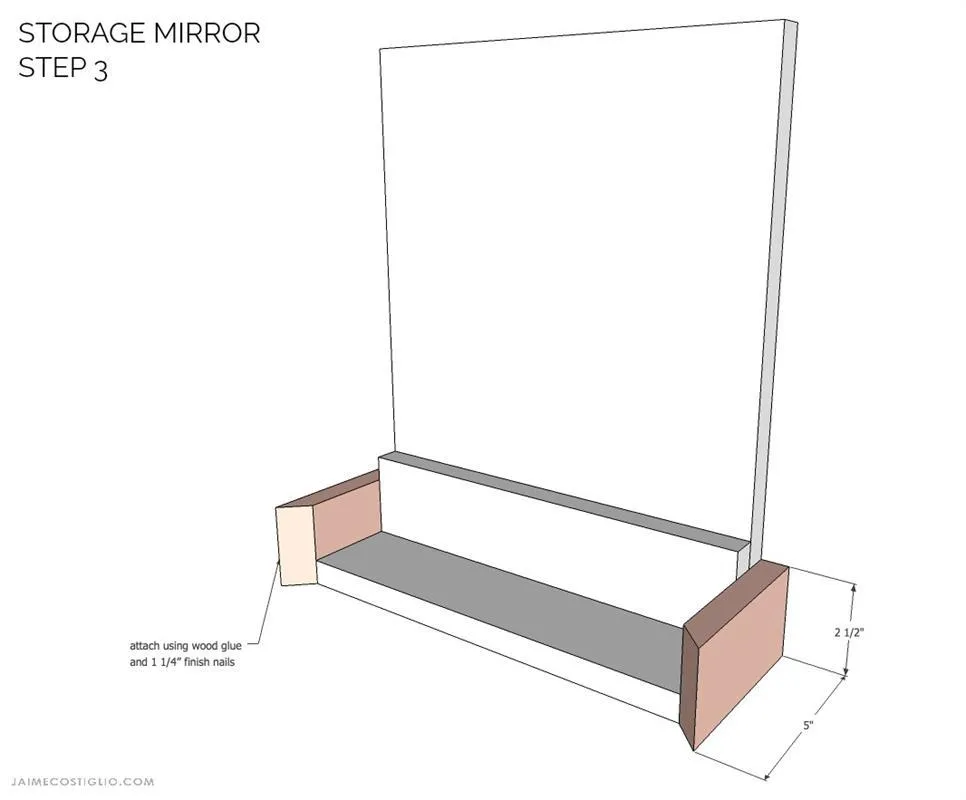
Step 3: Attach the base sides to the base and backing using wood glue and 1 ¼” finish nails.
5Step 4
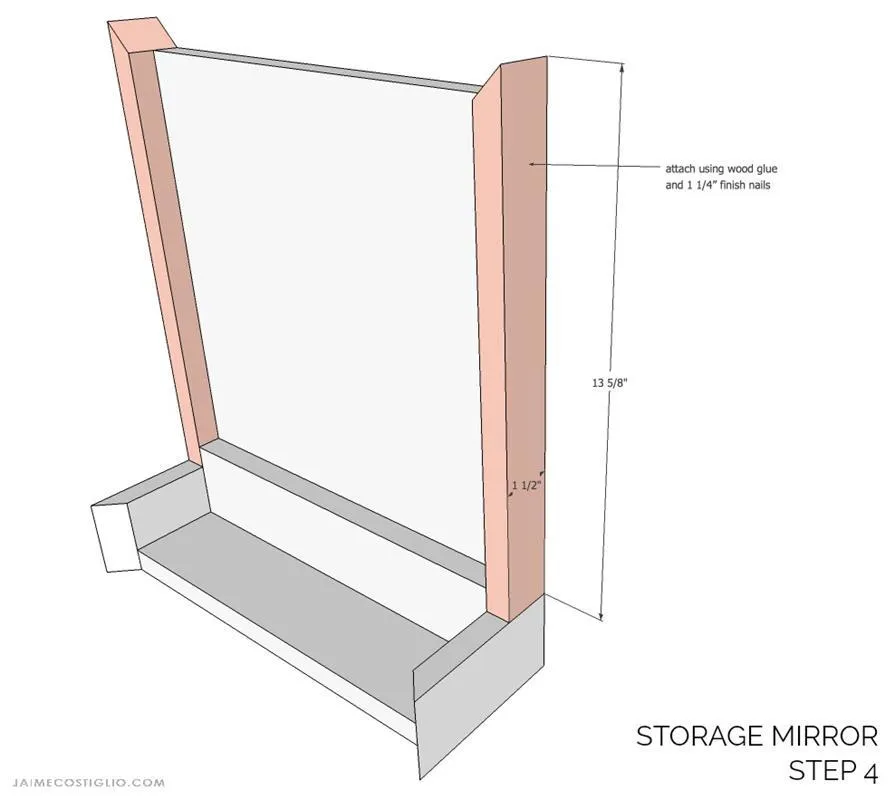
Step 4: Attach the frame sides to the backing wood glue and 1 ¼” finish nails.
6Step 5
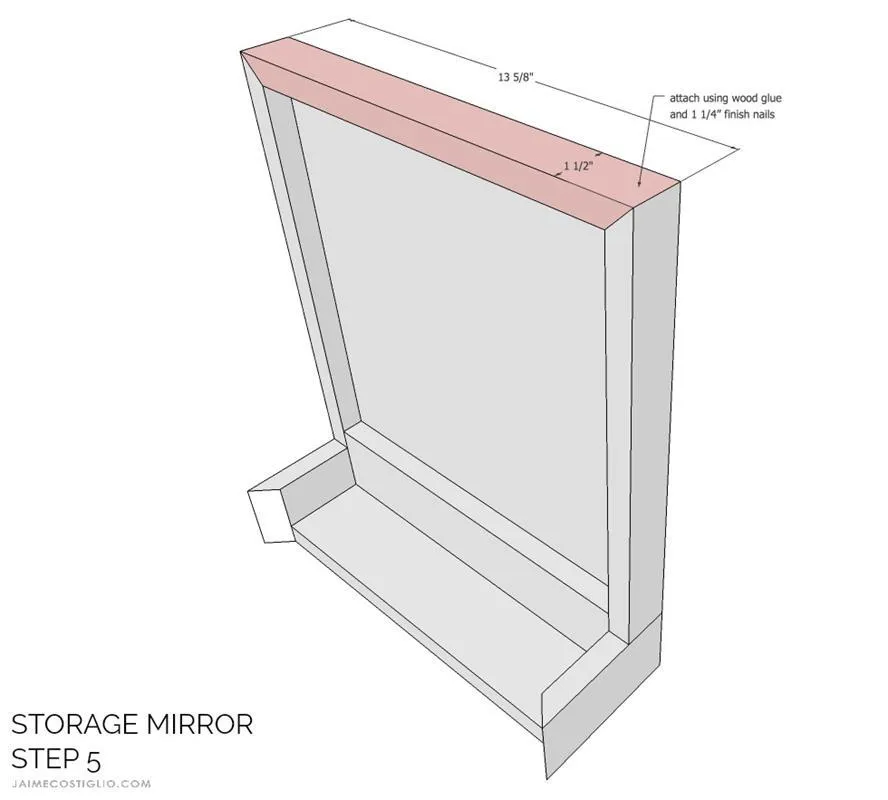
Step 5: Attach the frame top to the backing using wood glue and 1 ¼” finish nails.
7Step 6
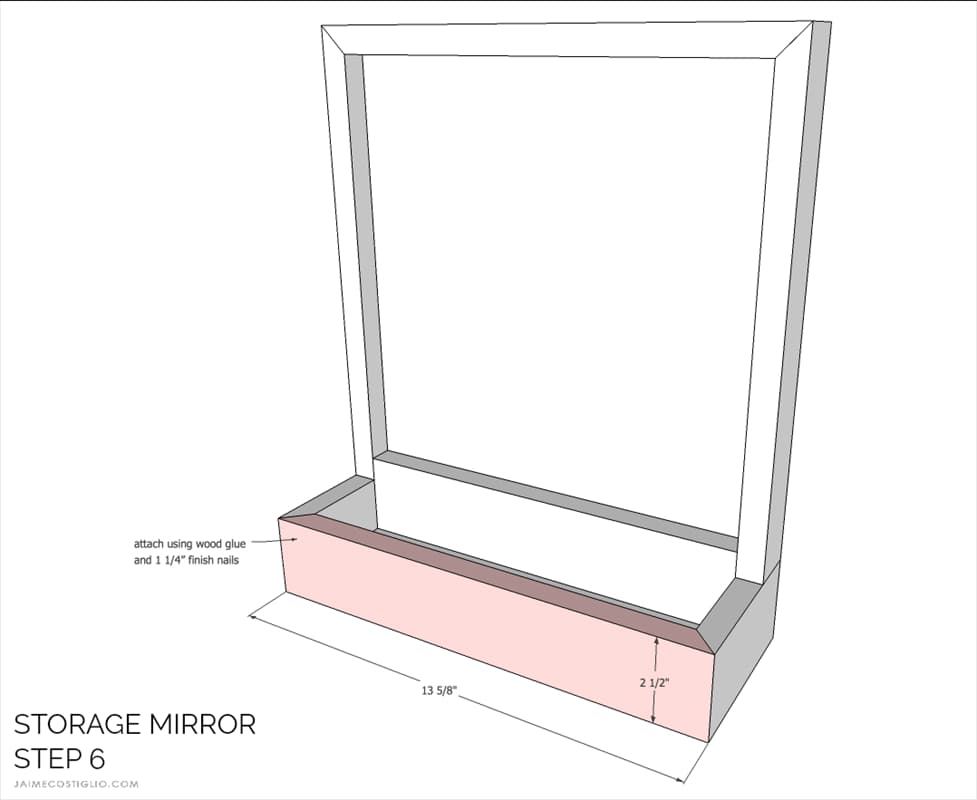
Step 6: Attach the base front to the base and sides using wood glue and 1 ¼” finish nails.
Tags
- Bathroom
- Beginner
Reviews & builds
No reviews yet
Sign in to review this plan or share your build.
No reviews yet. Be the first to build this.