Notch
NotchSmall Parts Organizer
Step-by-step build — 6 steps. Also available as a print sheet.
1Breaking Down Plywood
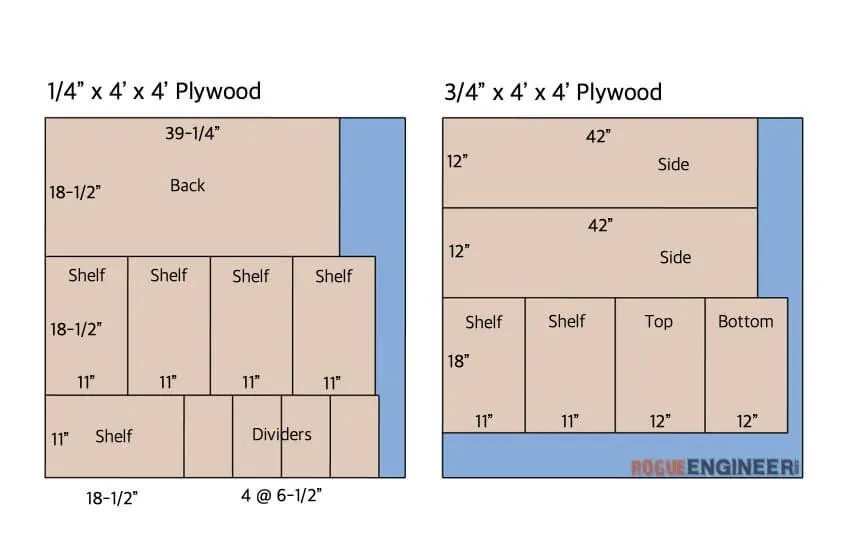
Break down the plywood using the cut list provided below.
2Cutting the Dados
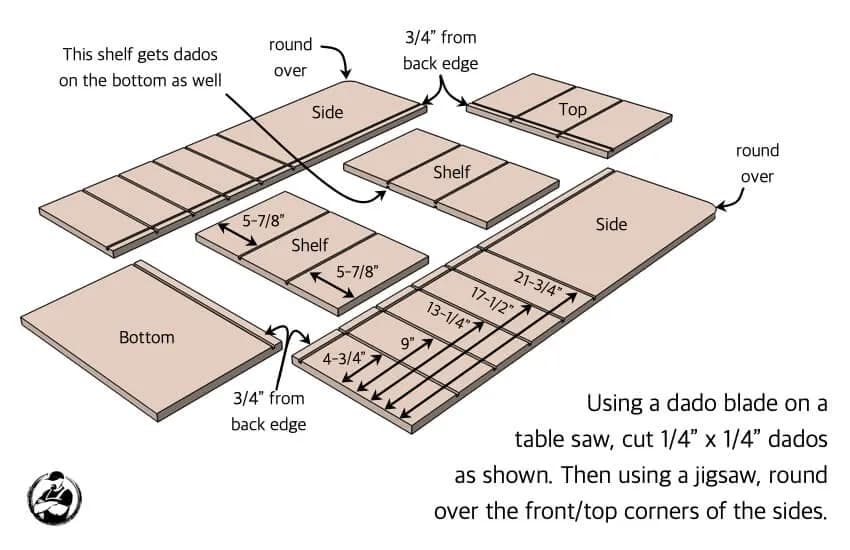
- After breaking down the plywood per the cut list, start by layout out all the 3/4″ thick parts as shown.
- Then, swap out the table saw blade for a blade(s) with a similar thickness to the 1/4″ plywood dividers.
- Then cut the dados per the diagram below.
3Install Top and Shelves
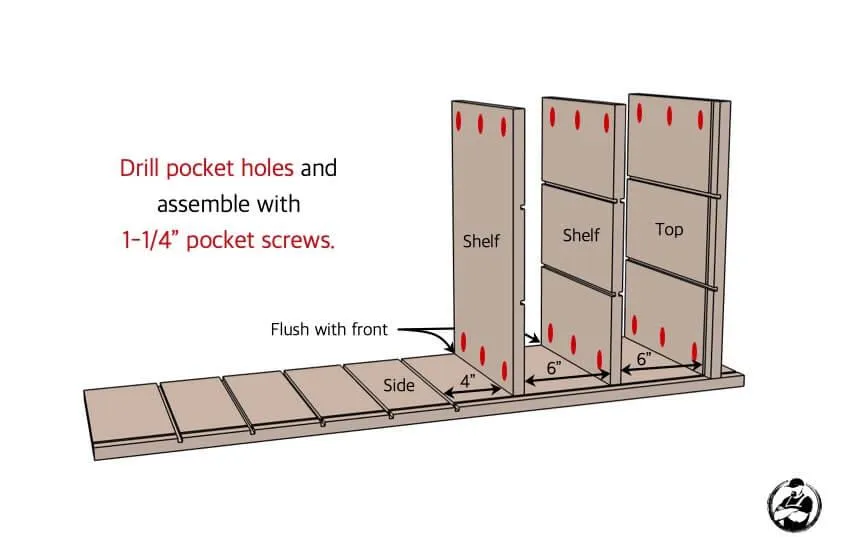
Per the diagram below, drill the pocket holes and attach the top and shelves to the side, as shown, with 1-1/4″ pocket hole screws.
4Attach Other Side
Per the diagram below, use the pocket holes drilled in the last step to attach the other side with 1-1/4″ pocket hole screws.
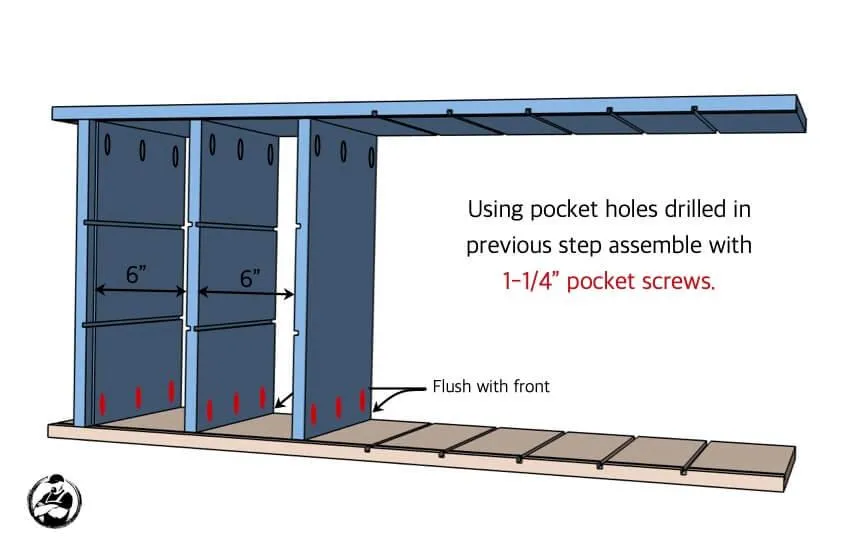
5Install Back and Bottom
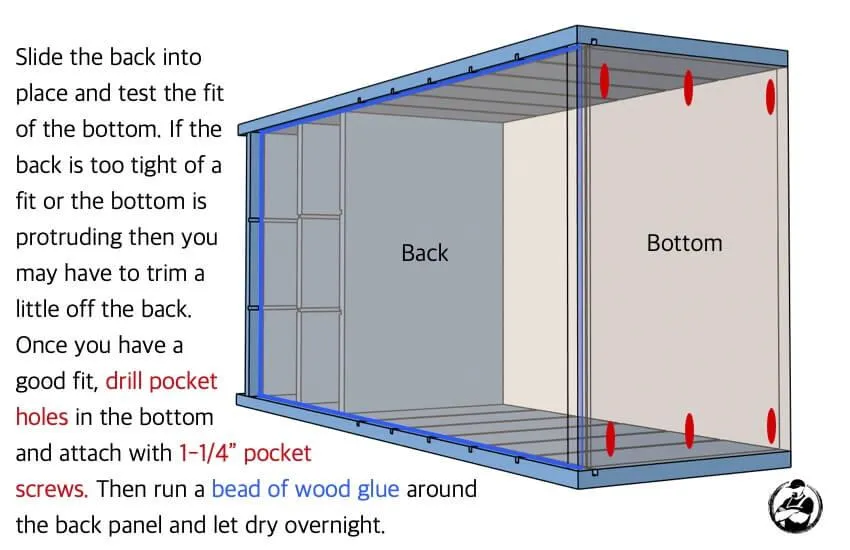
- Slide the back into place and test the fit of the bottom. If the back is too tight of a fit or the bottom is protruding then you may have to trim a little off the back.
- Once you have a a good fit, drill pocket holes in the bottom and attach with 1-1/4" pocket screws.
- Then run a bead of wood glue around the back panel and let dry overnight.
6Inserting the Dividers
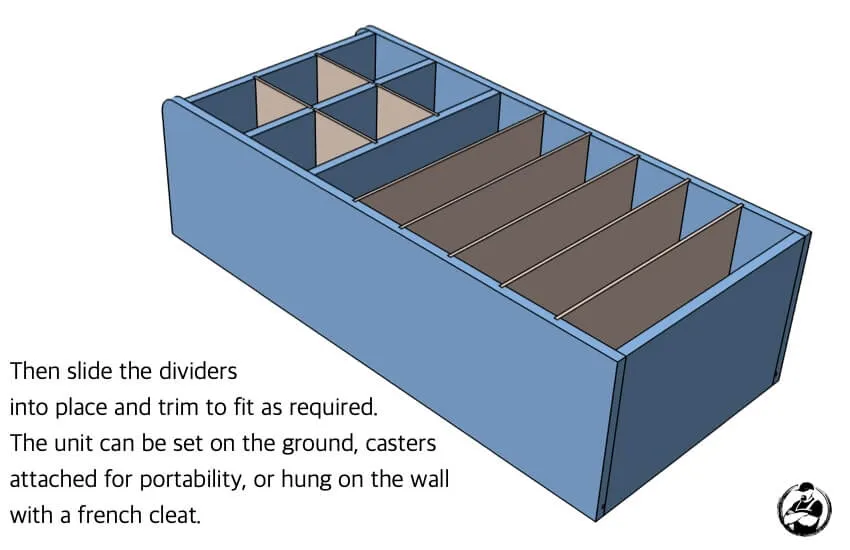
Then slide the dividers into place and trim to fit as required. The unit can be set on the ground, casters attached for portability, or hung on the wall with a french cleat.