 Notch
Notch- Difficulty
- Intermediate
- Time
- 2.5–4.5 hours
- Cost
- $$
About this build
I wanted to take the time to come up with a small parts organizing solution. After receiving the Husky interlocking small parts organizers in a recent My Prospective Tool Review shipment, I knew I wanted to build a unit to house them while in the shop. I also wanted this unit to include some easily accessible storage bins for things that I use on a more regular basis like safety glasses, tape measures, pencils, etc
Tools
Essential
- Drill / Driver
- Pocket Hole Jig
- Table Saw
Optional / nice to have
- Tape Measure
Materials
| Item | Qty |
|---|---|
| Plywood, 1/4" Thick Half Sheet | 1 board |
| Plywood, 3/4" Thick Half Sheet | 1 board |
| Husky Small Parts Organizers | 6 each |
| Stackable Storage Bins | 6 each |
Overall cost: $$. Lumber prices vary by region, species, and season, so we give a band rather than a figure we would only be pretending to know.
Cut list
| Part | Qty | T × W × L |
|---|---|---|
| Dividers, shelves, back | 1 | 1" × 4" × 4" |
| Top, Sides, Bottom | 1 | 3" × 4" × 4" |
What to buy
Buy 2 boards at 8 ft.
3" × 4"
1 board
1" × 4"
1 board
Assumes 8 ft stock, a 1/8" saw kerf, and buying each part at its own width. Change the board size or kerf on the full board plan →
Instructions
1Breaking Down Plywood
Break down the plywood using the cut list provided below.
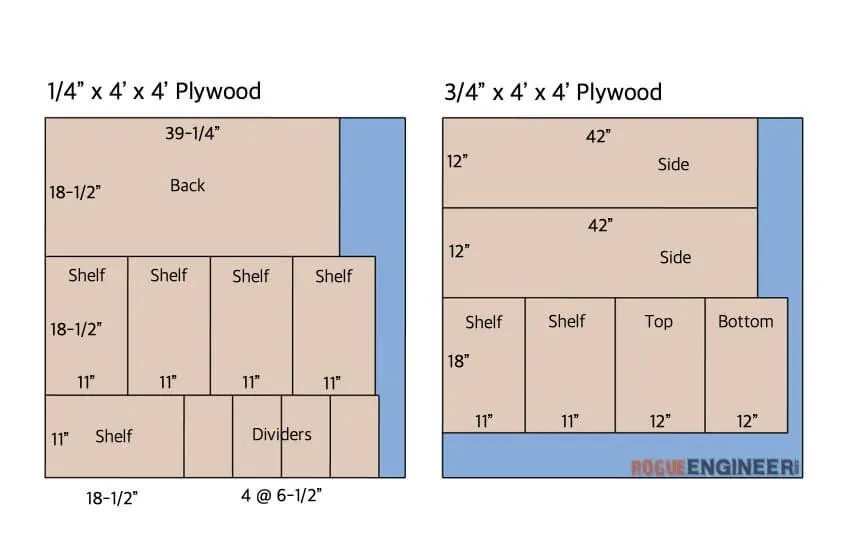
2Cutting the Dados
- After breaking down the plywood per the cut list, start by layout out all the 3/4″ thick parts as shown.
- Then, swap out the table saw blade for a blade(s) with a similar thickness to the 1/4″ plywood dividers.
- Then cut the dados per the diagram below.
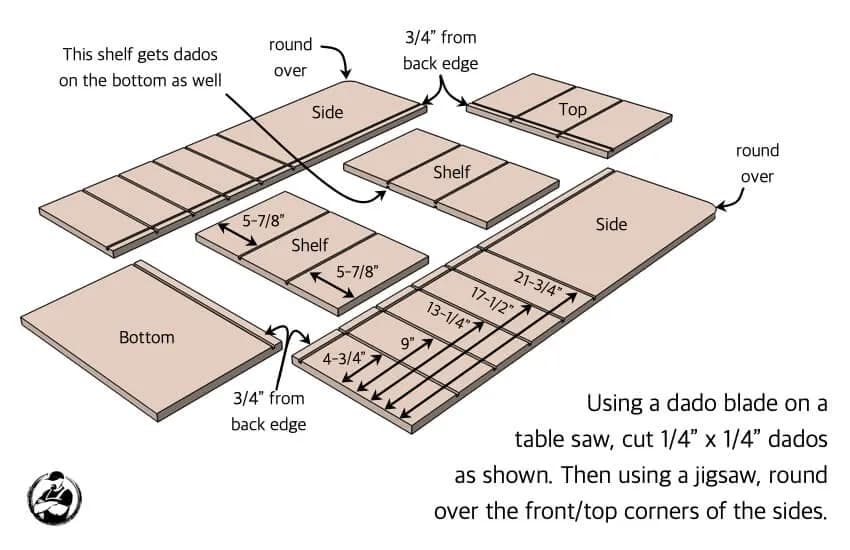
3Install Top and Shelves
Per the diagram below, drill the pocket holes and attach the top and shelves to the side, as shown, with 1-1/4″ pocket hole screws.
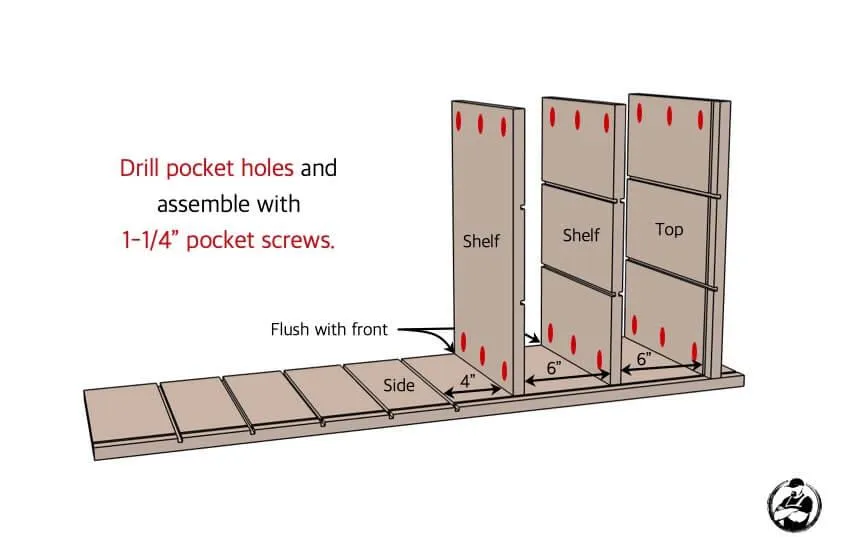
4Attach Other Side
Per the diagram below, use the pocket holes drilled in the last step to attach the other side with 1-1/4″ pocket hole screws.
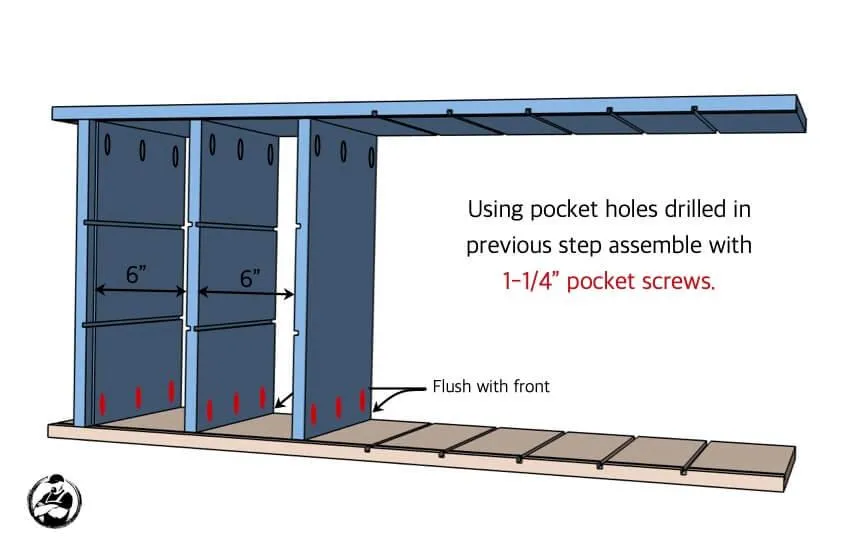
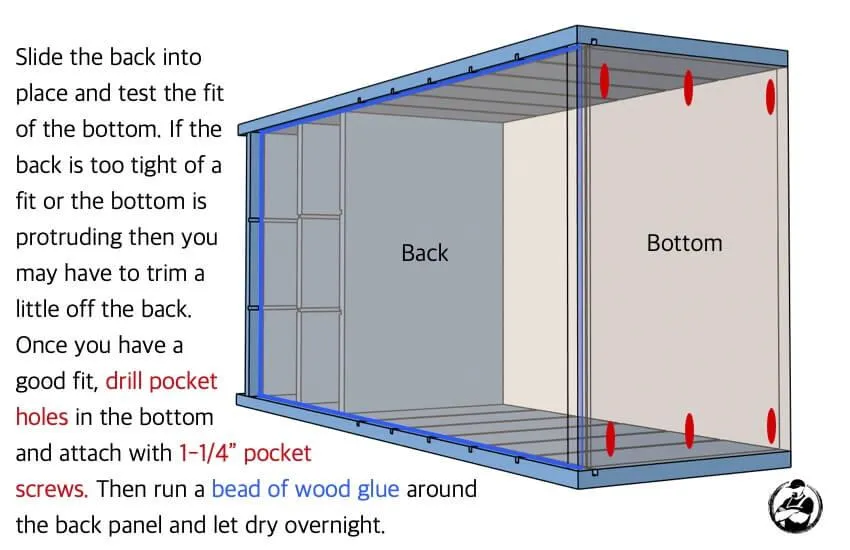
5Install Back and Bottom
- Slide the back into place and test the fit of the bottom. If the back is too tight of a fit or the bottom is protruding then you may have to trim a little off the back.
- Once you have a a good fit, drill pocket holes in the bottom and attach with 1-1/4" pocket screws.
- Then run a bead of wood glue around the back panel and let dry overnight.
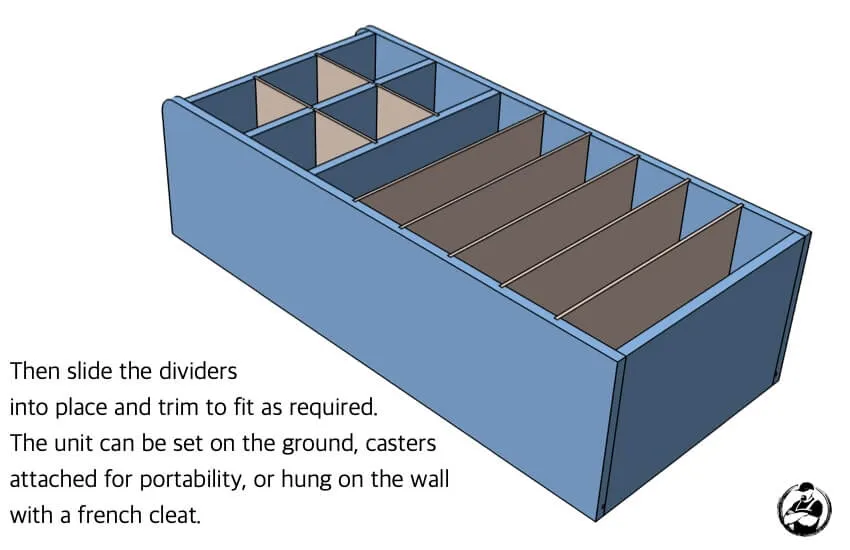
6Inserting the Dividers
Then slide the dividers into place and trim to fit as required. The unit can be set on the ground, casters attached for portability, or hung on the wall with a french cleat.
Tags
- Storage and Organizing
- Intermediate
Reviews & builds
No reviews yet
Sign in to review this plan or share your build.
No reviews yet. Be the first to build this.