Notch
NotchUse your browser's Print (Ctrl/Cmd + P) and choose Save as PDF. This page works offline once you've opened it with a signal.
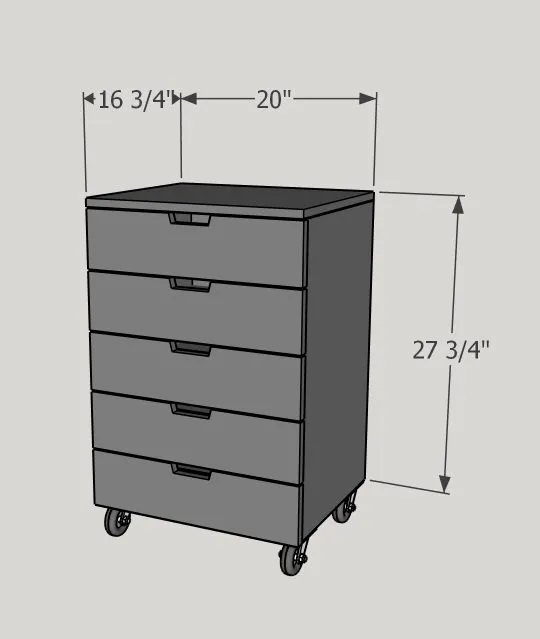
Rolling Storage Cart
This beginner friendly storage cart is perfect for getting that clutter organized.
- Difficulty
- Easy
- Time
- 3.5–6.5 hours
- Cost
- $$$
Cut list
| Part | Qty | T × W × L | Material | ✓ |
|---|---|---|---|---|
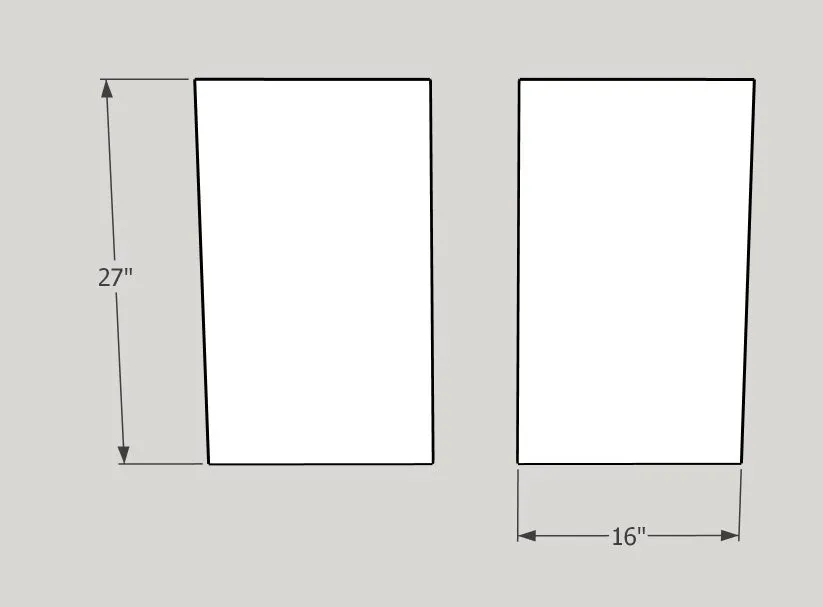
| Sides | 2 | 3/4" × 16" × 27" | — | ☐ |
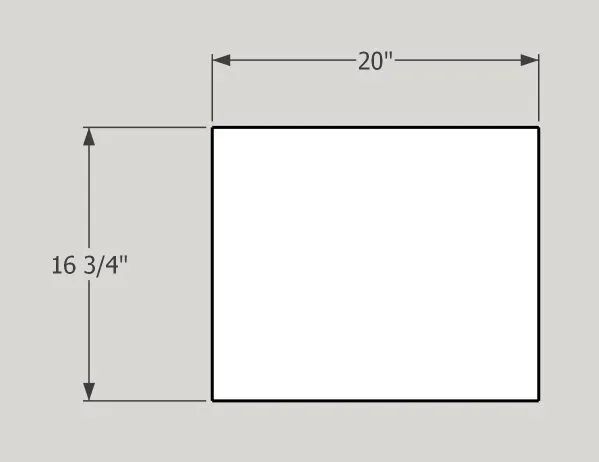
| Top | 1 | 3/4" × 16" × 20" | — | ☐ |
| Bottom | 1 | 3/4" × 16" × 18" | — | ☐ |
| Drawer sides | 10 | 3/4" × 3" × 15" | — | ☐ |
| Drawer front & backs | 10 | 3/4" × 3" × 16" | — | ☐ |
| Drawer fronts | 5 | 3/4" × 5" × 20" | — | ☐ |
| Drawer bottoms | 5 | 1/4" × 14" × 16" | — | ☐ |
| Back | 1 | 1/4" × 19" × 26" | — | ☐ |
Materials
| Item | Qty | ✓ |
|---|---|---|
| Plywood, 8' x 4' x 3/4" 96" x 48" x 3/4" | 1 board | ☐ |
| Plywood, 4' x 4' x 1/4" 48" x 48" x 1/4" | 1 board | ☐ |
| 15" full extension drawer slides | 5 each | ☐ |
| Locking casters | 4 each | ☐ |
| 1/4" rabbeting bit | 1 each | ☐ |
| 1 1/4" screws to attach drawer fronts | 10 each | ☐ |
| Paint or stain | 1 each | ☐ |
| Wood glue | 1 each | ☐ |
| Hardware for drawer fronts knob/handle | 5 each | ☐ |
| Optional: jigsaw for drawer handles | 1 each | ☐ |
Overall cost: $$$. Lumber varies by region, species, and season, so we give a band rather than a figure.
Tools
- Drill / Driver
- Pocket Hole Jig
- Router
Instructions
1. 1
Cut the sides of the cart to size.
2. 2
Cut the top of the storage cart to size.
3. 3
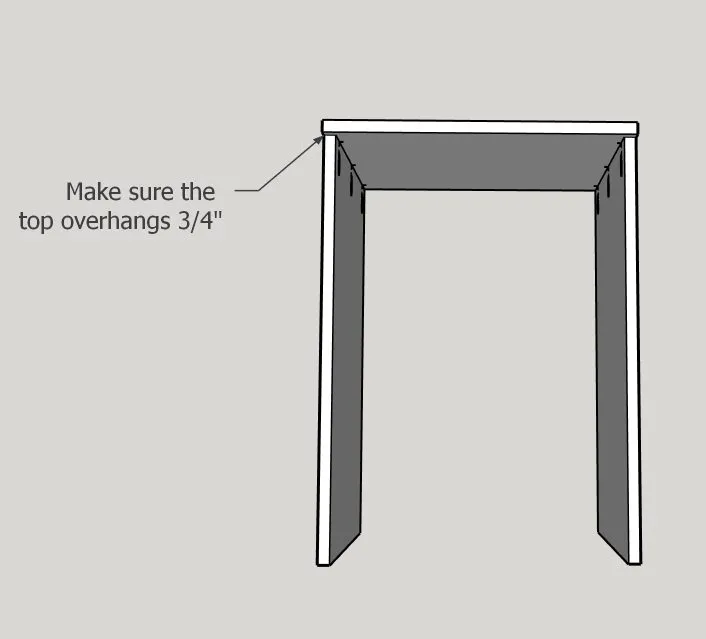
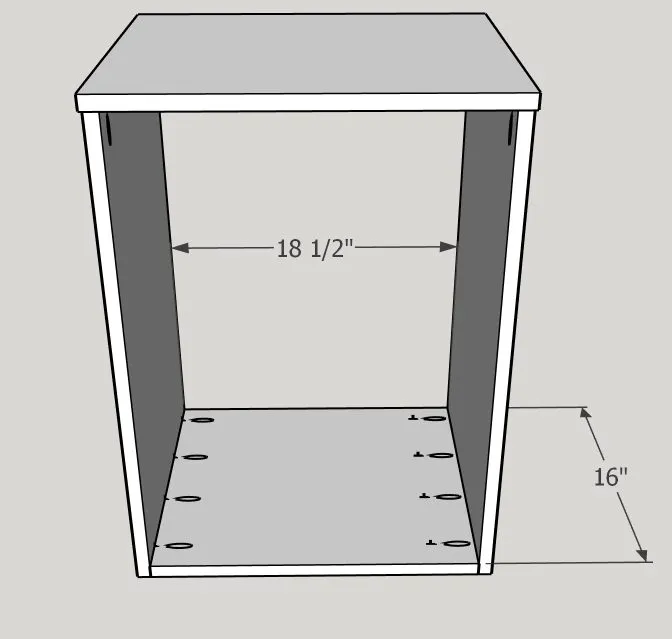
Using 1 1/4" pocket screws and wood glue, attach the top through the pocket holes on the inside of the sides of the cabinet. Make sure the top of the cabinet overhangs 3/4".
4. 4
Attach the bottom to the sides of the cabinet using 1 1/4" pocket screws and wood glue. Pocket holes can face up or down, either way they won't be visible.
5. 5
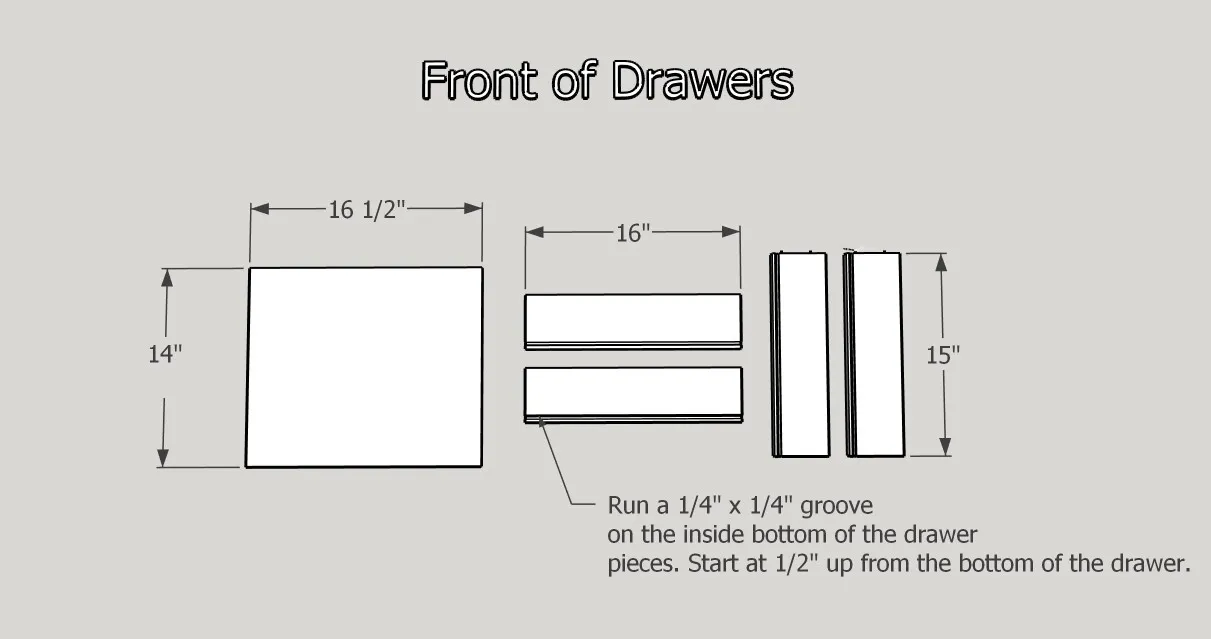
Cut all the drawer pieces to size. Run a 1/4" x 1/4" groove on the inside of the drawer box pieces. The groove should start 1/2" up from the bottom of the drawer pieces. You can use a track saw or a table saw for this!
6. 6
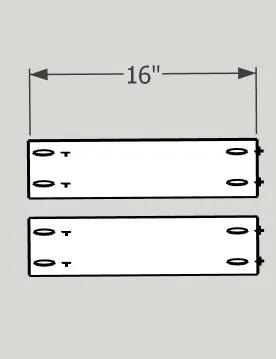
Drill pocket holes only on the front side of the front & back pieces of the drawer box pieces.
7. 7
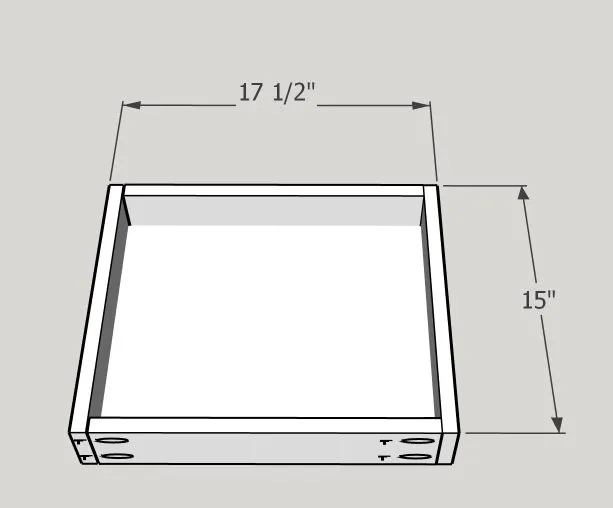
Put the drawer box together using wood glue and 1 1/4" pocket screws. The pocket holed pieces should face out and back. This way they wont be visible once the drawer front is put on. Slide the plywood bottom into the grooves in the drawer, you can add a little glue in the grooves for more durability.
8. 8
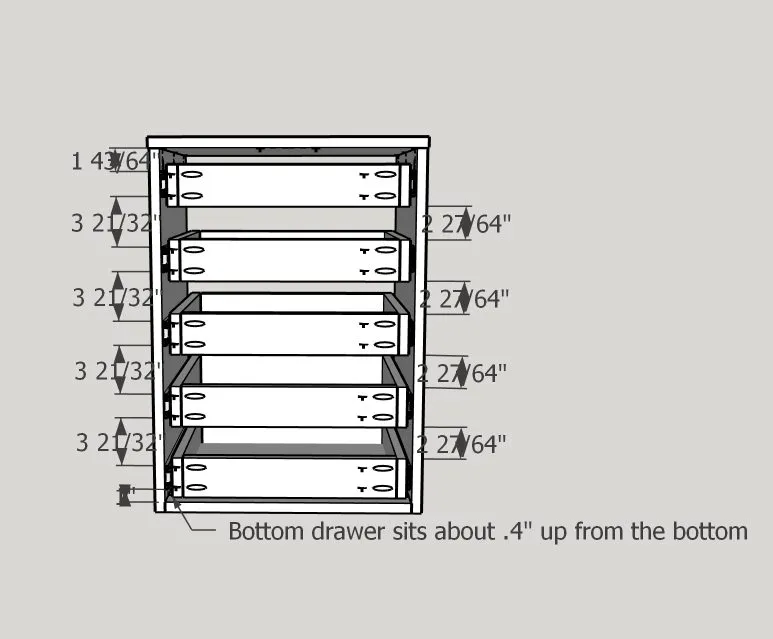
Install the drawer slides using the dimensions in the image. The drawer slide on the bottom should sit 1" from the bottom of the cabinet to the bottom of the drawer slides. All the other drawer slides should be 3.656" from the bottom of one slide to the bottom of the next slide. This is where a piece of scrap wood cut to size will come in handy! Install the drawer boxes using the same method you installed the drawer slides. Use a scrap piece of wood to space them out!
9. 9
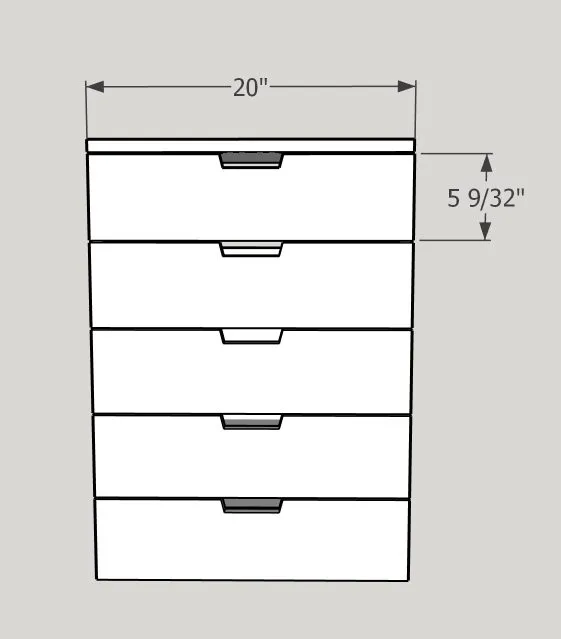
You can either cut out a handle for the drawer fronts with a jigsaw or you can just attach your favorite hardware. After you've done that, screw the drawer fronts onto the drawer boxes from the inside of the drawers. Make sure they are spaced evenly and that the last drawer front is flush with the bottom of the cabinet.
10. 10
Paint, attach your casters and you're done!