Notch
Use your browser's Print (Ctrl/Cmd + P) and choose Save as PDF. This page works offline once you've opened it with a signal.
Rolling Laundry Cart
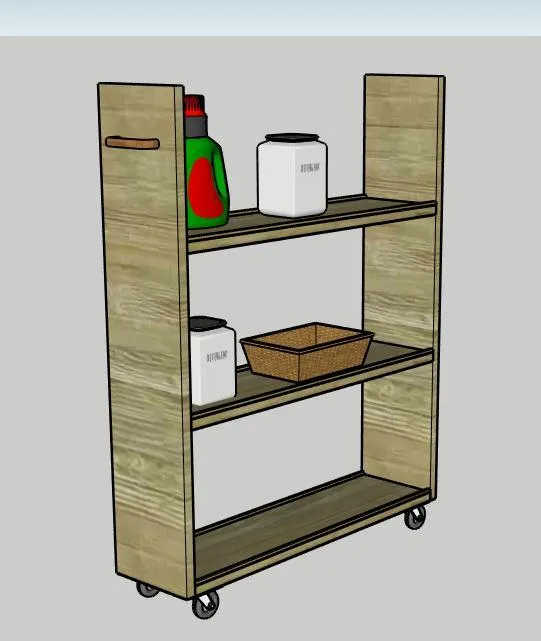
This rolling laundry cart is perfect for keeping essential laundry items close by while doing your laundry!
- Difficulty
- Easy
- Time
- 2.3–4 hours
- Cost
- $$
Cut list
| Part | Qty | T × W × L | Material | ✓ |
|---|---|---|---|---|
| Front and Back | 2 | 3/4" × 7" × 24" | — | ☐ |
| Shelves | 3 | 3/4" × 7" × 26" | — | ☐ |
| Trim | 6 | 1/4" × 1/4" × 26" | — | ☐ |
Materials
| Item | Qty | ✓ |
|---|---|---|
| Boards, 8'x1"x8" | 2 board | ☐ |
| 2" Rubber Casters | 4 each | ☐ |
| Drawer Pull of your choice | 1 each | ☐ |
| Wood Glue | 1 each | ☐ |
| Stain | 1 each | ☐ |
| Sealant | 1 each | ☐ |
Overall cost: $$. Lumber varies by region, species, and season, so we give a band rather than a figure.
Tools
- Drill / Driver
- Miter Saw
- Pocket Hole Jig
- Random Orbit Sander
- Table Saw
- Bar / Pipe Clamps — optional
Instructions
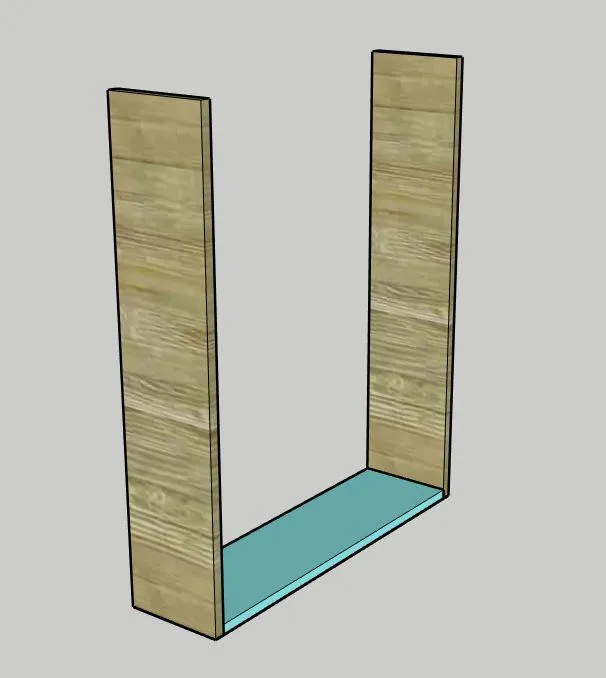
1. Attach Bottom Shelf
Drill pocket holes in the short ends of each of the shelves. Attach one shelf to the ends of the front and back flush with the bottom edge.
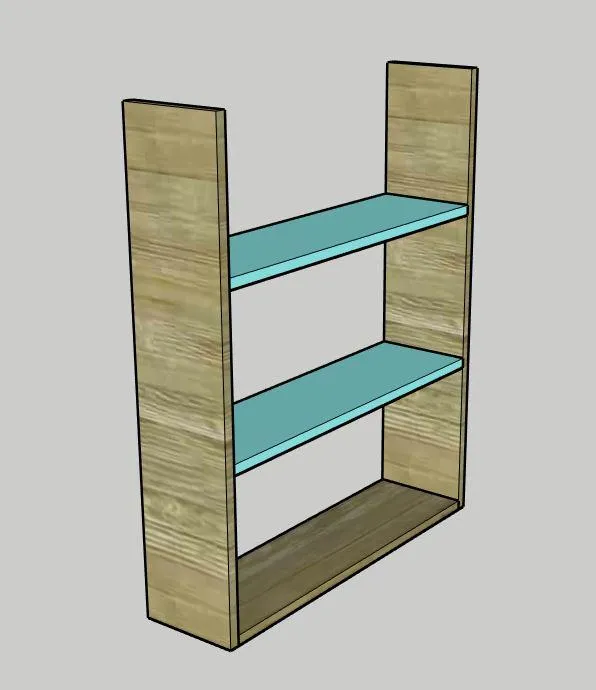
2. Attach Shelves
Attach the other two shelves the same way with 11" of space in between.
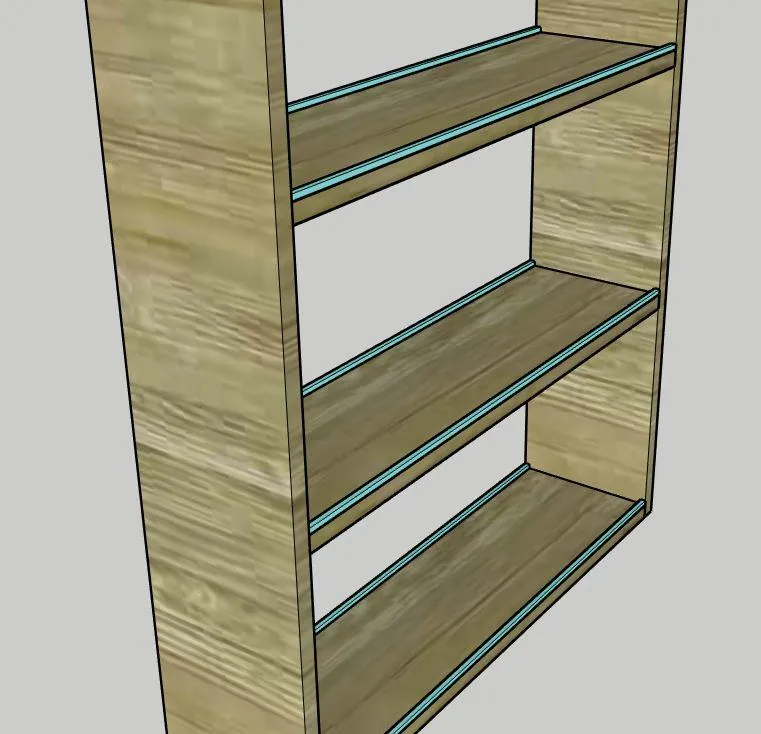
3. Attach Trim
Attach the trim pieces on the outside edge of the top of each shelf using wood glue and clamps.
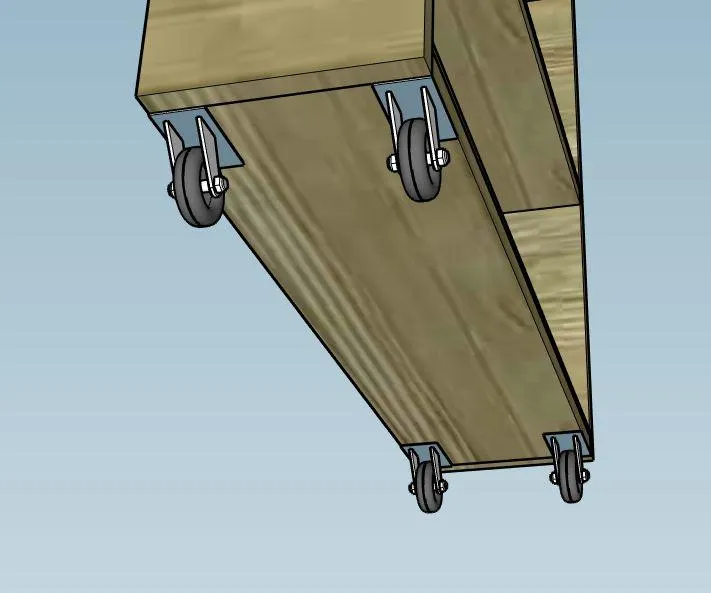
4. Attach Casters
Attach the casters onto the underside of the bottom shelf. We attached ours to the end.
5. Attach Handle
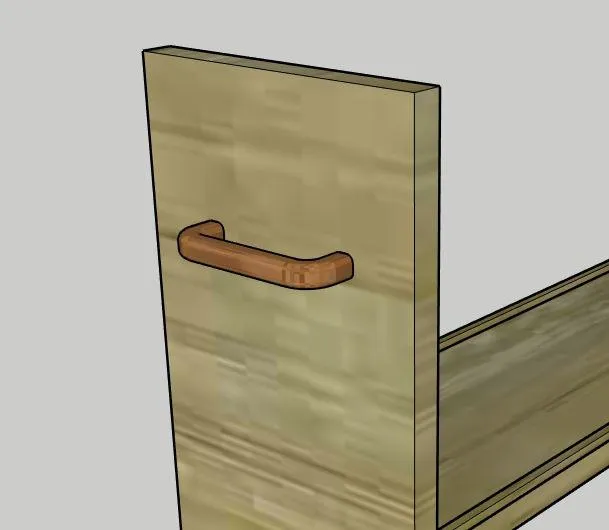
Attach the handle approximately 5" down from the top of the front.
6. Enjoy!
Enjoy your handiwork and tag @CharlestonCrafted on Instagram with a picture!