 Notch
Outdoor Table
Step-by-step build — 3 steps. Also available as a print sheet.
1Cut and fasten the table top
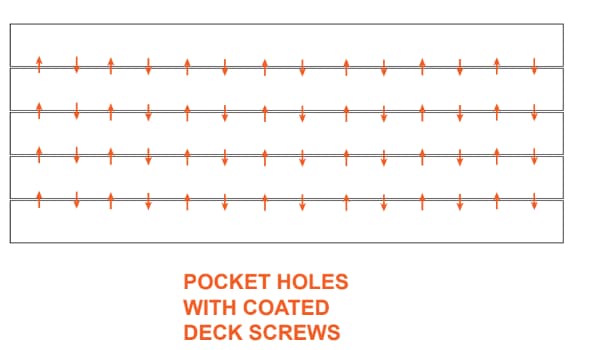
Cut 5 pieces of 2x6 at a length of 6'. Connect the pieces to make the top using pocket holes every 8 inches on the under side of the table top. I used washers as spacers with the pocket screws going through the center to make gaps for rain water about 1/8" to 1/4" wide.
2Assemble the legs
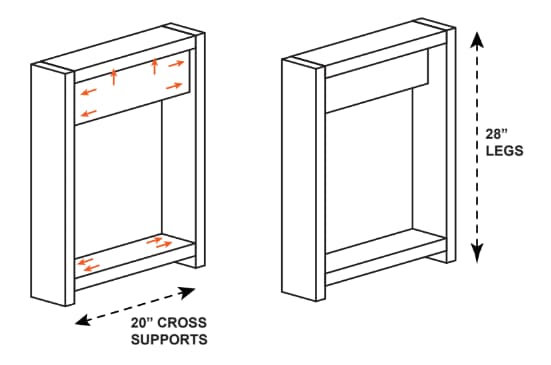
Cut 4 legs 28" long and 6 support pieces 20" long. Use pocket holes to connect the pieces. I placed the holes on the inside or under side of the pieces so that they would be less visible.
Tip: Note - as seen in the video, you can choose to use the powder coated legs (linked in the Extras tab) instead of building your own. Skip this step if you are using the powder-coated legs.
3Add the legs to the table top
Screw through the top cross support on the legs to connect the legs to the table top. Ben noted that he placed them symmetrically so that they supported multiple boards.