Notch
Use your browser's Print (Ctrl/Cmd + P) and choose Save as PDF. This page works offline once you've opened it with a signal.
Outdoor Bench
This DIY outdoor bench is made out of pieces of a 2x10 and a 2x4 that are cut at 15 degree angles and screwed together with pocket holes.
- Difficulty
- Beginner
- Time
- 1.3–2.5 hours
- Cost
- $
Cut list
| Part | Qty | T × W × L | Material | ✓ |
|---|---|---|---|---|
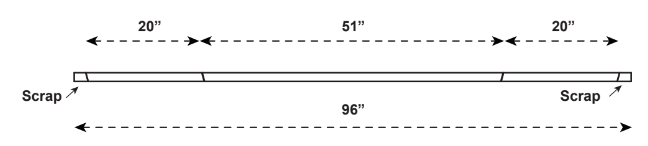
| Bench top | 1 | 2" × 10" × 51" | — | ☐ |
| Legs | 2 | 2" × 10" × 20" | — | ☐ |
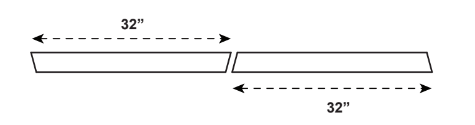
| Supports | 2 | 2" × 4" × 32" | — | ☐ |
Materials
| Item | Qty | ✓ |
|---|---|---|
| Board, 2"x10"x8' | 1 board | ☐ |
| Board, 2"x4"x8' | 1 board | ☐ |
| Box of 2 1/2" blue-kote pocket-hole screws (see tools list) | 1 each | ☐ |
| 80 grit sandpaper | 1 each | ☐ |
| Penetrating oil with UV protection | 1 each | ☐ |
Overall cost: $. Lumber varies by region, species, and season, so we give a band rather than a figure.
Tools
- Circular Saw
- Drill / Driver
- Pocket Hole Jig
- Random Orbit Sander
- Bar / Pipe Clamps — optional
Instructions
1. Cut the 2x10s
Cut a 2x10 with the blade set at 15 degree angle.
2. Cut the 2x4s
Set the blade on the circular saw back to 90 degrees and cut a 2x4 at a 15 degree angle.
3. Assemble the bench
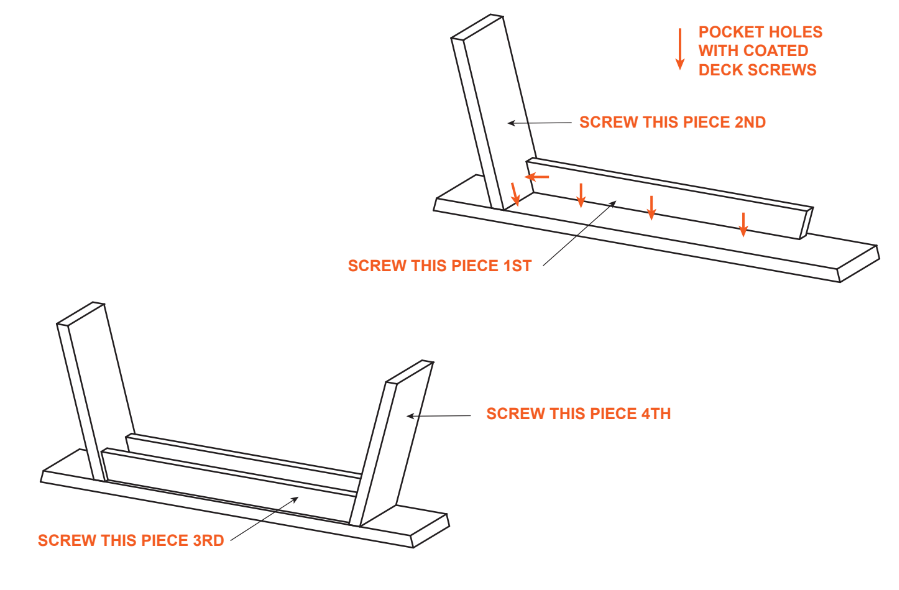
Use pocket holes to connect the pieces. I placed on the holes on the inside of the pieces so that they would be less visible. I screwed one of the 2x4 pieces first before adding a single leg. I then added another 2x4 piece and then the last leg. I used pocket holes to screw the 2x4s to both the legs and to the top of the bench. Use sealer to protect your bench.