 Notch
- Difficulty
- Beginner
- Time
- 1.8–3.5 hours
- Cost
- $$
About this build
Add the perfect decorative accent to your home with this unique open shelf, great for displaying books, plants, or your favorite home decor. This fast and easy beginner DIY build will look great in any space!
Tools
Essential
- Drill / Driver
- Impact Driver
- Miter Saw
- Pocket Hole Jig
- Random Orbit Sander
Optional / nice to have
- Bar / Pipe Clamps
- Combination Square
- Tape Measure
Materials
| Item | Qty |
|---|---|
| Board, 2x10 96" | 2 board |
| 2 1/2'' pocket hole screws | 28 each |
| Paint or stain of choice | 1 each |
Overall cost: $$. Lumber prices vary by region, species, and season, so we give a band rather than a figure we would only be pretending to know.
Cut list
| Part | Qty | T × W × L |
|---|---|---|
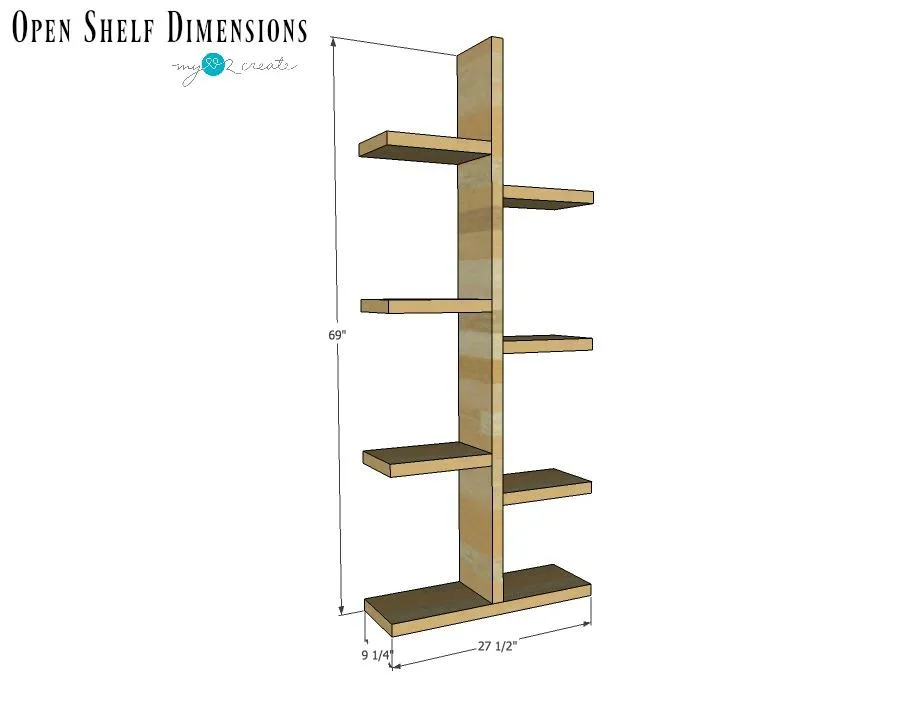
| Base | 1 | 1" × 9" × 27" |
| Divider board | 1 | 1" × 9" × 67" |
| Shelves | 6 | 1" × 9" × 13" |
What to buy
Buy 2 boards at 8 ft.
1" × 9"
2 boards
Assumes 8 ft stock, a 1/8" saw kerf, and buying each part at its own width. Change the board size or kerf on the full board plan →
Instructions
1Cut Wood
Using a miter saw cut your wood to the specified sizes.
2Drill pocket holes
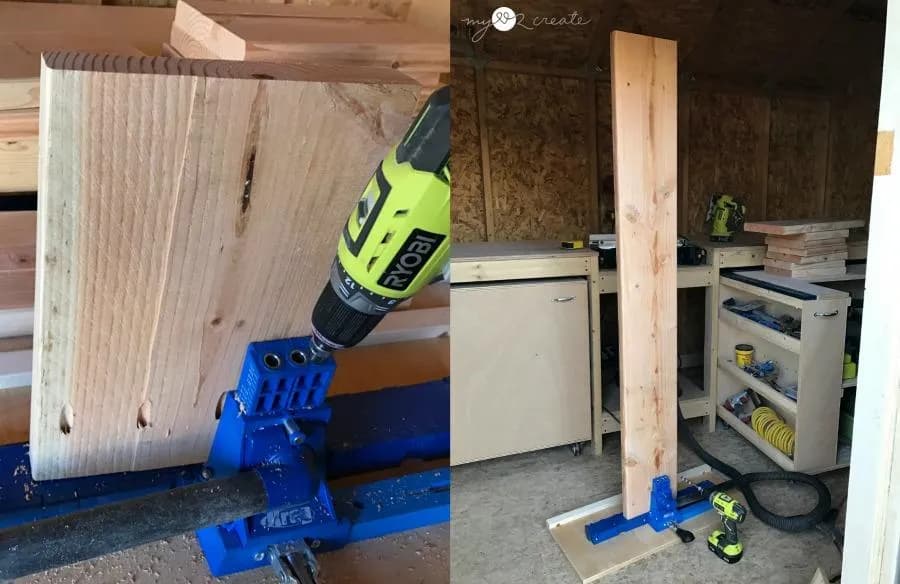
Drill 2 1/2'' pocket holes. Each shelf board will need 4 pocket holes on ONE side. The divider board will need 4 pocket holes alternating two on each side.
3Attach divider board to base
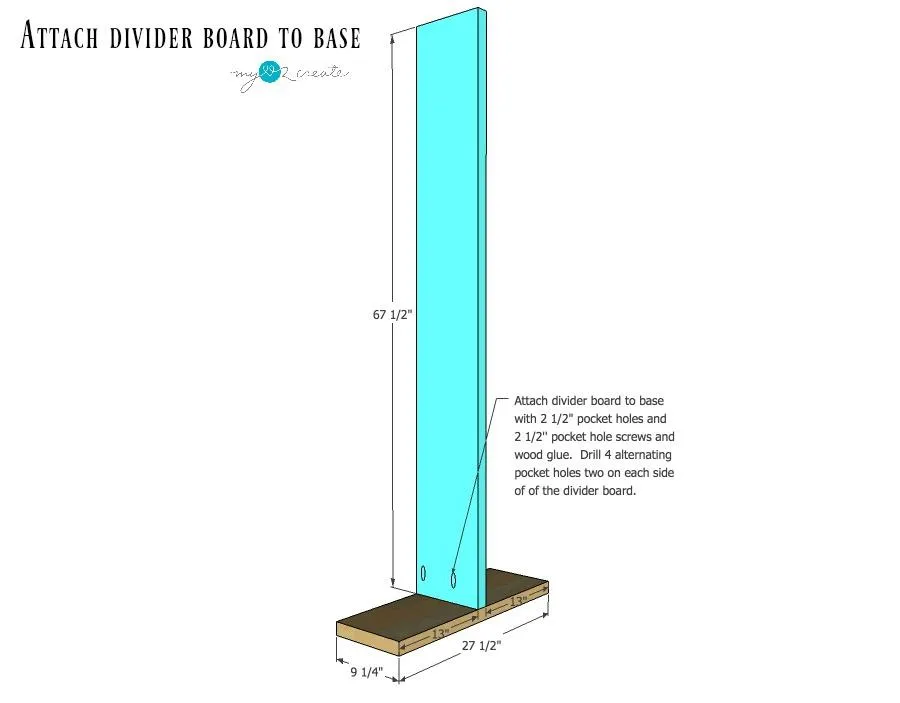
Using 2 1/2'' pocket hole screws and wood glue attach the divider board to the center of the base.
4Attach shelves to divider board
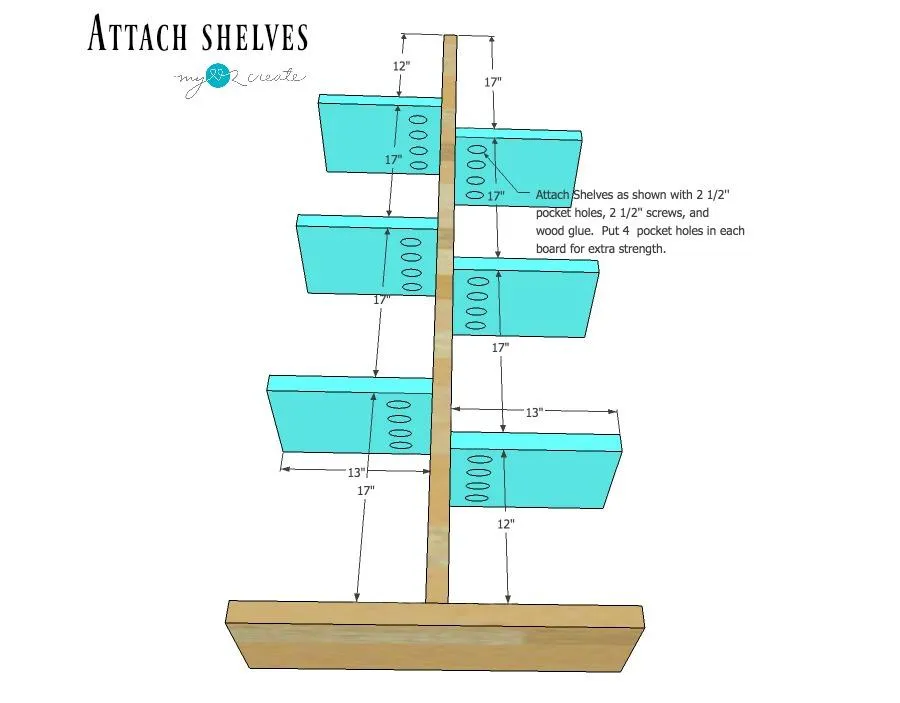
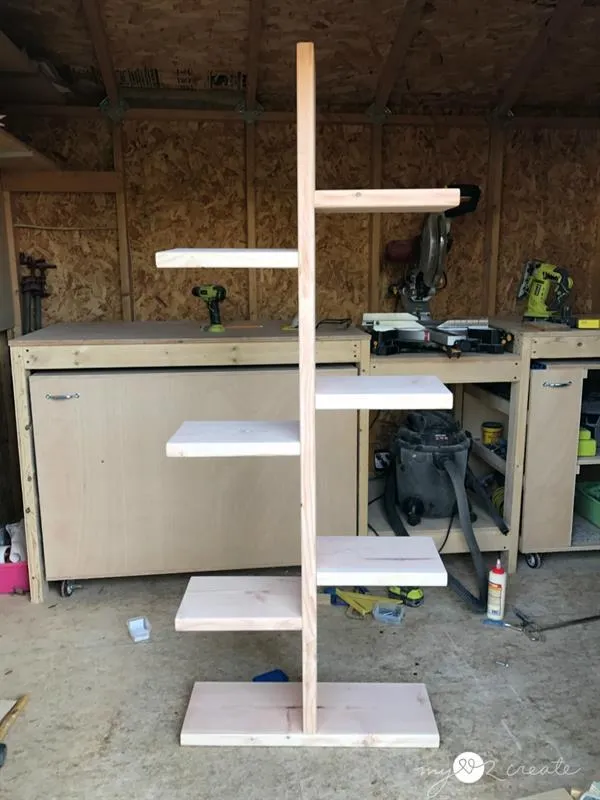
Using 2 1/2'' pocket hole screws and wood glue attach the shelves to the divider board as shown. For easy placement use scrap spacer boards, one cut at 12'' and one at 17''. Use a right angle clamp or a bar clamp to hole the shelf in place while drilling in the screws.
5Finish
- Fill desired pocket holes with wood filler or pocket hole plugs, then sand smooth and clean off the dust.
- Apply the paint or stain of your choice.
- Then enjoy! *Recommend: No more than 20 lbs per shelf. If you are worried about stability you can add an L bracket underneath a shelf at the back and attach it to the wall for safety. I have not had any issues with my shelf feeling unstable, but it would be an easy fix if you are concerned.
Tags
- Book
- Beginner
Reviews & builds
No reviews yet
Sign in to review this plan or share your build.
No reviews yet. Be the first to build this.