Notch
DIY Laundry Basket Shelves – Free Project Plan
Step-by-step build — 6 steps. Also available as a print sheet.
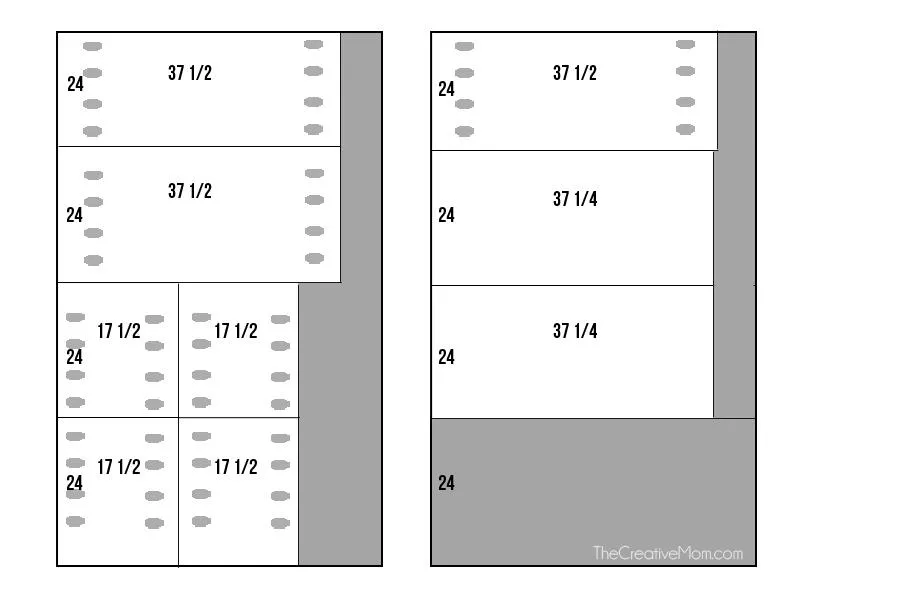
1Cut Plywood and Drill Pocket Holes
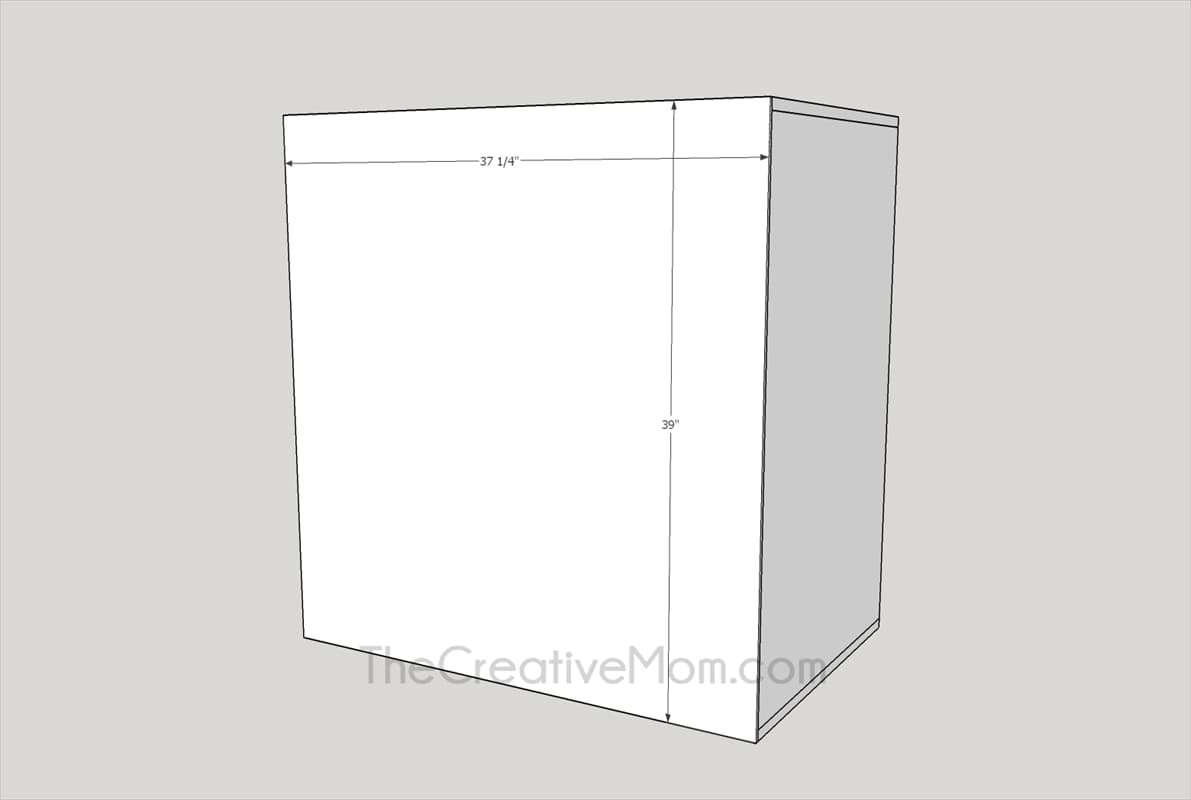
Using 3/4" plywood, cut the following: 3- 24" x 37 1/2" with pocket holes on short sides (vertical pieces) 2- 24" x 37 1/4" no pocket holes (top and bottom) 4- 24" x 17 1/2" with pocket holes on long sides (shelves) Using 1/4" plywood backing, cut the following: 1- 37 1/4" x 39" (backing)
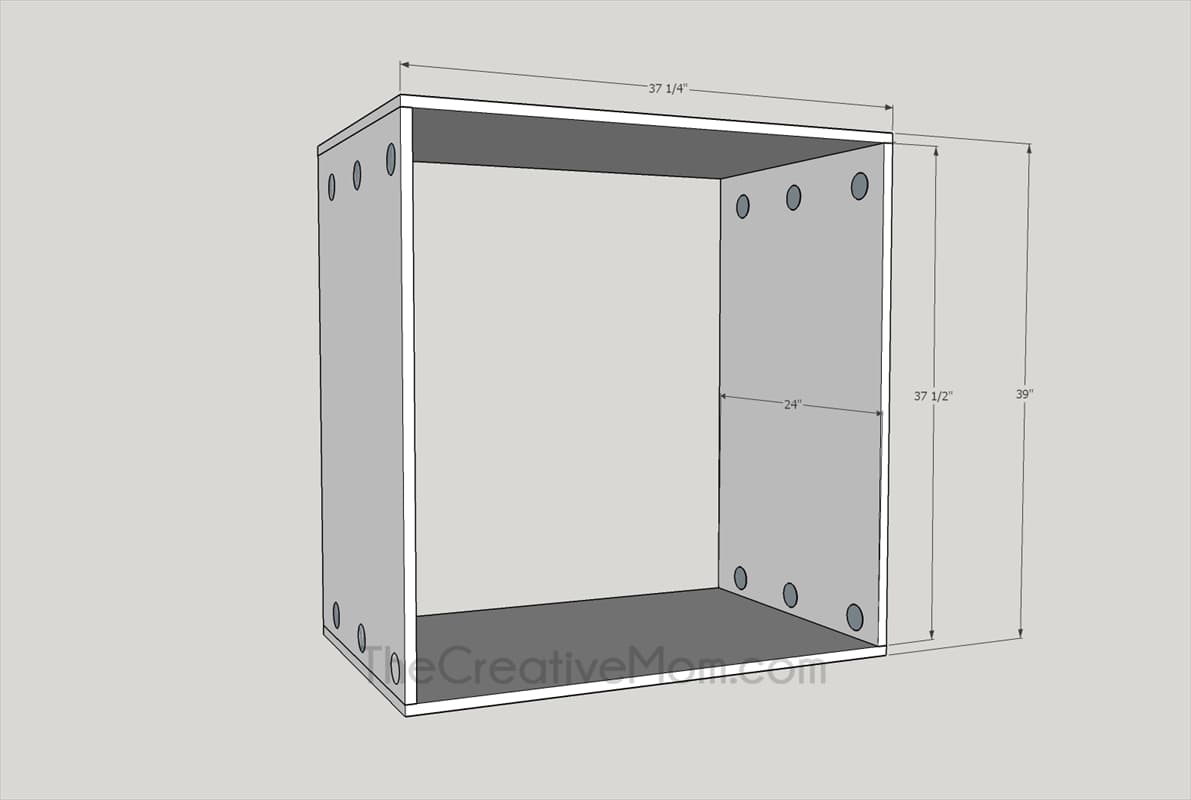
2Build Box
Using wood glue and 1 1/4" pocket hole screws, attach the 37 1/2" x 24" pieces to the 37 1/4" x 24" pieces.
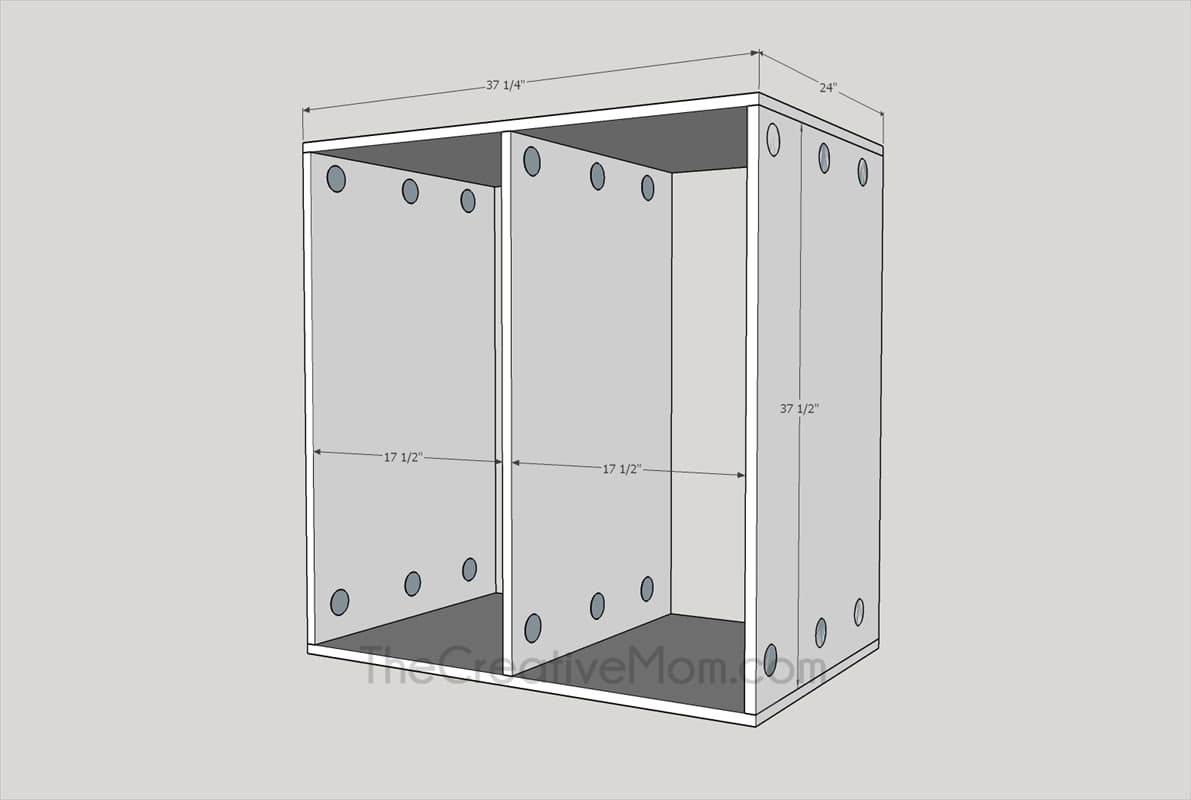
3Attach Middle Support
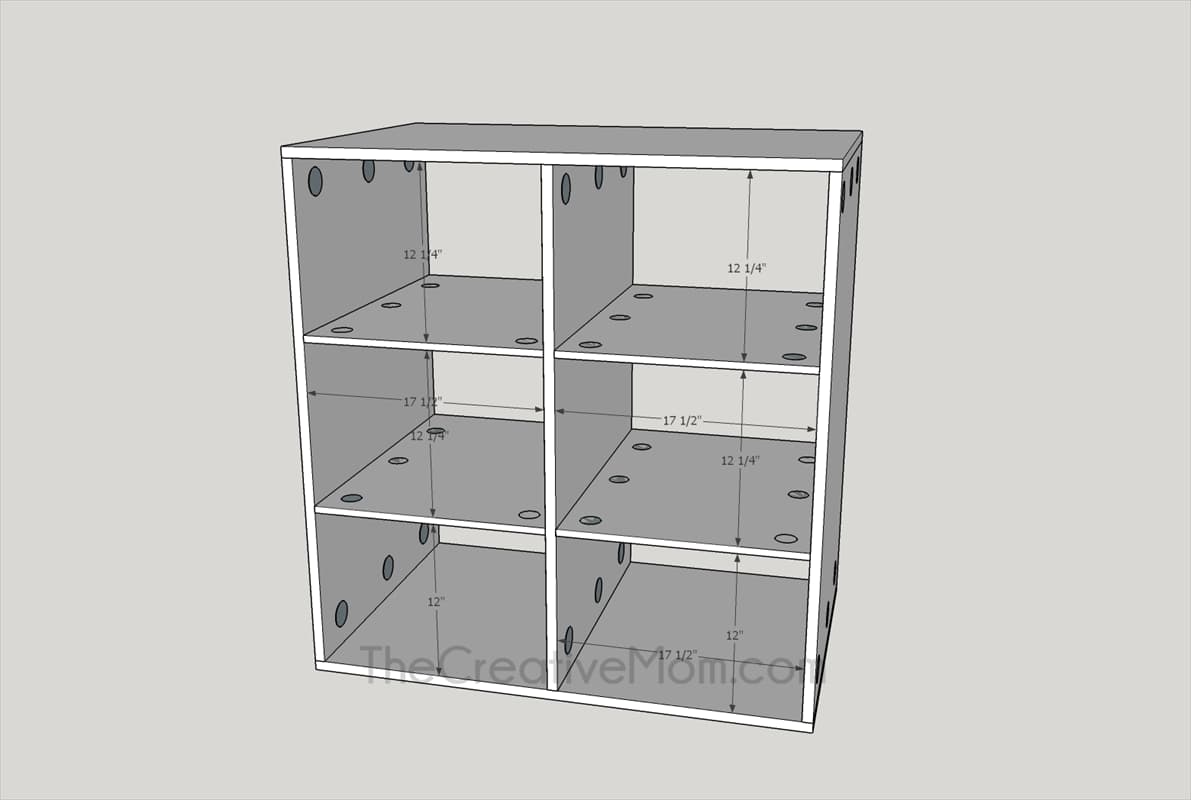
Using wood glue and 1 1/4" pocket hole screws, attach the middle vertical piece (37 1/2" x 24") to the center of the box. It should be about 17 1/2" on each side, but because materials vary, it's best to measure to find center.
4Attach Shelves
Using wood glue and 1 1/4" pocket hole screws, attach the horizontal shelves, with the pocket holes on the underside. These shelves should be about 12" to 12 1/4" apart.
5Finish
Sand, putty, and paint or stain your piece.
6Add Backing
Using staples, add the backing to the back of your shelf.