Notch
NotchKitchen Pantry Cabinet
Step-by-step build — 15 steps. Also available as a print sheet.
1Dimensions
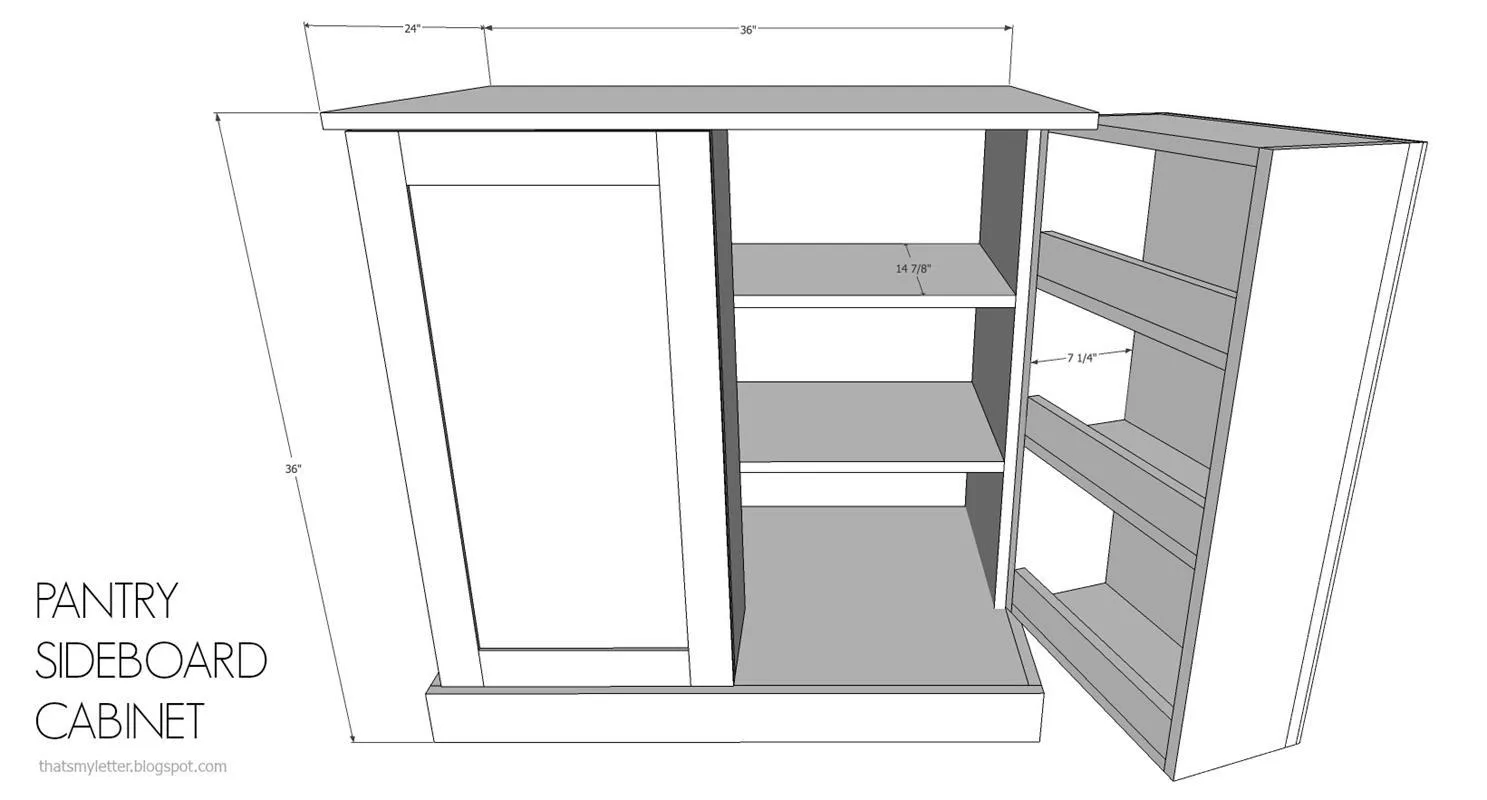
Overall dimensions: 36"w x 24"d x 36"h
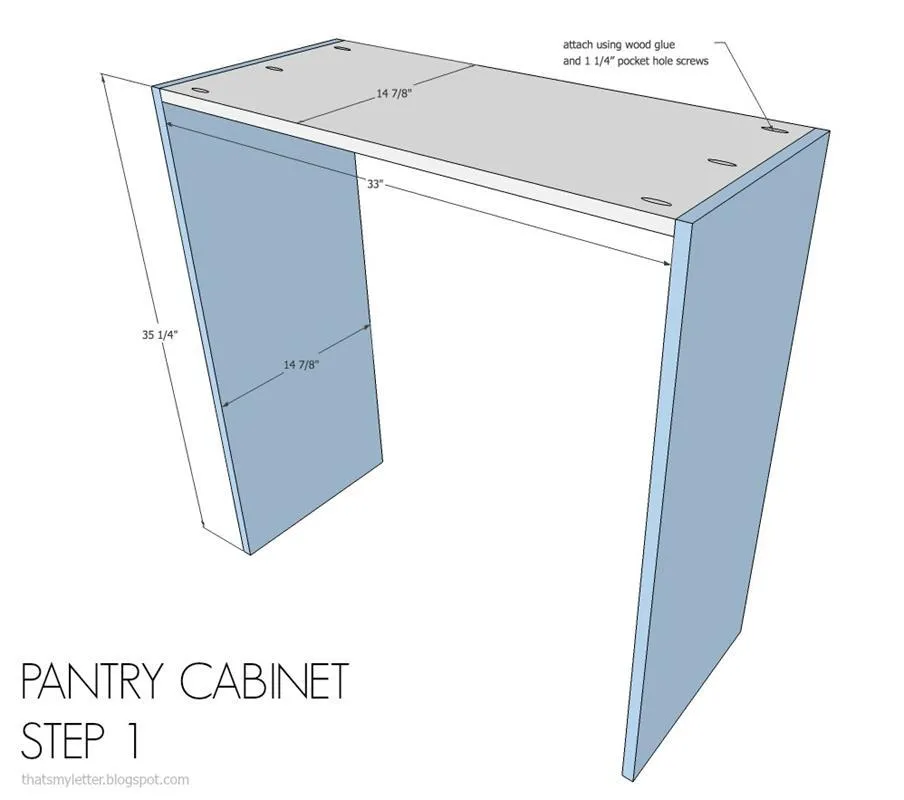
2Step 1
Attach sides to undertop using wood glue and 1 ¼” pocket hole screws.
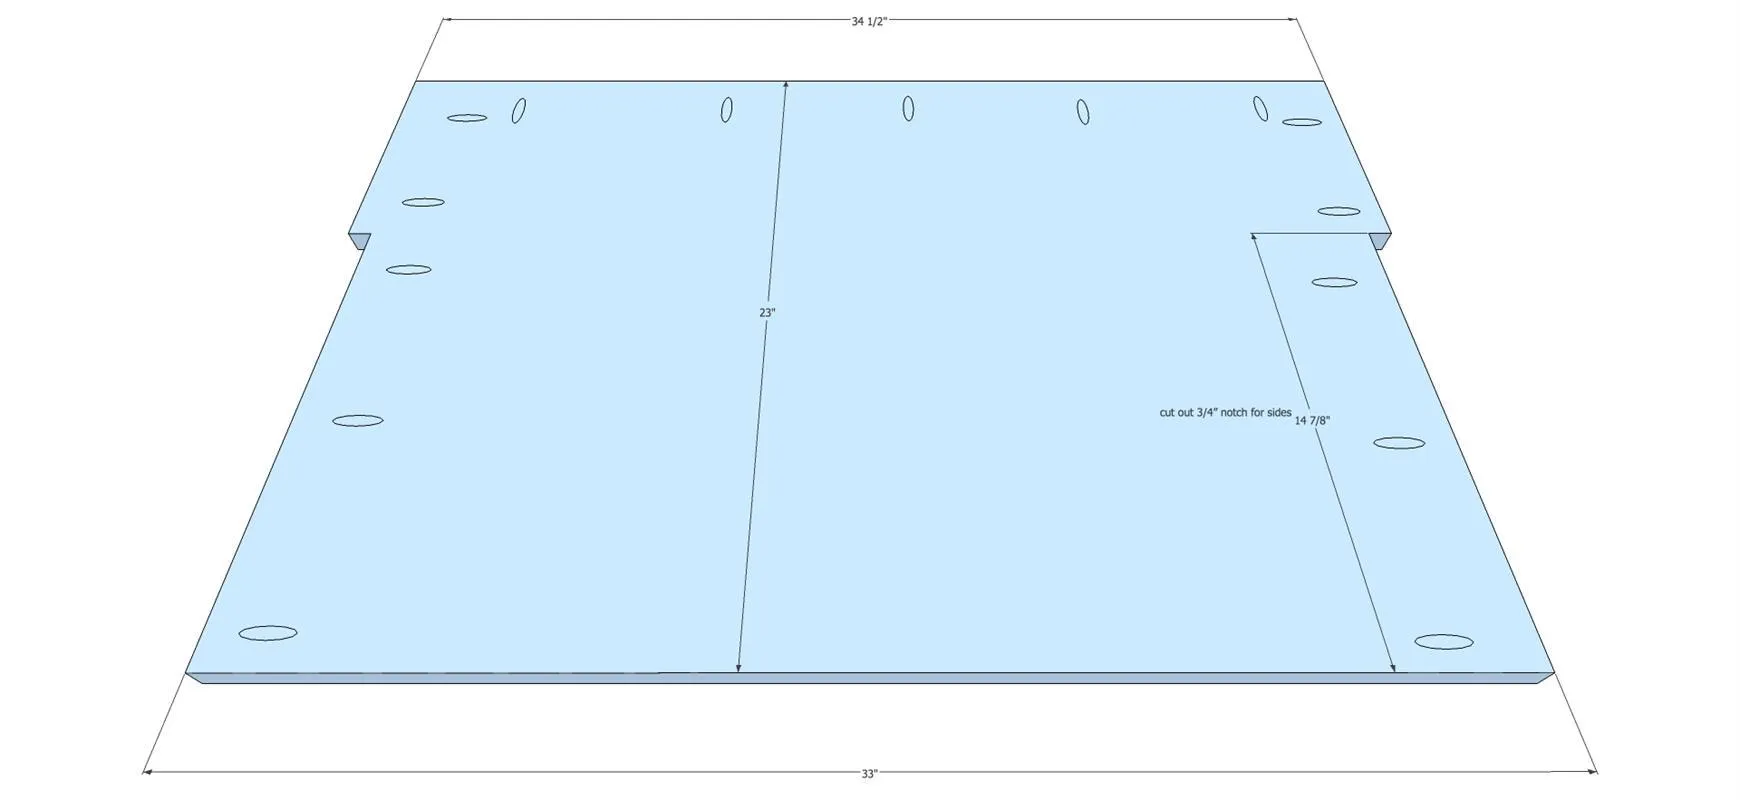
3Prep for Step 2
Using a jig saw notch out bottom piece at sides as per sketch above.
4Step 2
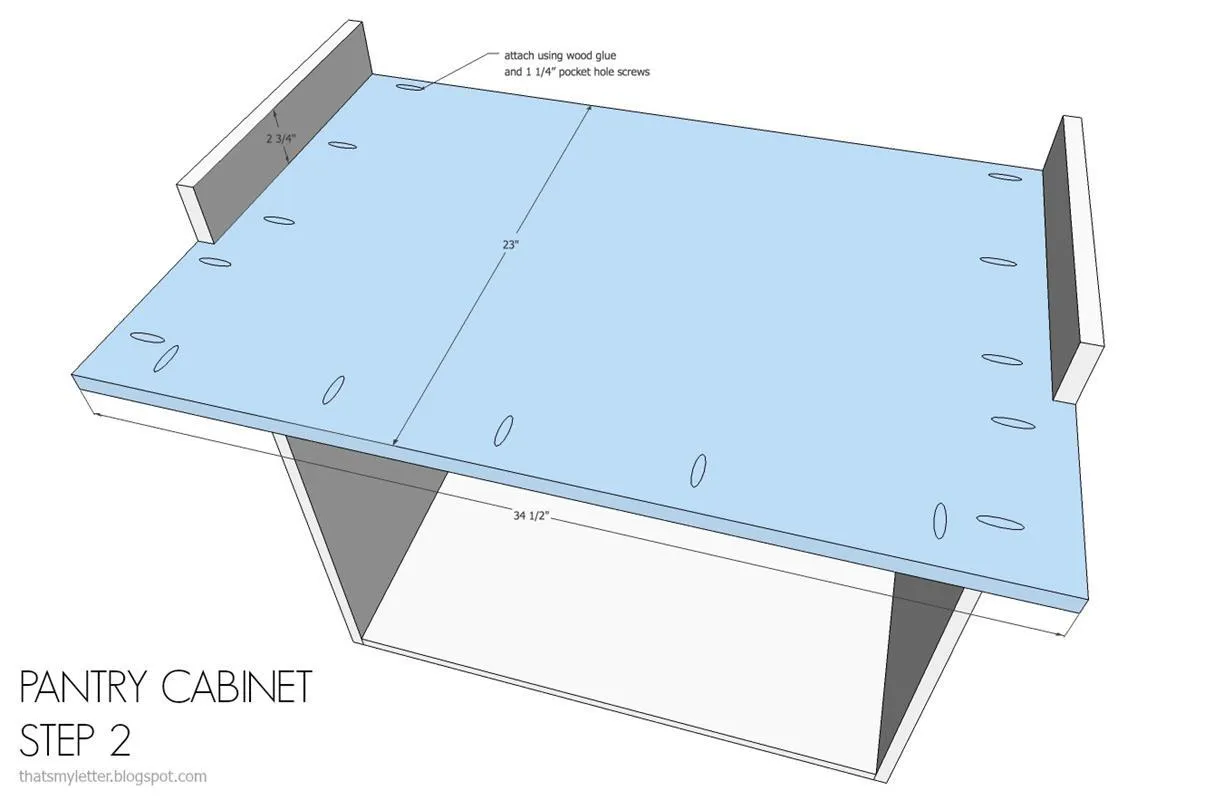
Attach bottom to sides using wood glue and 1 ¼” pocket hole screws.
5Step 3
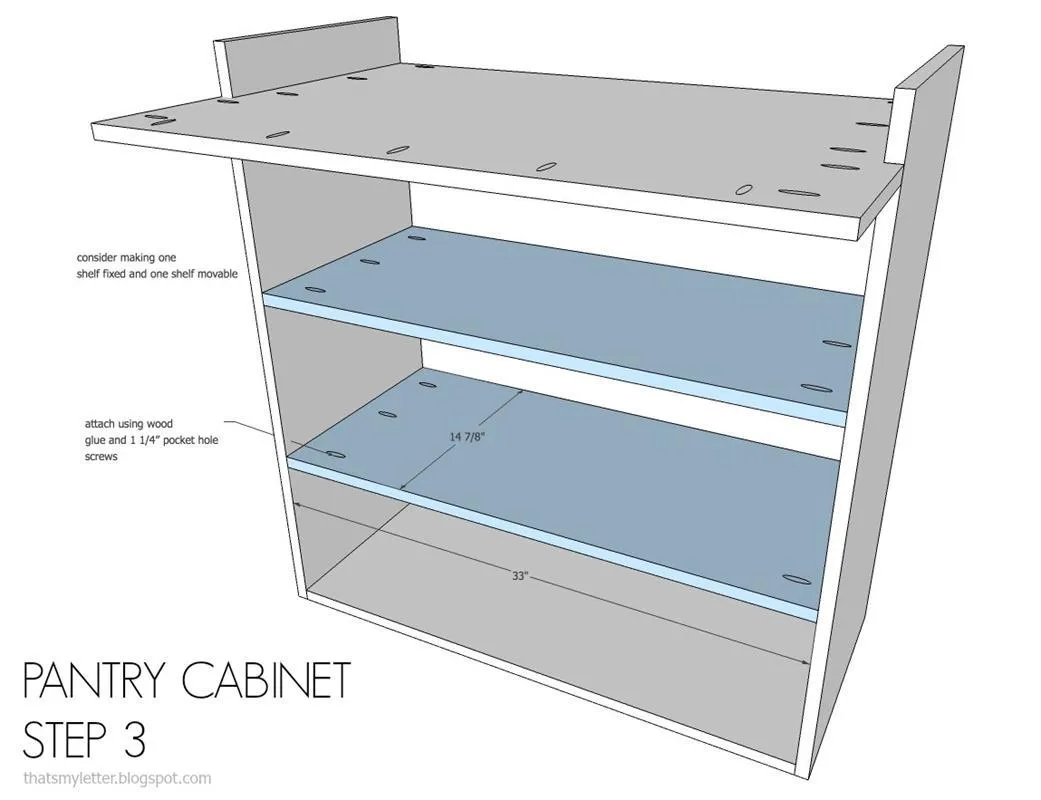
Attach shelves as desired. I suggest making one fixed shelf and one movable shelf. For the fixed shelf attach using wood glue and 1 ¼” pocket hole screws.
6Step 4
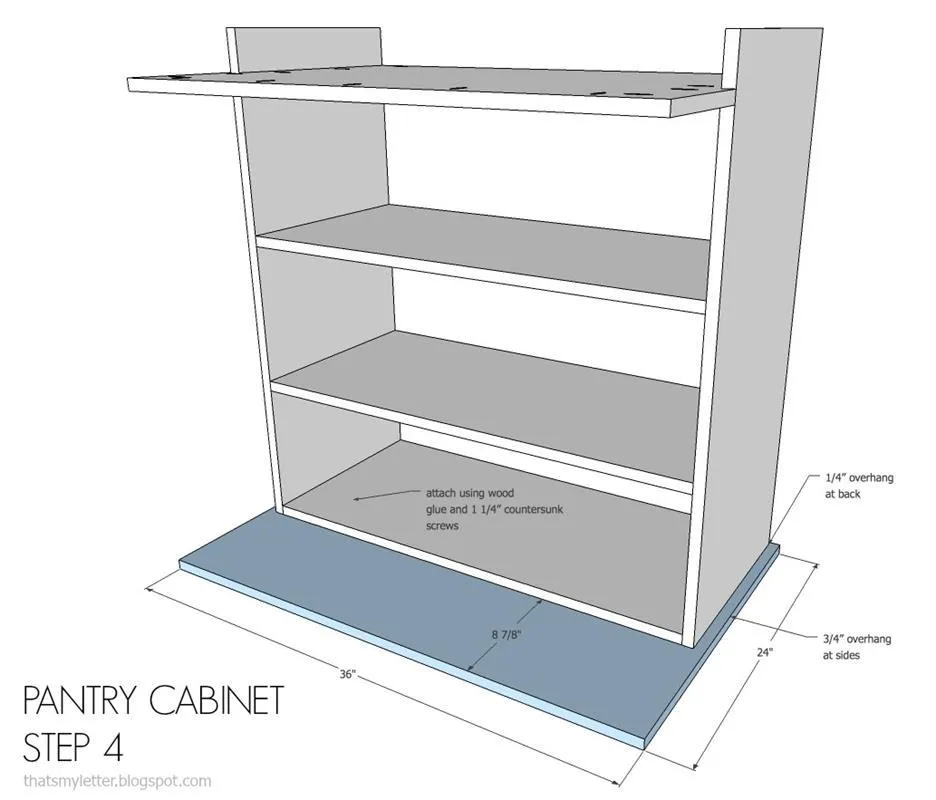
Attach top to undertop using wood glue and countersunk 1 ¼” wood screws. Leave ¼” overhang at back and ¾” overhang on both sides.
7Step 5
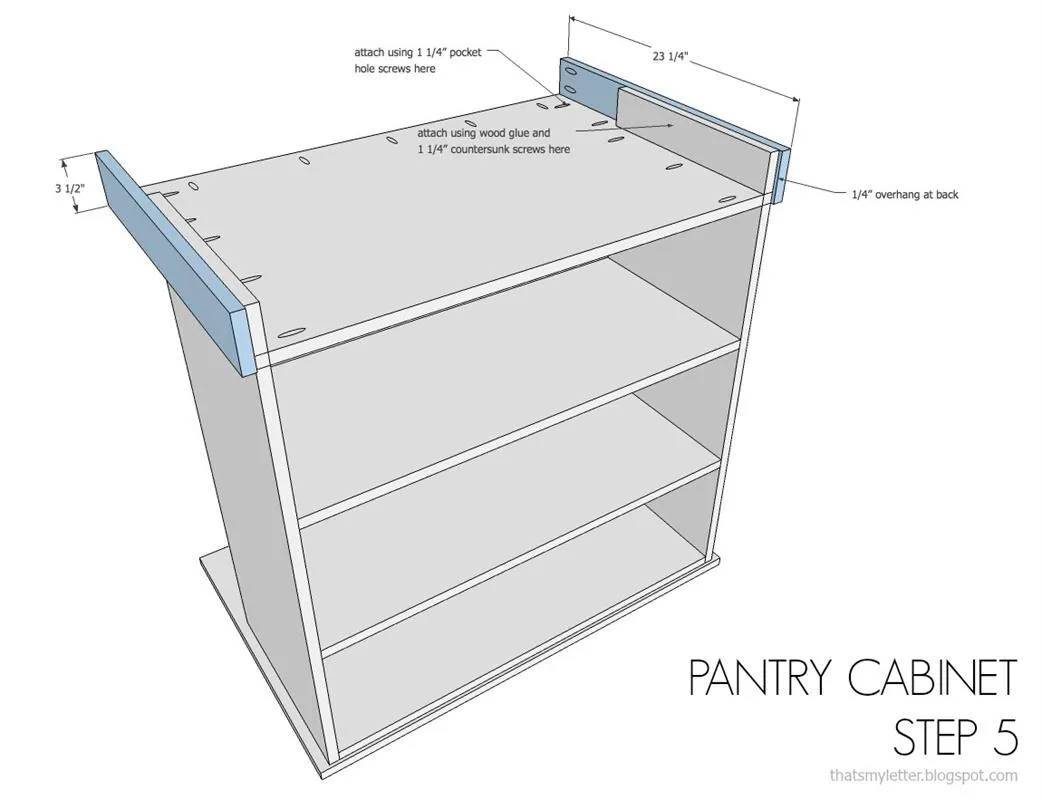
Attach base trim sides to carcass sides using wood glue and countersunk 1 ¼” wood screws. Attach front portion to bottom piece using 1 ¼” pocket hole screws.
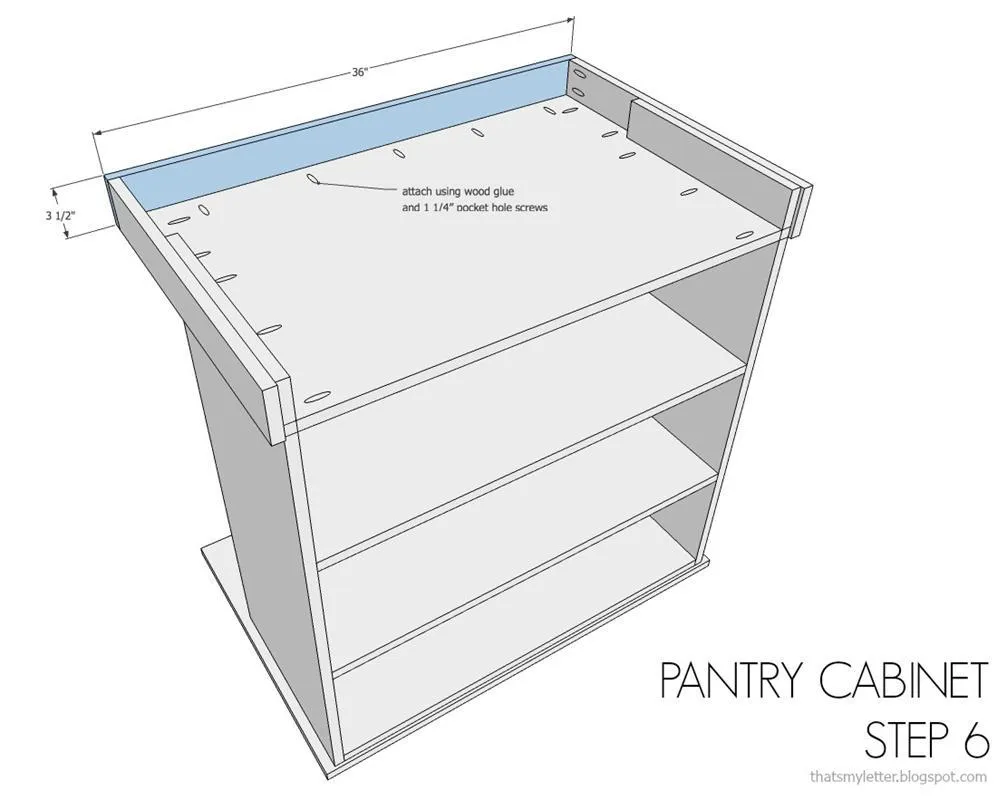
8Step 6
Attach front base trim to bottom piece using wood glue 1 ¼” pocket hole screws. Also attach to base trim side pieces using 1 ¼” pocket hole screws.
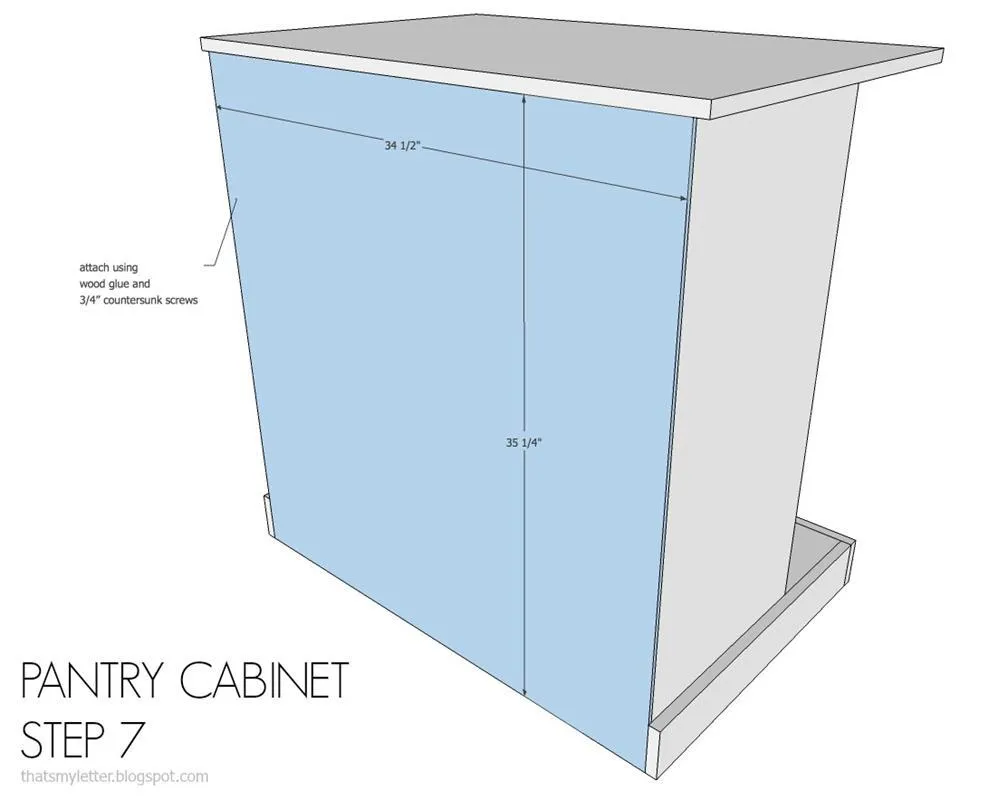
9Step 7
Attach backing to carcass using wood glue and ¾” countersunk wood screws.
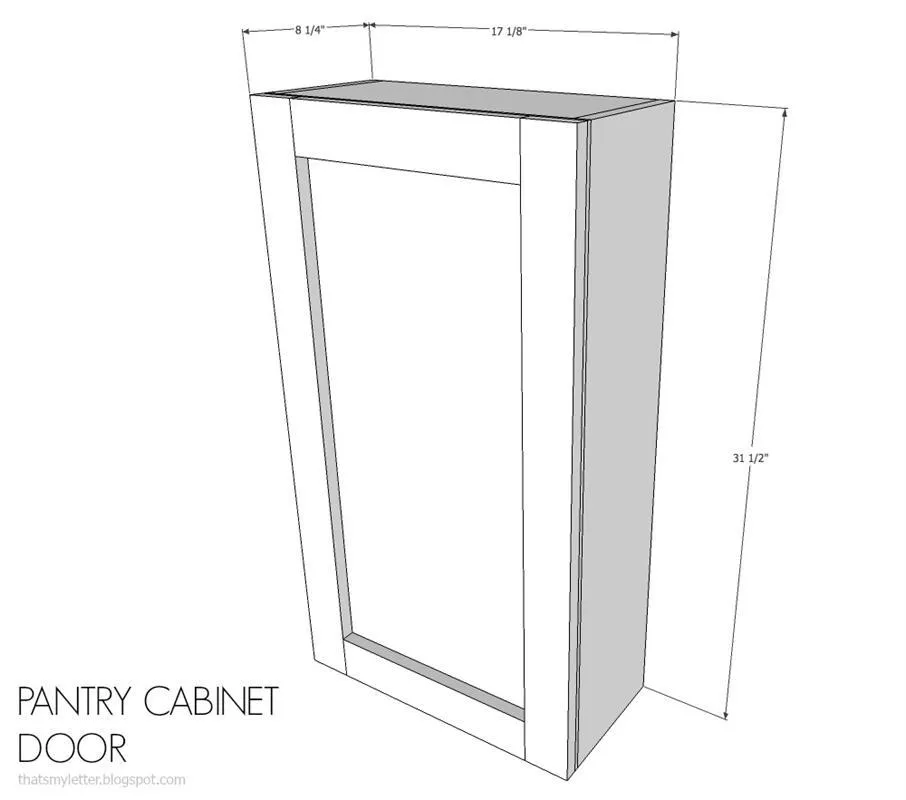
10Door Dimensions
Overall door dimensions: 17 1/8"w x 31 1/2" h x 8 1/4"d
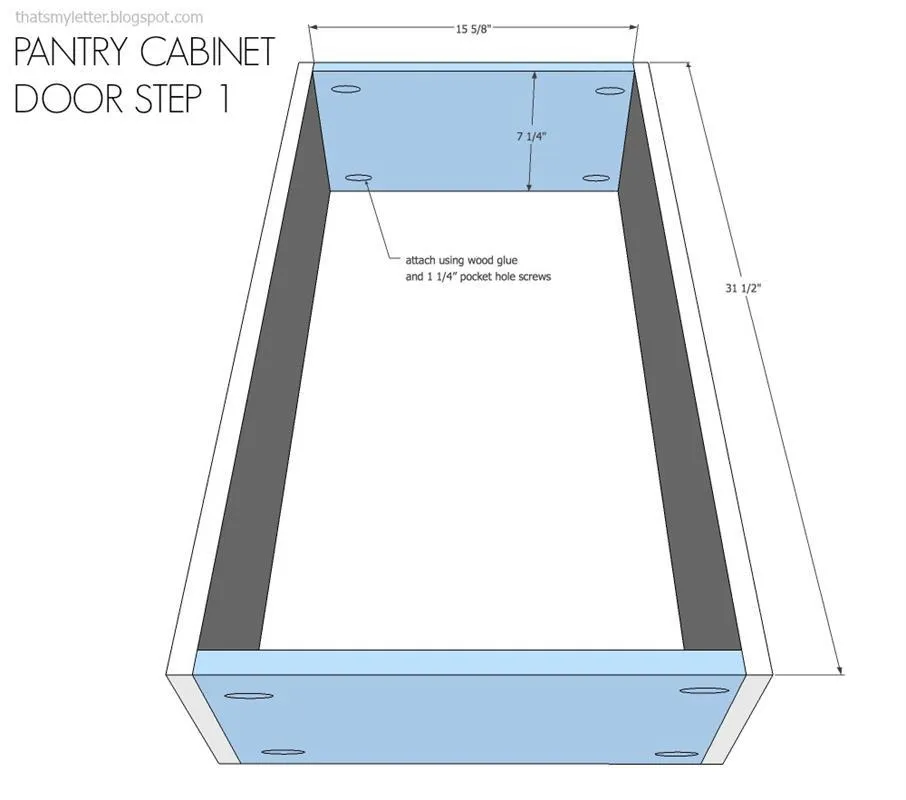
11Door Step 1
Make door frame by attaching top and bottom to sides using wood glue and 1 ¼” pocket hole screws.
12Door Step 2
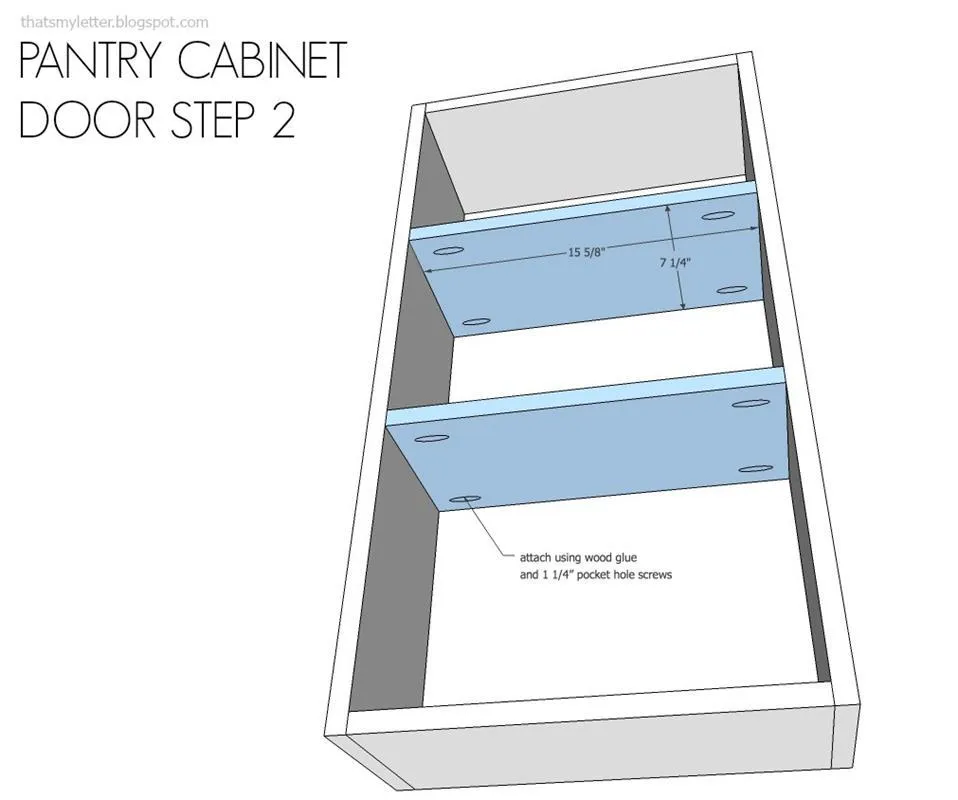
Insert shelves using wood glue and 1 ¼” pocket hole screws.
13Door Step 3
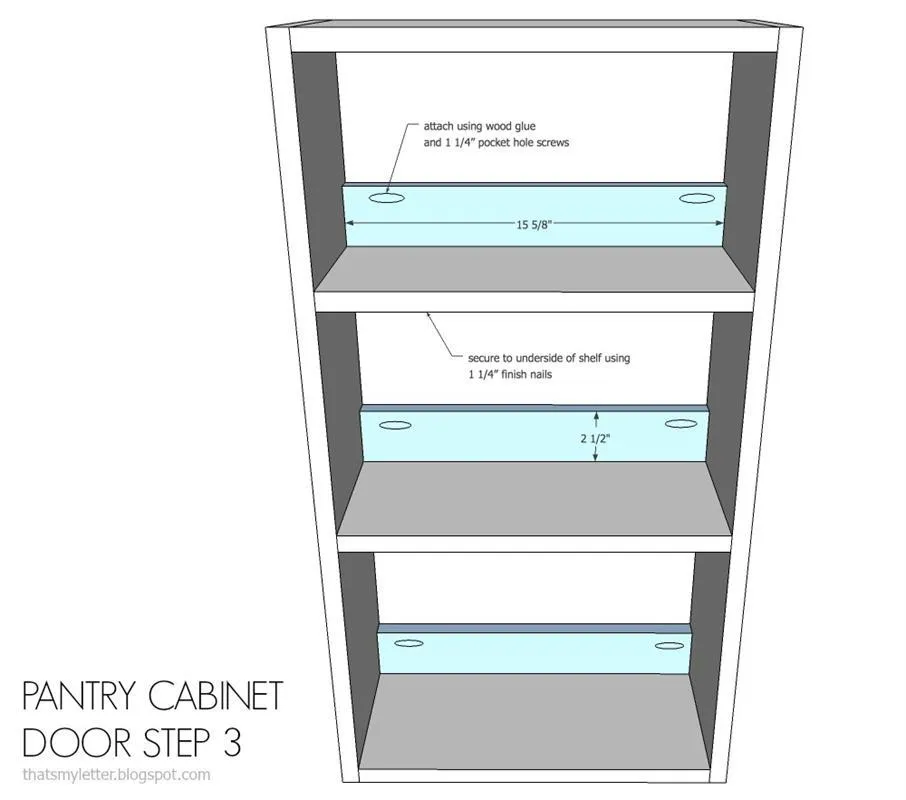
Attach shelf trim flush to front using wood glue and 1 ¼” pocket hole screws at sides and secure to shelf at underside using 1 ¼” finish nails.
14Door Step 4
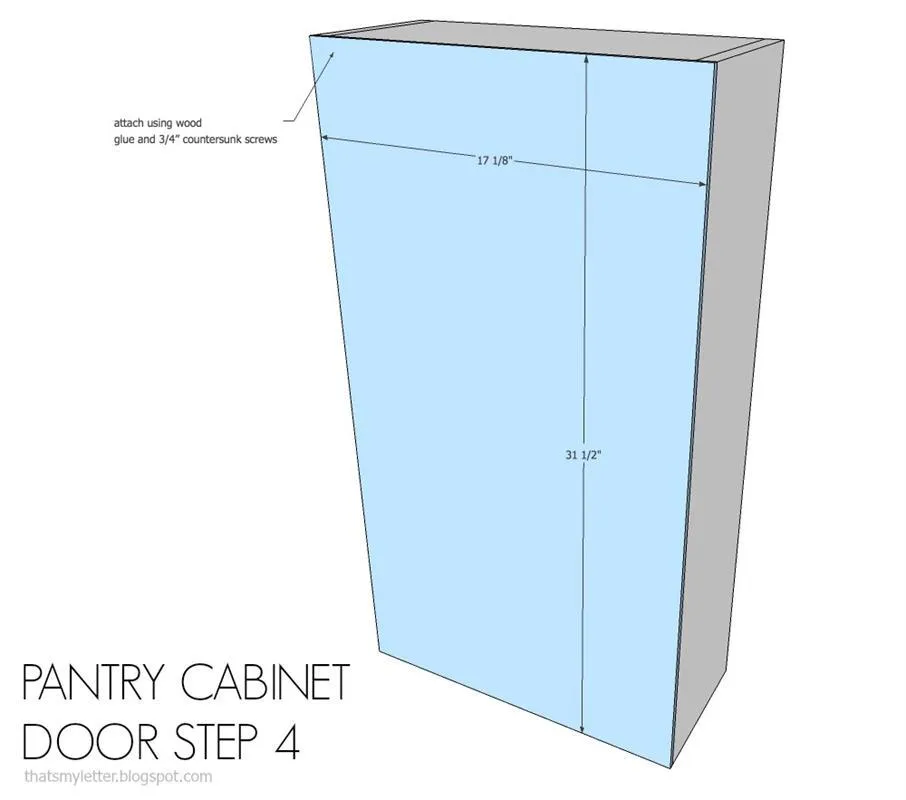
Attach backing to door frame using wood glue and countersunk 3/4” wood screws.
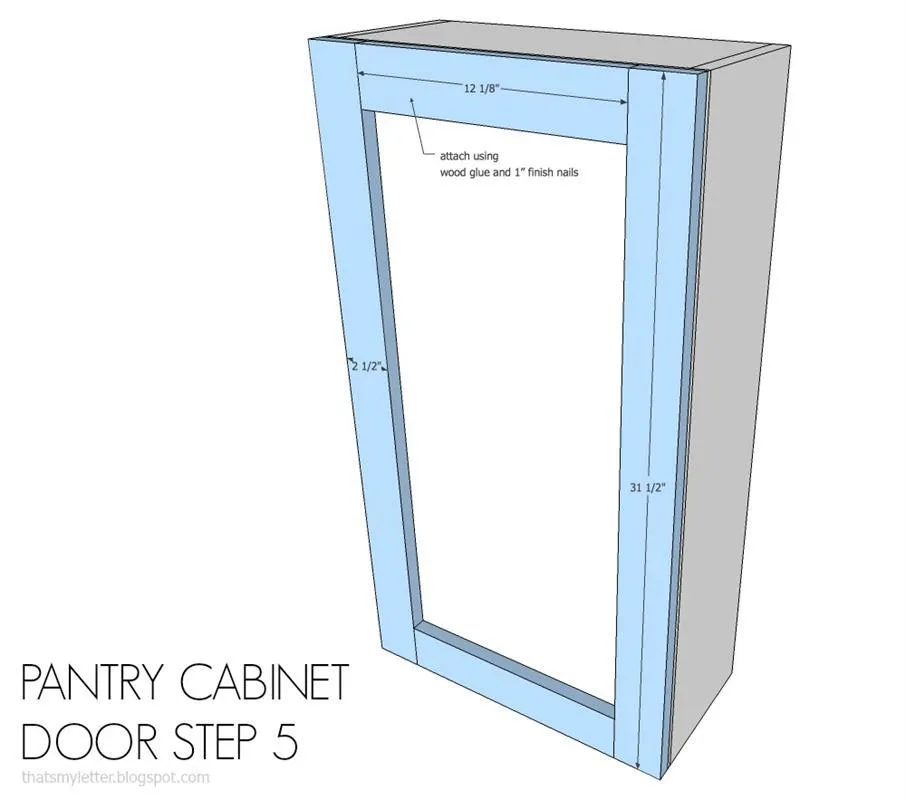
15Door Step 5
Attach trim pieces using wood glue and 1” finish nails.