Notch
NotchUse your browser's Print (Ctrl/Cmd + P) and choose Save as PDF. This page works offline once you've opened it with a signal.
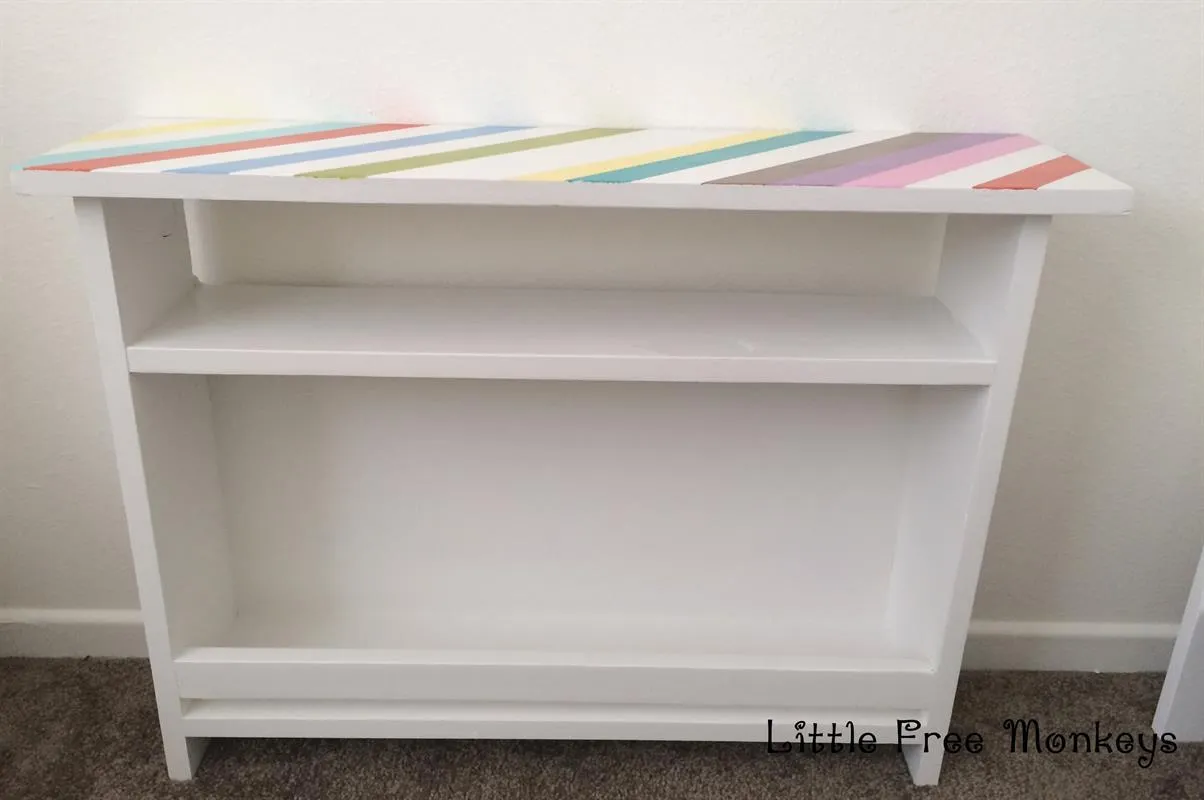
Kids bedside table with book storage
A simple bedside table with book storage especially for kids that love to read at bed time.
- Difficulty
- Easy
- Time
- 2.3–4.3 hours
- Cost
- $$
Cut list
| Part | Qty | T × W × L | Material | ✓ |
|---|---|---|---|---|
| Shelves | 2 | 3/4" × 5 1/2" × 22" | — | ☐ |
| Sides | 2 | 3/4" × 5 1/2" × 20" | — | ☐ |
| Book bar | 1 | 3/4" × 1 1/2" × 22" | — | ☐ |
| Back | 1 | 1/4" × 18" × 23 1/2" | — | ☐ |
| Table top | 1 | 3/4" × 7 1/2" × 25 1/2" | — | ☐ |
Materials
| Item | Qty | ✓ |
|---|---|---|
| Board, 1x6 96" | 1 board | ☐ |
| Board, 1x2 24" | 1 board | ☐ |
| Board, 1x8 36" | 1 board | ☐ |
| Plywood, 1/4" Thick Quarter Sheet | 1 board | ☐ |
| Wood glue | 1 each | ☐ |
| 1 1/4" kreg pocket hole screws | 22 each | ☐ |
| 1/2" finish nails | 20 each | ☐ |
| Wood putty | 1 each | ☐ |
| Sandpaper - 80, 150 and 220 grit | 3 each | ☐ |
| Primer | 1 each | ☐ |
| Paint - color of choice | 1 each | ☐ |
Overall cost: $$. Lumber varies by region, species, and season, so we give a band rather than a figure.
Tools
- Brad Nailer
- Circular Saw
- Drill / Driver
- Miter Saw
- Pocket Hole Jig
- Random Orbit Sander
Instructions
1. Cut sides and shelves
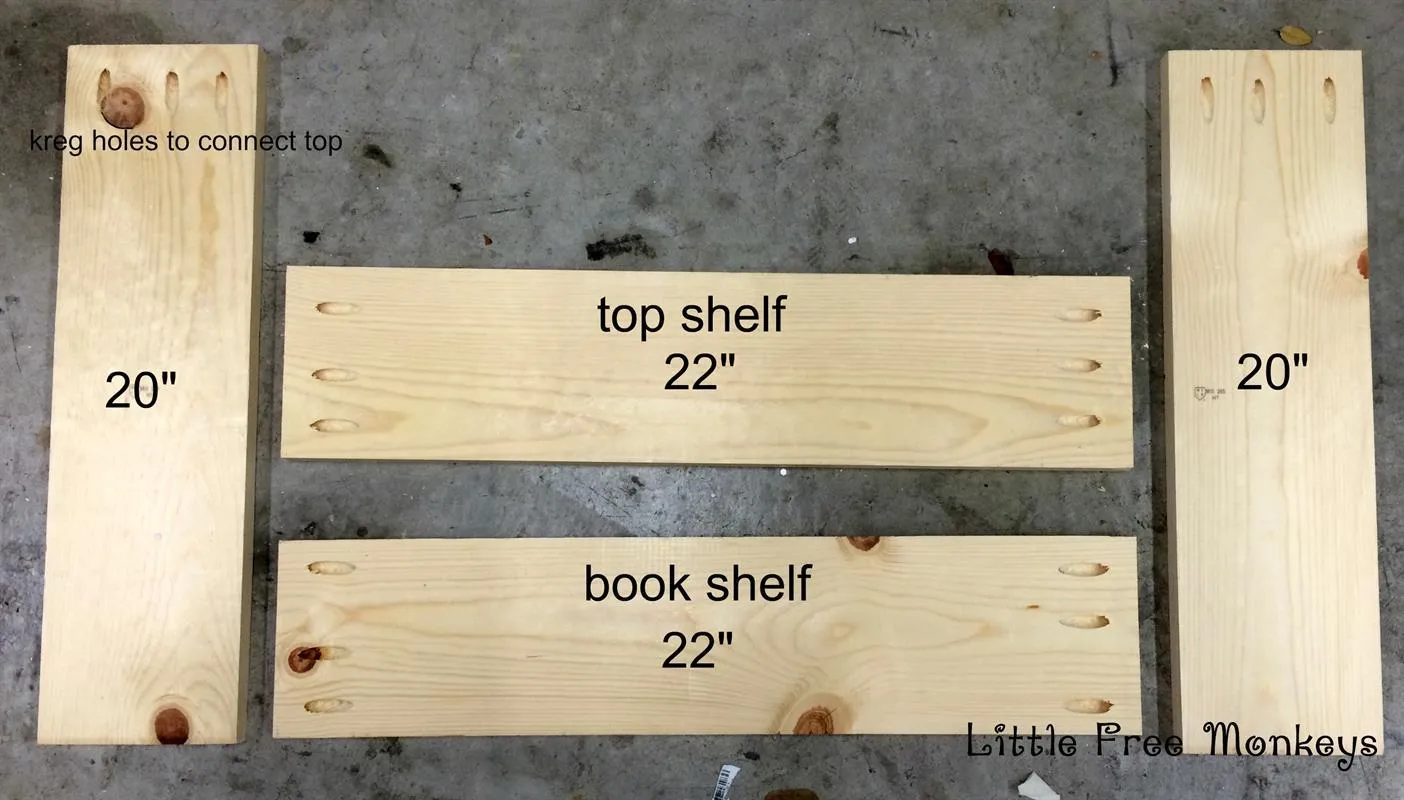
Use 1x6 board - Cut 2 shelves @ 22" Cut 2 sides @ 20" Make pocket holes as shown in picture
2. Join shelves and sides
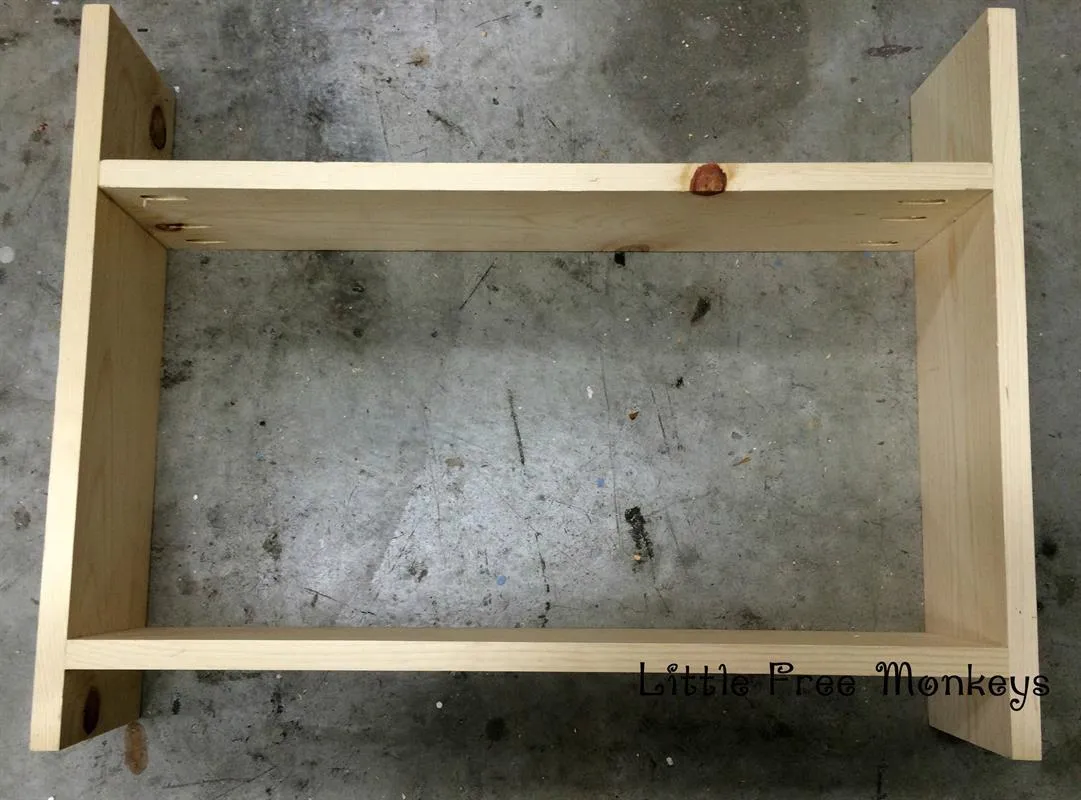
Attach the shelves to the sides at 2″ from the bottom and 5.5″ from the top using glue and pocket hole screws. Ensure that the pocket holes for the top are on the outside os the side boards.
3. Add bar for books
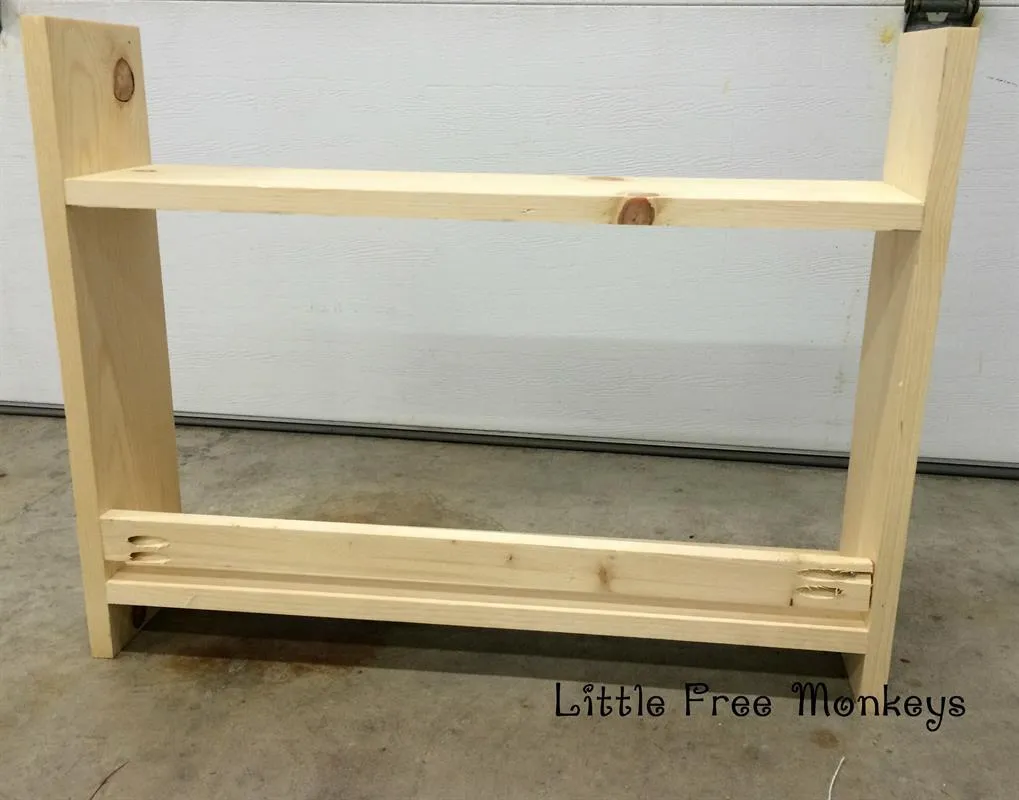
attach 1x2 @ 22" to the front leaving a 3/4" gap on the bottom. I used a scrap 1 x3 board for the spacing.
4. Attach back of book storage
Attach the 1/4" plywood cut at 23.5″ x 18″ on the back between the two shelves to create a backing for the book storage area. Use glue and finish nails
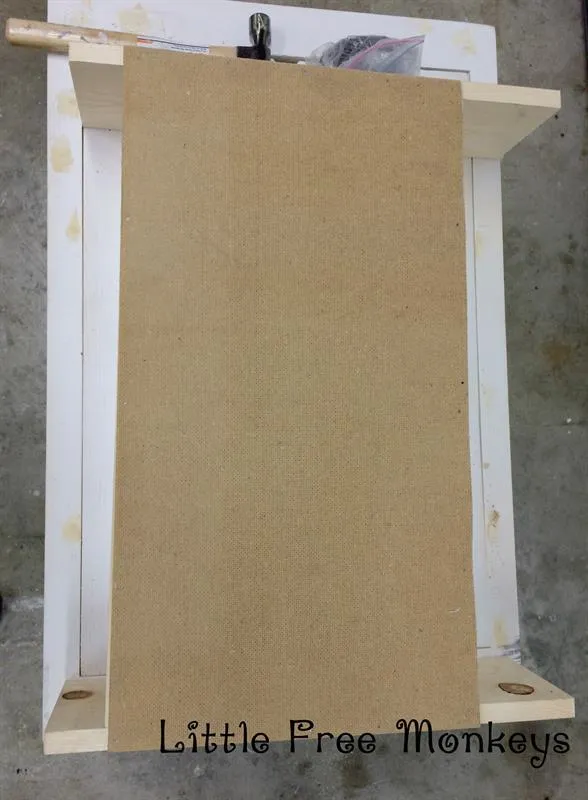
5. Attach table top
Attach 1 x 8 cut at 25.5" as the table top using the pocket hole screws. Leave an inch over hang on all four sides.
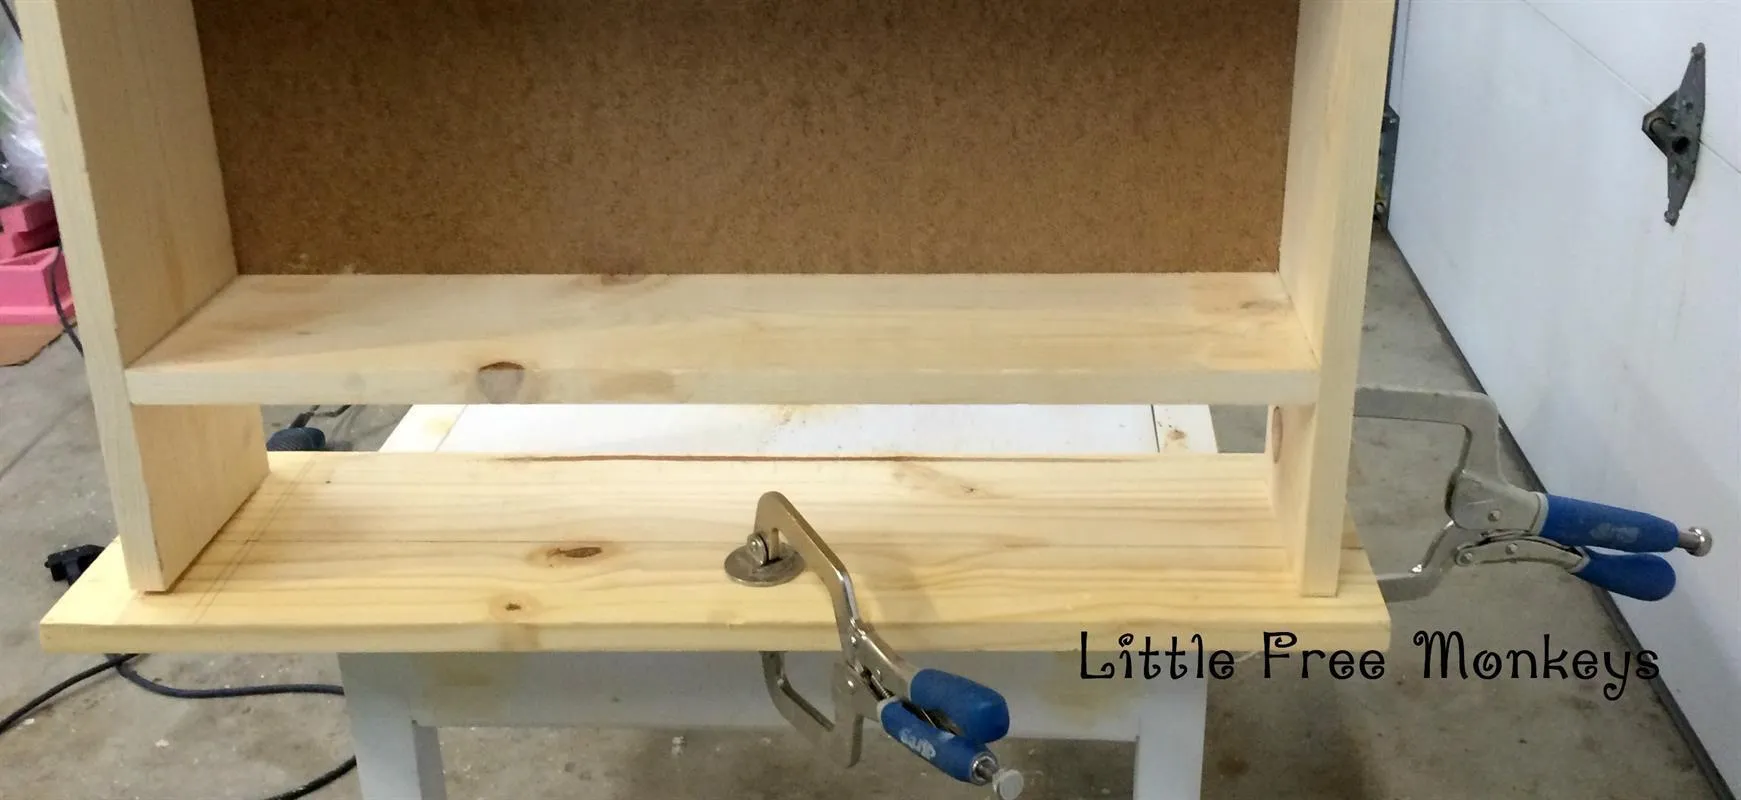
6. Finish the bedside table
Fill all the holes with wood putty, sand, prime and paint the table. I also added a pattern on the top to make it a little colorful.