Notch
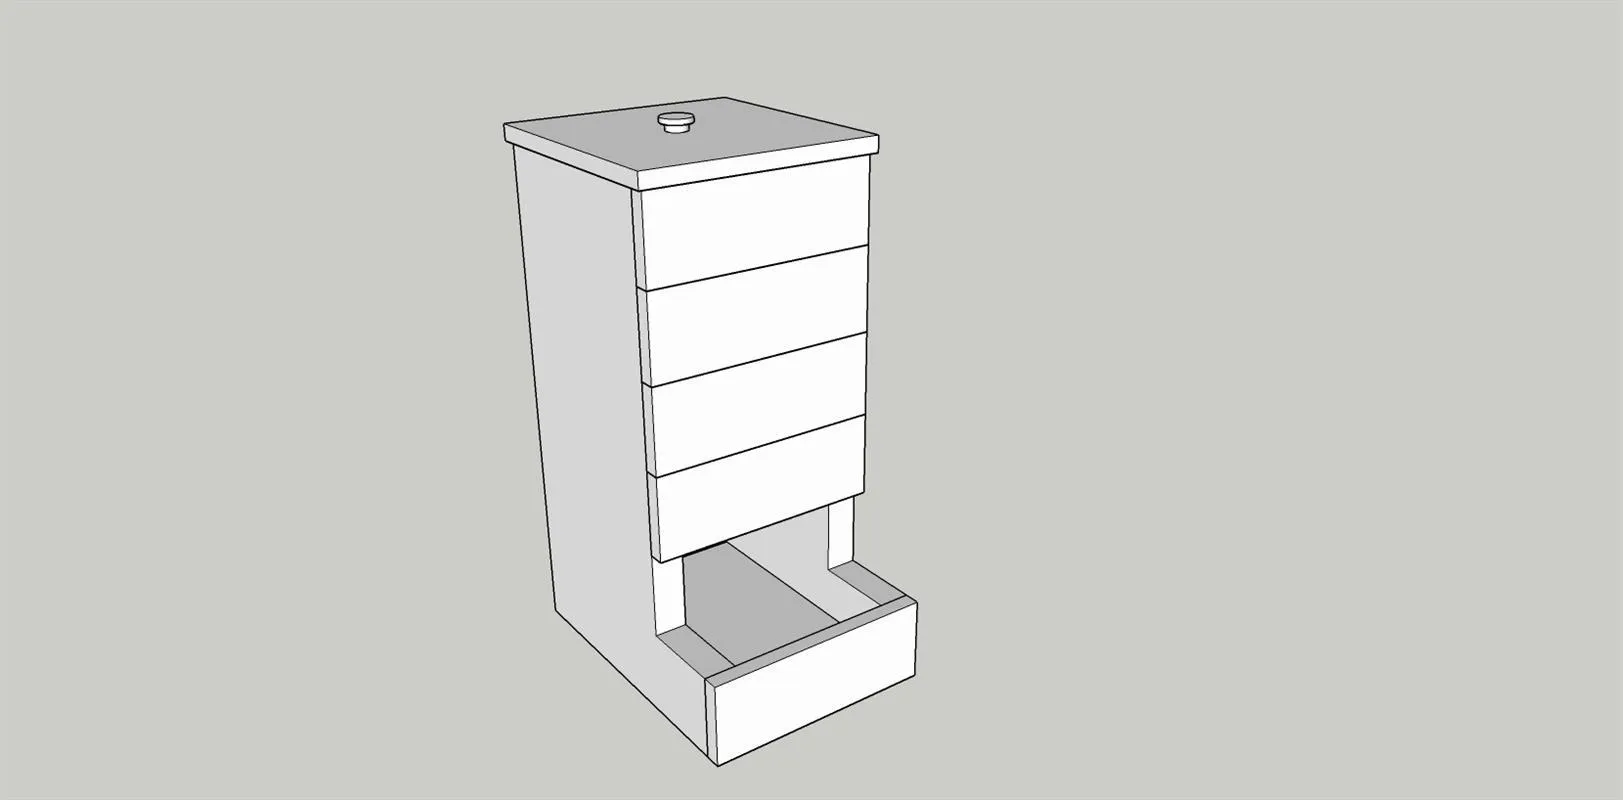
K-Cup Coffee Dispenser
Step-by-step build — 12 steps. Also available as a print sheet.
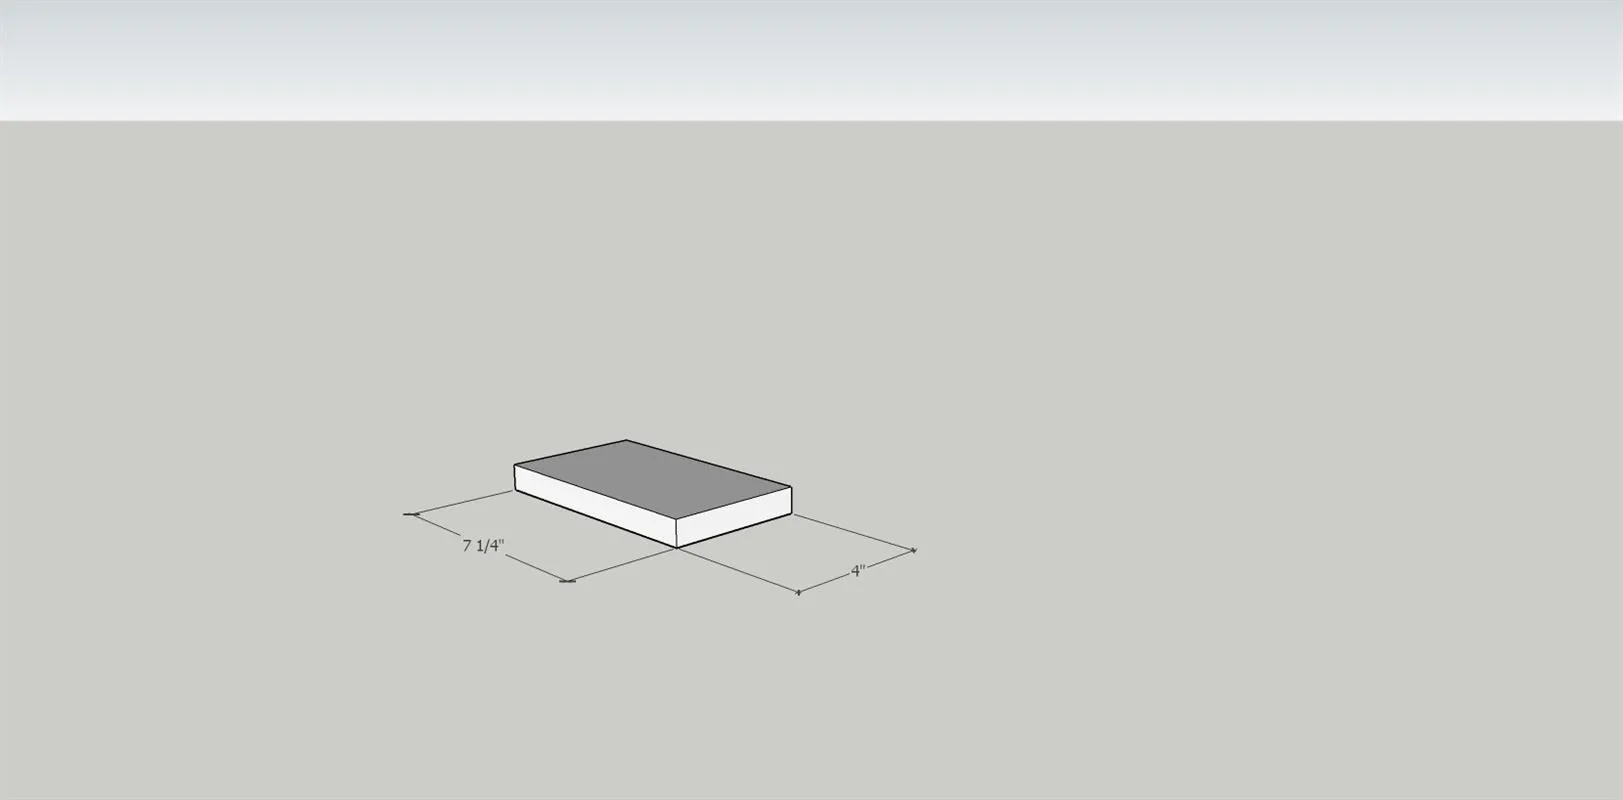
1Cut the base
Cut the base per the dimensions indicated.
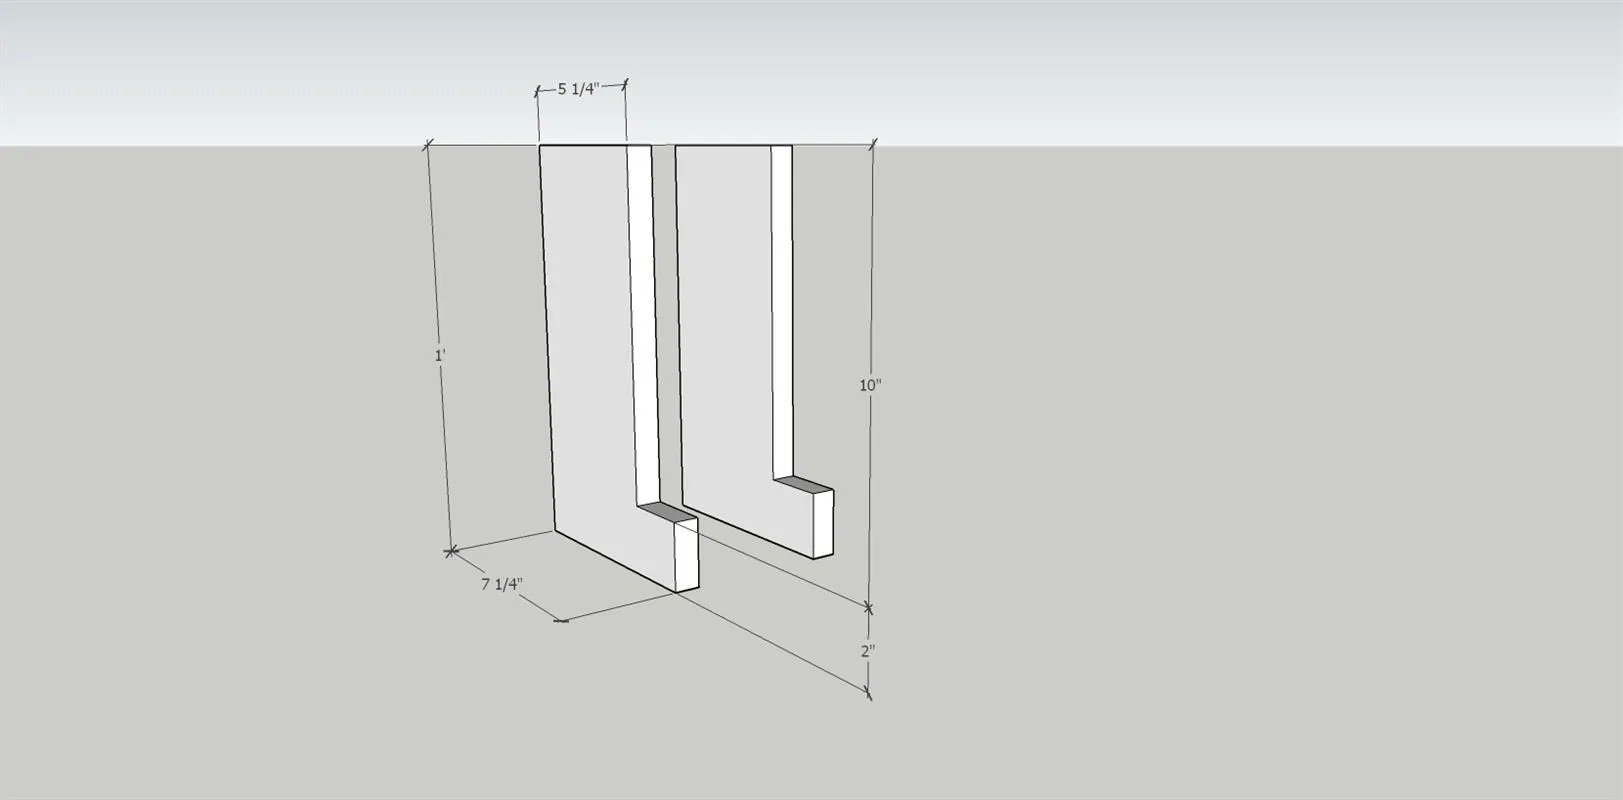
2Cut the sides
Cut two side panels per the dimensions indicated
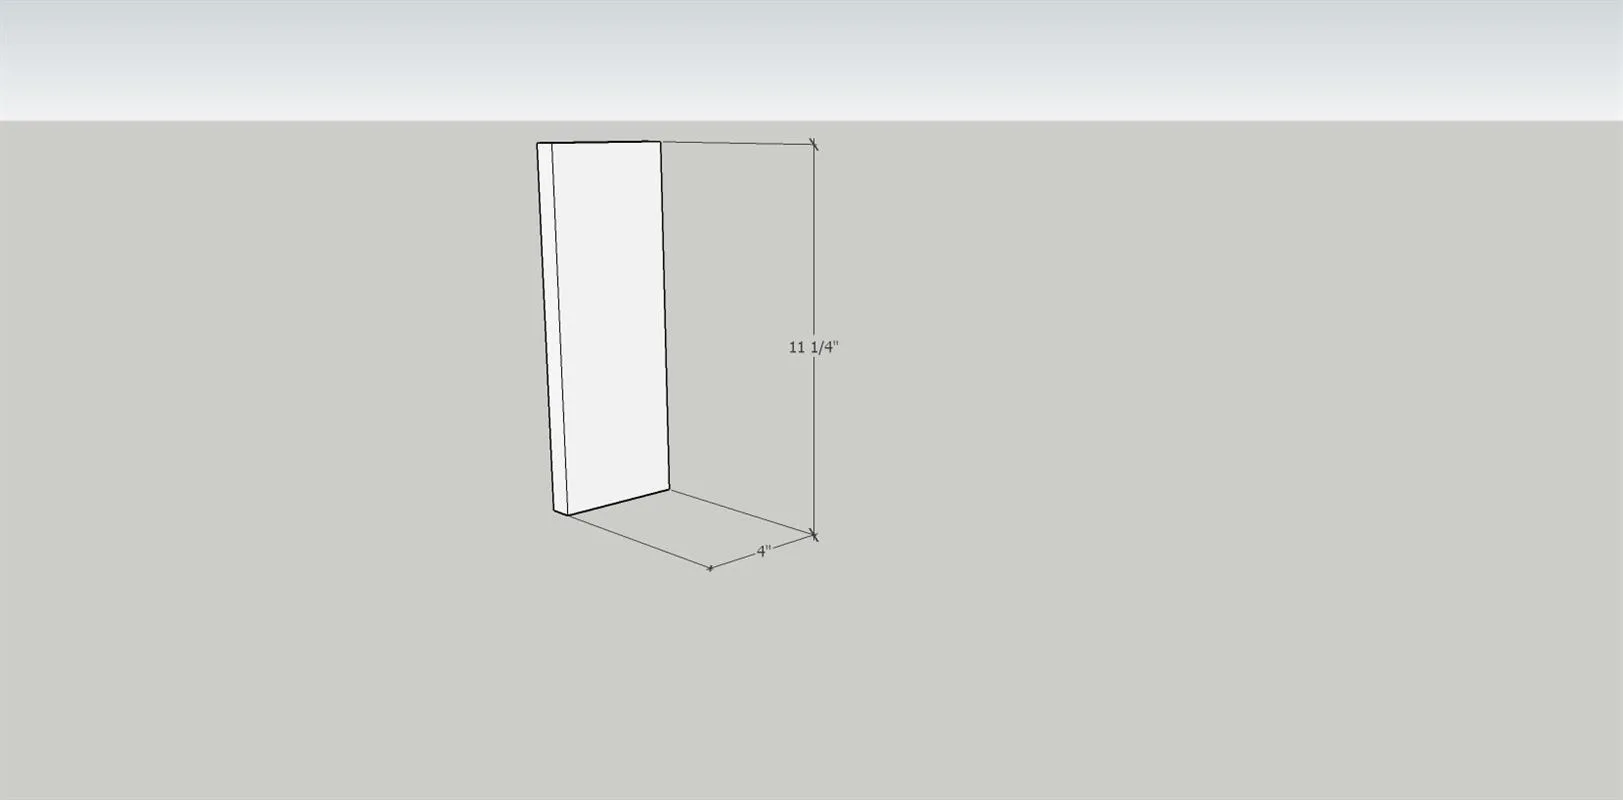
3Cut the back
Cut the back panel per the dimensions indicated
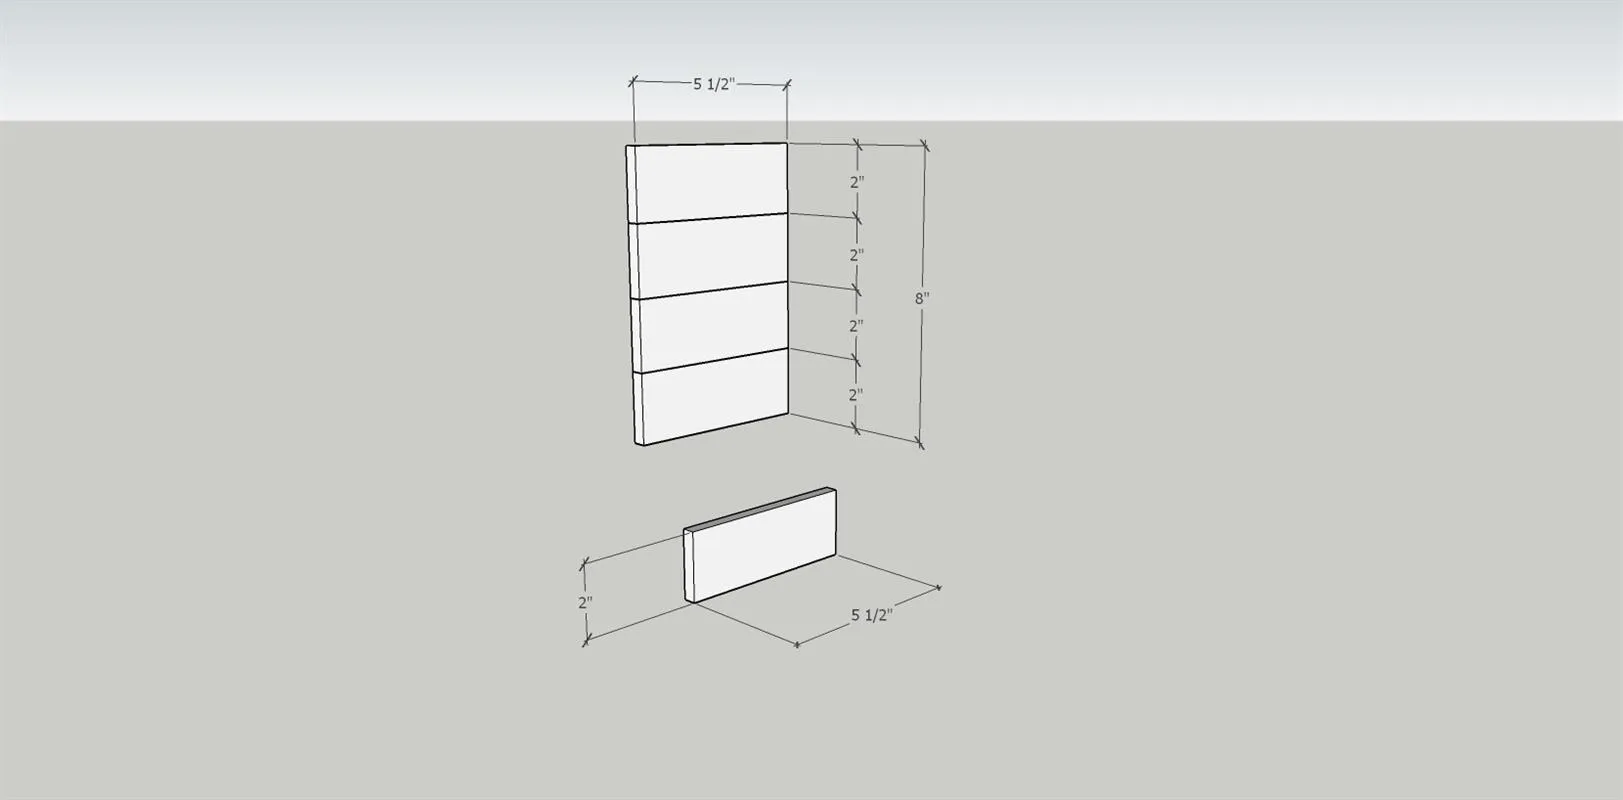
4Cut the front pieces
Cut 5 front pieces per dimensions indicated
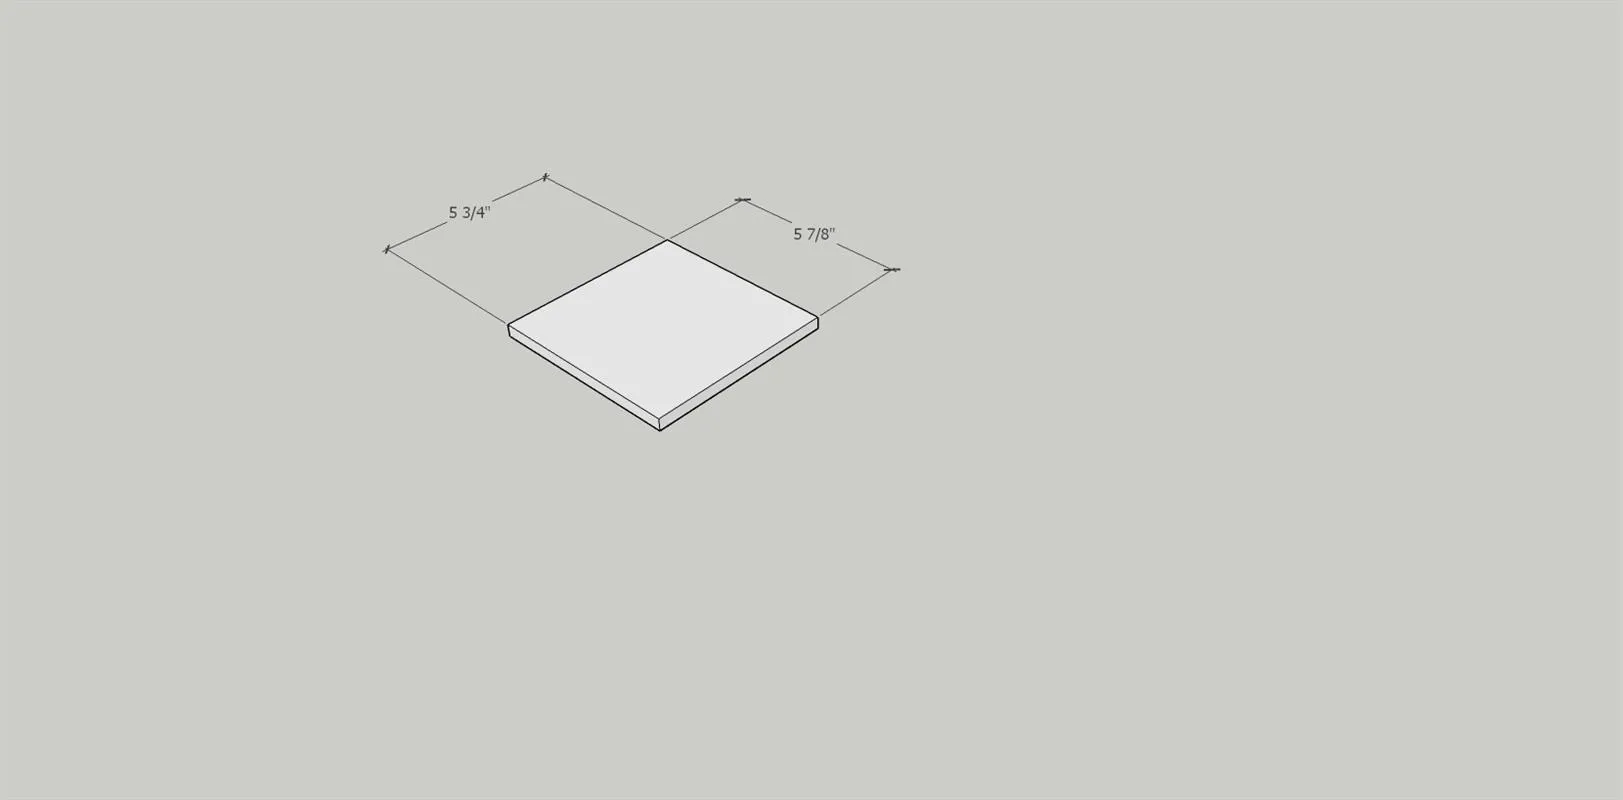
5Cut the top
Cut the top per dimensions indicated
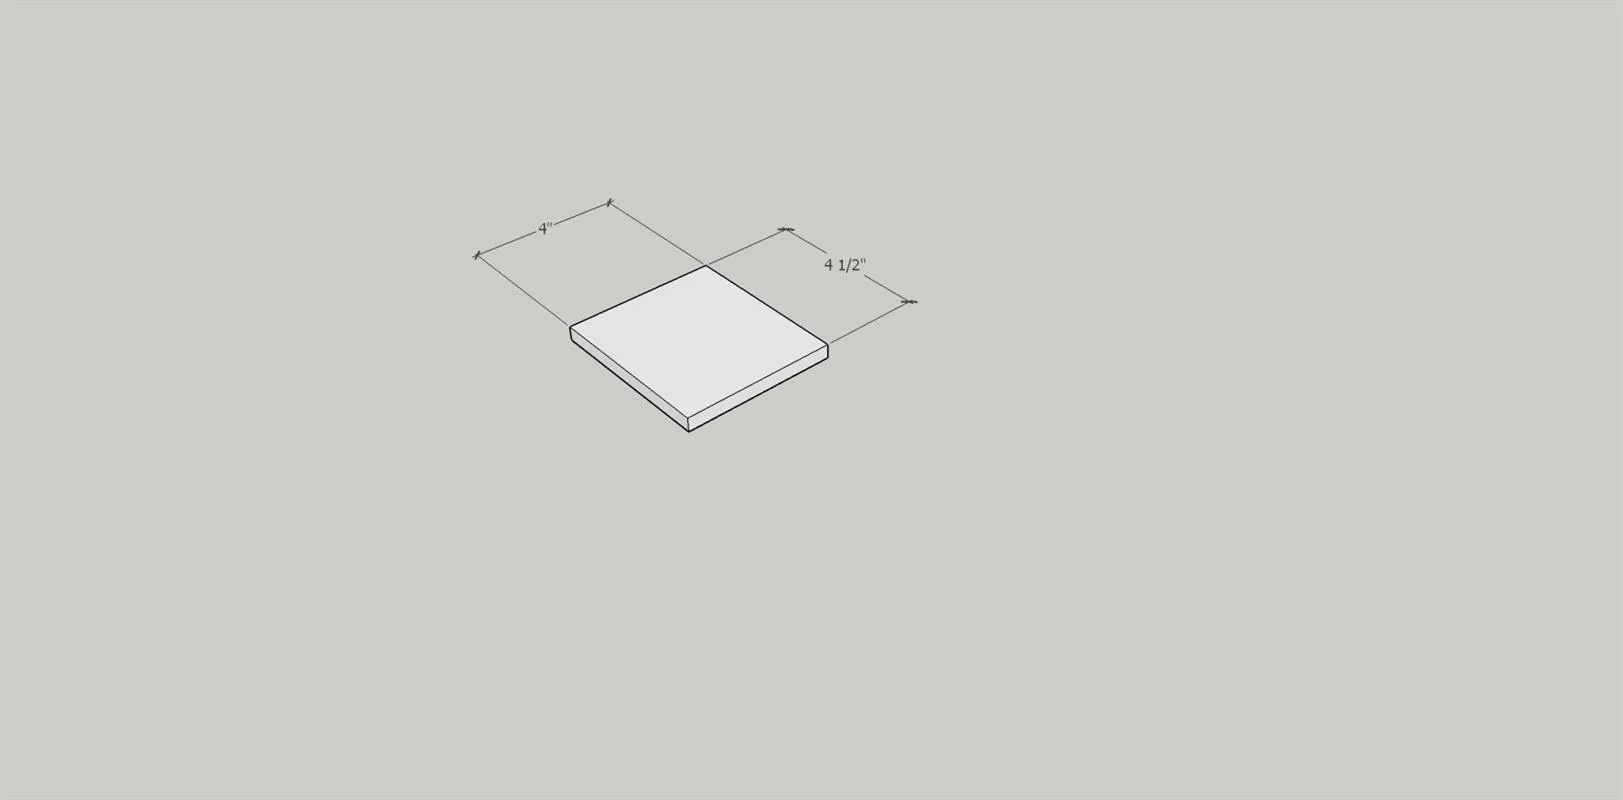
6Cut the sub-top
Cut the sub-top per dimensions indicated
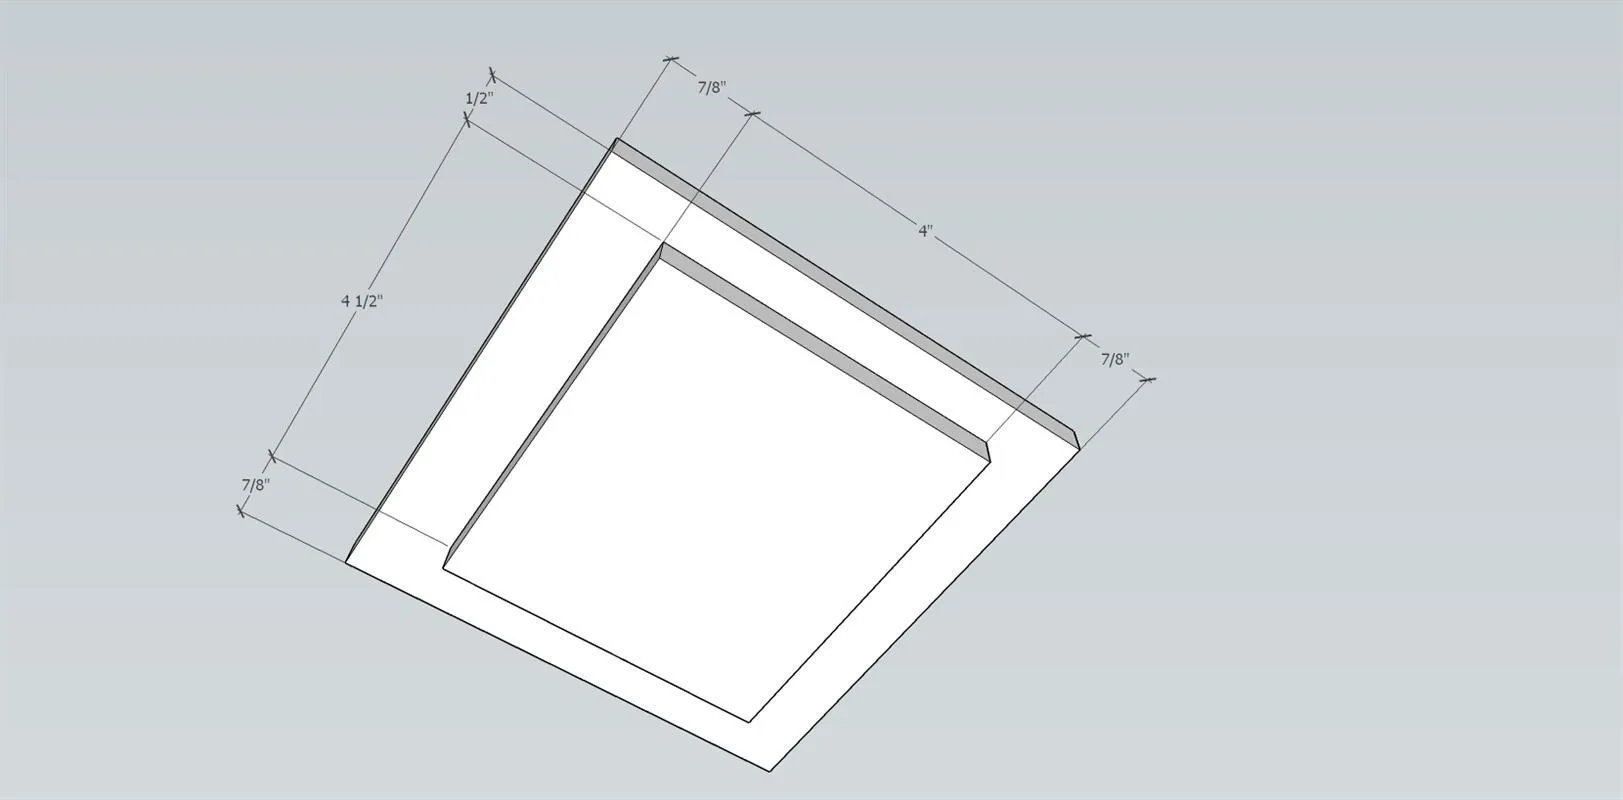
7Join the two top pieces
Join the two top pieces by gluing and clamping
8Join the sides to the base
Join the sides to the base by drilling pocket holes as shown in the base and attaching with 1 1/4" pocket hole screws.
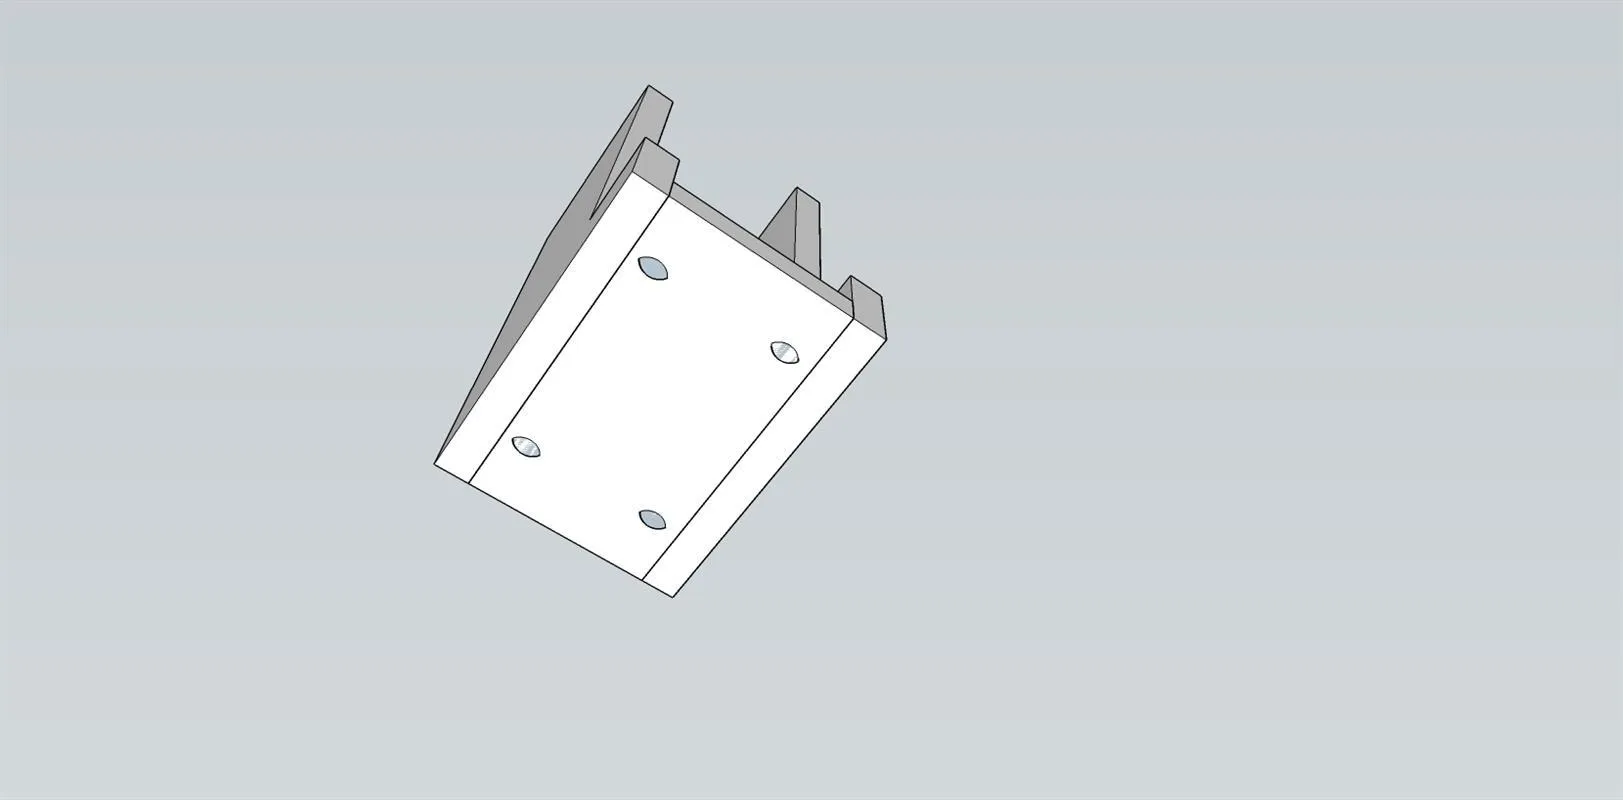
9Join the back to the sides
Join the back to the sides by drilling pocket holes as shown and attaching with 1 1/4" pocket hole screws.
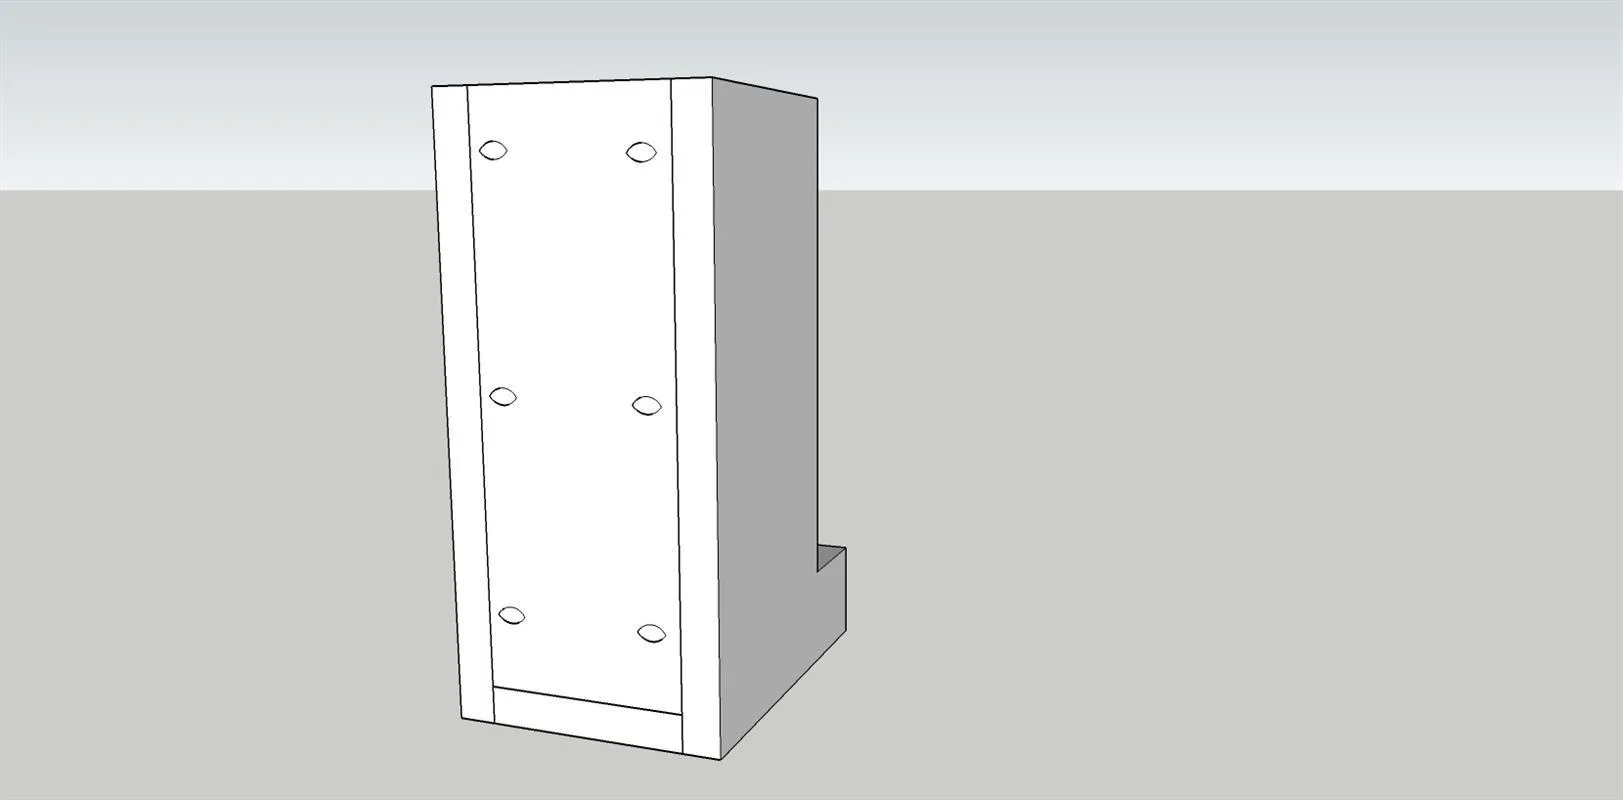
10Install the front pieces
Install the front pieces as shown by gluing and clamping
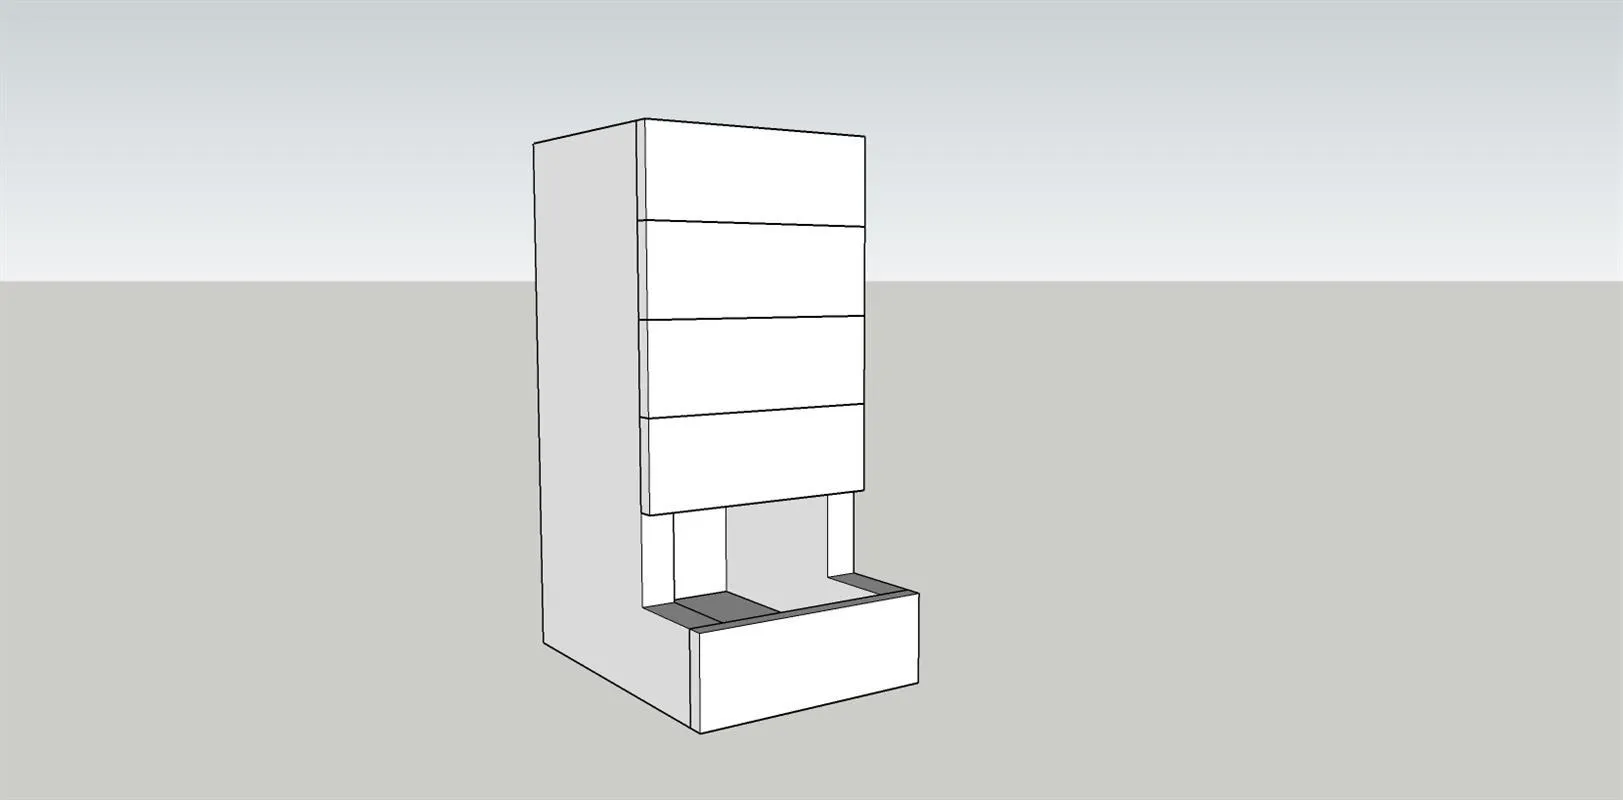
11Install the top
Verify that the top fits. Sand as required.
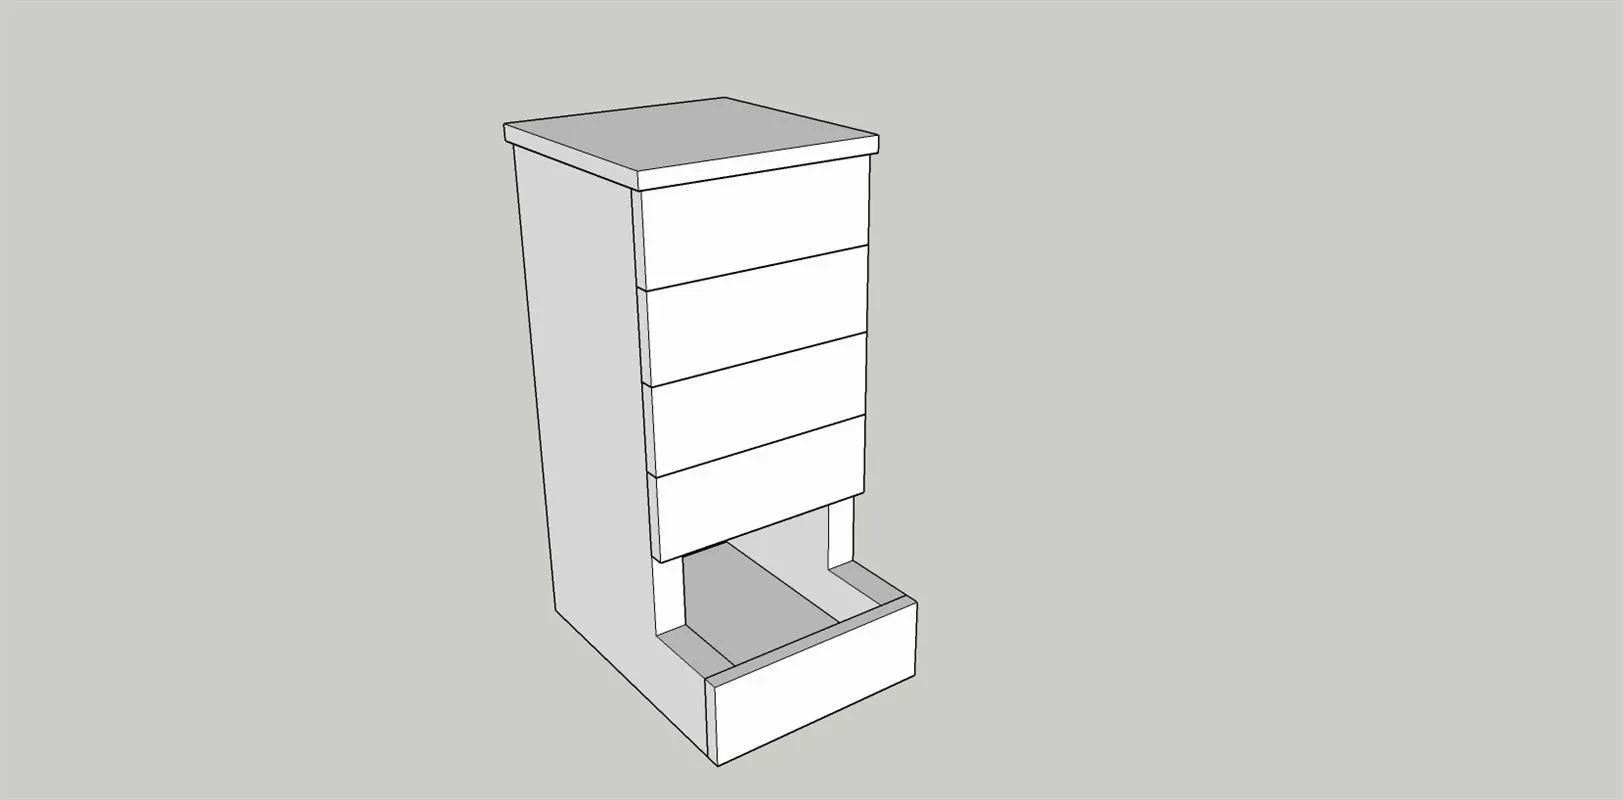
12Add top pull
Add a pull of your choice to the top and finish the dispenser.