 Notch
- Difficulty
- Easy
- Time
- 3.3–6.3 hours
- Cost
- $
About this build
This simple build perfectly displays all the ingredients for a successful hot chocolate bar. Bring it out for your holiday parties, a winter wedding, or just a fun evening with friends and family. Made primarily from small pieces, you can likely put this together with scraps from other projects.
Tools
Essential
- Miter Saw
- Random Orbit Sander
- Table Saw
Optional / nice to have
- Bar / Pipe Clamps
Materials
| Item | Qty |
|---|---|
| Board, 1" x 11-1/2" 43" | 1 board |
| Board, 1" x 1" 48" | 2 board |
| Wood Glue | 1 each |
| Sandpaper | 1 each |
| Wood Stain | 1 each |
| Polyurethane | 1 each |
Overall cost: $. Lumber prices vary by region, species, and season, so we give a band rather than a figure we would only be pretending to know.
Cut list
| Part | Qty | T × W × L |
|---|---|---|
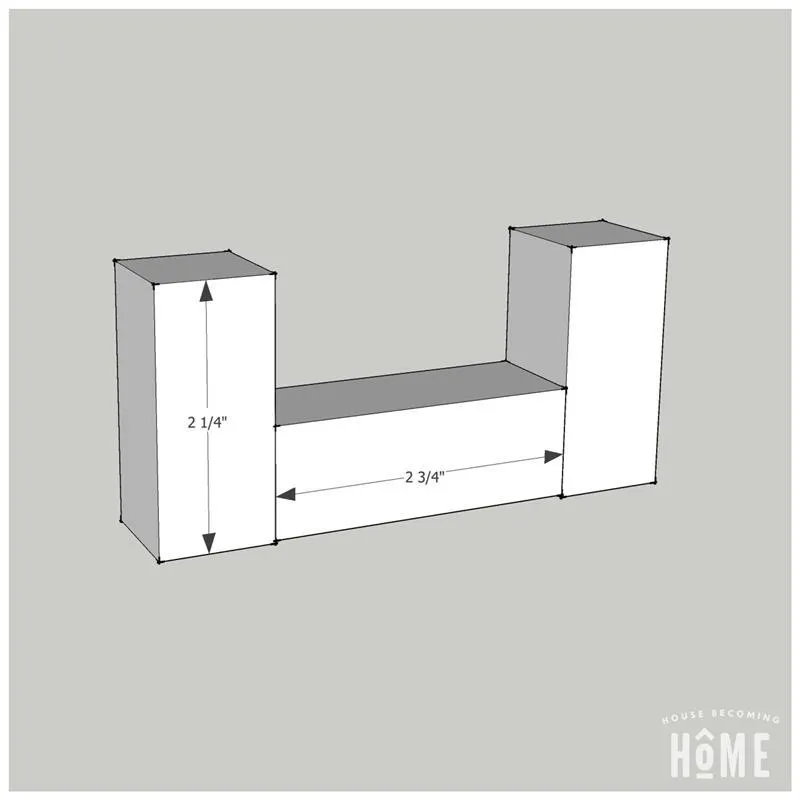
| Small Tier Legs - side pieces | 4 | 1" × 1" × 2 1/4" |
| Small Tier Legs - bottom pieces | 2 | 1" × 1" × 2 3/4" |
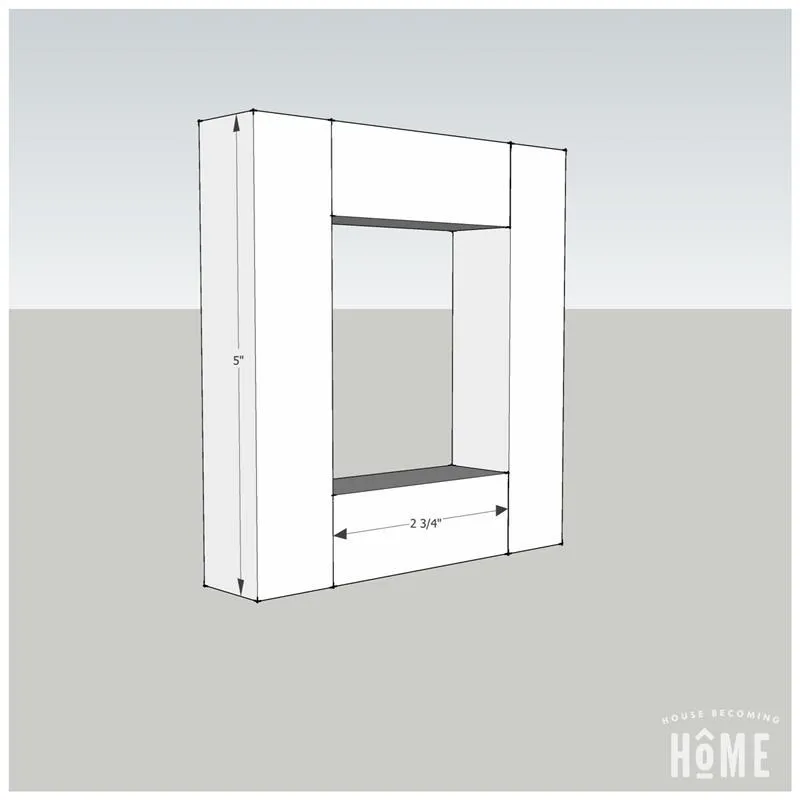
| Medium Tier Legs - side pieces | 4 | 1" × 1" × 5" |
| Medium Tier Legs - top & bottom pieces | 4 | 1" × 1" × 2 3/4" |
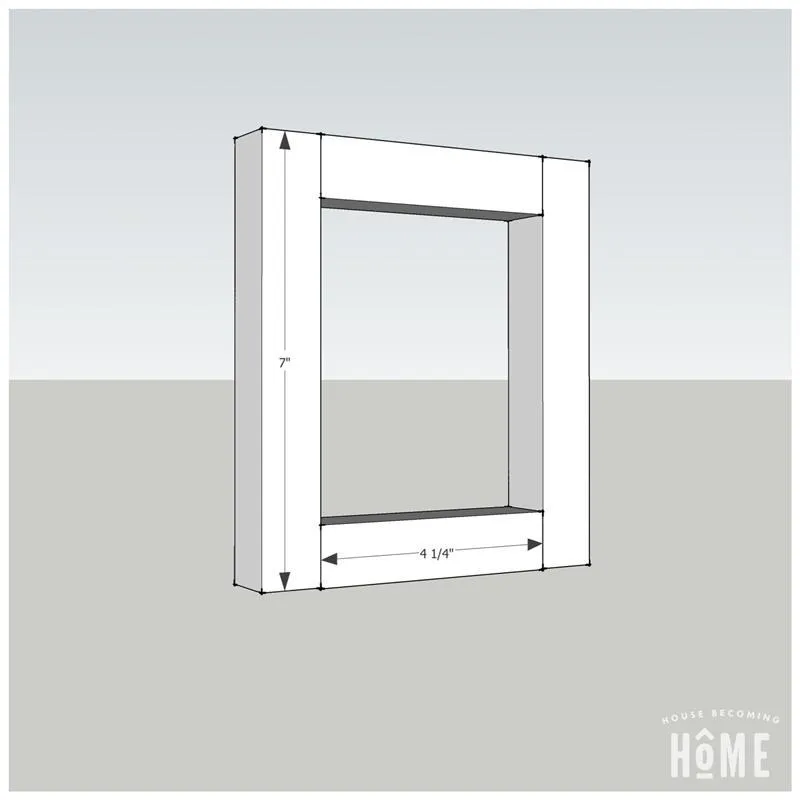
| Large Tier Legs - side pieces | 4 | 1" × 1" × 7" |
| Large Tier Legs - top & bottom pieces 1"x1"x | 4 | 1" × 1" × 4 1/4" |
| Small Tier Top | 1 | 1" × 4 3/4" × 20" |
| Medium Tier Top | 1 | 1" × 4 3/4" × 22" |
| Large Tier Top | 1 | 1" × 6 1/4" × 27" |
What to buy
Buy 3 boards at 8 ft.
1" × 6 1/4"
1 board
1" × 4 3/4"
1 board
1" × 1"
1 board
Assumes 8 ft stock, a 1/8" saw kerf, and buying each part at its own width. Change the board size or kerf on the full board plan →
Instructions
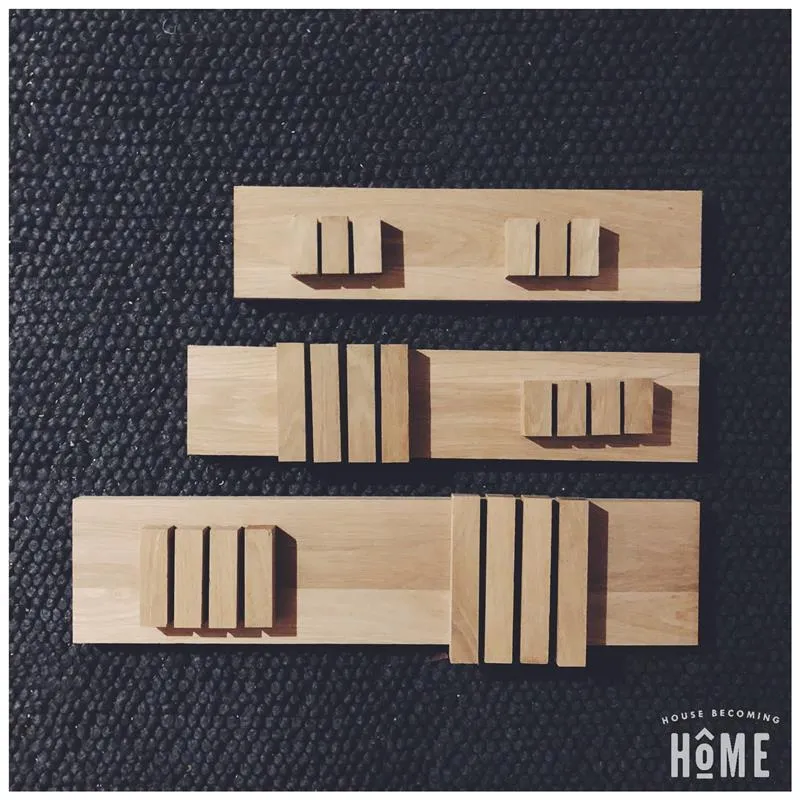
1Cut Lumber
Cut lumber to size, then organize into groups: small, medium, and large tiers.
2Assemble Small Tier Legs
Using wood glue and clamps, assemble the legs of the small tier.
3Assemble Medium Tier Legs
Using wood glue and clamps, assemble the legs of the medium tier.
4Assemble Large Tier Legs
Using wood glue and clamps, assemble the legs of the large tier.
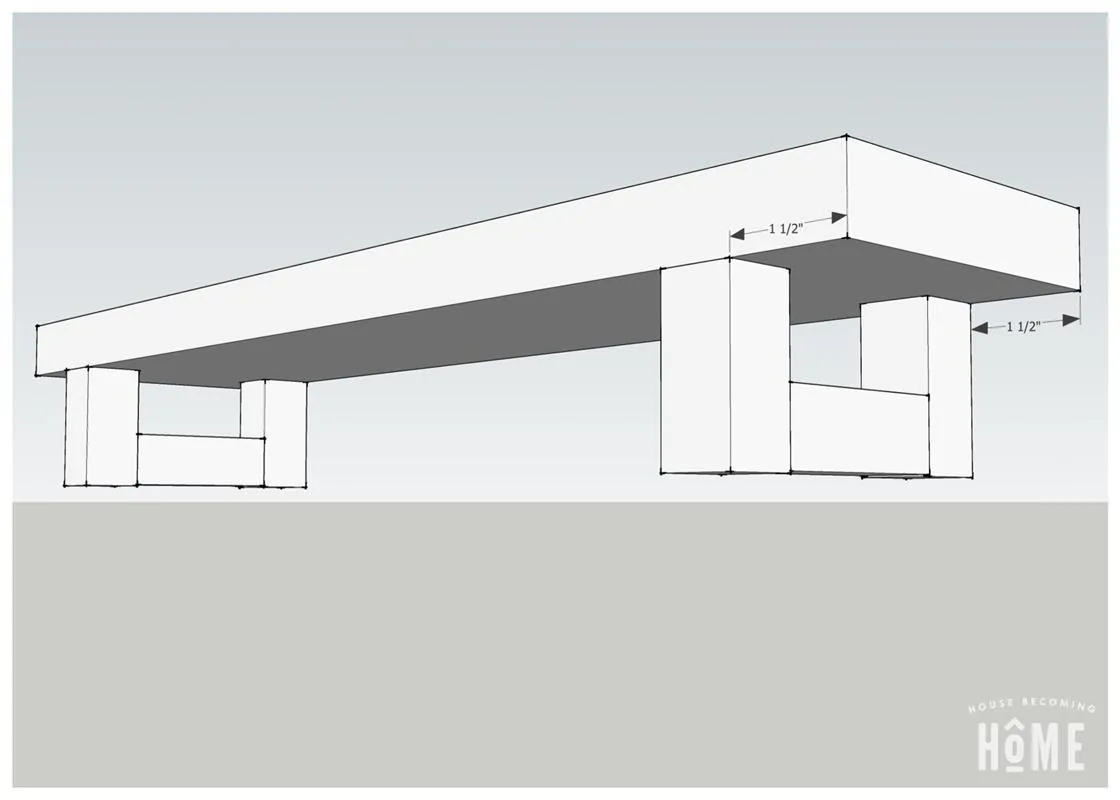
5Attach Legs to Small Tier Top
Using wood glue and clamps, attach completed legs to the small tier top, 1-1/2" from the edge. Use a carpenter's square to ensure legs are attached at 90 degrees.
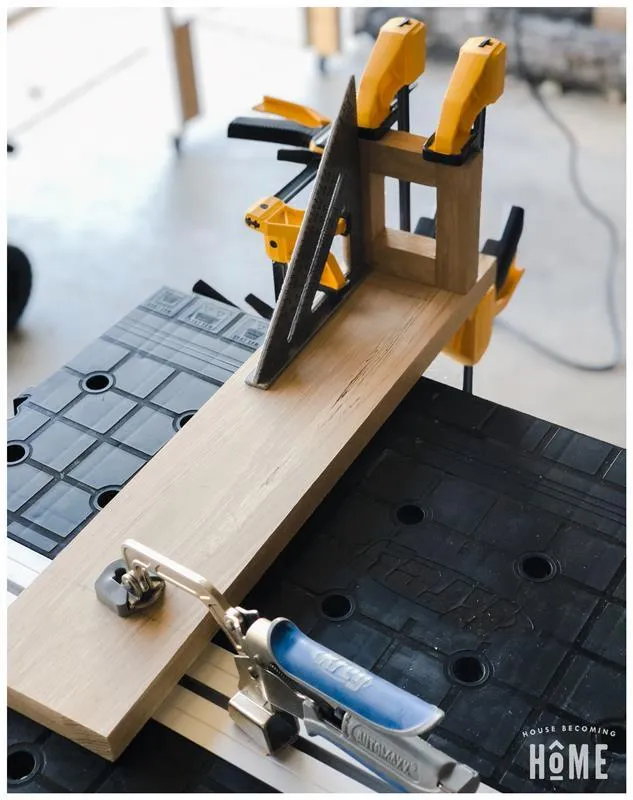
6Attach Legs to Medium Tier Top
Using wood glue and clamps, attach completed legs to the medium tier top, 1-1/2" from the edge. Use a carpenter's square to ensure legs are attached at 90 degrees.
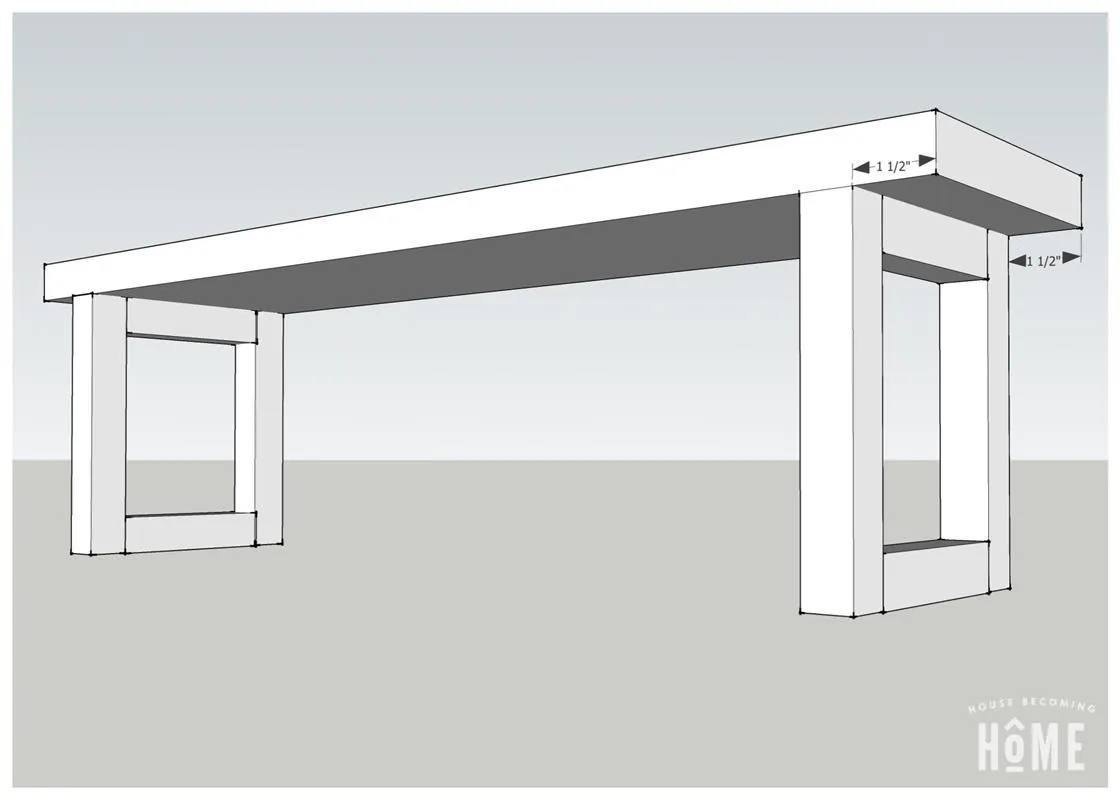
7Attach Legs to Large Tier Top
Using wood glue and clamps, attach completed legs to the large tier top, 1-1/2" from the edge. Use a carpenter's square to ensure legs are attached at 90 degrees.
8Sand
Sand all faces and the legs of each tier.
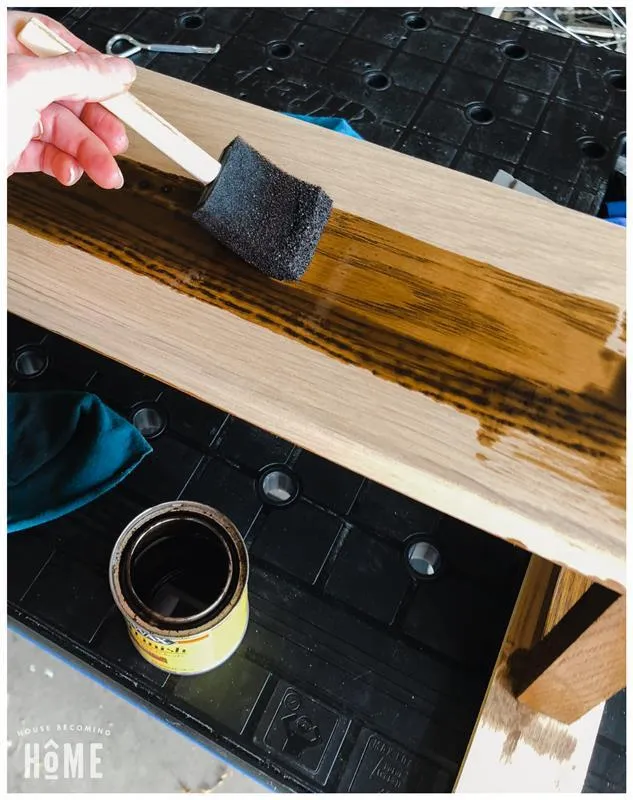
9Stain
Stain all faces and legs of each tier. Once stain is dry, protect with several layers of polyurethane.
Tags
- Beverage
- Beginner
Reviews & builds
No reviews yet
Sign in to review this plan or share your build.
No reviews yet. Be the first to build this.