 Notch
NotchUse your browser's Print (Ctrl/Cmd + P) and choose Save as PDF. This page works offline once you've opened it with a signal.
How To Build Garage Shelves – DIY Garage Storage Shelves
I built these shelves to create some heavy-duty storage in my garage.
- Difficulty
- Intermediate
- Time
- 2.5–4.8 hours
- Cost
- $$$
Cut list
| Part | Qty | T × W × L | Material | ✓ |
|---|---|---|---|---|
| Legs | 6 | 1" × 2" × 72" | — | ☐ |
| Short Rails | 12 | 1" × 2" × 18" | — | ☐ |
| Long Rails | 16 | 1" × 2" × 45" | — | ☐ |
| Shelves | 4 | 1" × 23" × 96" | — | ☐ |
Materials
| Item | Qty | ✓ |
|---|---|---|
| Board, 2x3 96" | 16 board | ☐ |
| Plywood, 1/2" Thick Full Sheet | 2 board | ☐ |
| 2 1/2" coarse thread pocket screws | 120 each | ☐ |
| 1" coarse thread pocket hole screws | 28 each | ☐ |
Overall cost: $$$. Lumber varies by region, species, and season, so we give a band rather than a figure.
Tools
- Circular Saw
- Drill / Driver
- Jigsaw
- Miter Saw
- Pocket Hole Jig
- Bar / Pipe Clamps — optional
- Combination Square — optional
- Tape Measure — optional
Instructions
1. Step 1. Cut the Legs and Rails
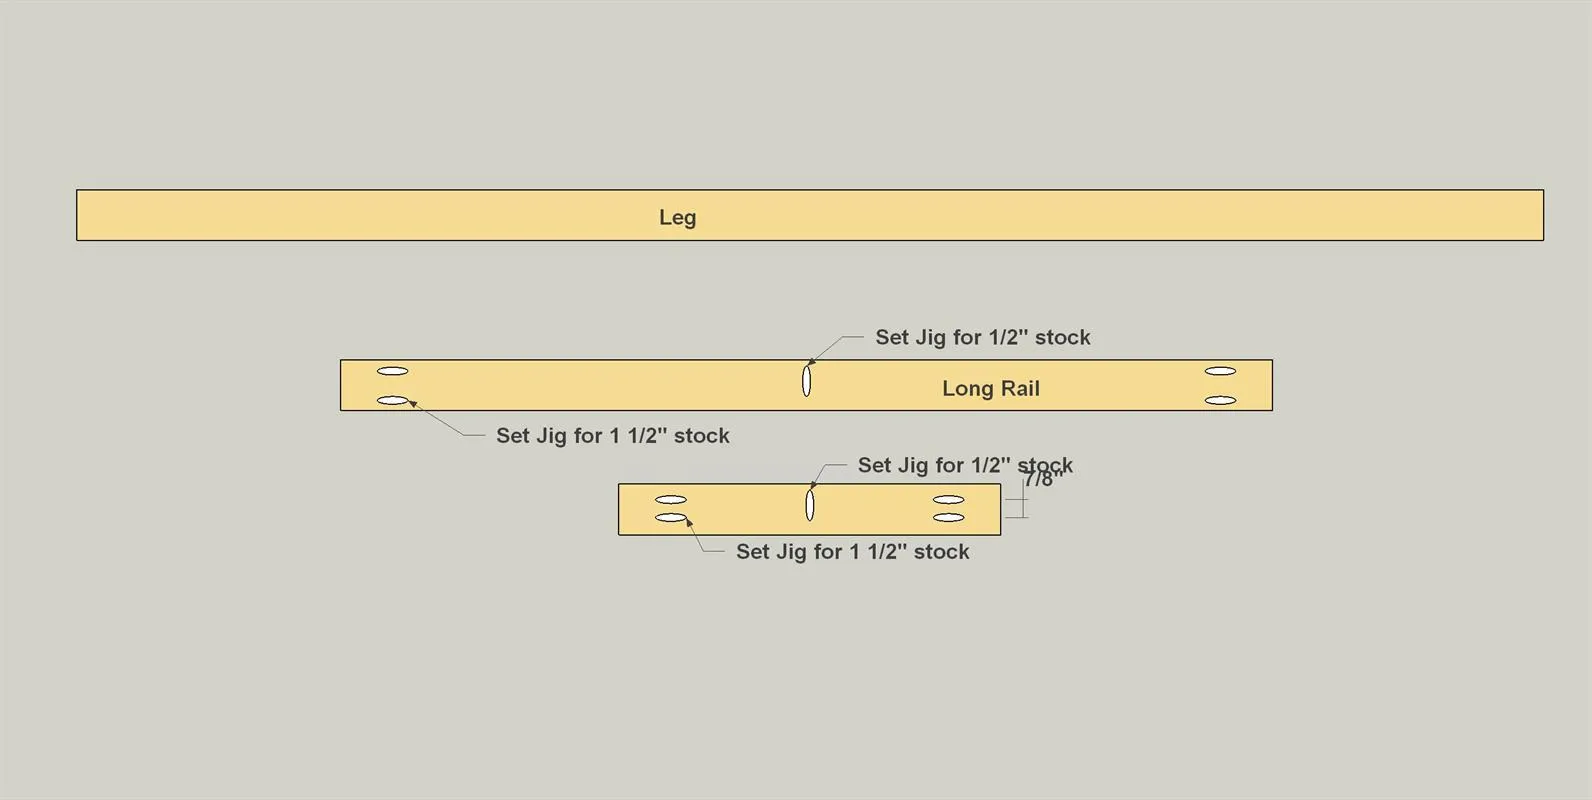
- Cut 6 legs, the 12 short rails, and 16 long rails to length. The cut diagram shows how. You can just get out your miter saw and start chopping. Just make sure everything is measured carefully so they all come out the same length.
- Then you can drill all the pocket holes. Notice that the holes on the ends are done wit the jig set for 1 1/2" thick boards. For the holes on the edge, change the setup to 1/2" stock to drill holes that you'll use to attach the shelves that are made from 1/2" thick plywood.
2. Step 2. Assemble the Short Rails & Legs
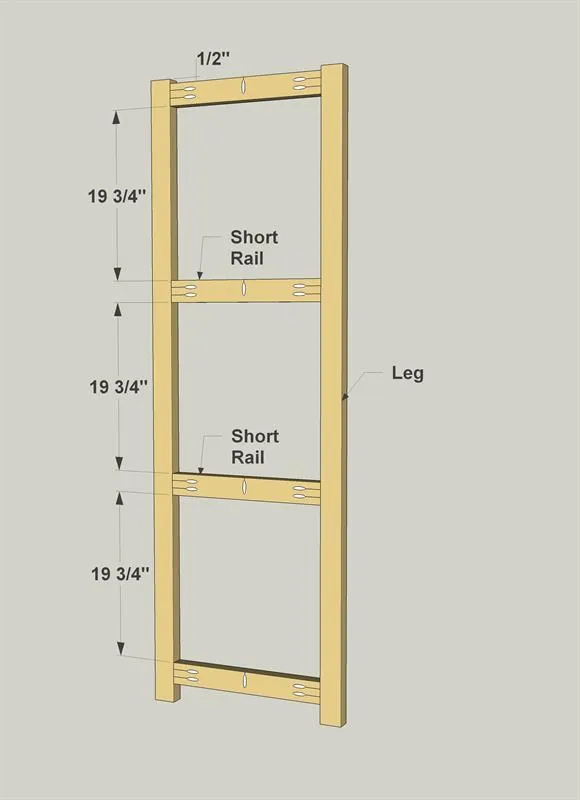
Now you can make three assemblies by attaching the short rails to the legs. You'll need 2 1/2" pocket screws for this.
3. Step 3. Add the Long Rails
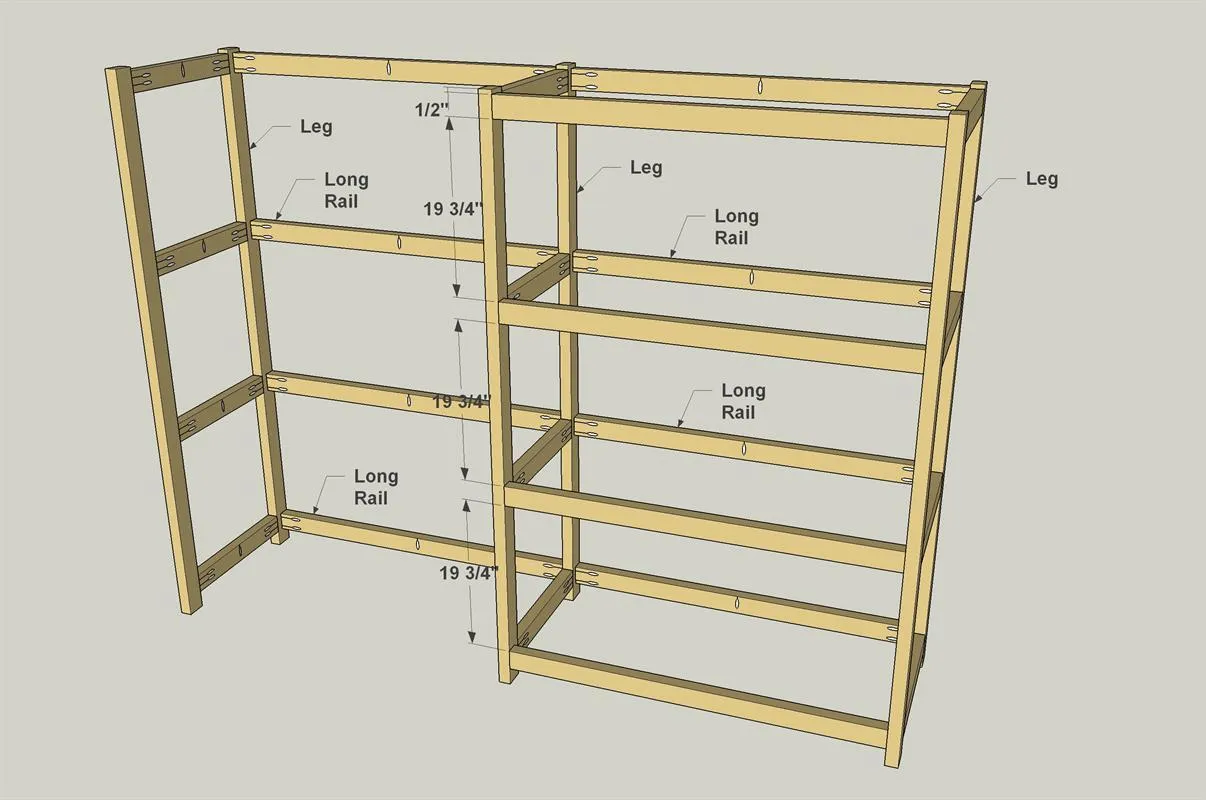
Now you can add the long rails. Make sure you're working on a flat surface, and take care to line up the long rails with the short rails. That way everything will come out square and straight.
4. Step 4. Make the Shelves
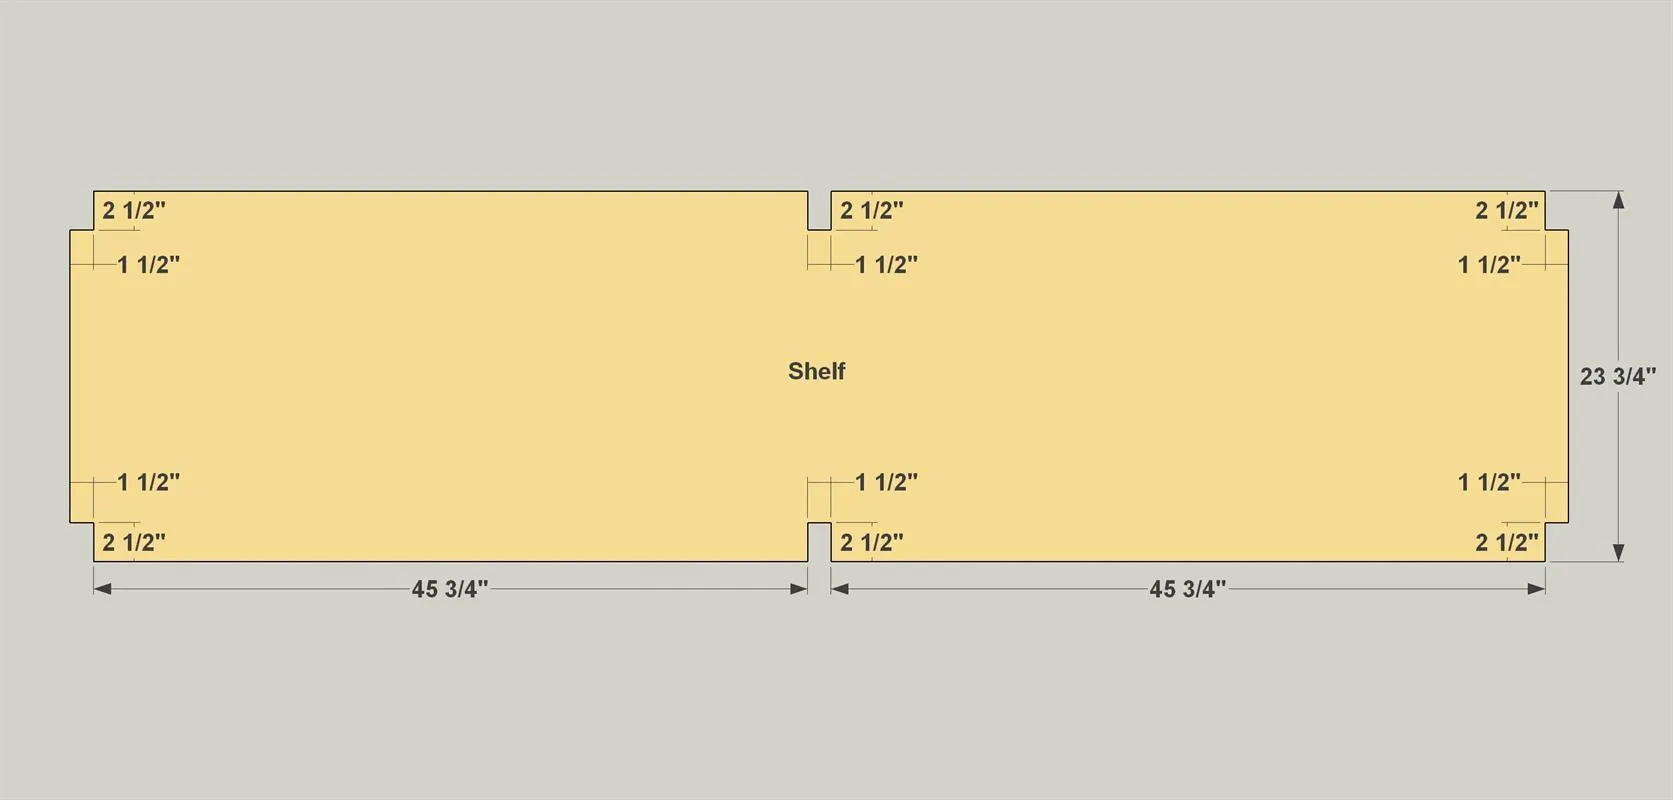
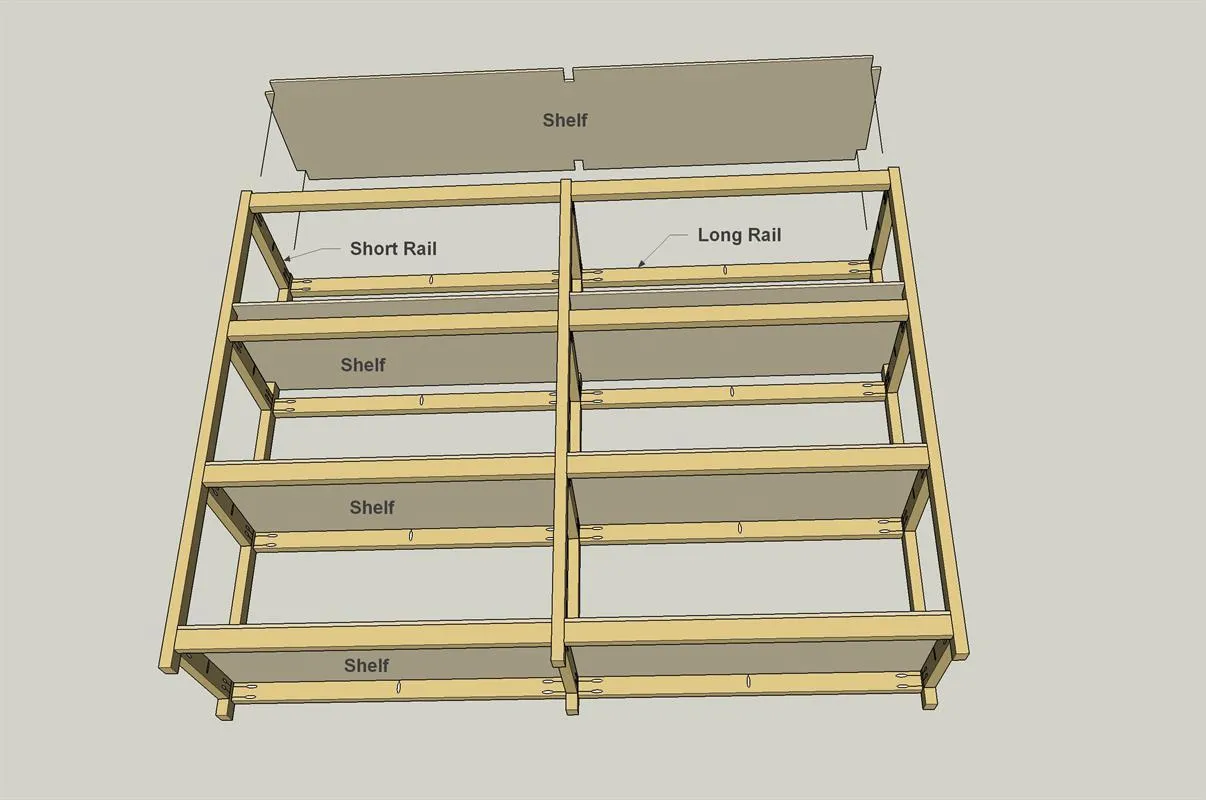
The shelves come next. All you have to do is rip them from the plywood sheets. Then lay out the notches that fit around the legs, and cut them with a jigsaw.
5. Step 5. Attach the Shelves
All that's left now is to attach the shelves. Just drop each one in place, and then drive 1" pocket screws through the holes in the rails and into the underside of each shelf.
6. Step 6. Put the Shelves In Place
You may want someone to help you move the shelves into position. And you may find that your garage floor isn't level. Just put a level on one of the shelves to check, and then use some shims or wood scraps to get everything level.