Notch
NotchUse your browser's Print (Ctrl/Cmd + P) and choose Save as PDF. This page works offline once you've opened it with a signal.
Drop-Zone Shelf
Corral the clutter the moment you walk in the door with this drop-zone shelf.
- Difficulty
- Easy
- Time
- 2–3.8 hours
- Cost
- $$
Cut list
| Part | Qty | T × W × L | Material | ✓ |
|---|---|---|---|---|
| Back | 1 | 1" × 10" × 23" | — | ☐ |
| Shelf | 1 | 1" × 6" × 23" | — | ☐ |
Materials
| Item | Qty | ✓ |
|---|---|---|
| Board, 1x10 24" | 1 board | ☐ |
| Board, 1x6 24" | 1 board | ☐ |
| 1 1/4" coarse-thread pocket-hole screws | 4 each | ☐ |
| 7/8" nickel-plated cup hooks | 4 each | ☐ |
| Sawtooth picture hangers | 2 each | ☐ |
| Spray primer | 1 each | ☐ |
| Gold spray paint | 1 each | ☐ |
| White spray paint | 1 each | ☐ |
Overall cost: $$. Lumber varies by region, species, and season, so we give a band rather than a figure.
Tools
- Circular Saw
- Drill / Driver
- Jigsaw
- Pocket Hole Jig
- Random Orbit Sander
- Bar / Pipe Clamps — optional
Instructions
1. Cut the Parts
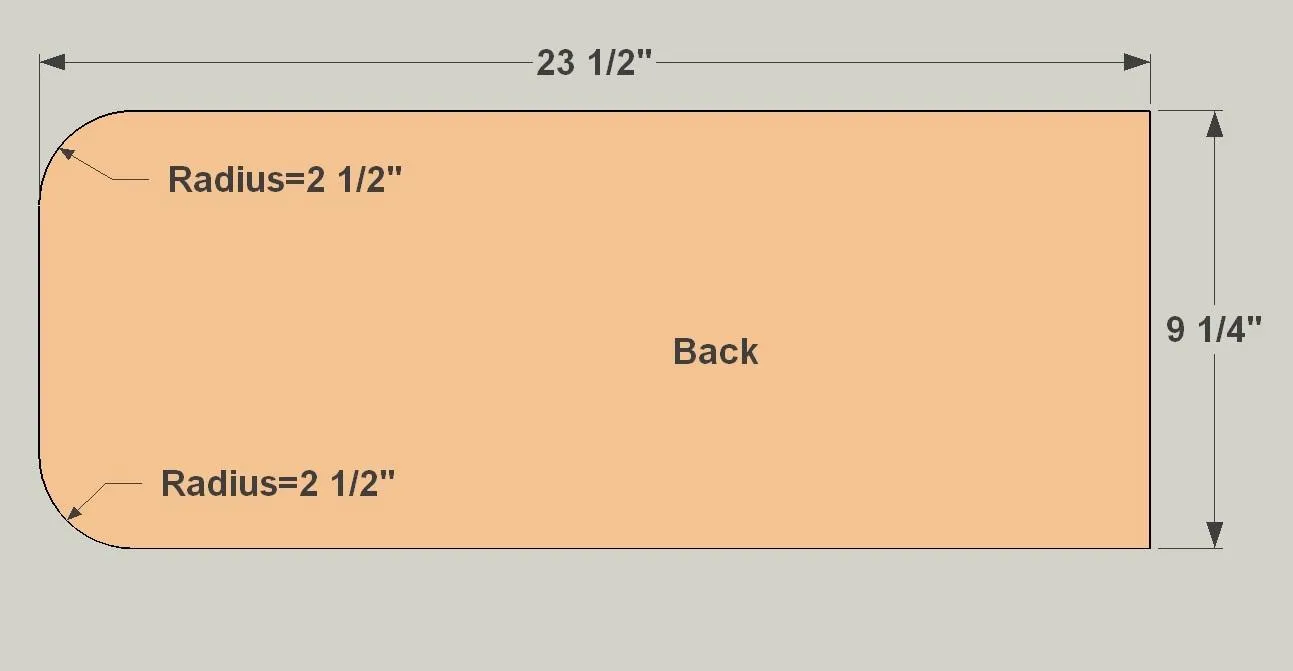
Cut one Back to length from a 1x10 and one shelf to length from 1x6, as shown in the cutting diagram.
2. Shape the Back
Using a compass, lay out a 2 1/2" radius on two corners of the Back, and cut arcs using a jigsaw.
Tip: Sand to Perfect the Shape When cutting with a jigsaw, don’t try to cut exactly on the line. Cut just outside the line—on the “waste” side—and then sand to get the exact shape. You’ll get better, smoother results.
3. Wrap Up the Shelf
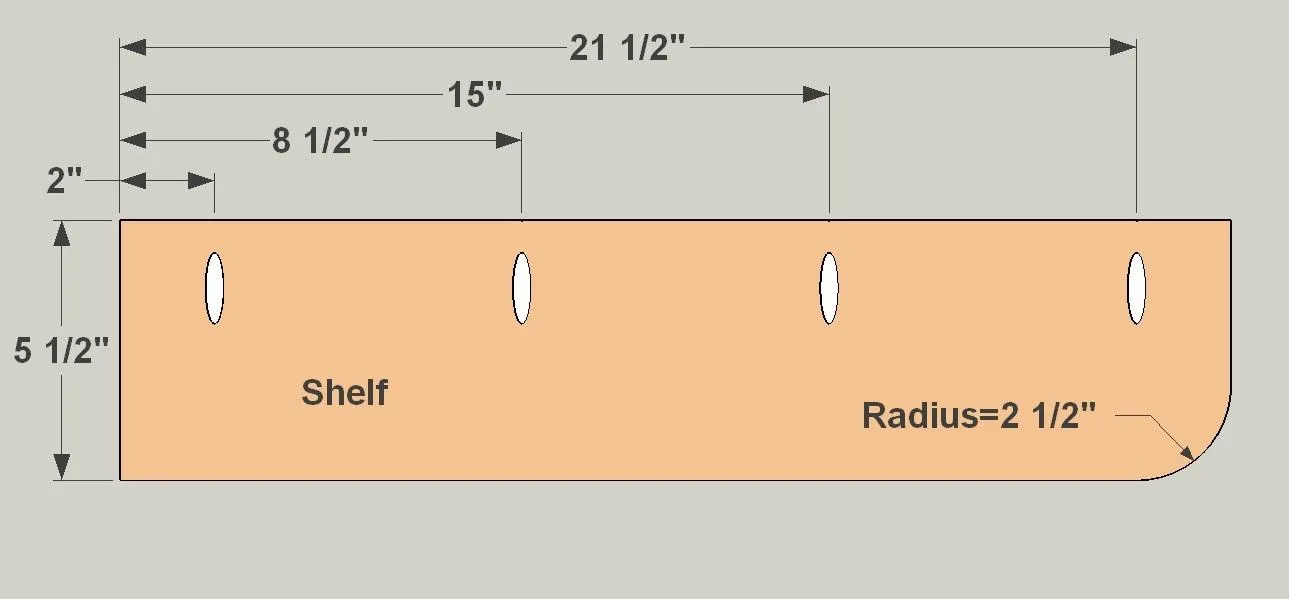
Lay out a 2 1/2" radius on one corner of the Shelf, and cut the arc using a jigsaw. Then, with your pocket-hole jig, set up for 3/4" material and drill four pocket holes along the back edge of the shelf.
4. Attach the Shelf
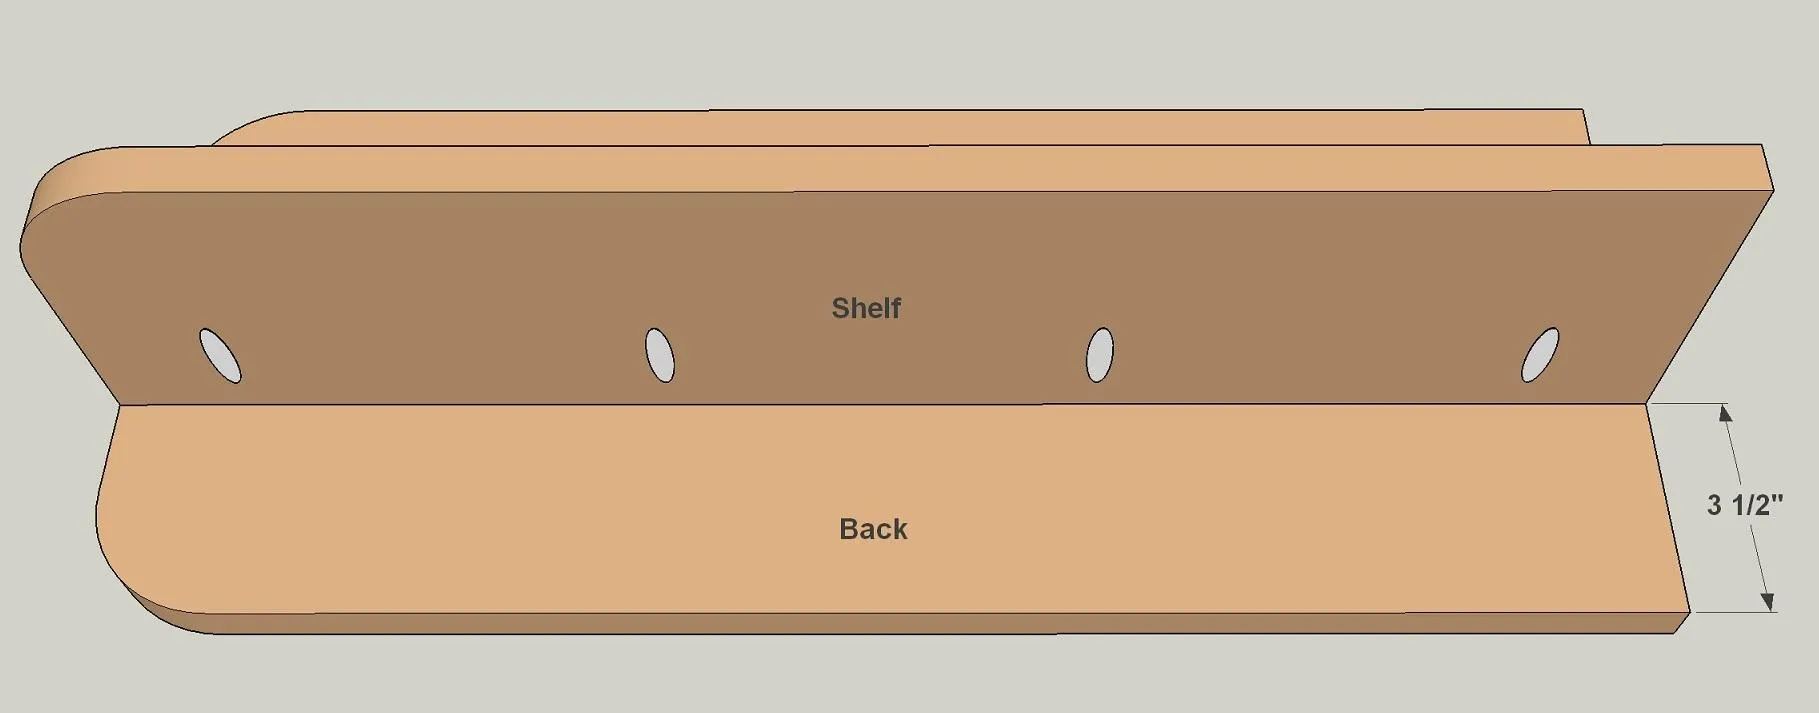
Mark the location on the Shelf on the Back and secure it with four 1 1/4" coarse-thread pocket-hole screws.
5. Paint on a Pattern
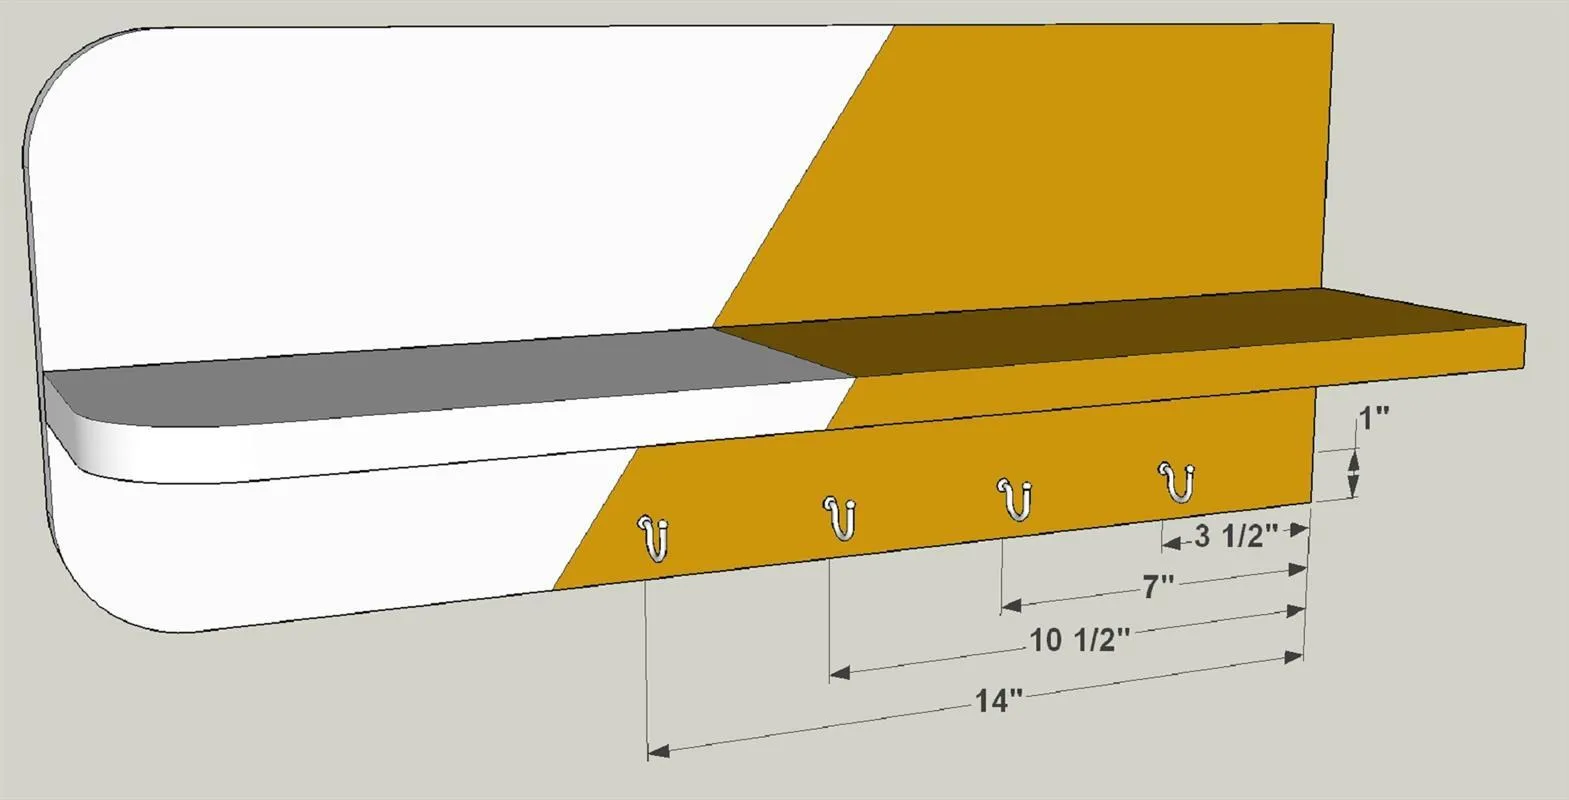
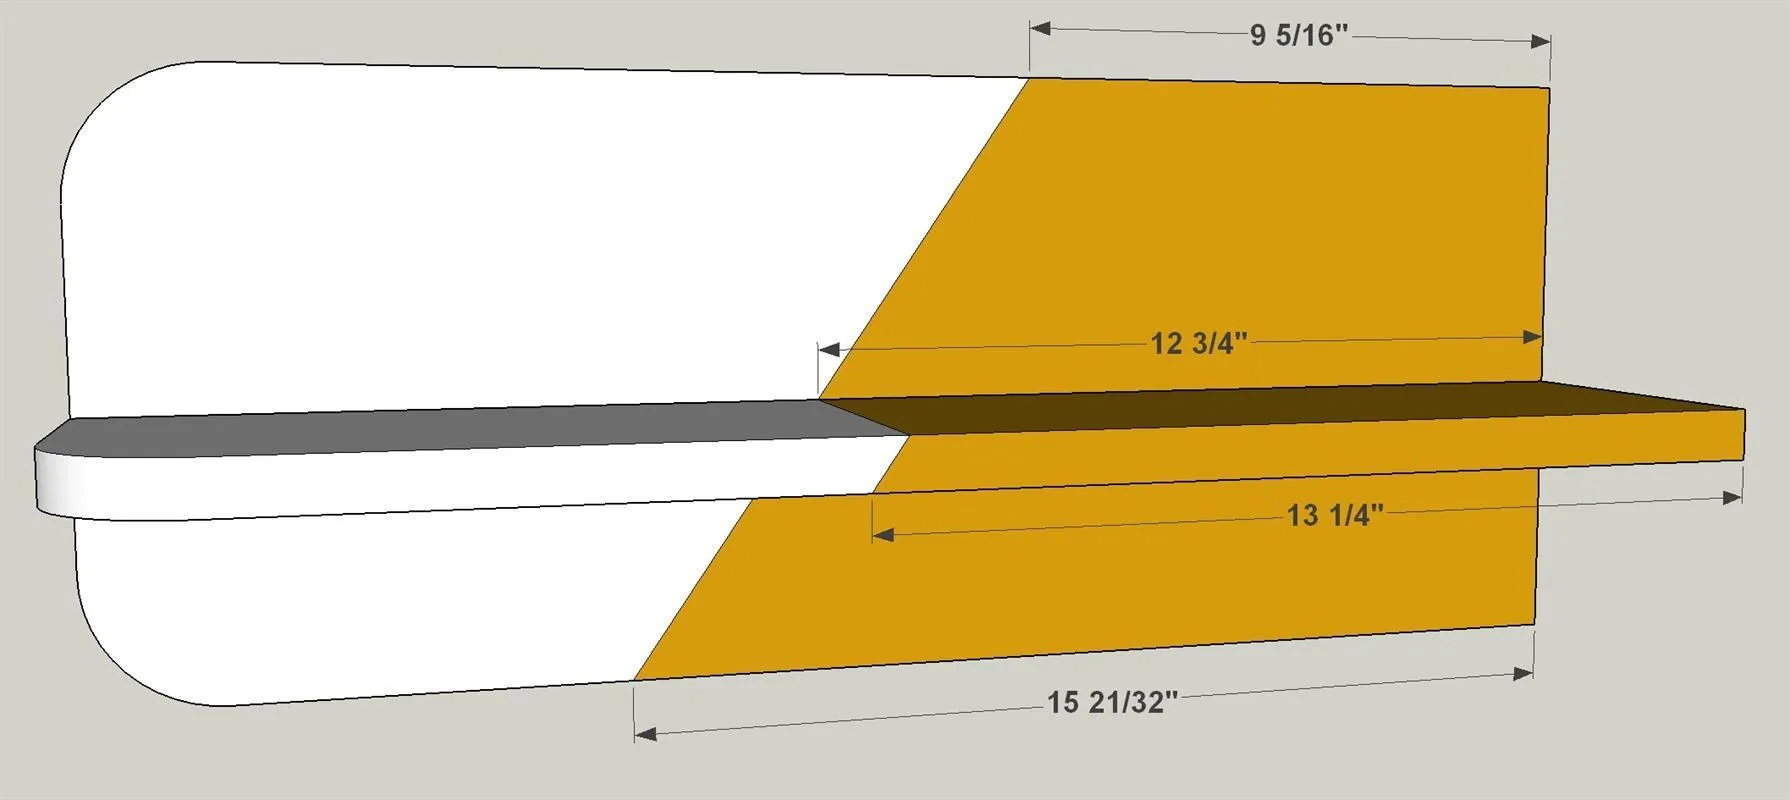
After a final sanding, paint or finish the shelf. To create the pattern shown here, first paint the entire shelf assembly white. Once that coat dries, measure over from the square end of the Back, and then draw a line (at approximately a 55° angle). Mask along the line, and then paint on the gold color.
6. Hang the Hooks
- Add 1" cup hooks below the shelf for hanging keys, etc.
- Measure to get the spacing even.
- Then drill pilot holes to fit the threaded ends of your hooks, and screw in the hooks.