 Notch
NotchUse your browser's Print (Ctrl/Cmd + P) and choose Save as PDF. This page works offline once you've opened it with a signal.
DIY Wooden Snowflake
This DIY wooden snowflake is a great build for the holidays!
- Difficulty
- Easy
- Time
- 2.5–4.8 hours
- Cost
- $
Cut list
| Part | Qty | T × W × L | Material | ✓ |
|---|---|---|---|---|
| Boards (you'll rip your 1x4 into 2 1 1/2" wide pieces and then cut the following measurements from there) | 2 | 3/4" × 1" × 8" | — | ☐ |
| Center | 1 | 3/4" × 1" × 24" | — | ☐ |
| Diagonals | 4 | 1" × 3" × 12" | — | ☐ |
| End pieces | 12 | 1" × 3" × 3" | — | ☐ |
| Middle pieces | 12 | 1" × 2" × 3" | — | ☐ |
Materials
| Item | Qty | ✓ |
|---|---|---|
| Board, 3/4" x 3 1/2" x 8' | 1 board | ☐ |
| Box of 1 ¼" pocket hole screws (see tools list) | 1 each | ☐ |
| Wood glue | 1 each | ☐ |
| Stain/ paint and sealant of your choice | 1 each | ☐ |
Overall cost: $. Lumber varies by region, species, and season, so we give a band rather than a figure.
Tools
- Drill / Driver
- Miter Saw
- Pocket Hole Jig
- Random Orbit Sander
- Table Saw
- Tape Measure — optional
Instructions
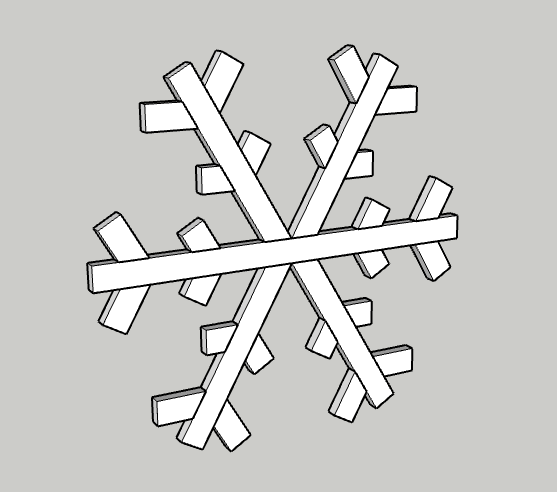
1. Attach Diagnals
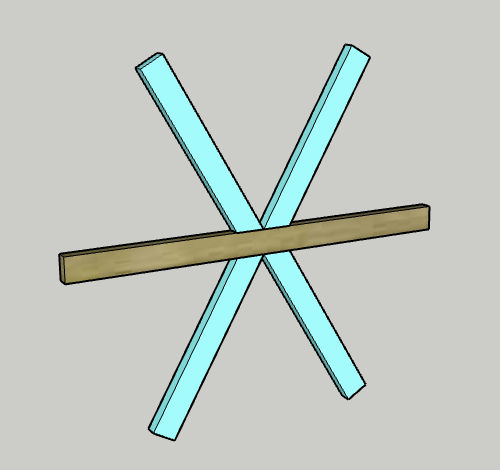
- Mark the 12" center point of the Center board on both sides.
- Drill one pocket hole into the mitered end of each Diagonal board. Using wood glue and pocket hole screws, attach each diagonal to the center at the center marks so the Diagonal points away from the center.
2. Attach End Pieces
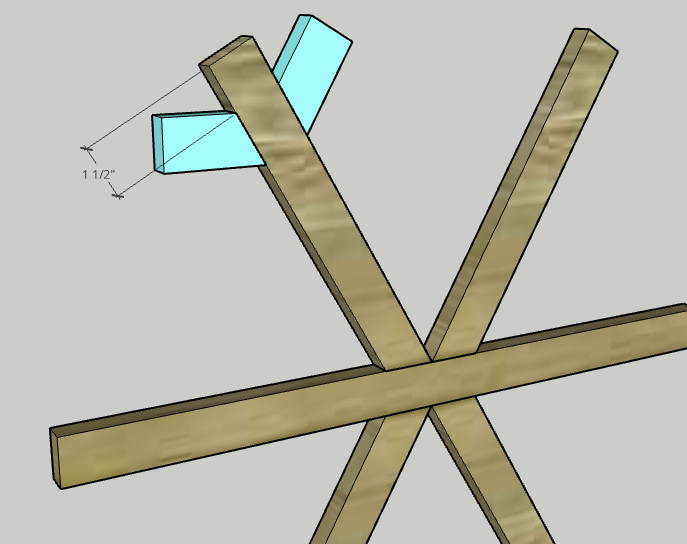
On each Diagonal and the Center, mark 1 1/2" down from the end. Drill one pocket hole into the mitered end of each of the End Pieces. Using wood glue and pocket hole screws, attach two End Pieces on each side of a Diagonal at the mark you just made so that the short side of the End Piece is at the mark and the pieces angle up and away from the Diagonal.
3. Attach Middle Pieces
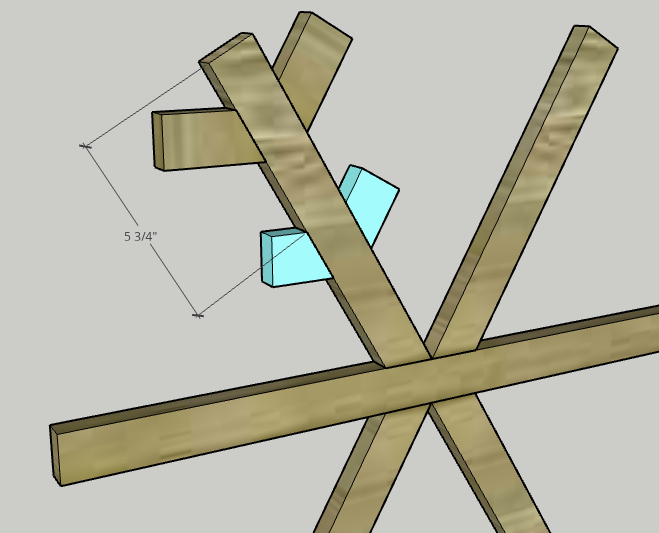
On each Diagonal and the Center, mark 5 3/4" down from the end. Drill one pocket hole into the mitered end of each of the Middle Pieces. Using wood glue and pocket hole screws, attach two Middle Pieces on each side of a Diagonal at the mark you just made so that the short side of the Middle Piece is at the mark and the pieces angle up and away from the Diagonal.
4. Repeat five more times
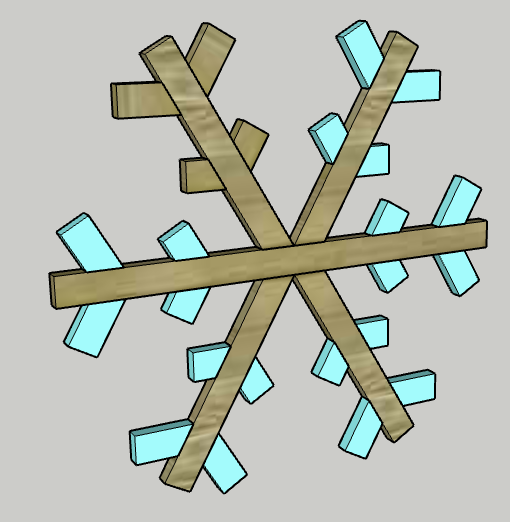
Repeat steps two and three on the remaining five points on the snowflake. Each one gets two End Pieces and two Middle Pieces secured in the same places the same way.
5. Paint or stain
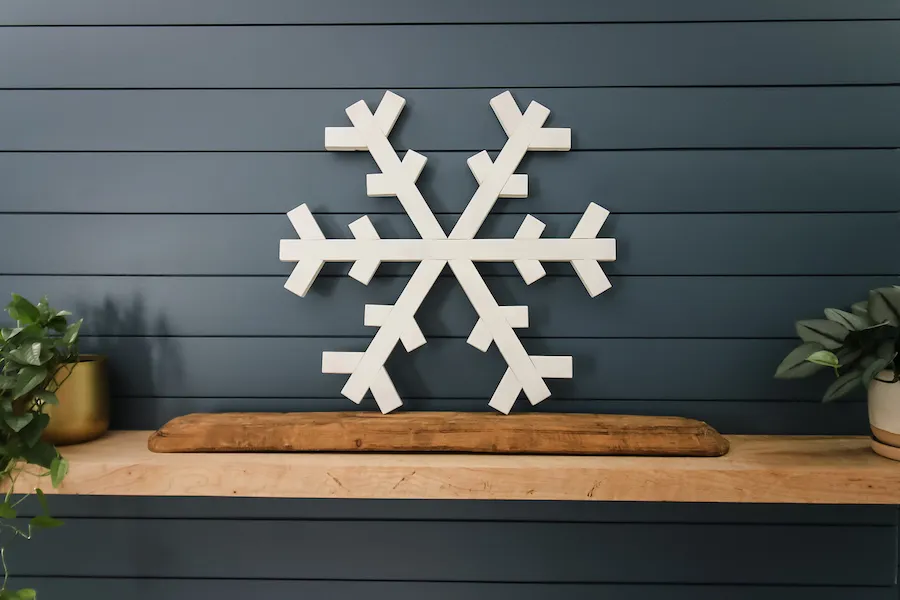
After the glue has dried, sand everything smooth and then apply a paint or stain to the wood. We chose to add white spray paint and then add a little distance shot of silver to give the snowflake a little sparkle. Finally, add polyurethane to keep it protected.
6. Display
Repeat this process to make as many snowflakes as you want! You can even adjust the size a little here or there to make them a little different. Display your snowflakes wherever you want! You can add hanging hardware to hang them on the wall, attach a string to hang on the porch, or set them on the mantel to display.
7. Enjoy!
Enjoy your handiwork and tag @CharlestonCrafted on Instagram with a picture!