 Notch
NotchUse your browser's Print (Ctrl/Cmd + P) and choose Save as PDF. This page works offline once you've opened it with a signal.
DIY Tabletop Planter Centerpiece
Brighten up your dinner table with this DIY elevated tabletop planter centerpiece.
- Difficulty
- Intermediate
- Time
- 2.5–4.8 hours
- Cost
- $
Cut list
| Part | Qty | T × W × L | Material | ✓ |
|---|---|---|---|---|
| Base | 1 | 3" × 5" × 22" | — | ☐ |
| Long Sides | 2 | 3" × 3" × 24" | — | ☐ |
| Short Sides | 2 | 3" × 3" × 6" | — | ☐ |
| Legs | 4 | 3/4" × 2" × 2" | — | ☐ |
Materials
| Item | Qty | ✓ |
|---|---|---|
| Board, 3/4" x 5 1/2" x 8' | 1 board | ☐ |
| Box of 1 ¼ pocket hole screws (see tools list) | 1 each | ☐ |
| Wood glue | 1 each | ☐ |
| Stain/paint and sealant of your choice | 1 each | ☐ |
Overall cost: $. Lumber varies by region, species, and season, so we give a band rather than a figure.
Tools
- Drill / Driver
- Miter Saw
- Pocket Hole Jig
- Random Orbit Sander
- Table Saw
- Bar / Pipe Clamps — optional
- Tape Measure — optional
Instructions
1. Drill pocket holes
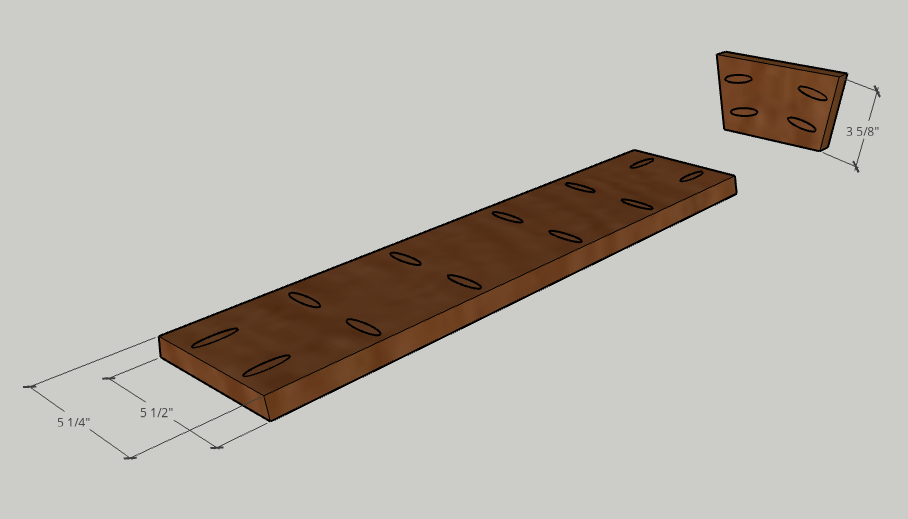
On the under (smaller) side of the Base, drill two pocket holes on the short edges and four pocket holes on each of the long edges. On both of the angled edges of the Short Sides, drill two pocket holes.
2. Attach short sides
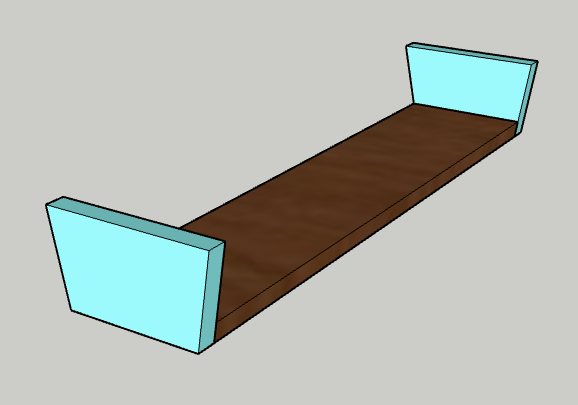
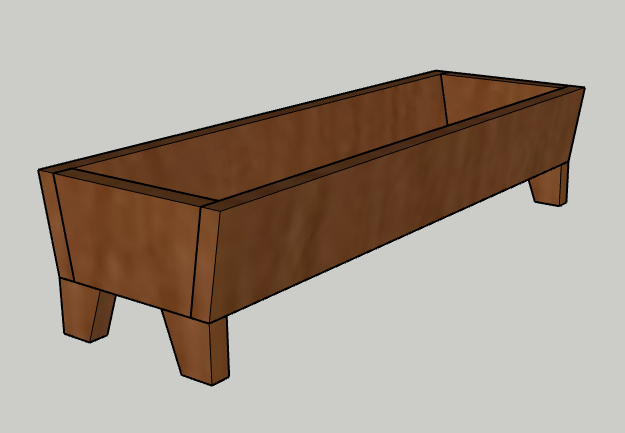
Using wood glue and pocket hole screws, attach the short edge of the Short Sides to the short ends of the Base. The 10 degree edges should line up with each other.
3. Attach long sides
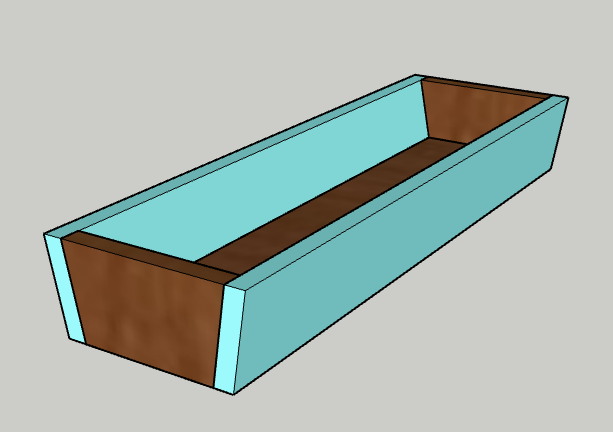
Using wood glue and pocket hole screws, attach the Long Sides to the Base and Short Sides. Make sure that the 10 degree angled edges line up with the others so that the sides are flat along the top and bottom.
4. Attach feet
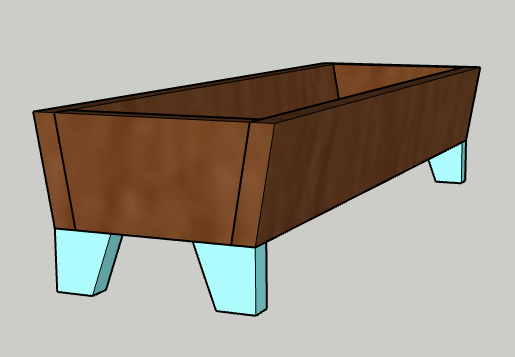
Make a 20 degree angled cut on each of the Feet to taper down from 2" at the top to 1 1/4" on the bottom. Using wood glue and clamps, attach the Feet to the underside of the planter on each of the four corners.
5. Finishing touches
Use a router or router table to add a rounded edge to the inside and outside of the top of the planter. After sanding all remaining edges, add stain and sealant to match your decor. Fill with seasonal embellishments to add a festive look!
6. Enjoy!
Enjoy your handiwork and tag @CharlestonCrafted on Instagram with a picture!