 Notch
- Difficulty
- Intermediate
- Time
- 2.5–4.8 hours
- Cost
- $
About this build
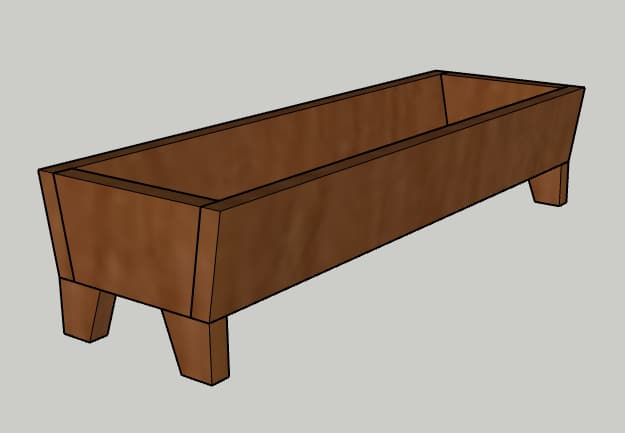
Brighten up your dinner table with this DIY elevated tabletop planter centerpiece. You can fill this with any type of decor that fits your style or what you’re looking for. This is perfect for holiday decor or everyday use!
Tools
Essential
- Drill / Driver
- Miter Saw
- Pocket Hole Jig
- Random Orbit Sander
- Table Saw
Optional / nice to have
- Bar / Pipe Clamps
- Tape Measure
Materials
| Item | Qty |
|---|---|
| Board, 3/4" x 5 1/2" x 8' | 1 board |
| Box of 1 ¼ pocket hole screws (see tools list) | 1 each |
| Wood glue | 1 each |
| Stain/paint and sealant of your choice | 1 each |
Overall cost: $. Lumber prices vary by region, species, and season, so we give a band rather than a figure we would only be pretending to know.
Cut list
| Part | Qty | T × W × L |
|---|---|---|
| Base | 1 | 3" × 5" × 22" |
| Long Sides | 2 | 3" × 3" × 24" |
| Short Sides | 2 | 3" × 3" × 6" |
| Legs | 4 | 3/4" × 2" × 2" |
What to buy
Buy 3 boards at 8 ft.
3" × 5"
1 board
3" × 3"
1 board
3/4" × 2"
1 board
Assumes 8 ft stock, a 1/8" saw kerf, and buying each part at its own width. Change the board size or kerf on the full board plan →
Instructions
1Drill pocket holes
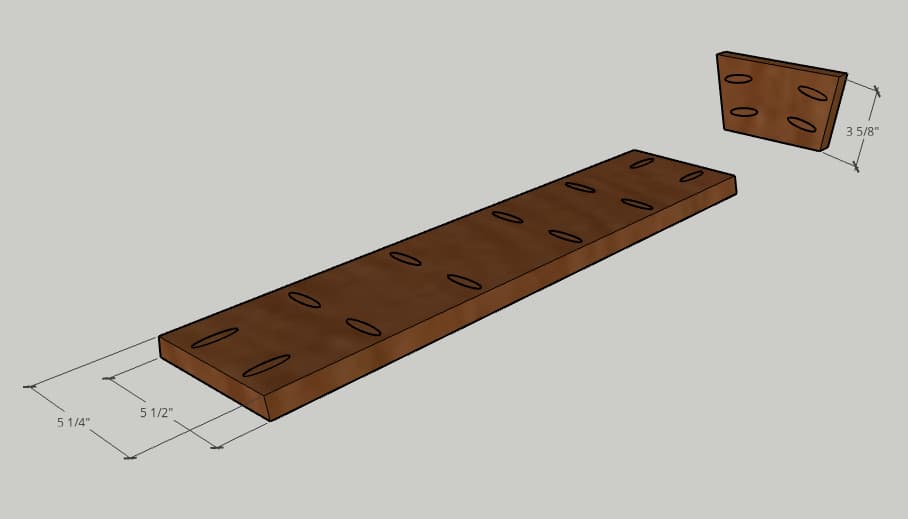
On the under (smaller) side of the Base, drill two pocket holes on the short edges and four pocket holes on each of the long edges. On both of the angled edges of the Short Sides, drill two pocket holes.
2Attach short sides
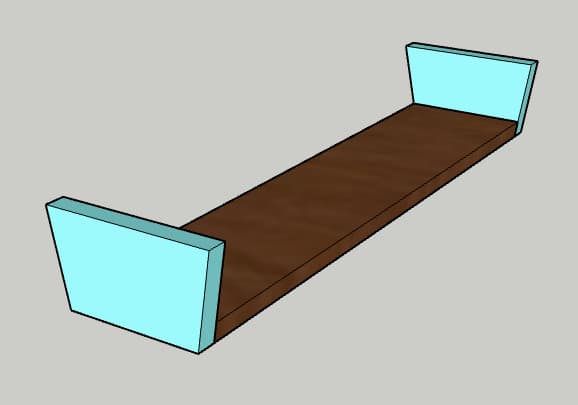
Using wood glue and pocket hole screws, attach the short edge of the Short Sides to the short ends of the Base. The 10 degree edges should line up with each other.
3Attach long sides
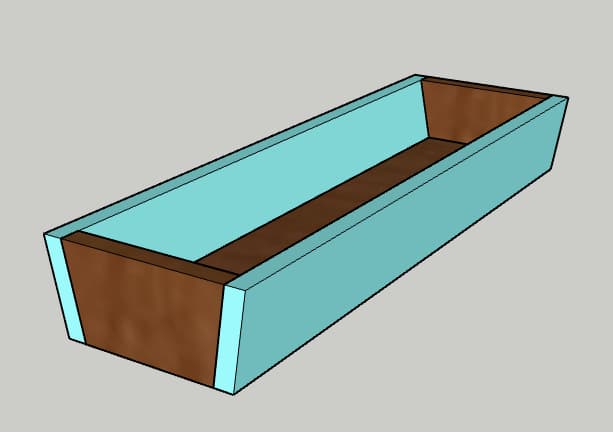
Using wood glue and pocket hole screws, attach the Long Sides to the Base and Short Sides. Make sure that the 10 degree angled edges line up with the others so that the sides are flat along the top and bottom.
4Attach feet
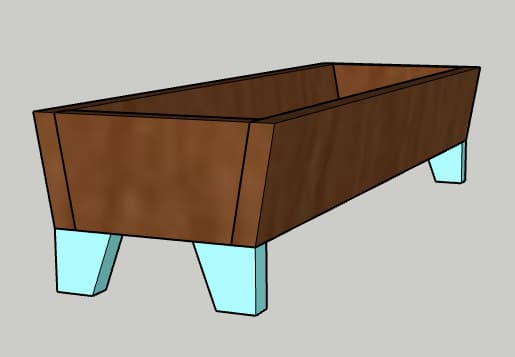
Make a 20 degree angled cut on each of the Feet to taper down from 2" at the top to 1 1/4" on the bottom. Using wood glue and clamps, attach the Feet to the underside of the planter on each of the four corners.
5Finishing touches
Use a router or router table to add a rounded edge to the inside and outside of the top of the planter. After sanding all remaining edges, add stain and sealant to match your decor. Fill with seasonal embellishments to add a festive look!
6Enjoy!
Enjoy your handiwork and tag @CharlestonCrafted on Instagram with a picture!
Tags
- Centerpieces
- Intermediate
Reviews & builds
No reviews yet
Sign in to review this plan or share your build.
No reviews yet. Be the first to build this.