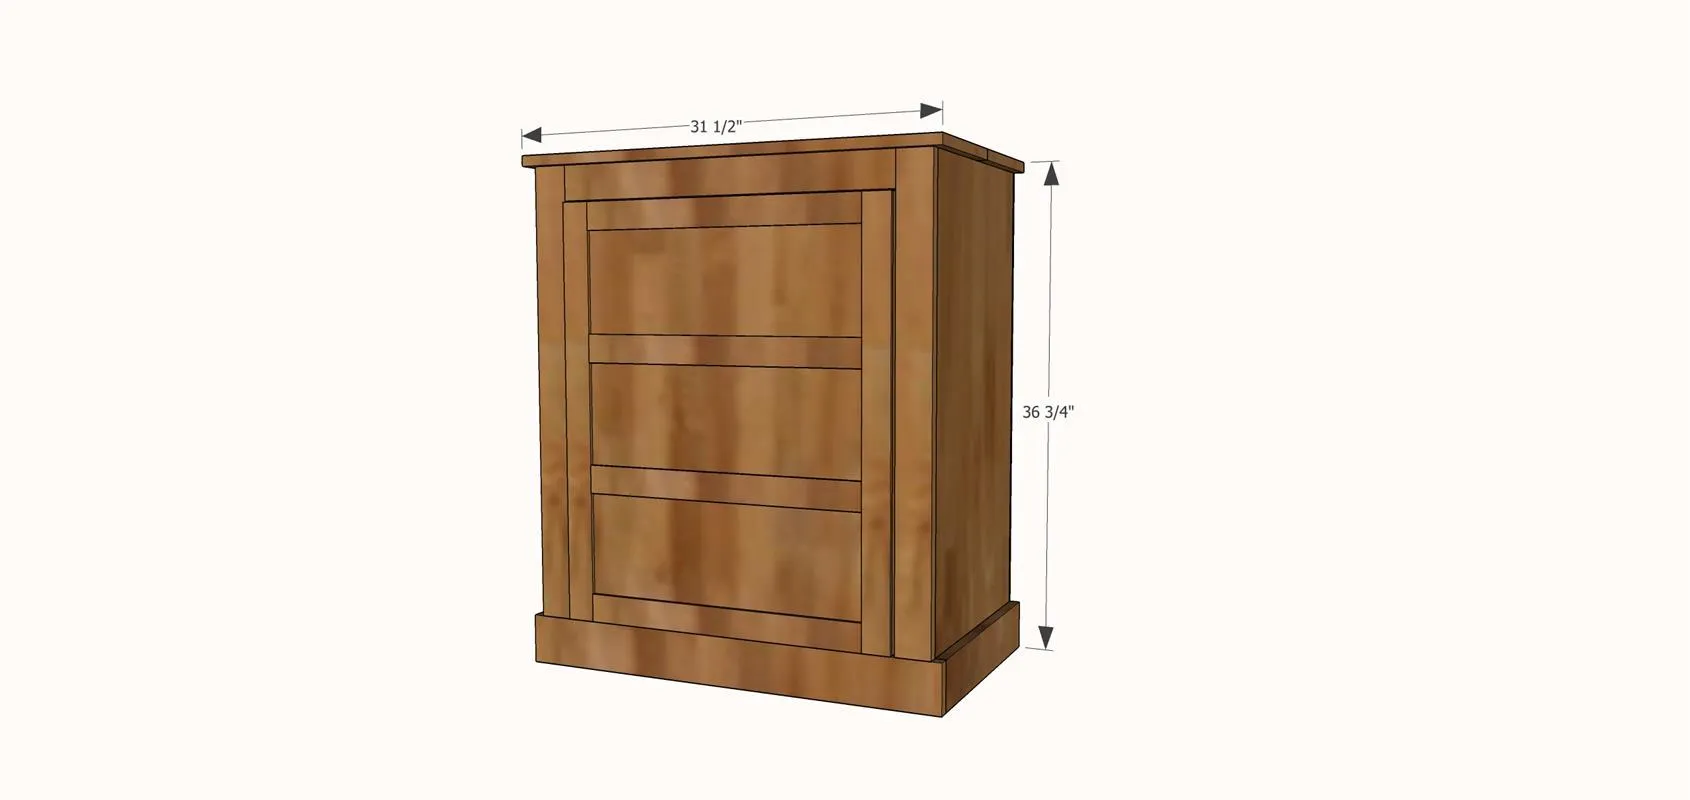
Notch
NotchDIY Small Buffet
Step-by-step build — 10 steps. Also available as a print sheet.
1Step 1: Cuts and Pocket Holes
Make Cuts and create pocket holes where indicated by the red dots in the provided cut list. However, I do suggest cutting as you go in order to keep the project square.
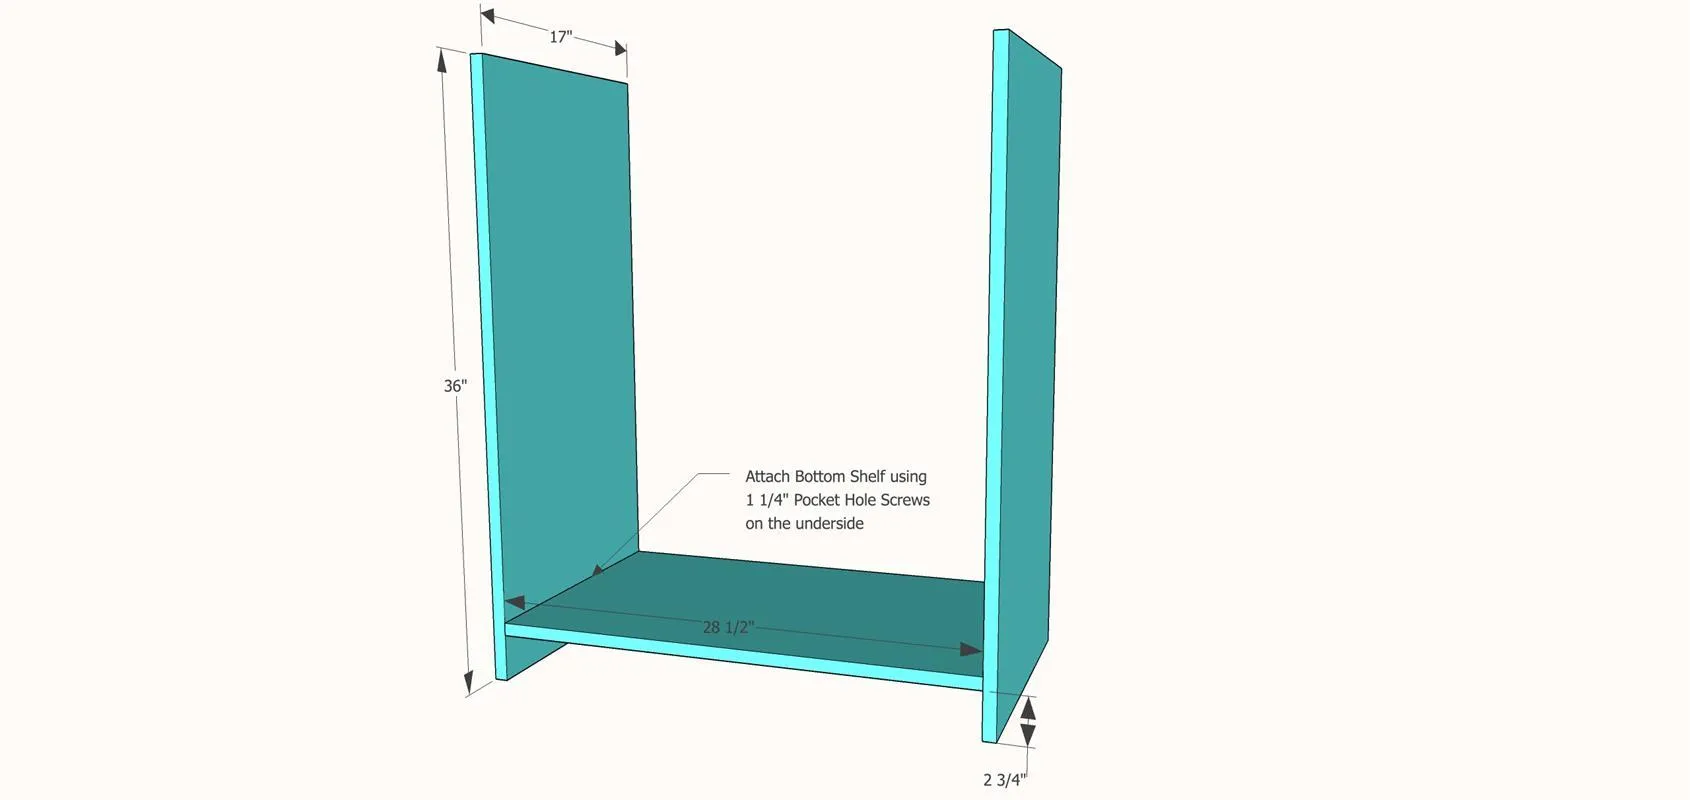
2Step 2: Form Box
Using the 2 side panels and 1 shelf, attach the bottom shelf to the side panels with 1 1/4" pocket hole screws and wood glue.
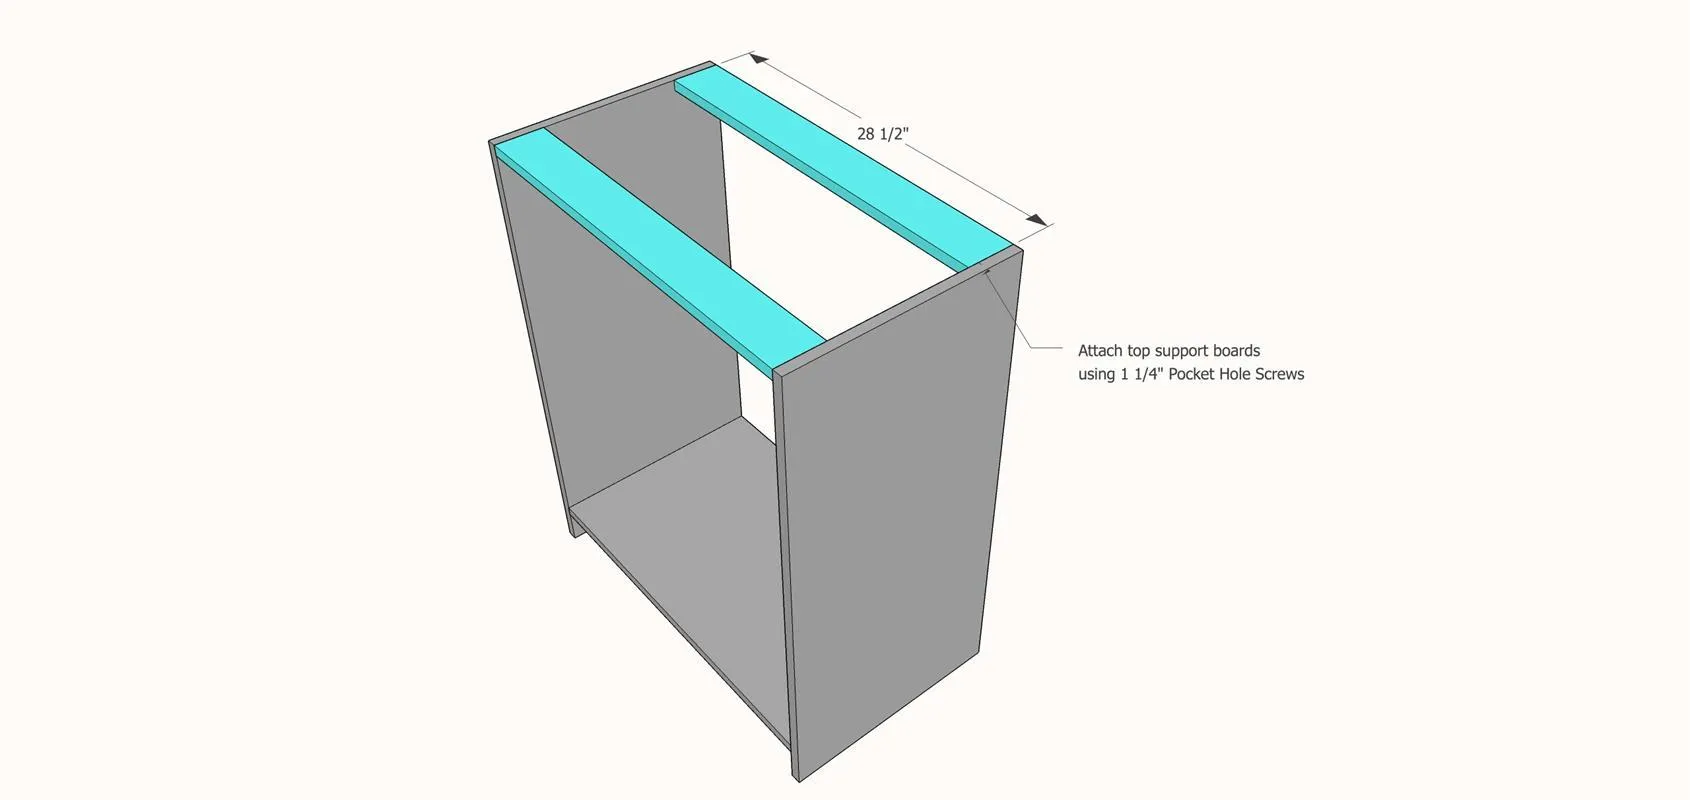
3Step 3: Attach Top Supports
Attach top support boards to side panels using 1 1/4" Pocket Hole Screws.
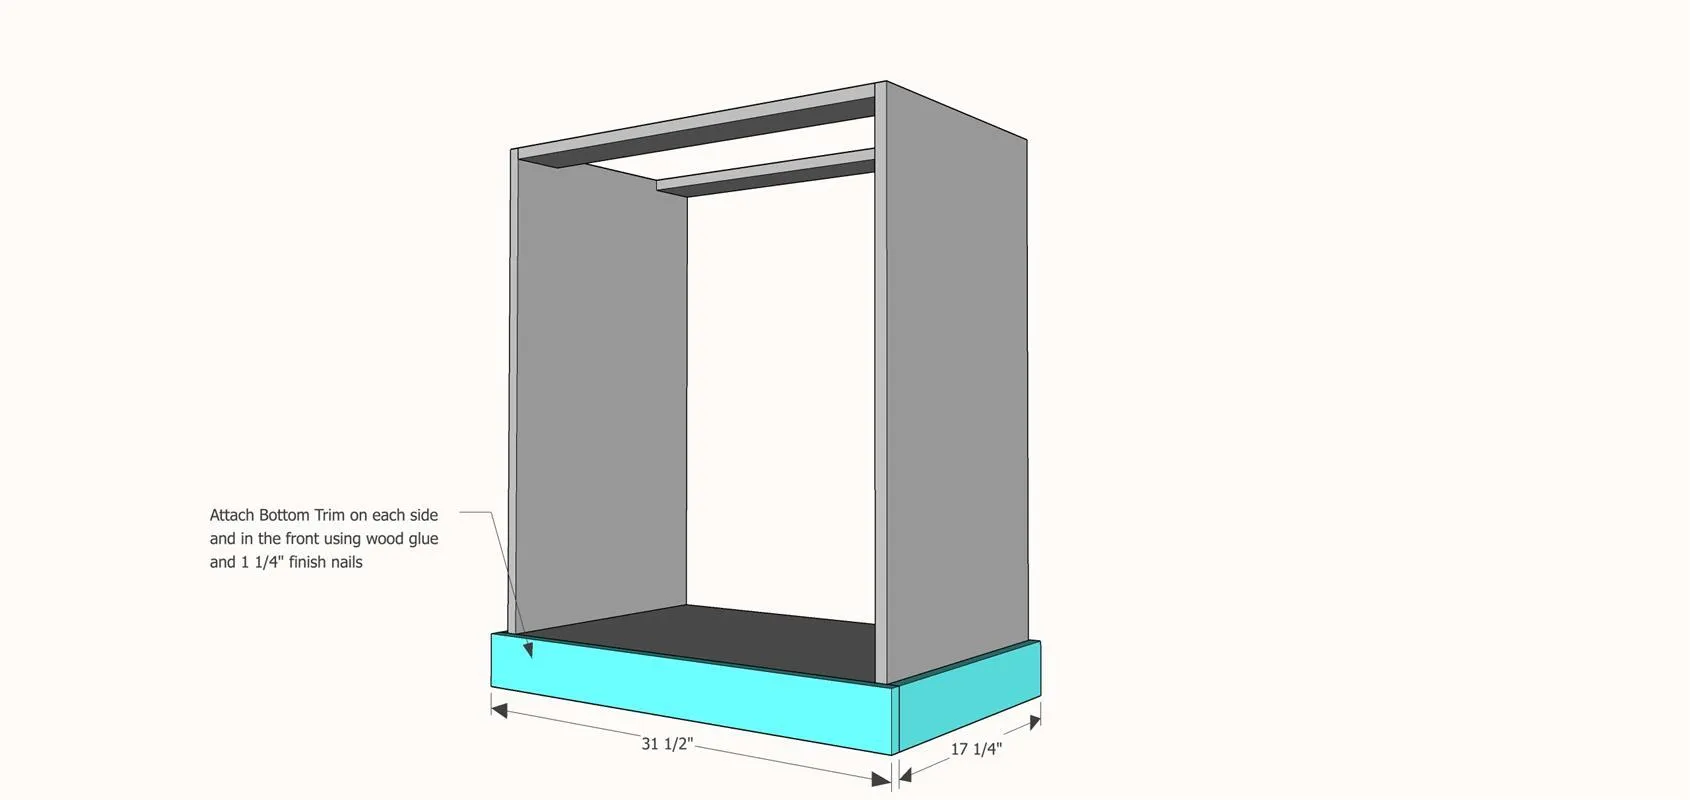
4Step 4: Add Bottom Trim
Add the bottom trim to the bottom, flush with the side panels using wood glue and 1 1/4" finish nails.
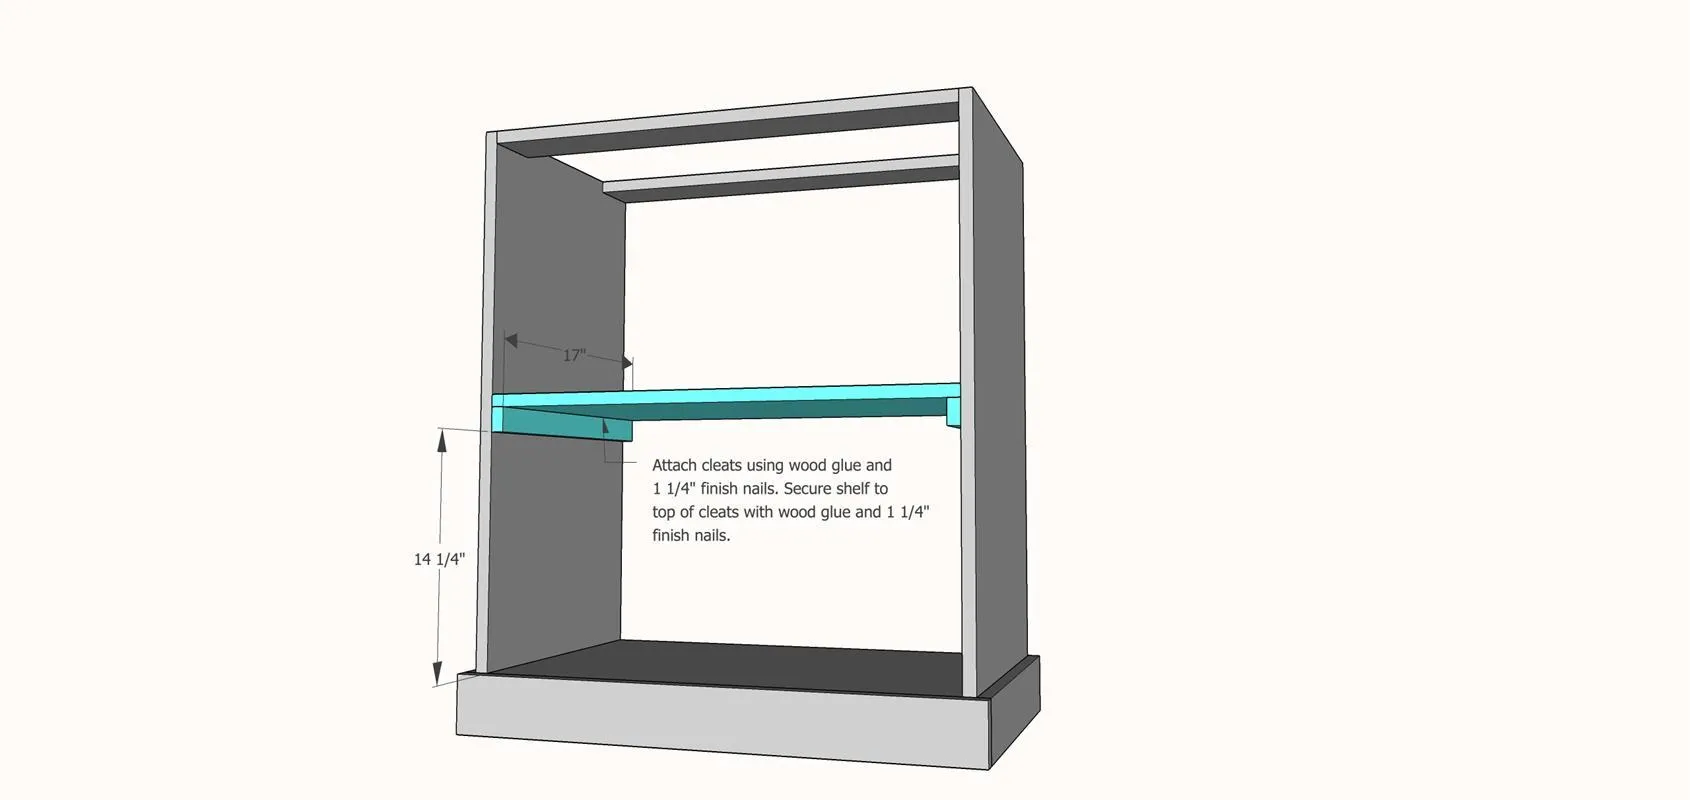
5Step 5: Add Shelf
Attach cleats using wood glue and 1 1/4" finish nails. Secure shelf to top of cleats with wood glue and 1 1/4" finish nails.
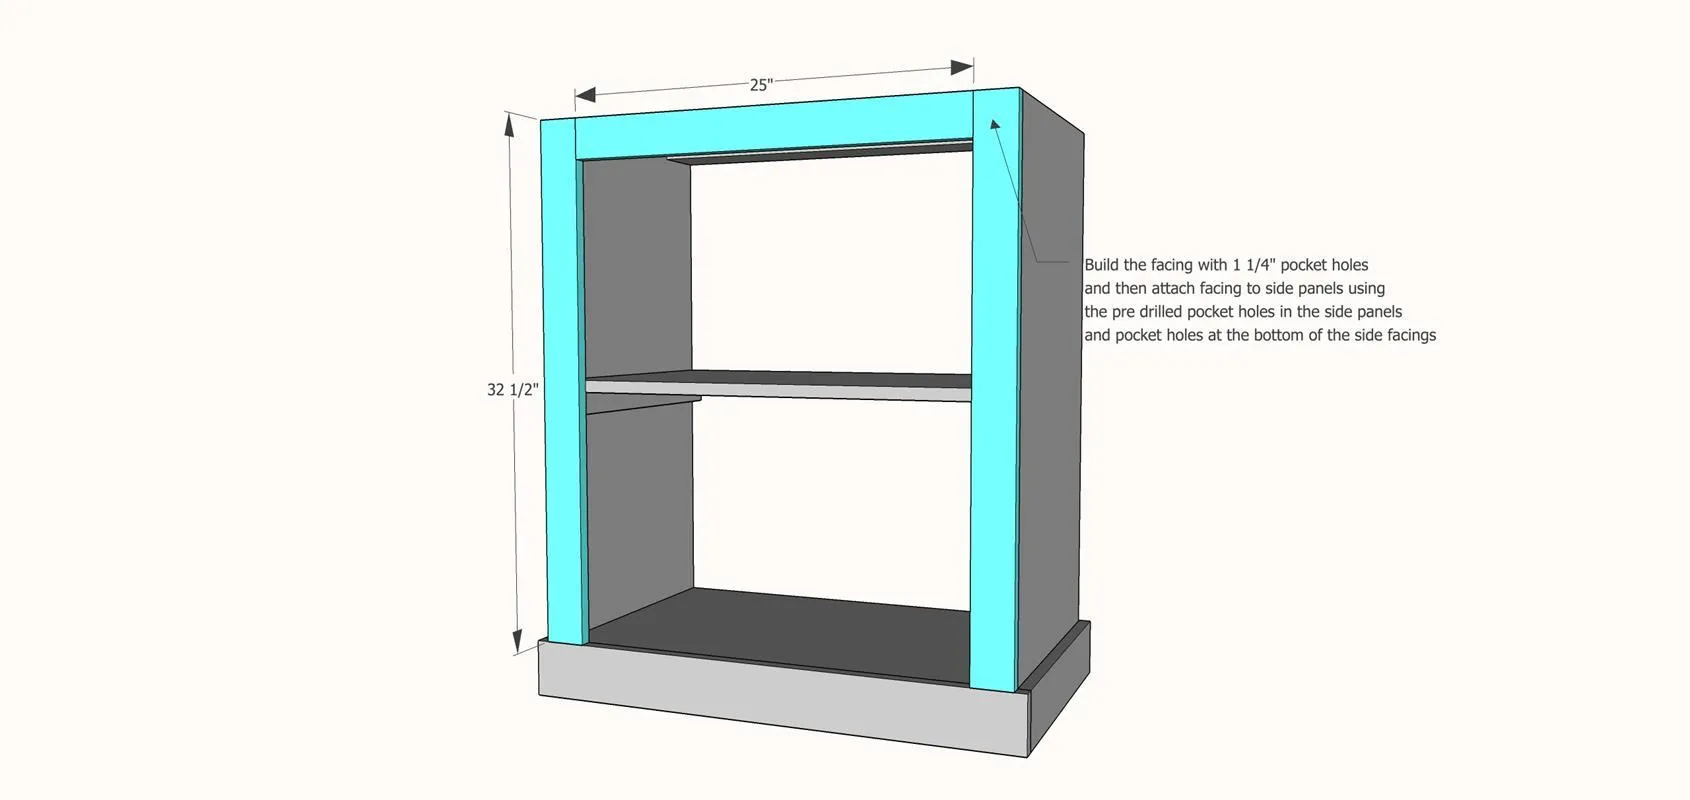
6Step 6: Attach Facing
Build the facing with 1 1/4" pocket holes and then attach facing to side panels using the pre drilled pocket holes in the side panels and pocket holes at the bottom of the side facings.
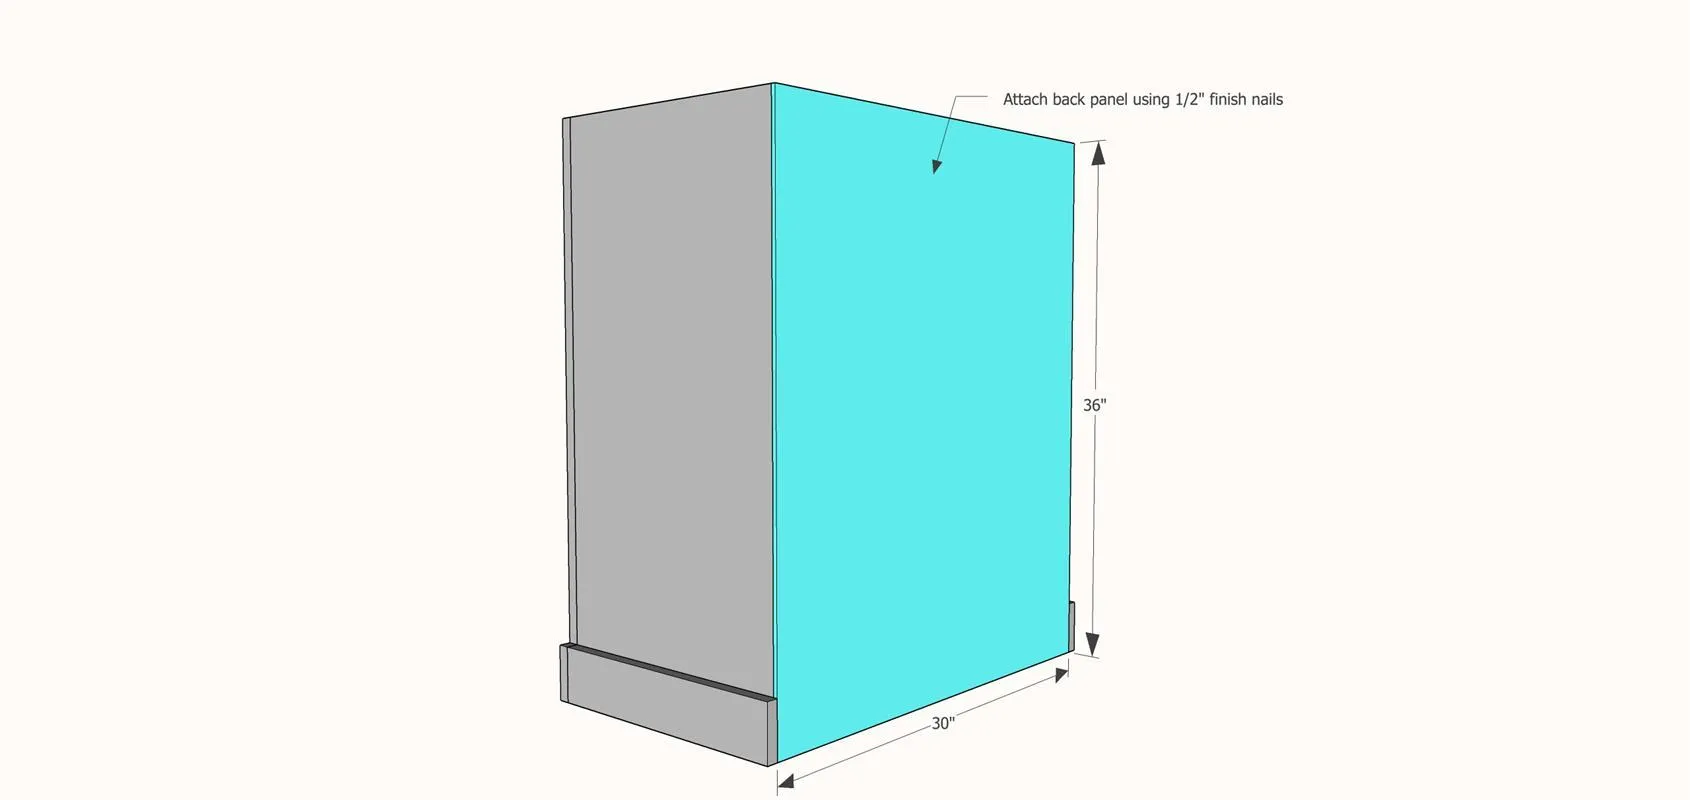
7Step 7: Attach Back Panel
Attach Back Panel with 1/2" finish nails.
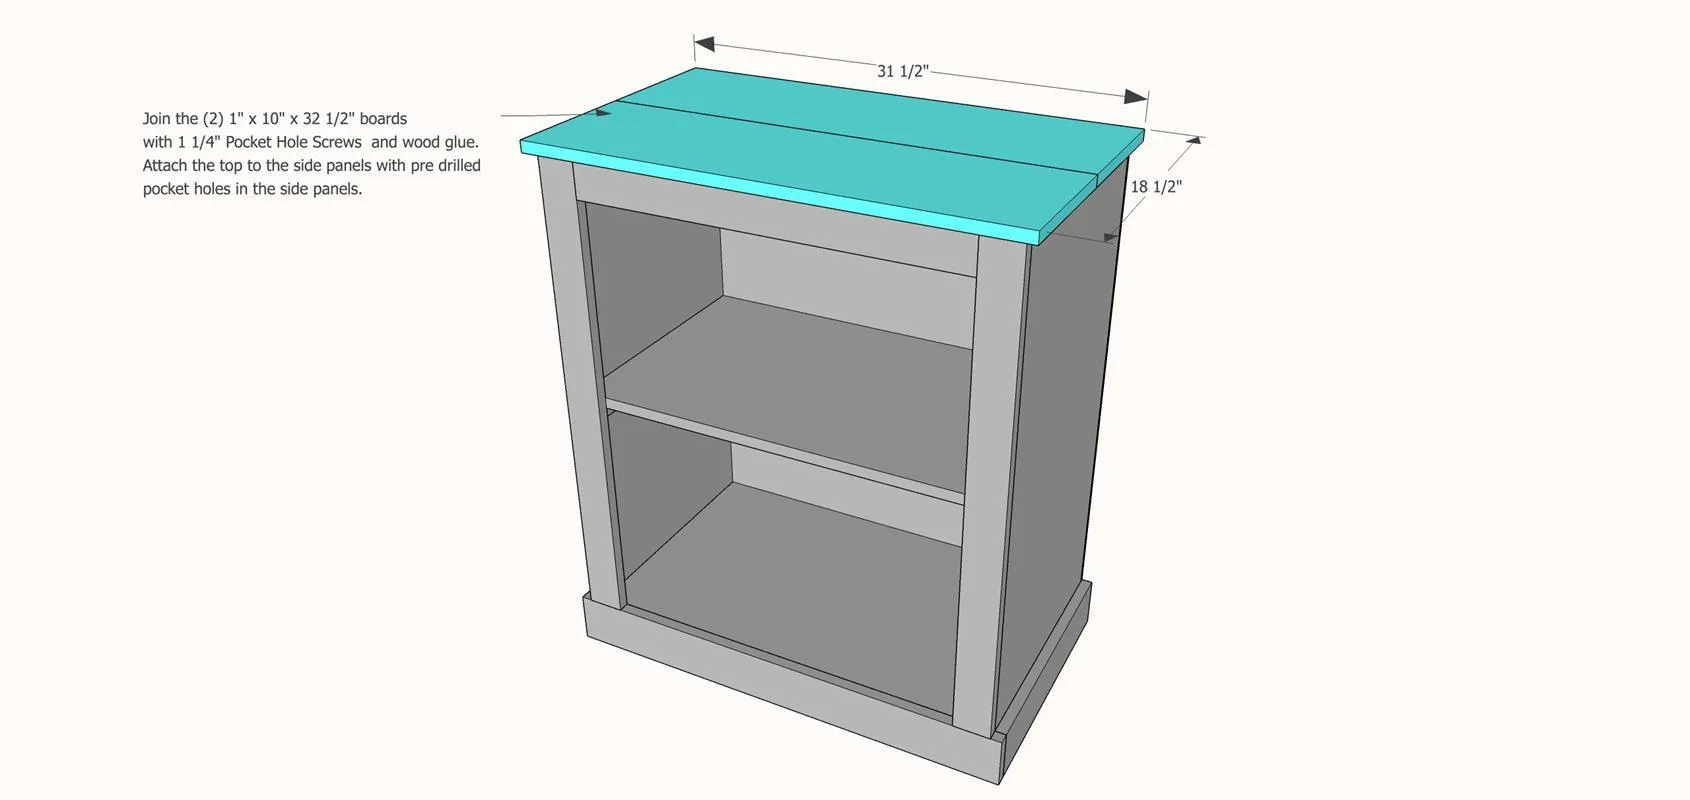
8Step 8: Attach top
Join the (2) 1" x 10" x 32 1/2" boards with 1 1/4" Pocket Hole Screws and wood glue. Attach the top to the side panels with pre drilled pocket holes in the side panels.
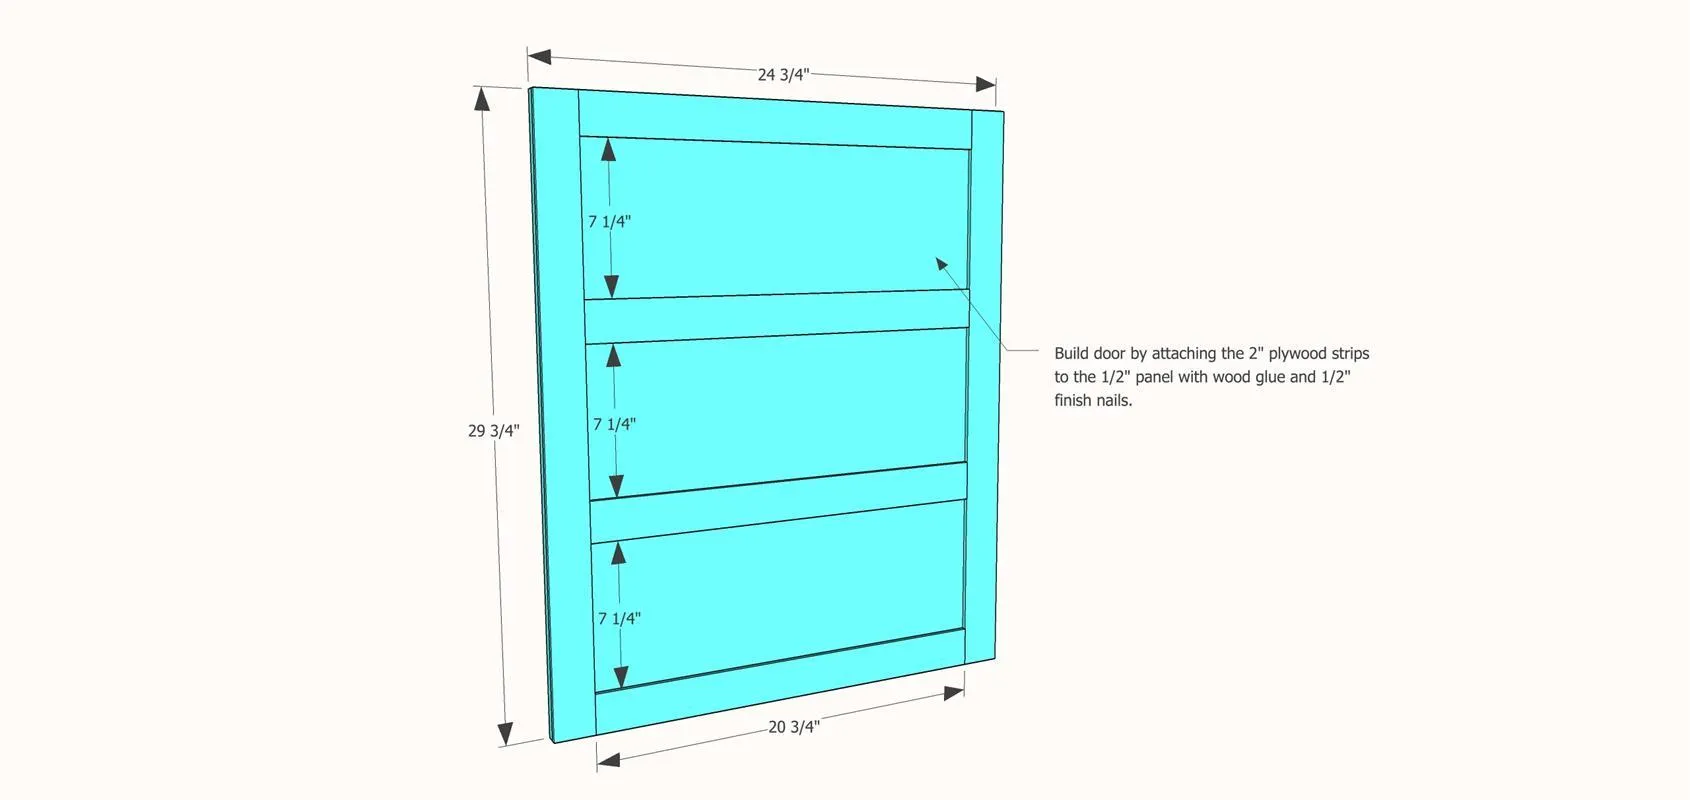
9Step 9: Build Door
Build door by attaching the 2" plywood strips to the 1/2" panel with wood glue and 1/2" finish nails.
10Step 10: Add Hardware
- Attach the door with your T hinges leaving an 1/8" gap around the perimeter of the door.
- Then attach the sliding barrel bolt to the door.
- Finish with your desired style and enjoy!