Notch
NotchUse your browser's Print (Ctrl/Cmd + P) and choose Save as PDF. This page works offline once you've opened it with a signal.
DIY Retro Side Table
Retro Mid Century Modern Decor is coming back in style.
- Difficulty
- Intermediate
- Time
- 3.3–6.3 hours
- Cost
- $$
Cut list
| Part | Qty | T × W × L | Material | ✓ |
|---|---|---|---|---|
| Top Piece | 1 | 1" × 10" × 16" | — | ☐ |
| Bottom Piece | 1 | 1" × 10" × 16" | — | ☐ |
| Side Pieces | 2 | 1" × 10" × 10" | — | ☐ |
| Shelf | 1 | 1" × 10" × 14" | — | ☐ |
| Back Panel | 1 | 1" × 6" × 14" | — | ☐ |
| Drawer Sides | 2 | 1" × 4" × 6" | — | ☐ |
| Drawer Sides | 2 | 1" × 4" × 11" | — | ☐ |
| Drawer Bottom | 1 | 1" × 4" × 11" | — | ☐ |
| Drawer Front | 1 | 1" × 6" × 14" | — | ☐ |
Materials
| Item | Qty | ✓ |
|---|---|---|
| Board, 1x10 72" | 1 board | ☐ |
| Board, 1x6 96" | 1 board | ☐ |
| 1 1/4" Kreg Pocket Hole Screws | 50 each | ☐ |
| 1 1/4" Brad Nails (optional) | 10 each | ☐ |
| 6" Set Drawer Slides | 1 each | ☐ |
| Drawer Pull | 1 each | ☐ |
| Wood Filler | 1 each | ☐ |
| Wood Stain & Sealer | 1 each | ☐ |
| Tapered Table Legs (link for product on blog) | 4 each | ☐ |
| Angled Plates for Legs (link for product on blog) | 4 each | ☐ |
Overall cost: $$. Lumber varies by region, species, and season, so we give a band rather than a figure.
Tools
- Drill / Driver
- Miter Saw
- Pocket Hole Jig
- Random Orbit Sander
- Bar / Pipe Clamps — optional
Instructions
1. Check Dimensions & Cut List
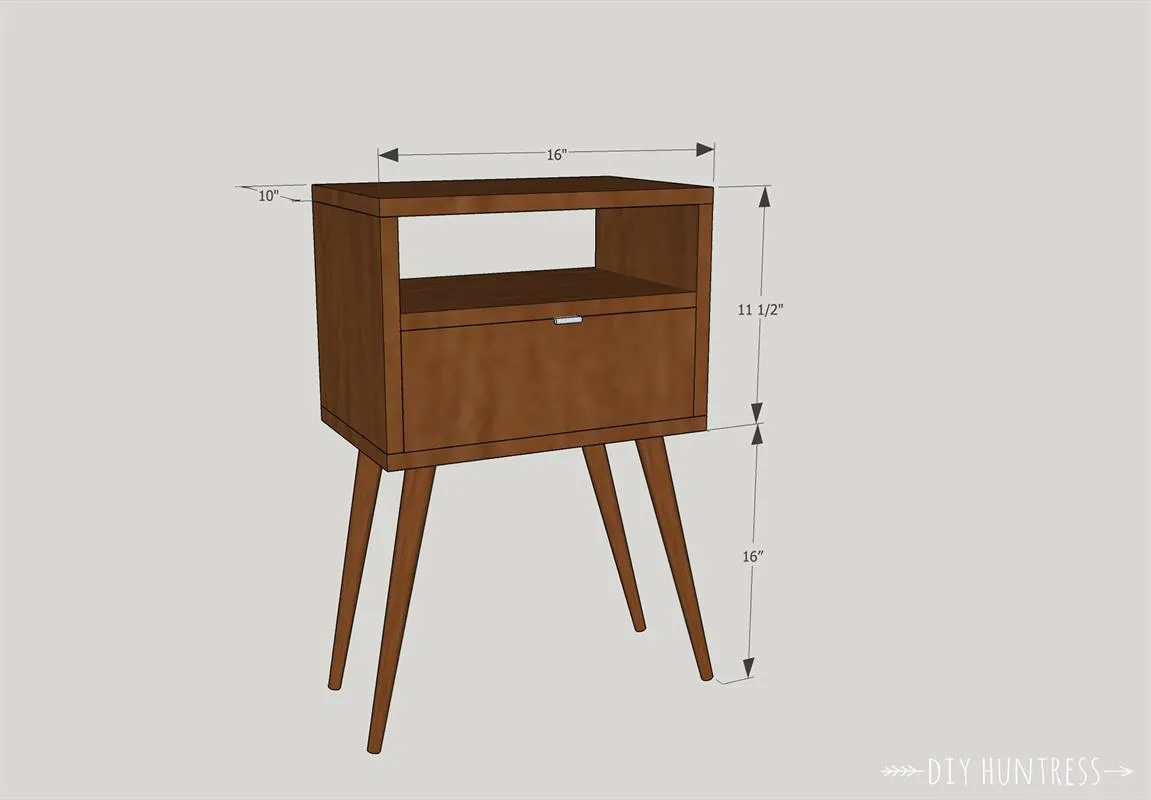
Prior to starting this project, check the dimensions and cut list.
2. Assemble The Frame
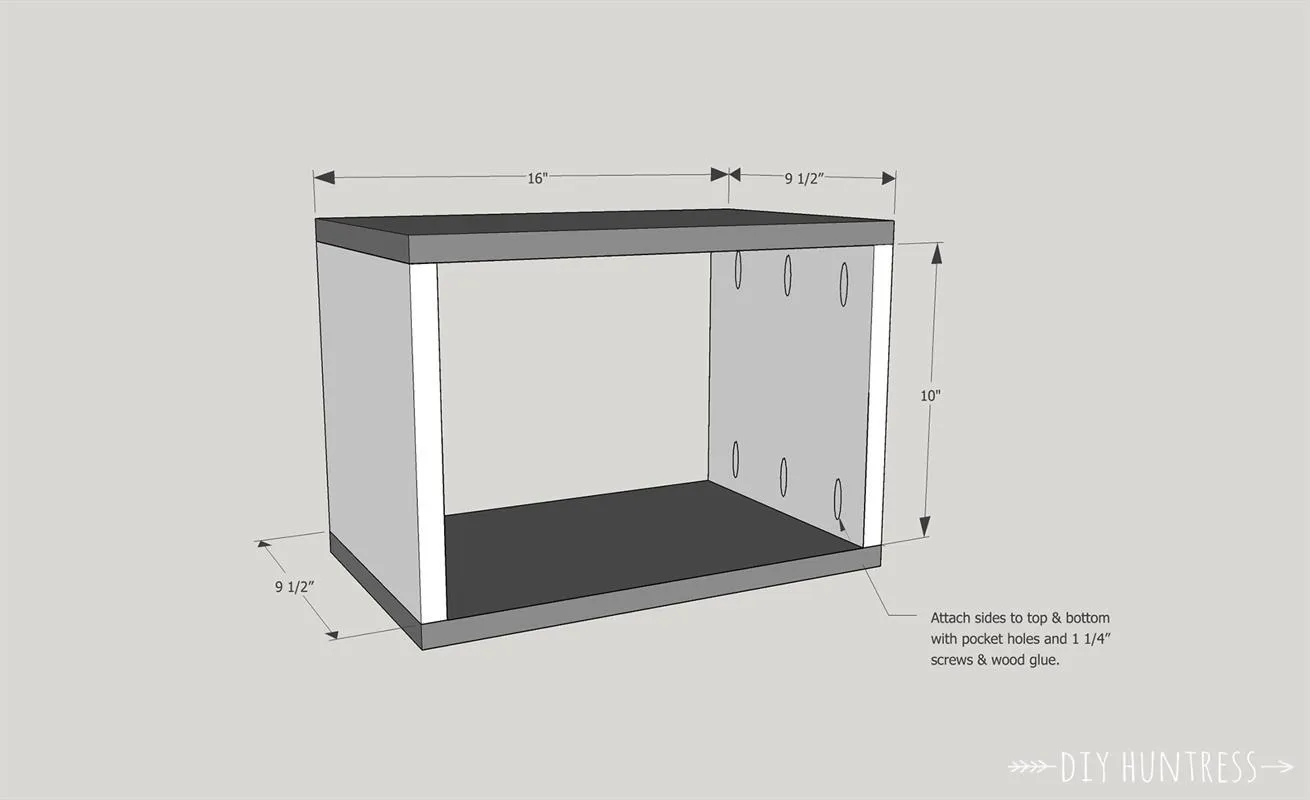
Once your frame pieces are cut, attach the top & bottom panels to the side panels using wood glue and 1 1/4" pocket hole screws.
3. Add The Shelf
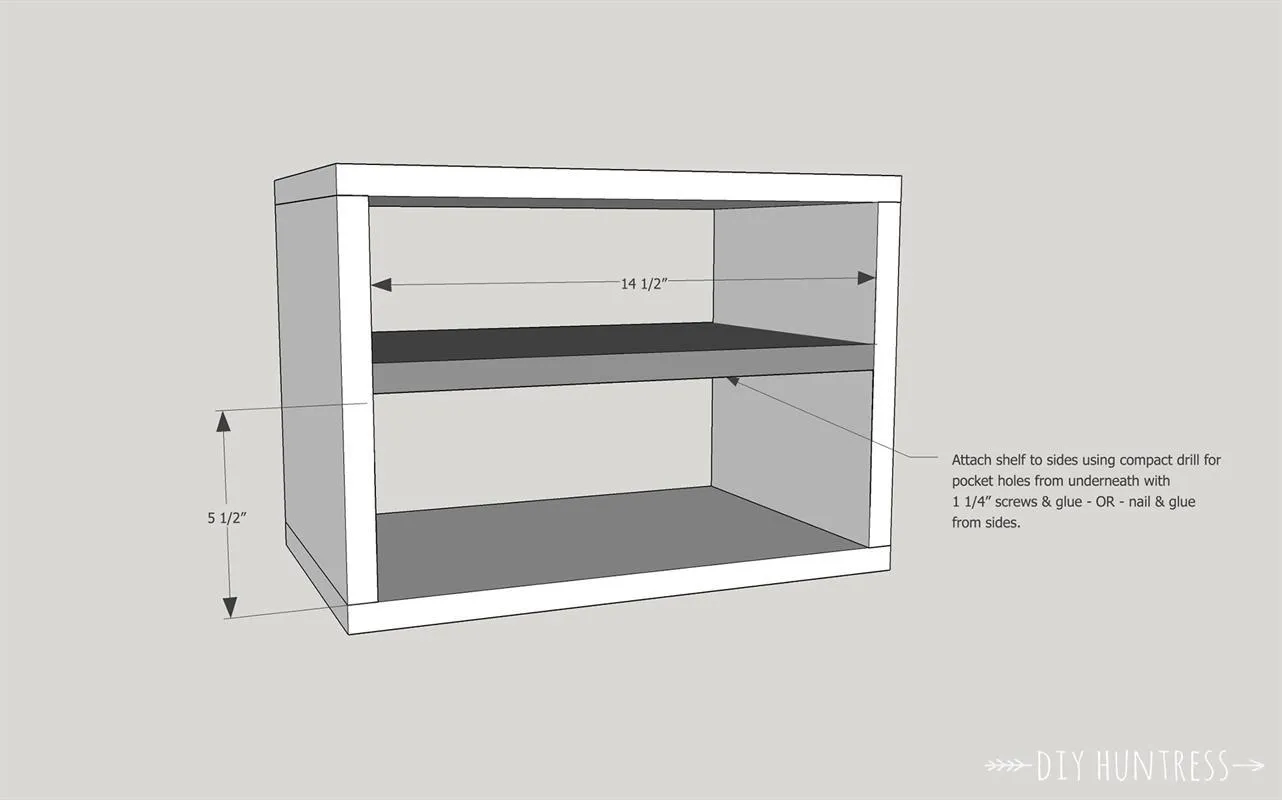
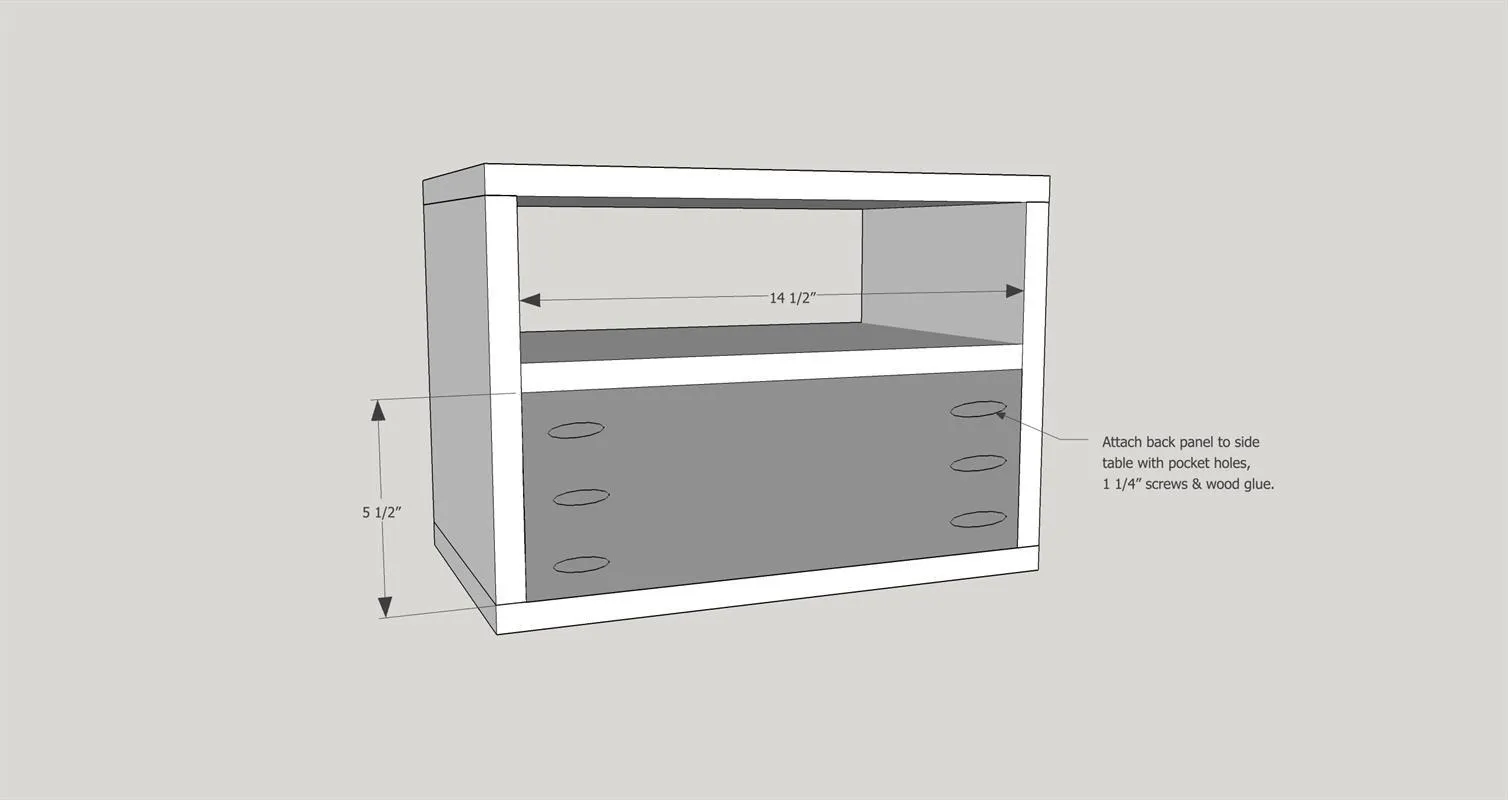
Add the shelf to the frame by using wood glue and pocket hole screws. You will need a compact drill here in order to get the screws in. If you do not have a compact drill, you can also use brad nails and wood glue to attach the shelf from the sides. Make sure to attach the frame 5 1/2" up to make room for the drawer.
4. Attach Back Panel
Attach the back panel of the table to the frame underneath the shelf. You can attach this piece with pocket holes in the back. Use wood glue and 1 1/4" screws to adhere.
5. Build The Drawer
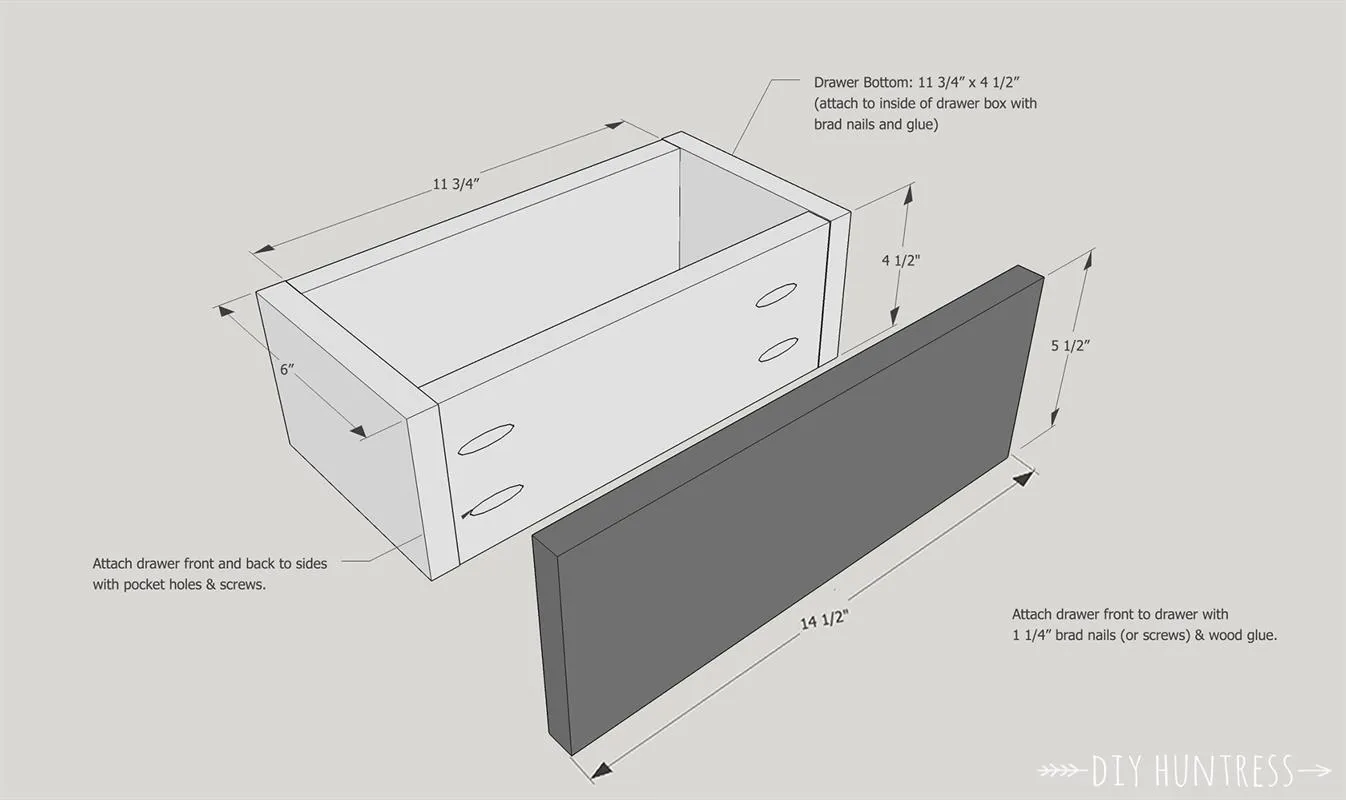
- Assemble the drawer by attaching the sides with pocket holes & screws. Make sure to place the pocket holes in the back and front panels (they will be hidden by the drawer face and back panel).
- Next, attach the bottom panel of the drawer flush, inside the drawer frame with brad nails and wood glue. Lastly, attach the drawer front with brad nails or screws. You may have to sand and/or trim the panel in order to get it to fit without rubbing.
6. Install The Drawer
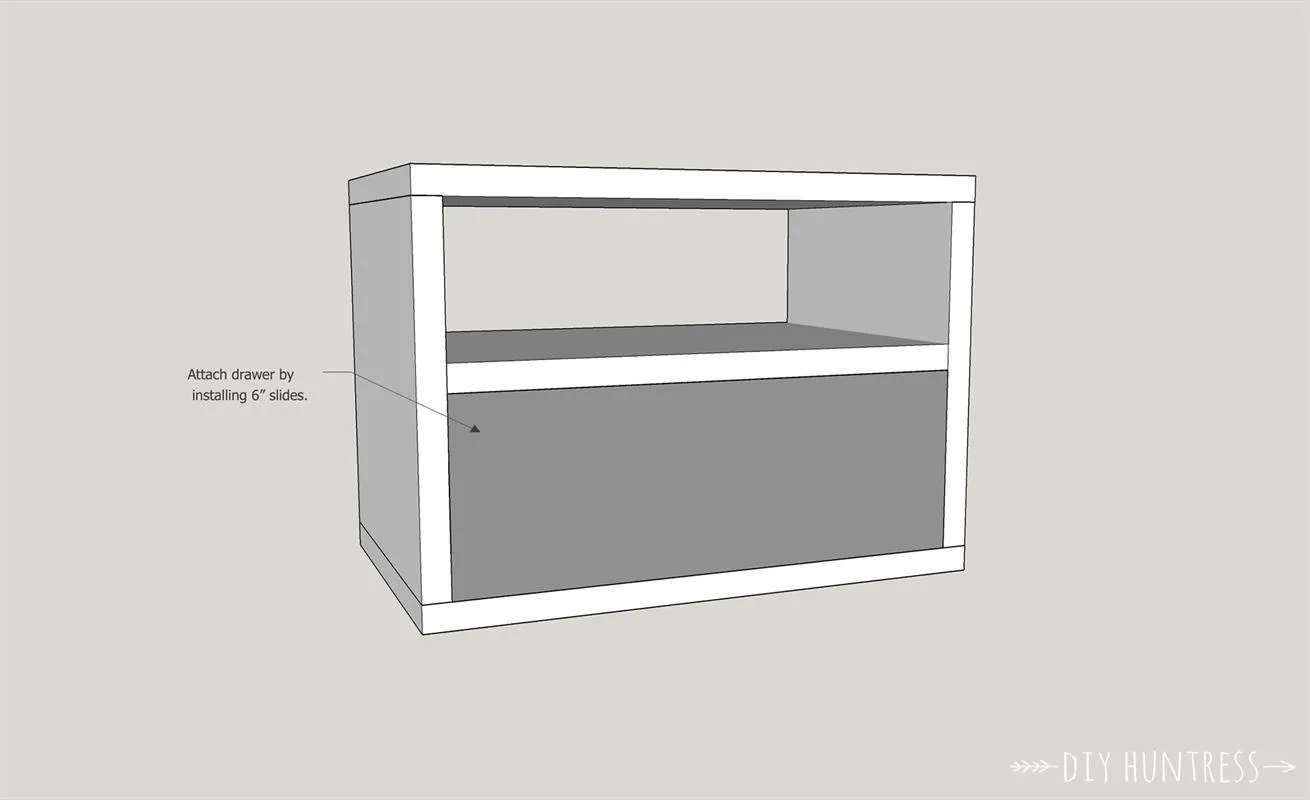
Install the drawer by adding 6" long drawer slides to the frame. Follow the directions provided with your drawer slides for installation.
7. Finish It Up
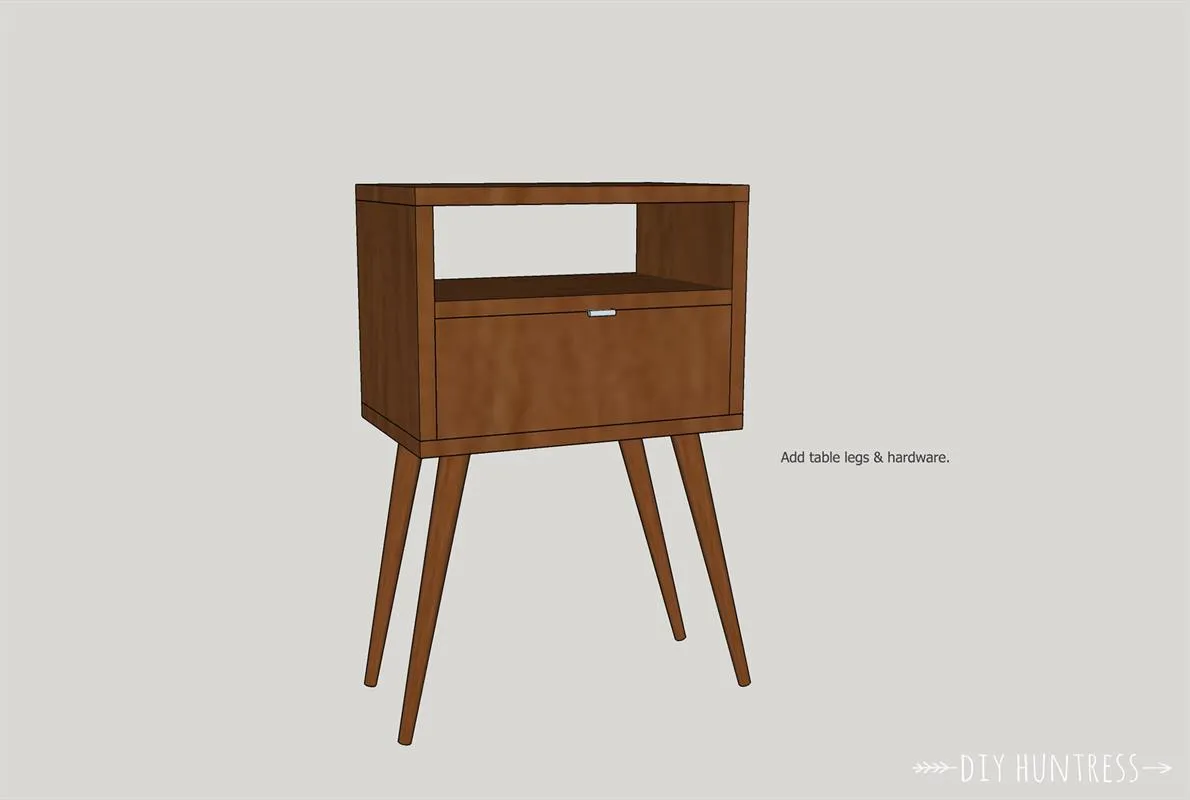
Fill all pocket holes and sand down the table. Once sanded, stain the piece and add hardware and legs (you can find links for the products I used on my blog).