Notch
Use your browser's Print (Ctrl/Cmd + P) and choose Save as PDF. This page works offline once you've opened it with a signal.
DIY File and Printer Cabinet
Build an easy DIY File cabinet for your home office.
- Difficulty
- Easy
- Time
- 2.8–5.3 hours
- Cost
- $$$
Cut list
| Part | Qty | T × W × L | Material | ✓ |
|---|---|---|---|---|
| Sides | 2 | 3/4" × 18" × 32" | — | ☐ |
| Top and bottom | 2 | 3/4" × 18" × 18" | — | ☐ |
| Shelf | 1 | 3/4" × 17" × 18" | — | ☐ |
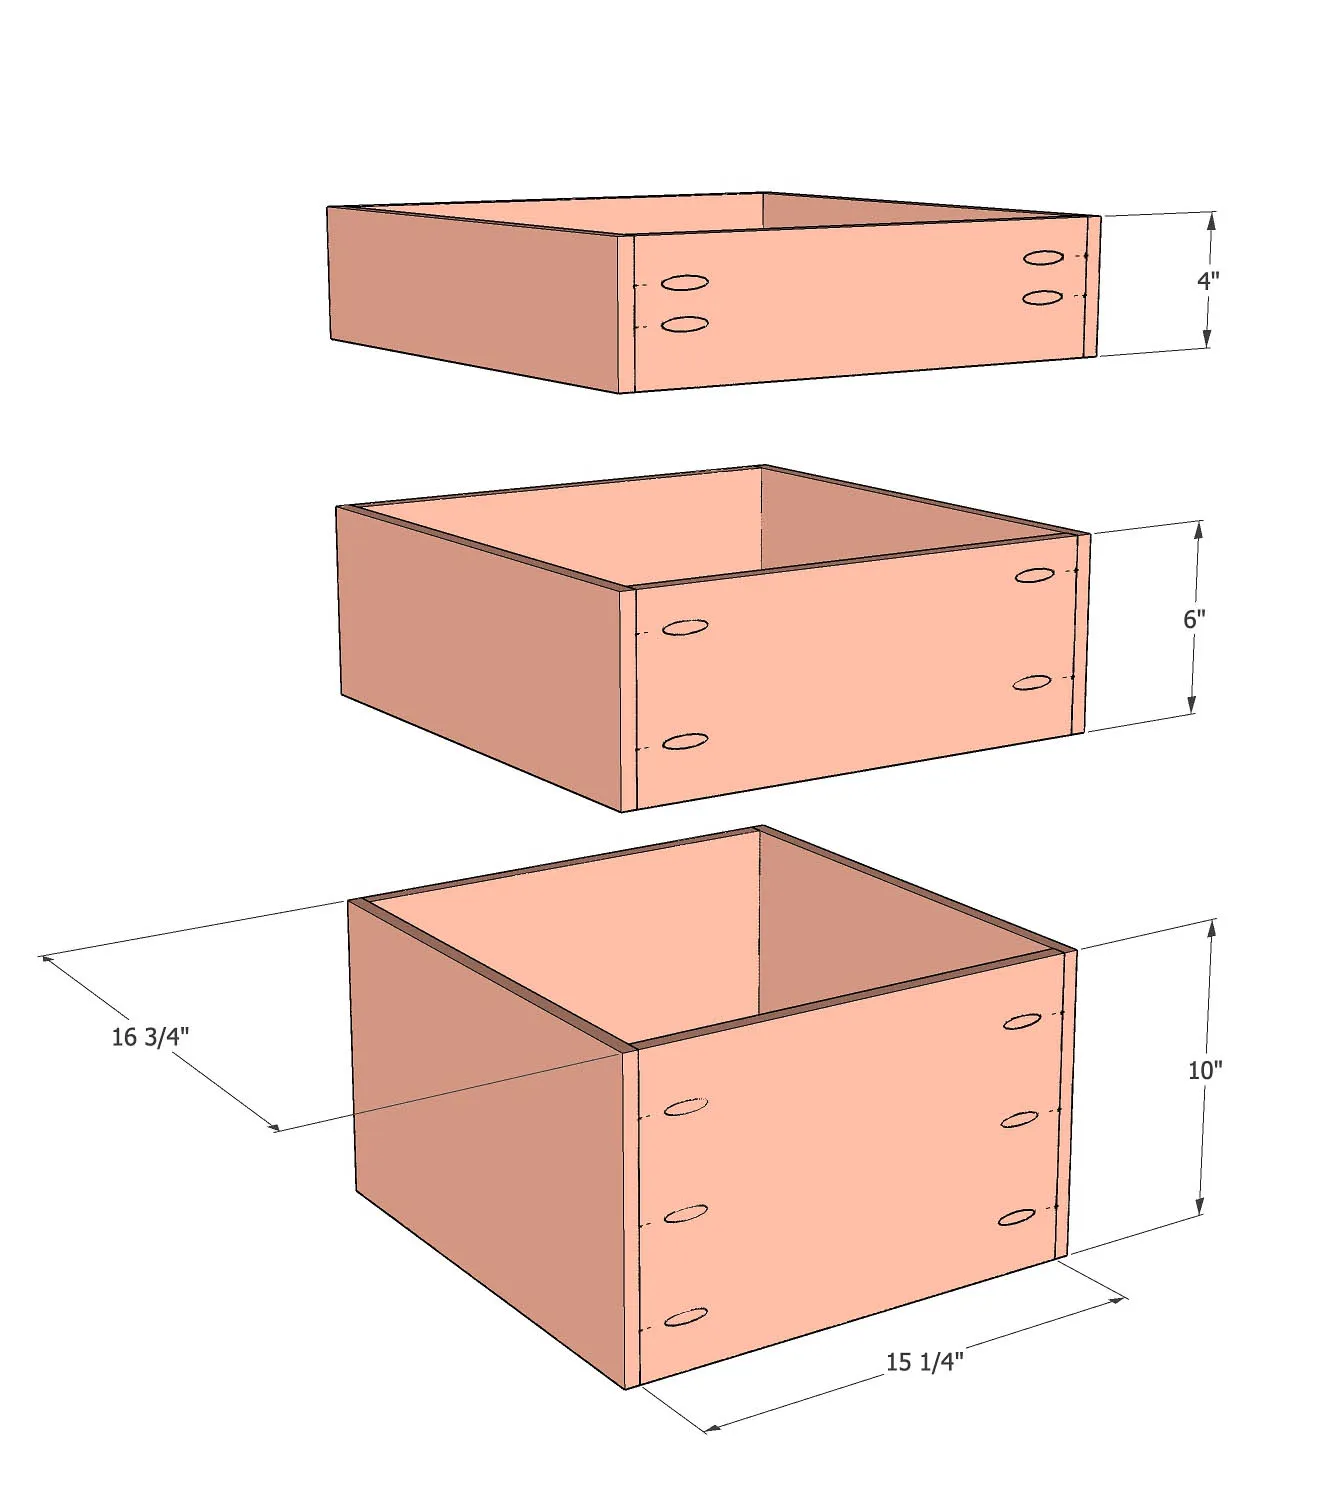
| Drawer box 1 sides | 2 | 1/2" × 10" × 16" | — | ☐ |
| Drawer box 1 front/back | 2 | 1/2" × 10" × 15" | — | ☐ |
| Drawer box 2 sides | 2 | 1/2" × 6" × 16" | — | ☐ |
| Drawer box 1 front/back | 2 | 1/2" × 6" × 15" | — | ☐ |
| Drawer box 3 sides | 2 | 1/2" × 4" × 16" | — | ☐ |
| Drawer box 1 front/back | 2 | 1/2" × 4" × 15" | — | ☐ |
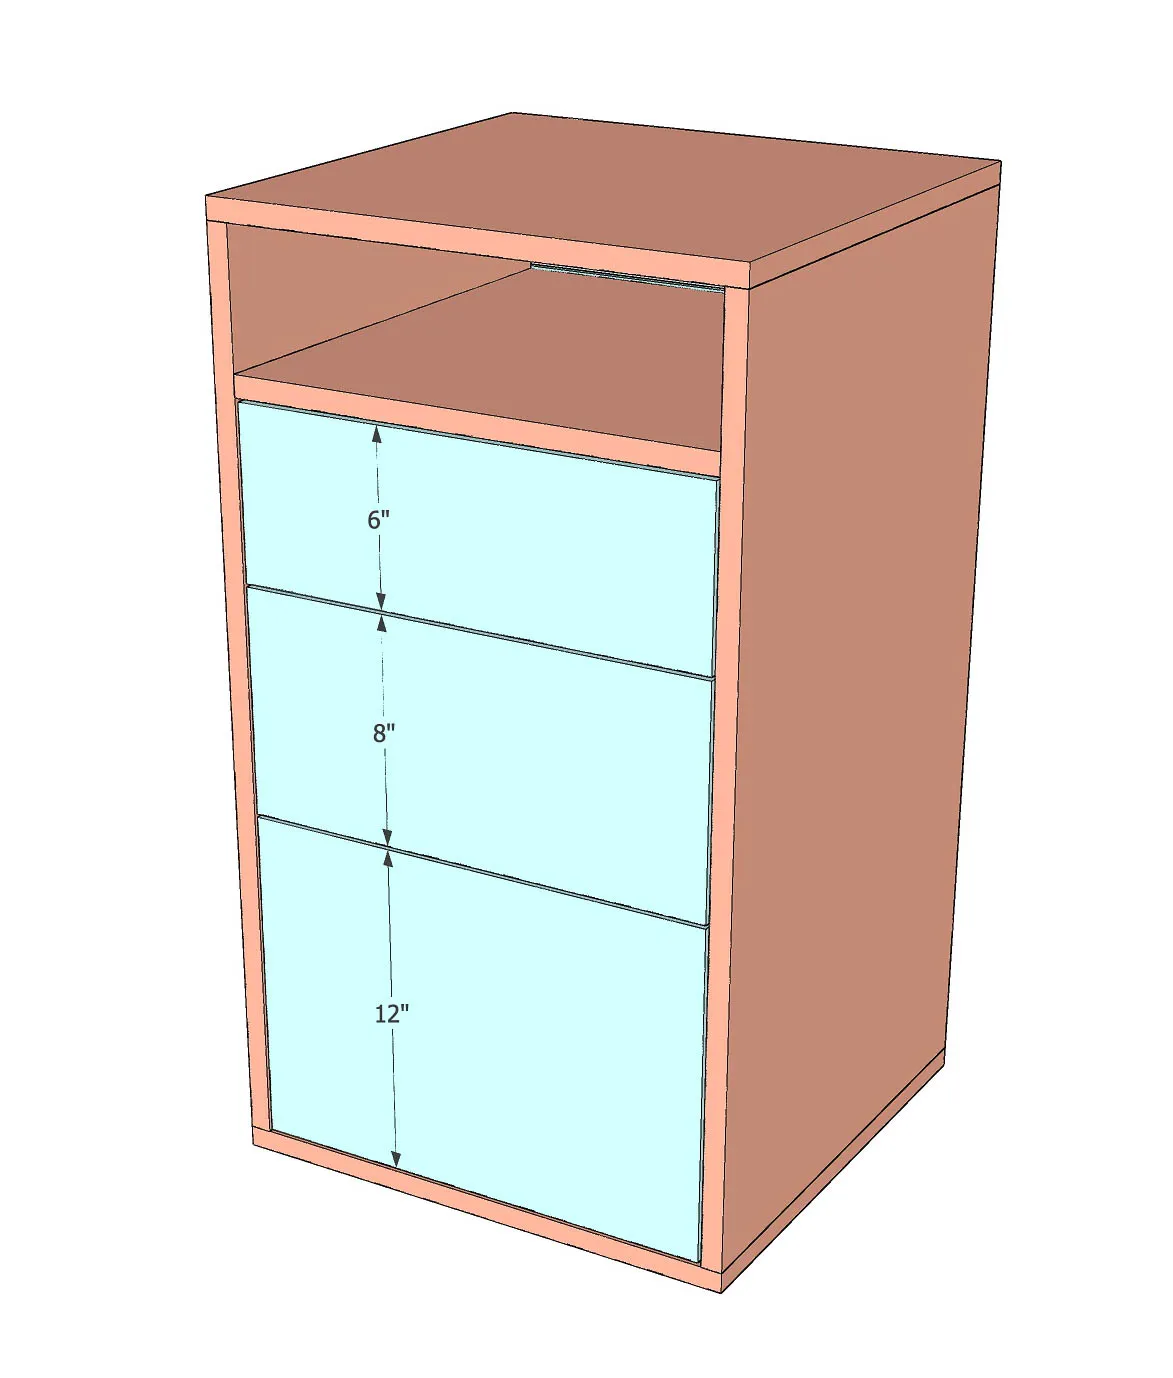
| Drawer Front 1 | 1 | 3/4" × 12" × 17" | — | ☐ |
| Drawer Front 2 | 1 | 3/4" × 8" × 17" | — | ☐ |
| Drawer Front 3 | 1 | 3/4" × 6" × 17" | — | ☐ |
Materials
| Item | Qty | ✓ |
|---|---|---|
| Plywood, 4' x 8' 3/4" | 1 board | ☐ |
| Plywood, 4' x 4' 1/2" | 1 board | ☐ |
| Plywood, 4' x 4' 1/4" | 1 board | ☐ |
| 1-1/4" pocket hole screws | 25 each | ☐ |
| 1" coarse thread pan head pocket hole screws | 25 each | ☐ |
| Drawer slides | 6 each | ☐ |
| Hanging file rails | 2 each | ☐ |
| Drawer pulls | 3 each | ☐ |
| Casters or feet | 4 each | ☐ |
Overall cost: $$$. Lumber varies by region, species, and season, so we give a band rather than a figure.
Tools
- Circular Saw
- Drill / Driver
- Miter Saw
- Pocket Hole Jig
- Bar / Pipe Clamps — optional
Instructions
1. Attach Top and Bottom
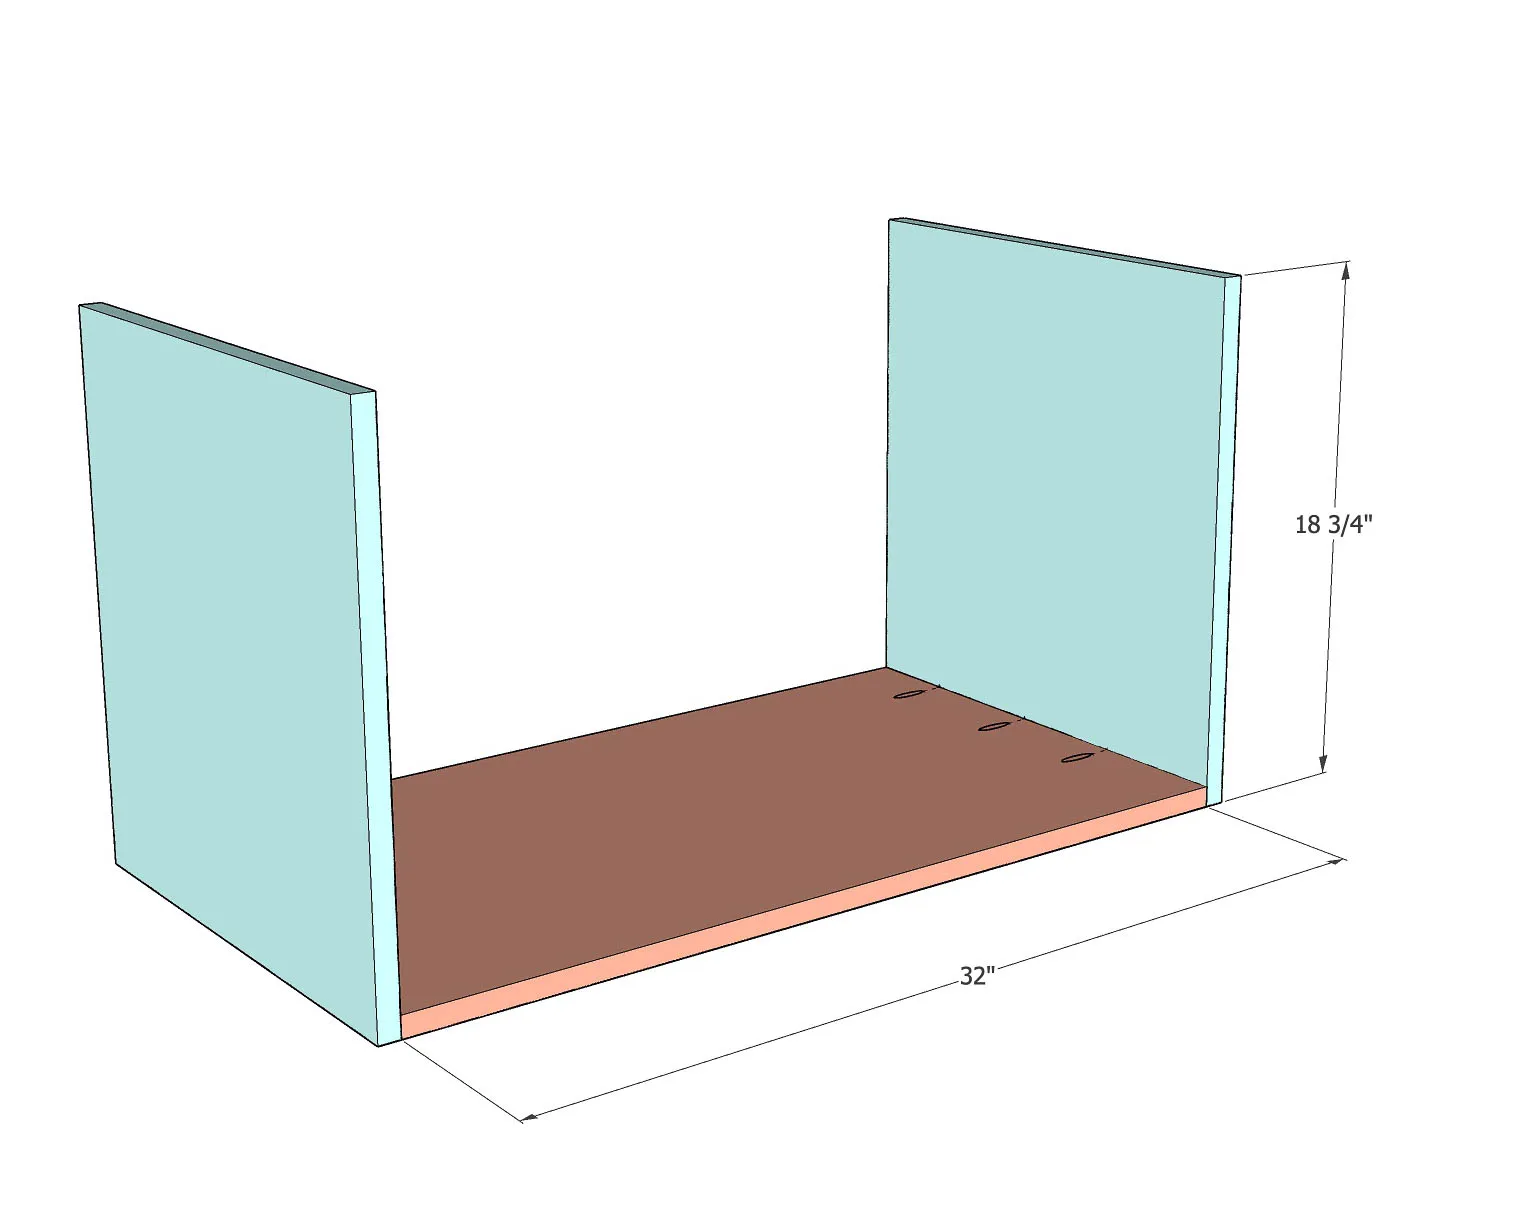
Attach the top and bottom to the side plywood using wood glue and pocket hole screws. The pocket hole screws are on the inside. Use 1-1/4" pocket hole screws.
2. Attach shelf
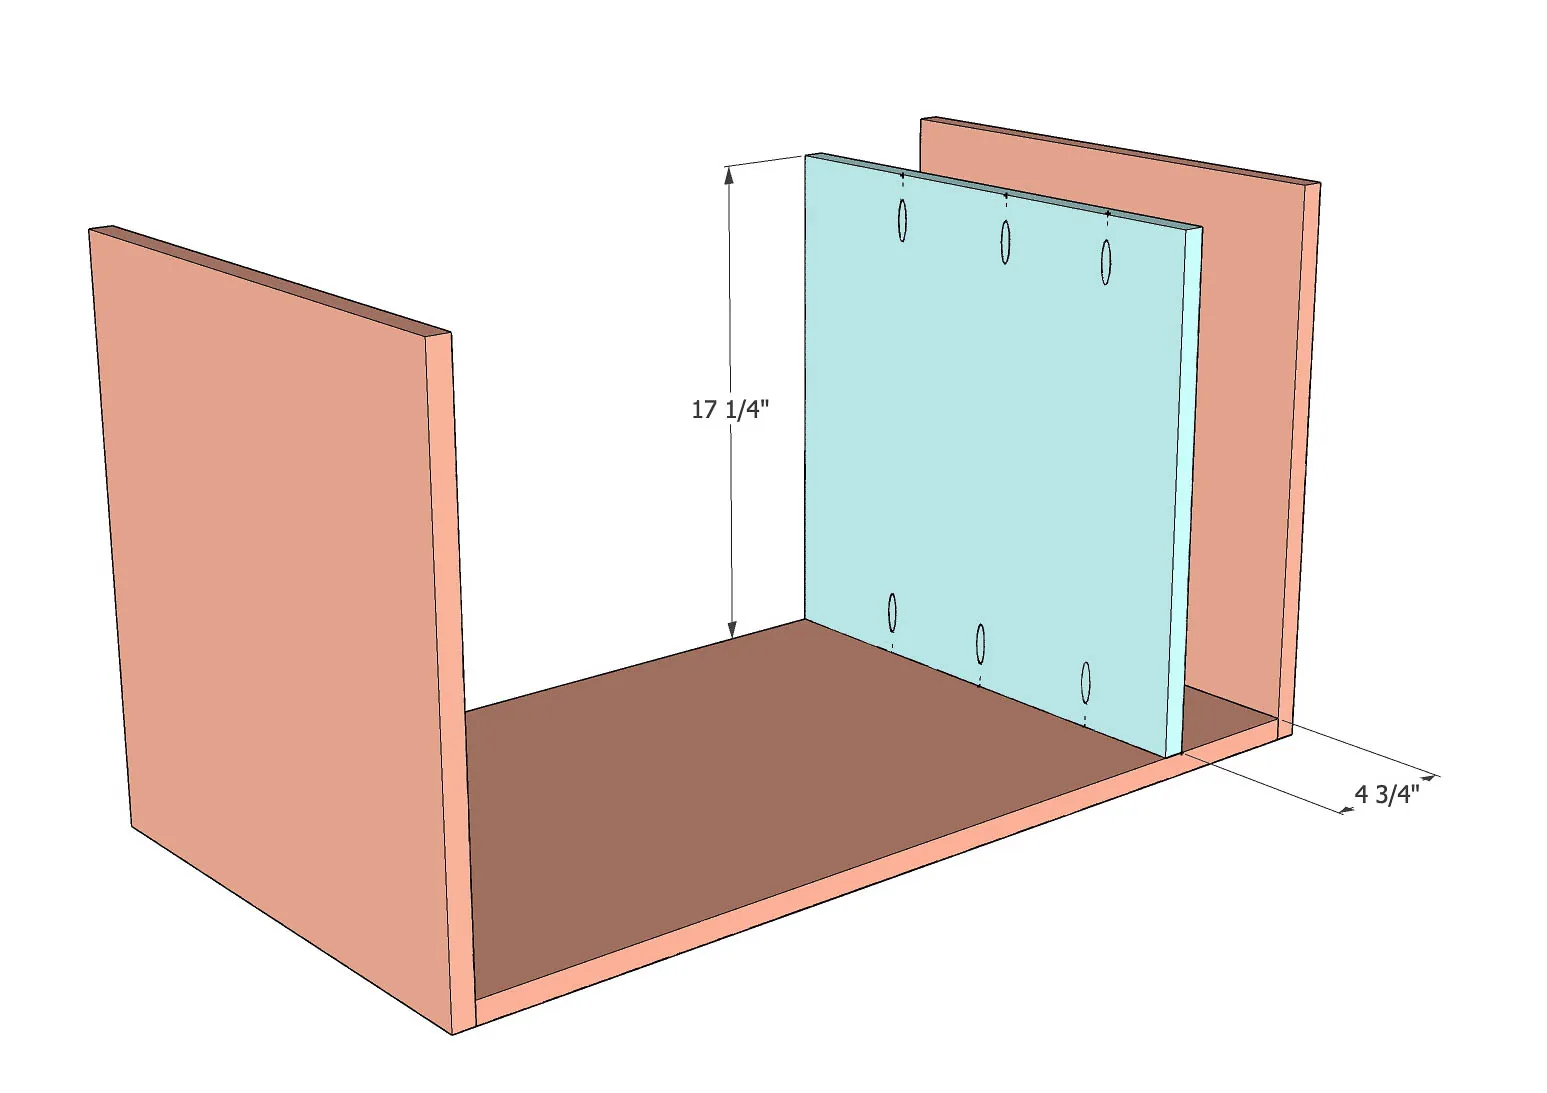
Attach the shelf as shown using wood glue and 1-1/4" pocket hole screws. You can clamp a scrap 2x4 board to help keep the shelf aligned as you attach it.
3. Complete the cabinet
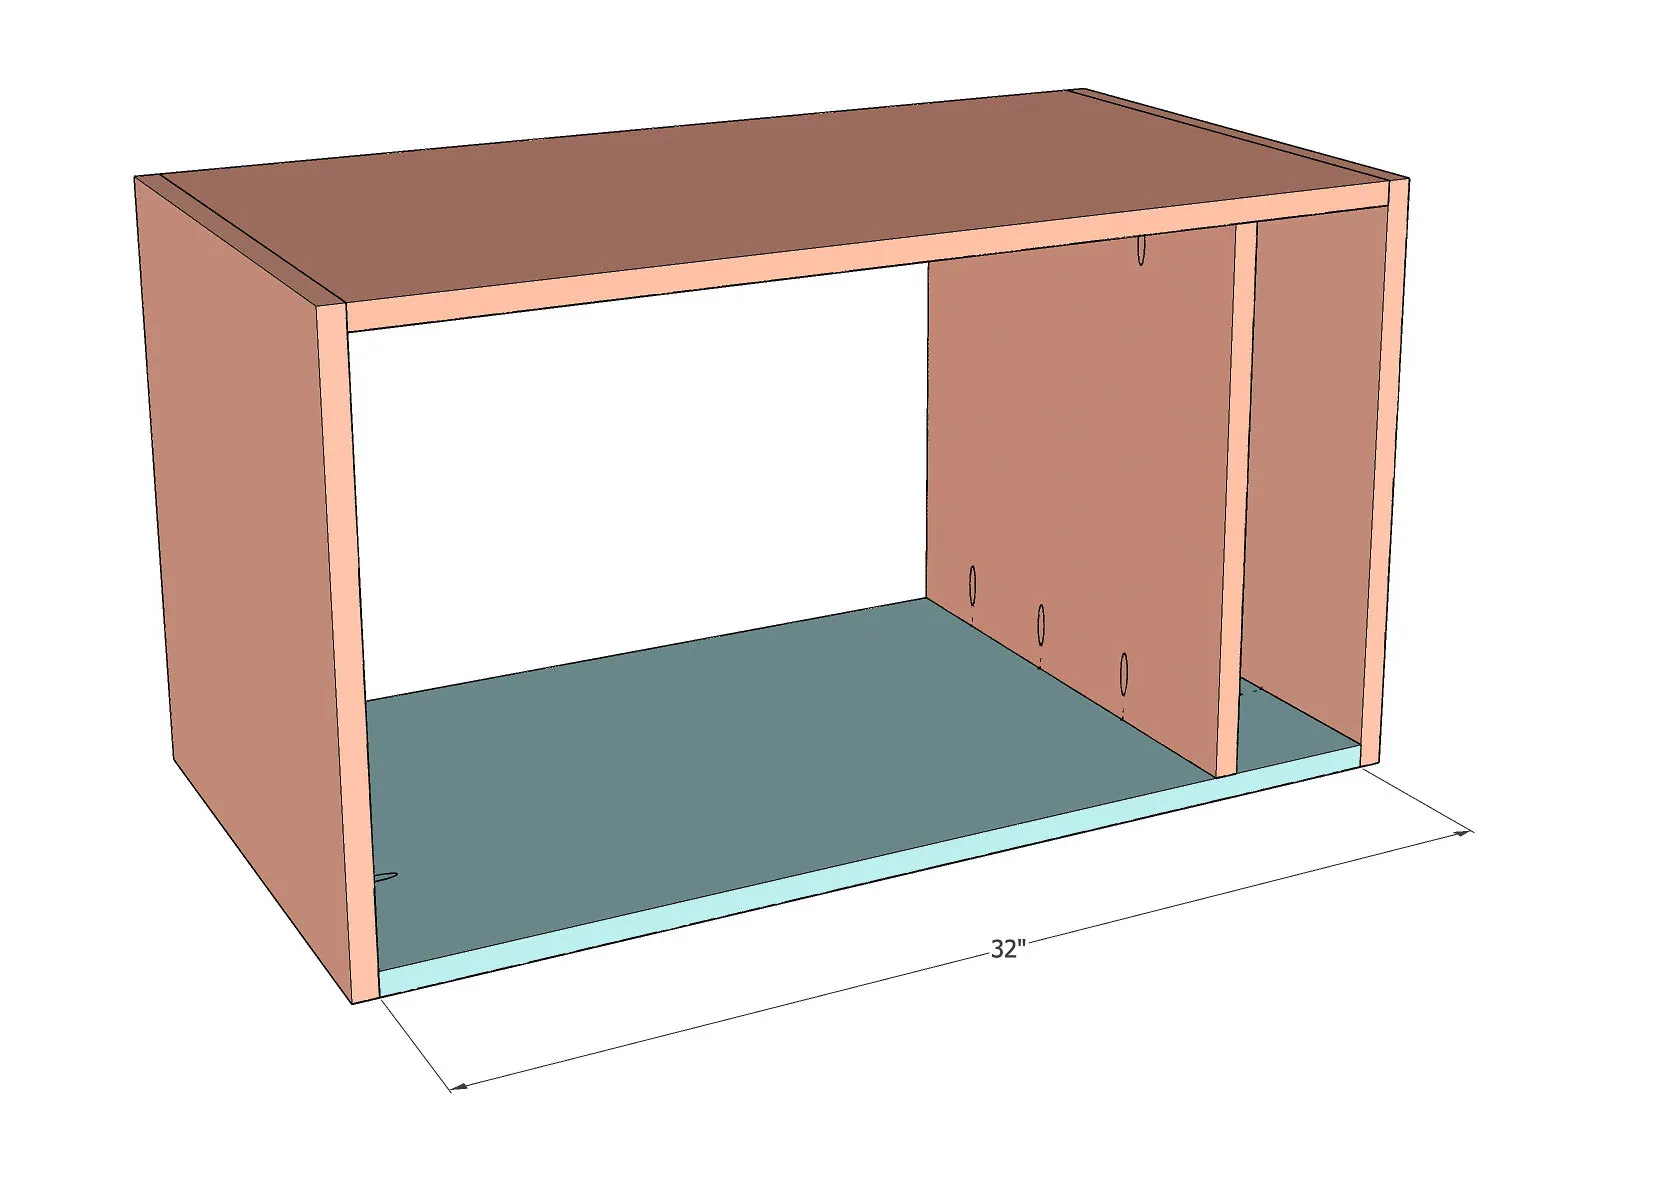
Attach the remaining side using pocket hole screws and wood glue to complete the cabinet.
4. Build and install the drawers
Build the three drawers using pocket hole screws and wood glue. Since we are using 1/2" plywood, we use 1" screws. There are three drawers with the exact same depth and width but different heights. Install the drawers into the cabinet built above using drawer slides. Full extension ball bearing drawer slides are highly recommended.
5. Install the drawer fronts
Attach drawer fronts to the drawers. These are inset drawers. You can use the Hardware jig to attach drawer hardware.
6. Finishing touches
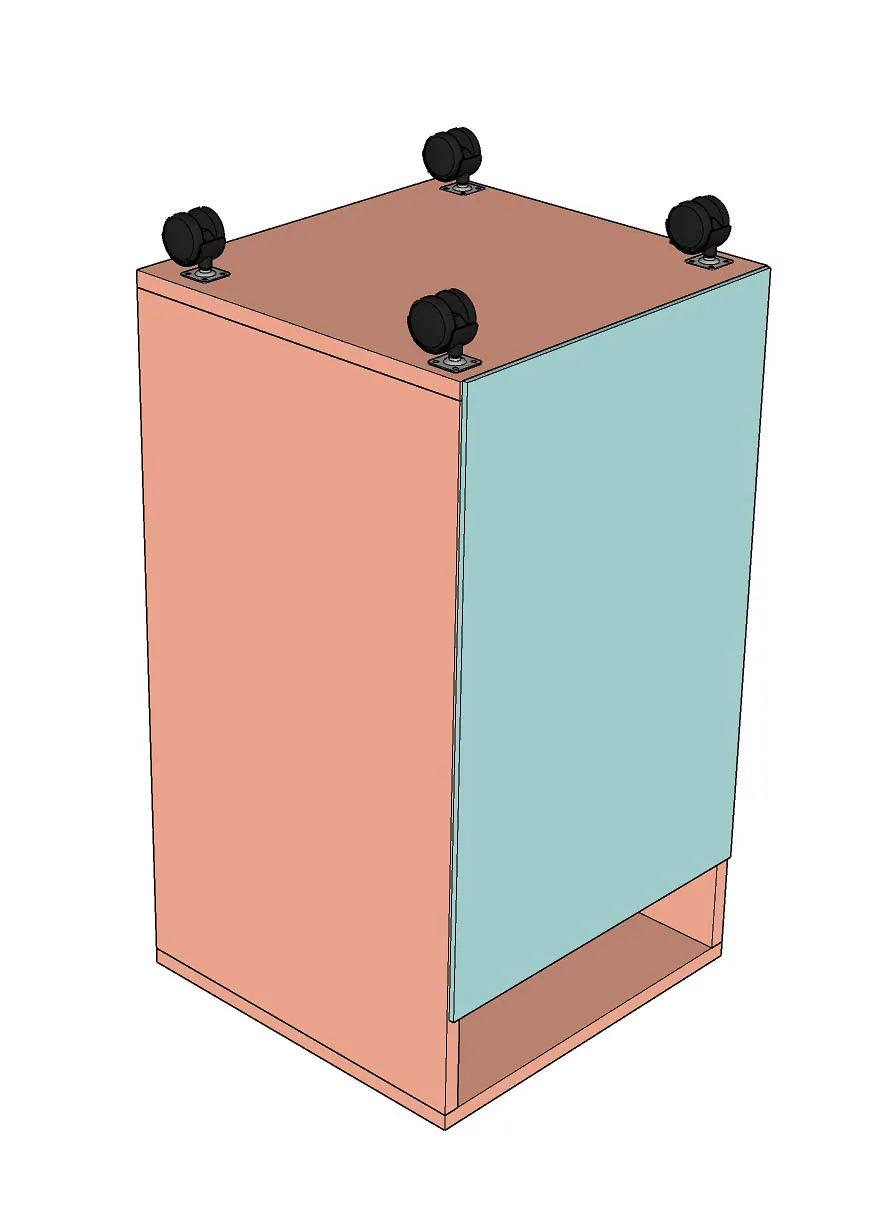
- Add a 1/4" plywood to the back of the cabinet. The plywood is cut 1/8" smaller on all sides so the edges aren't visible. Install casters or stationary feet as desired.
- Add hanging file rails on the sides of the bottom drawer.