 Notch
NotchUse your browser's Print (Ctrl/Cmd + P) and choose Save as PDF. This page works offline once you've opened it with a signal.
DIY Custom Craft Closet
Turn any closet into the craft closet of your dreams with this easy DIY custom craft closet.
- Difficulty
- Intermediate
- Time
- 4.3–8.3 hours
- Cost
- $$$
Cut list
| Part | Qty | T × W × L | Material | ✓ |
|---|---|---|---|---|
| Top | 1 | 3/4" × 13" × 42" | — | ☐ |
| Sides | 4 | 3/4" × 12" × 32" | — | ☐ |
| Base support 1 | 2 | 3/4" × 12" × 13" | — | ☐ |
| Base Support 2 | 1 | 3/4" × 12" × 12" | — | ☐ |
| Small drawer fronts | 3 | 3/4" × 4" × 12" | — | ☐ |
| Large drawer fronts | 2 | 3/4" × 7" × 12" | — | ☐ |
| Shelves | 5 | 3/4" × 12" × 13" | — | ☐ |
| Small drawer side 1 | 6 | 3/4" × 2" × 10" | — | ☐ |
| Small drawer side 2 | 6 | 3/4" × 2" × 11" | — | ☐ |
| Large drawer side 1 | 4 | 3/4" × 5" × 10" | — | ☐ |
| Large drawer side 2 | 4 | 3/4" × 5" × 11" | — | ☐ |
Materials
| Item | Qty | ✓ |
|---|---|---|
| Plywood, 3/4" Thick Full Sheet | 1 board | ☐ |
| Plywood, 1/4" Thick Quarter Sheet | 1 board | ☐ |
| Board, 1x3 96" | 2 board | ☐ |
| Board, 1x6 96" | 1 board | ☐ |
| Board, 1x5 96" | 1 board | ☐ |
| Board, 1x8 48" | 1 board | ☐ |
| Board, 3/4" x 3/4" 48" | 5 board | ☐ |
| 1 1/4" pocket hole screws | 50 each | ☐ |
| 10" drawer slides | 5 each | ☐ |
| Sets of shelf pins | 5 each | ☐ |
| Drawer knobs/pulls | 5 each | ☐ |
Overall cost: $$$. Lumber varies by region, species, and season, so we give a band rather than a figure.
Tools
- Brad Nailer
- Circular Saw
- Drill / Driver
- Miter Saw
- Pocket Hole Jig
- Table Saw
- Bar / Pipe Clamps — optional
- Tape Measure — optional
Instructions
1. Attach base supports
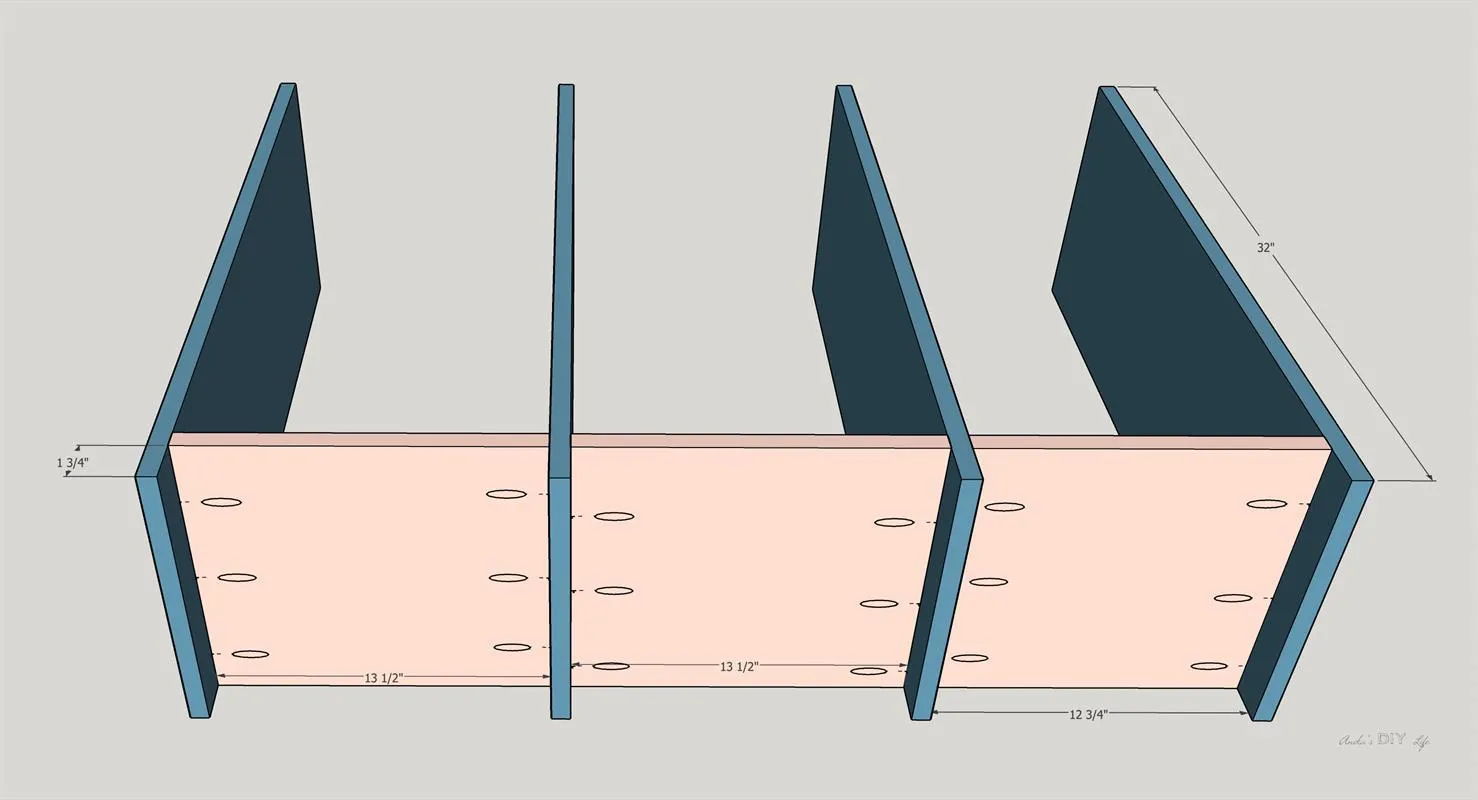
Build the basic frame by attaching base supports to the sides as shown in the figure. They are 1 3/4" off of the bottom. Note - I chose to make one of the three sections narrow than the others. But you can make them any width you like. Be sure to cut the base supports and back supports accordingly.
2. Build Drawers
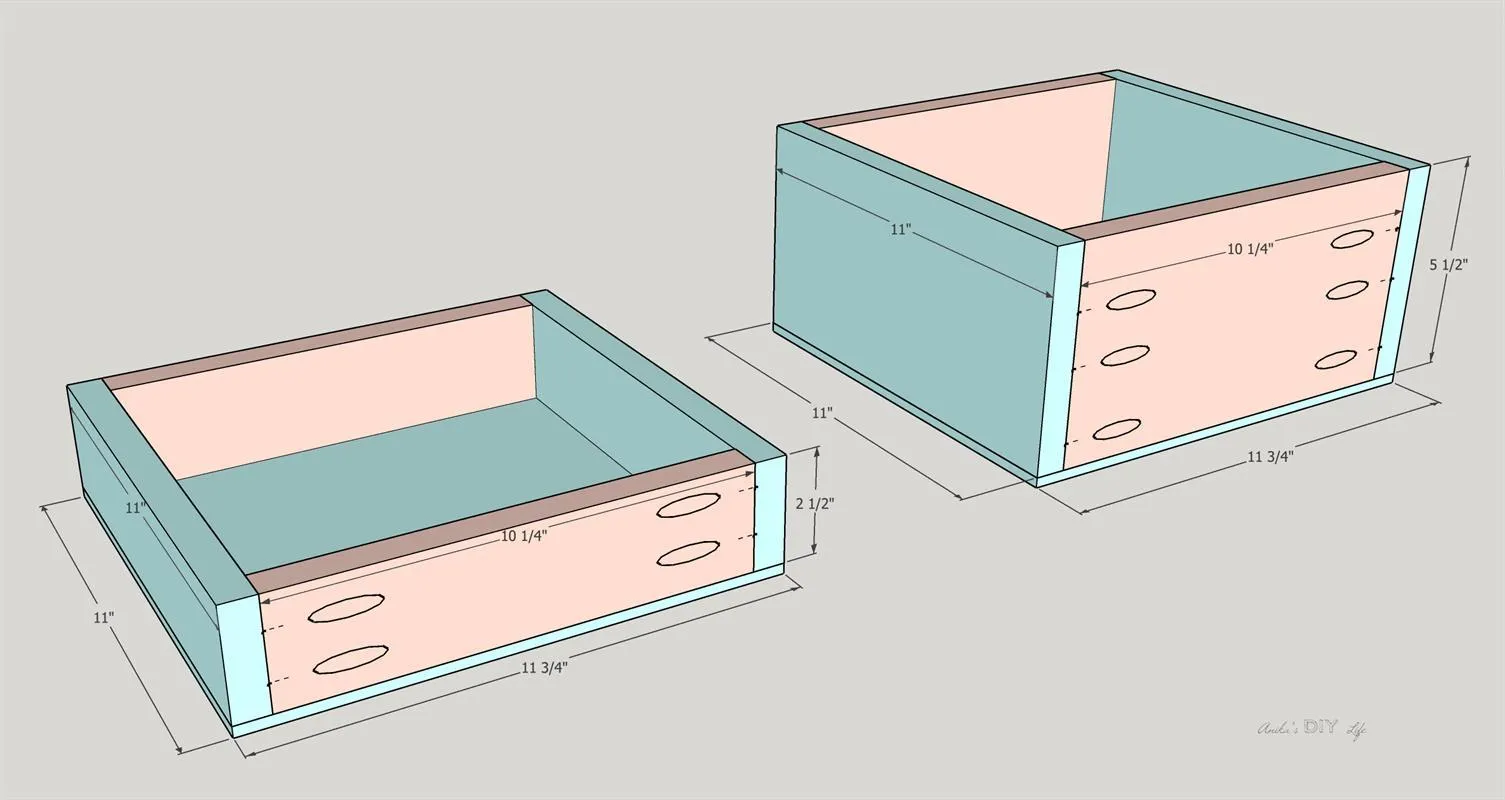
Build 5 drawers using pocket hole screws and wood glue - 3 using 1x3 boards and 2 using 1x6 boards as shown. The base is 1/4" plywood.
3. Add shelf and drawer slides
Before attaching to the closet, make shelf pin holes using the Shelf Pin Jig. Also, attach the drawer slides and test the drawers for fit. The Drawer Slide Jig makes this quick and easy. I did this before attaching to the wall because it is easier to clamp jigs and reach in behing the shelves.
4. Attach back support
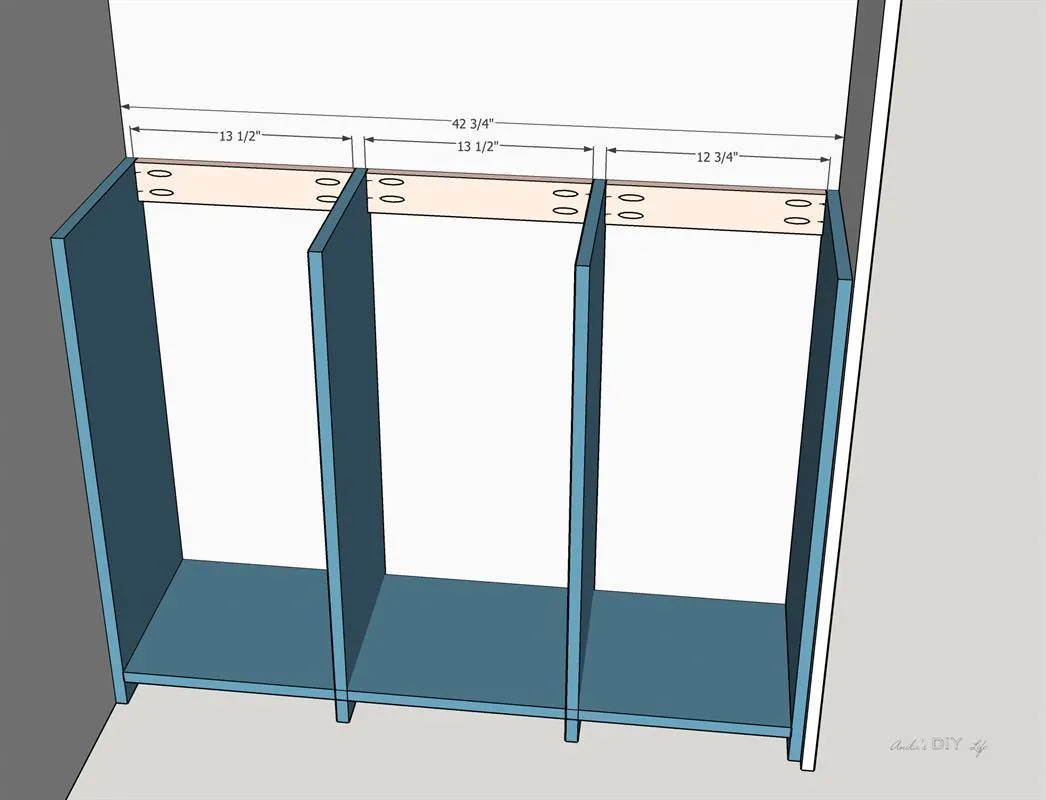
Attach the organizer to the wall using 1x3 back supports. These supports are attached using 1 1/4" pocket hole screws to the sides. Use 3" screws to attach the back supports to the studs in the wall.
5. Add the top
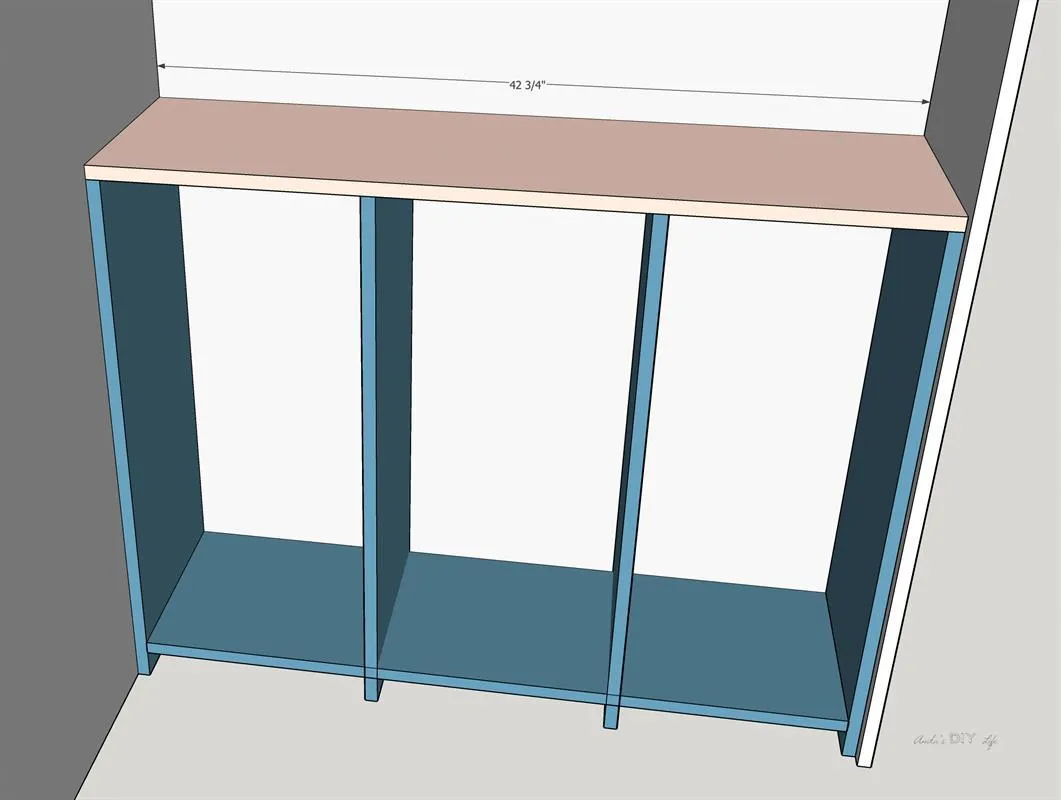
Now add the top and attach using wood glue and 1-1/4" finish nails to the base.
6. Attach trim
Attach 3/4" square dowels as trim along the sides and the top to cover the plywood edges using wood glue and 1-1/4" finish nails. For the toe kick, attach a 1x3 board using wood glue and 1-1/4" finish nails.
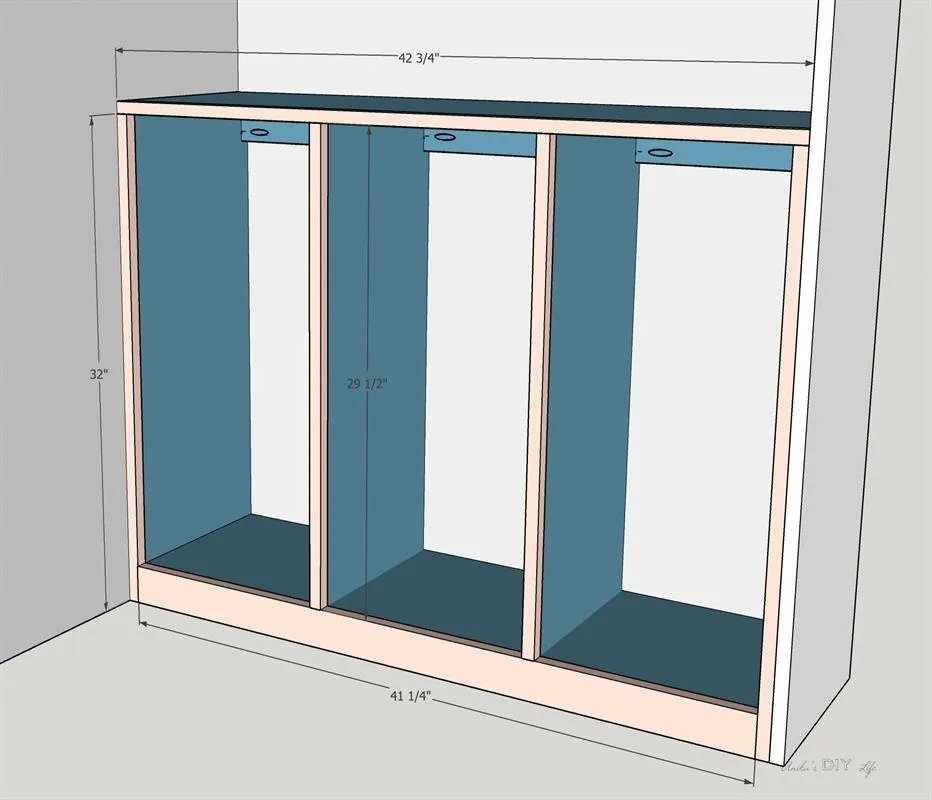
7. Add drawer fronts
Finally, attach drawer fronts to the drawers leaving 1/8" gap on all sides. Also, add the shelves.
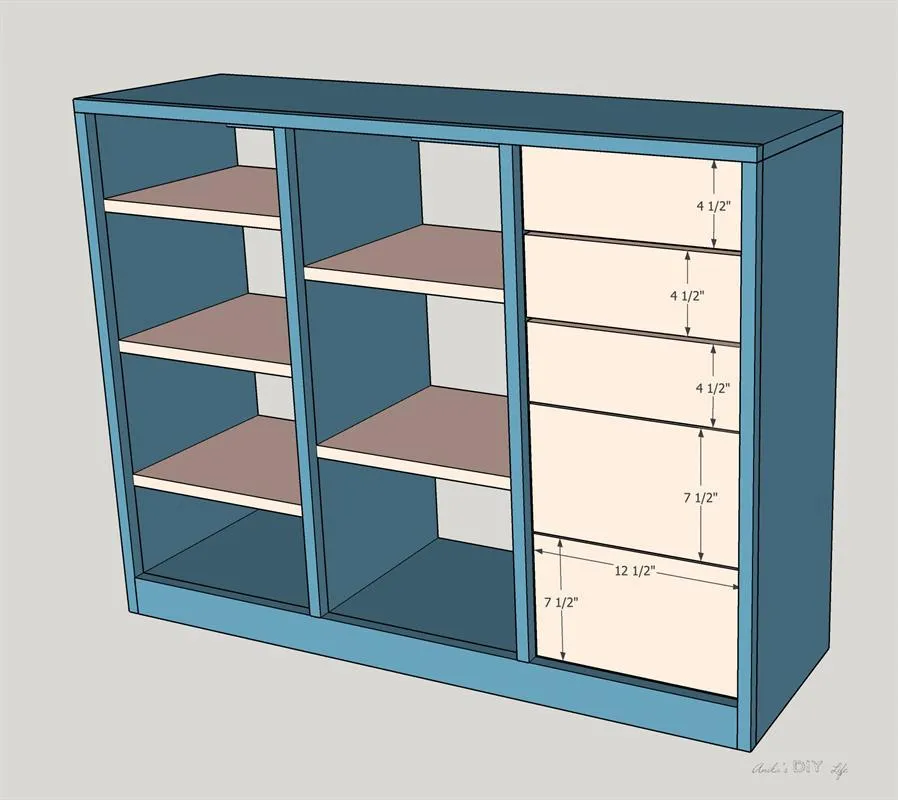
8. Add pegboard (optional)
If you would like to add a pegboard, mark the studs and attach 1x3 boards using 3" screws into the studs. Attach pegboard to the 1x3 boards using 1 1/4" screws.
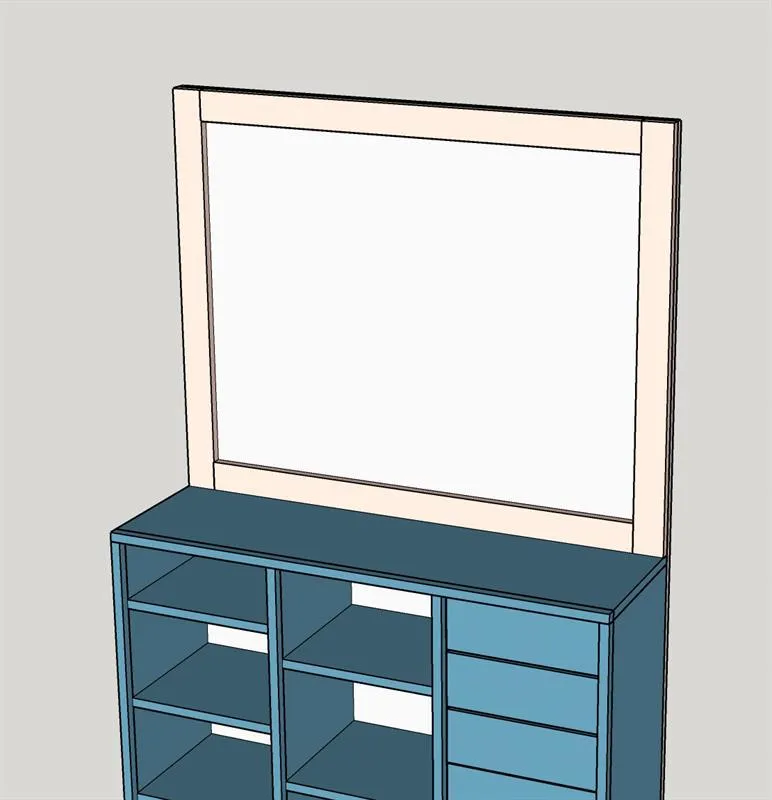
9. Finish the project
- Fill any visible nail holes and sand.
- Stain or paint in color of your choice. I decided to add contact paper to the top.
- Add drawer pulls or knobs using the cabinet hardware jig.
10. More Details
Check out more details and pictures of the process at - https://www.anikasdiylife.com/diy-craft-closet-organizer-plans/