Notch
NotchUse your browser's Print (Ctrl/Cmd + P) and choose Save as PDF. This page works offline once you've opened it with a signal.
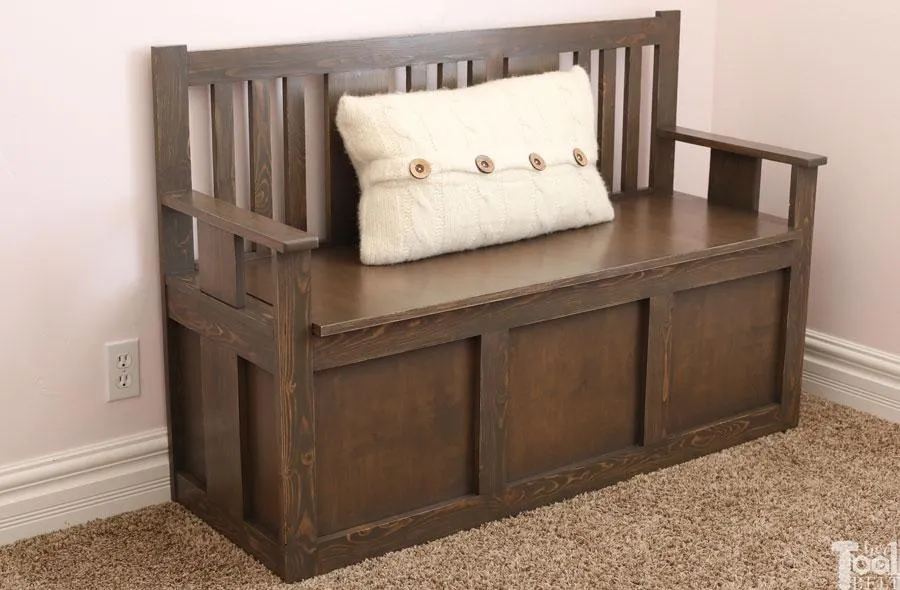
Craftsman Toy Box Bench
Craftsman style bench that doubles as a toy box.
- Difficulty
- Expert
- Time
- 7.8–15.3 hours
- Cost
- $$$
Cut list
| Part | Qty | T × W × L | Material | ✓ |
|---|---|---|---|---|
| Box Front | 1 | 3/4" × 17" × 48" | — | ☐ |
| Box Back | 1 | 3/4" × 17" × 48" | — | ☐ |
| Box Bottom | 1 | 3/4" × 14" × 48" | — | ☐ |
| Box Top | 1 | 3/4" × 17" × 46" | — | ☐ |
| Box Side | 2 | 3/4" × 16" × 17" | — | ☐ |
| Long Slat | 4 | 3/4" × 2" × 46" | — | ☐ |
| Back Leg | 2 | 3/4" × 2" × 34" | — | ☐ |
| Front Trim | 2 | 3/4" × 2" × 12" | — | ☐ |
| Front Leg | 2 | 3/4" × 2" × 23" | — | ☐ |
| Side Rail | 6 | 3/4" × 2" × 16" | — | ☐ |
| Arm Rest | 2 | 3/4" × 2" × 17" | — | ☐ |
| Back Slat Wide | 2 | 3/4" × 5" × 13" | — | ☐ |
| Side Trim | 2 | 3/4" × 5" × 12" | — | ☐ |
| Arm Trim | 2 | 3/4" × 5" × 5" | — | ☐ |
| Back Slat Thin | 9 | 3/4" × 1" × 13" | — | ☐ |
Materials
| Item | Qty | ✓ |
|---|---|---|
| Plywood, 3/4" Thick Full Sheet | 1 board | ☐ |
| Board, 1x3 96" | 5 board | ☐ |
| Board, 1x6 72" | 1 board | ☐ |
| Board, 1x2 96" | 2 board | ☐ |
| 1 1/4" pocket hole screw | 100 each | ☐ |
| Full overlay frameless euro hinges | 2 each | ☐ |
| Wood glue | 1 each | ☐ |
| Briar Smoke Stain | 1 each | ☐ |
| Satin Polyurethane | 1 each | ☐ |
| Sandpaper (80, 120, 220) | 3 each | ☐ |
| 1 1/4" brad nails | 20 each | ☐ |
| Wood Putty | 1 each | ☐ |
| 46 1/2" Plywood Edge Banding | 1 each | ☐ |
Overall cost: $$$. Lumber varies by region, species, and season, so we give a band rather than a figure.
Tools
- Brad Nailer
- Drill / Driver
- Miter Saw
- Pocket Hole Jig
- Random Orbit Sander
- Bar / Pipe Clamps — optional
- Tape Measure — optional
Instructions
1. Cut Plywood
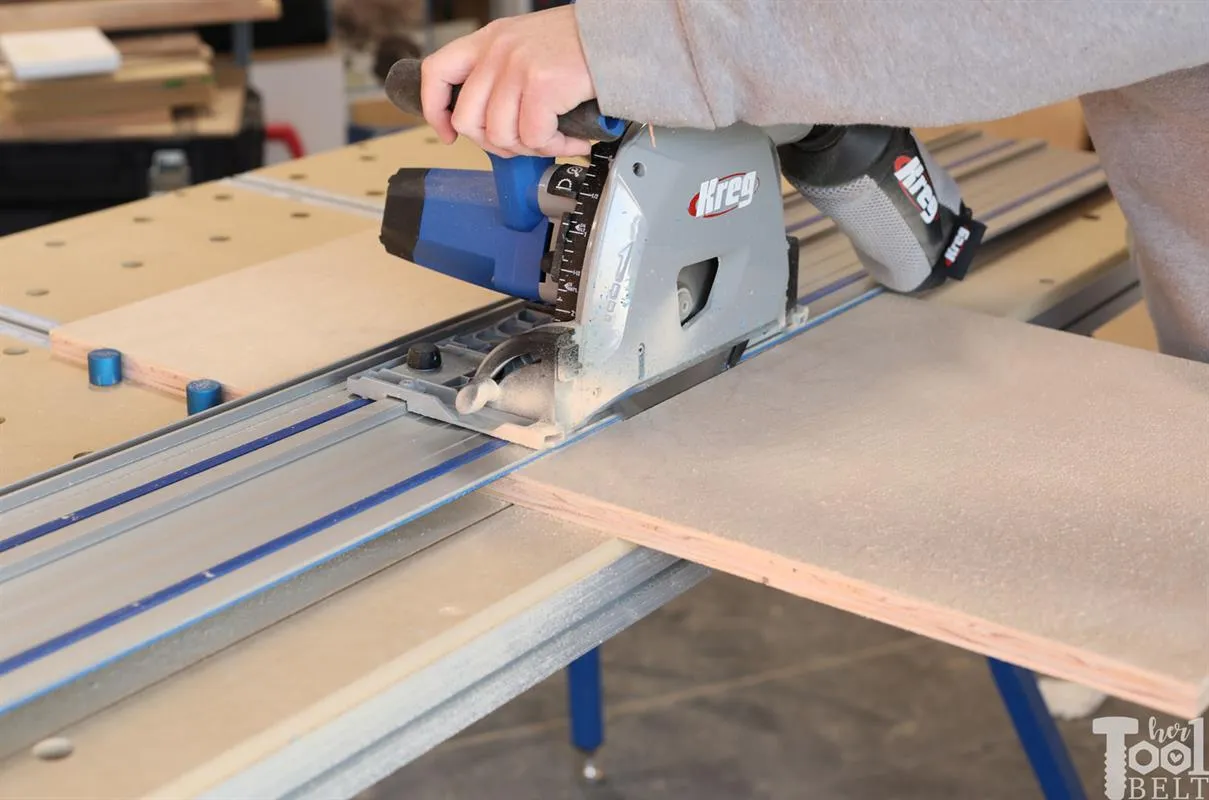
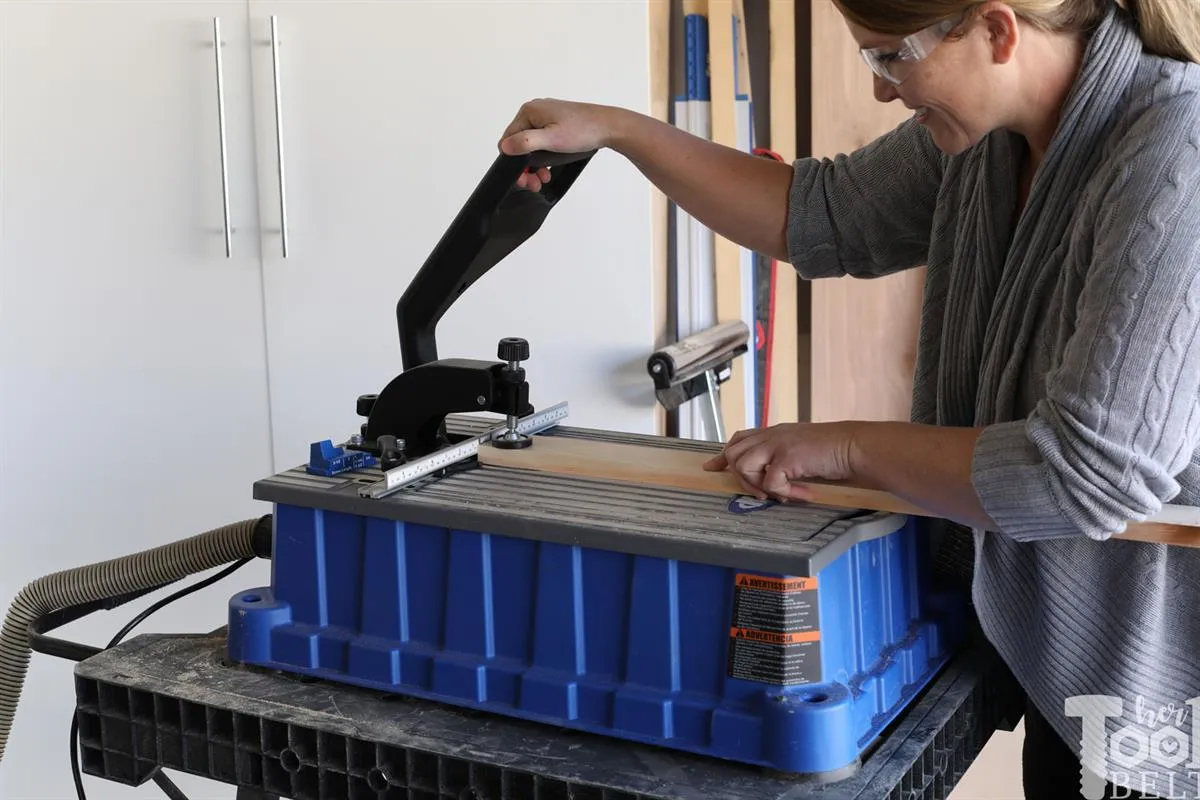
Cut down the plywood according to the plywood cut list and diagram. I used the Adaptive Cutting System to easily cut the plywood down to size.
2. Cut Boards
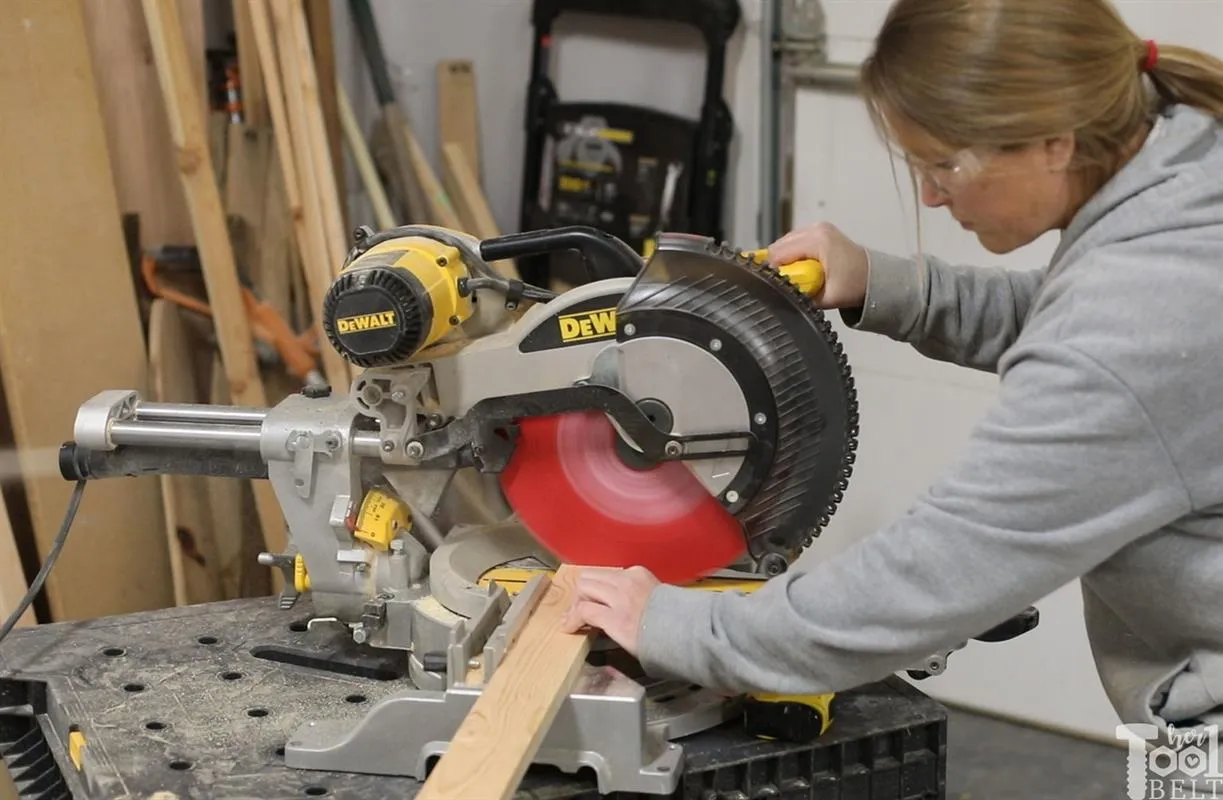
Cut the boards according to the board cut list and diagram. I used a miter saw to make the cuts. Note: You may want to wait to make the 'trim' board cuts until you can measure and cut to fit.
3. Plywood Pocket Holes
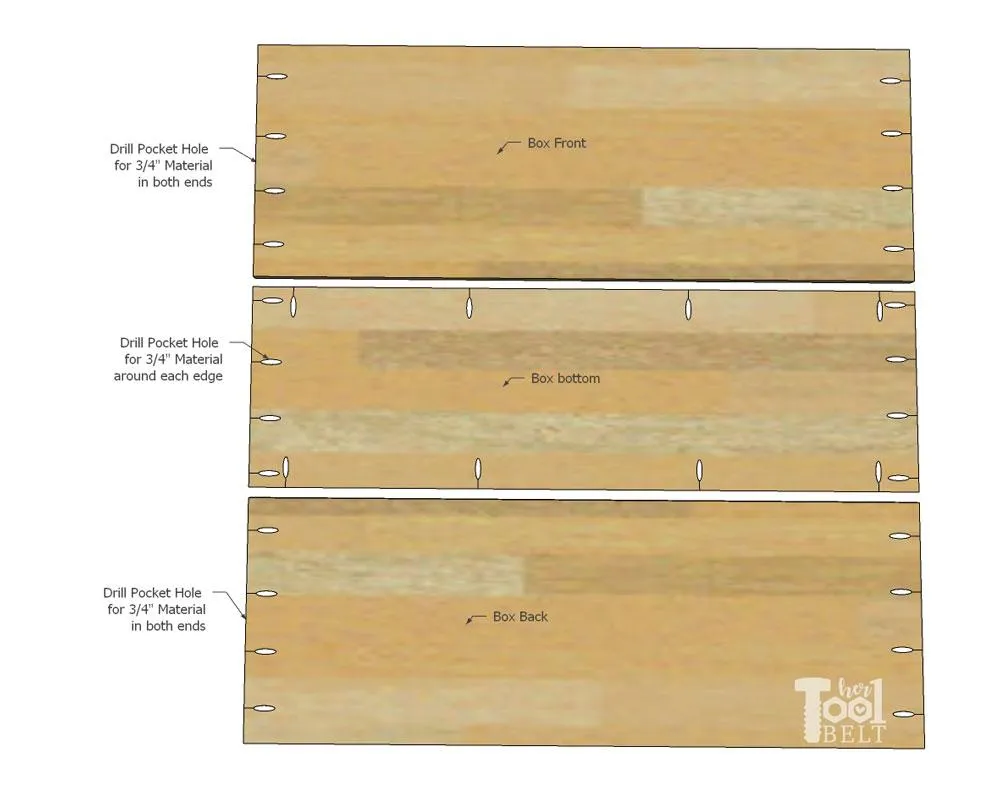
In the box front and back plywood pieces, drill pocket holes for 3/4" material in both ends. In the box bottom plywood piece, drill pocket holes for 3/4" material in all sides.
4. Board Pocket Holes
Drill 2 pocket holes for 3/4" material in both ends of the following boards: 2 - long slats, 6 - side rails, 2 - back slat wide, 9 - back slat thin. Also drill 2 pocket holes for 3/4" material in one end of the 2 - arm rest boards.
5. Bench Side Assembly
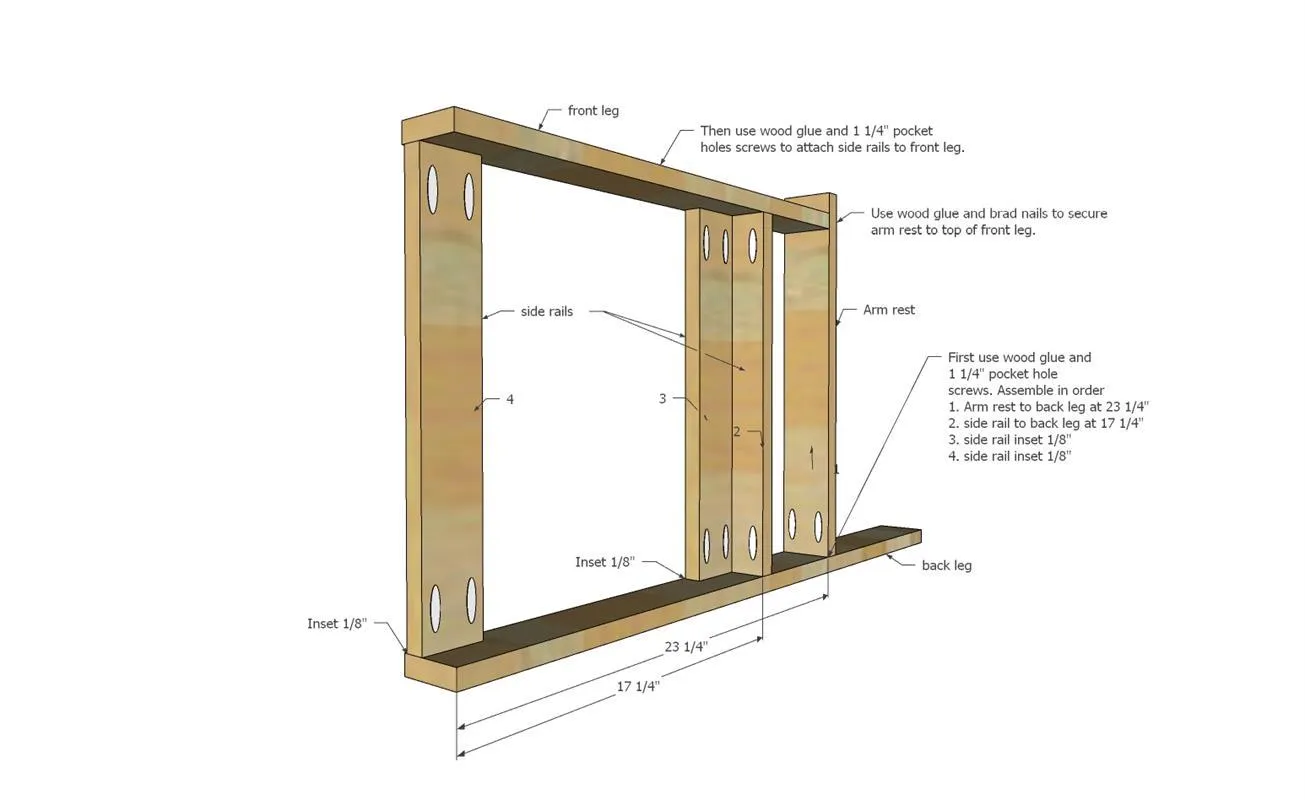
- On the back legs, measure and mark 17 1/4" and 23 1/4" from the bottom. On the front legs, measure and mark 17 1/4". Use wood glue and 1 1/4" pocket hole screws to attach the arm rest to the back leg at 23 1/4" (bottom side). Use wood glue and 1 1/4" pocket hole screws to attach a side rail to the back leg at 17 1/4" (bottom side). Inset a side rail 1/8" from the back leg side and butt up against the side rail at 17 1/4", secure with glue and screws. Inset a side rail 1/8" at the bottom of the leg and attach with glue and screws.
- Repeat for front leg, and use wood glue and 1 1/4" brad nails to attach arm rest on front leg top.
- Repeat for other bench side, except IT MUST BE MIRROR IMAGE.
6. Insert Side Plywood
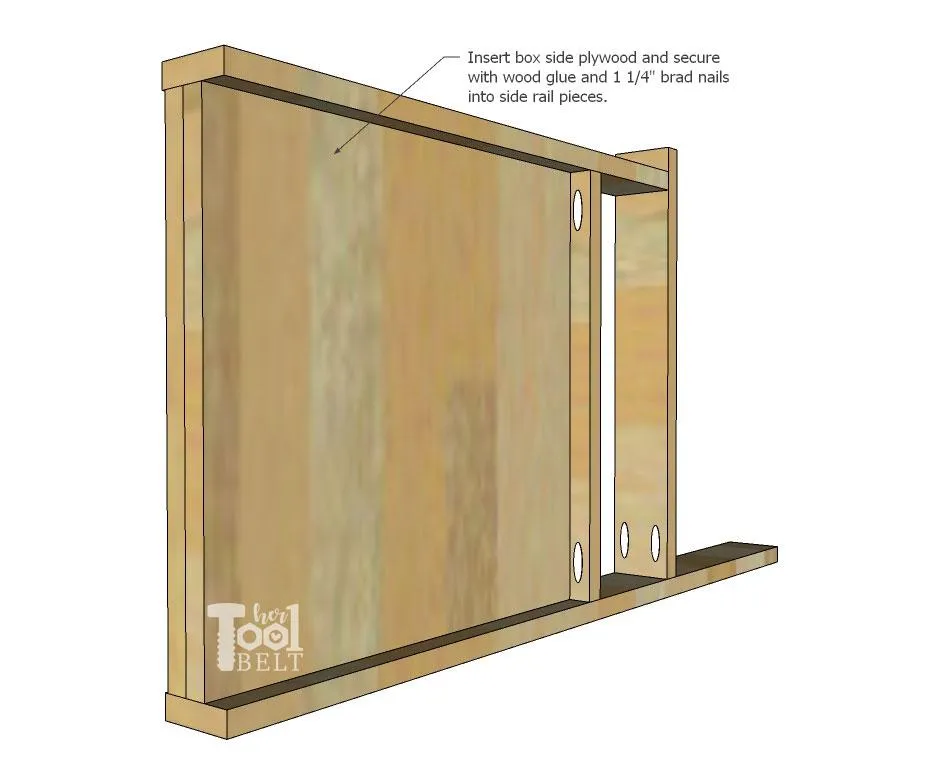
Insert box side plywood into the bench side assembly (trim plywood to fit if needed). Secure plywood with wood glue and 1 1/4" brad nails into the side rail pieces.
7. Side Trim
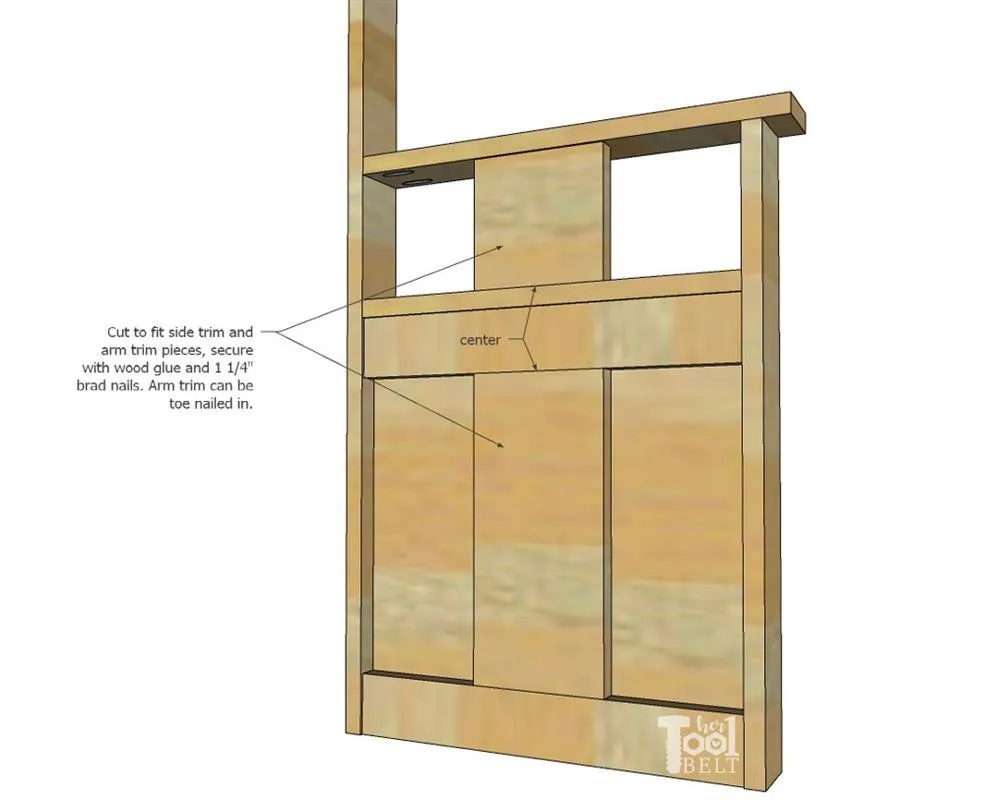
Cut to fit the 5 1/2" wide side trim and arm trim pieces. Find the centers of the trim and side rails. Secure side trim with wood glue and a few 1 1/4" brad nails. Secure the arm trim with 1 1/4" brad nails through the arm rest into the trim. You may need to toe nail the bottom into place with brad nails.
8. Box Front and Back
Attach the box front plywood behind the front legs (make sure the pocket holes are facing inside the toy box.) Secure with wood glue and 1 1/4" pocket hole screws to the box side pieces. Attach the box back plywood in front of the back legs (pocket holes facing back of bench.) Secure with wood glue and 1 1/4" pocket hole screws to the box side pieces.
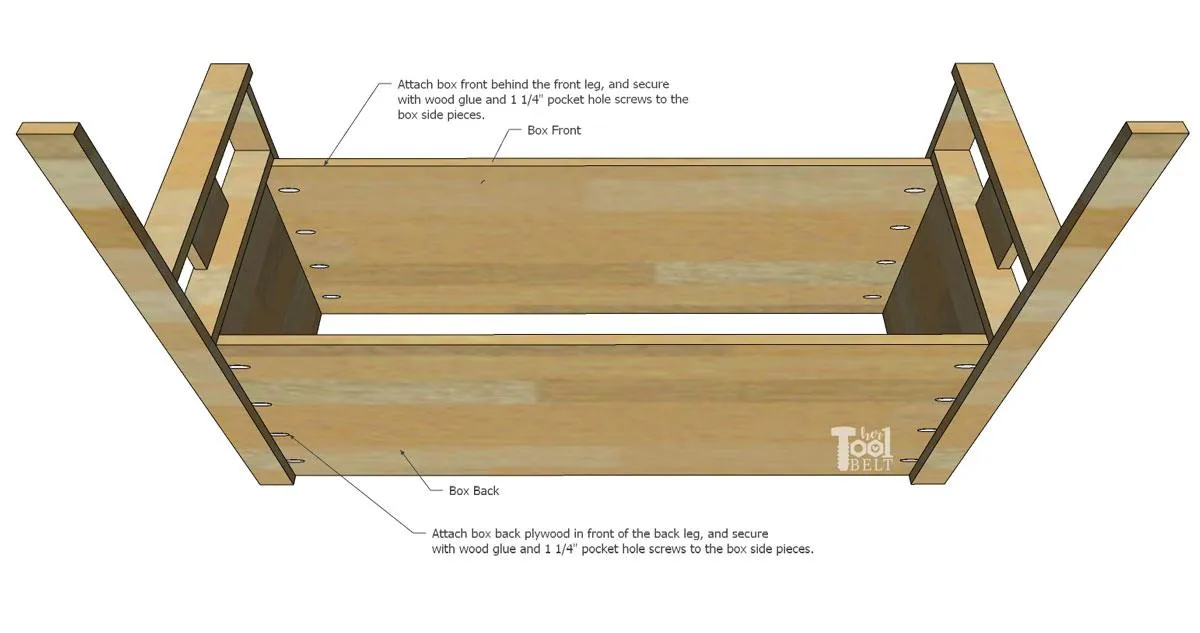
9. Box Bottom
Use wood glue and 1 1/4" pocket holes to secure the box bottom flush with the plywood bottoms of the box front/back/side pieces.
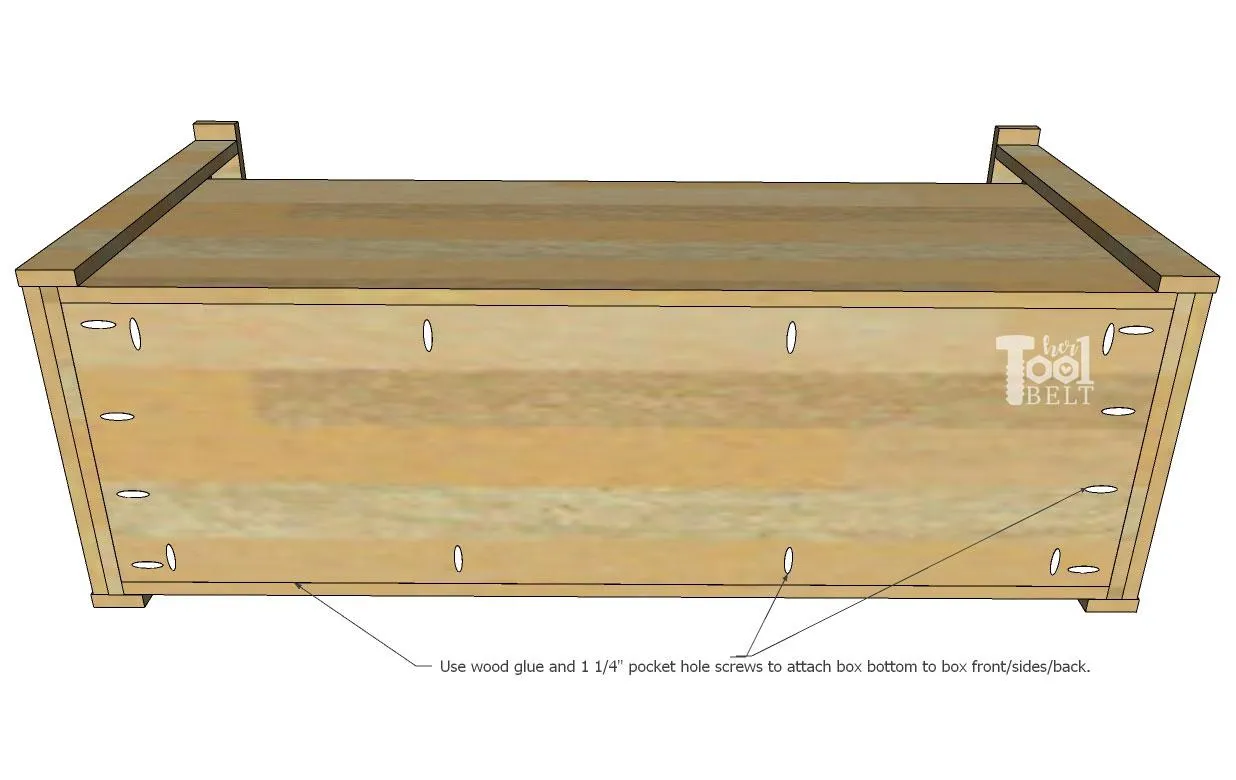
10. Front Trim
- Use wood glue and 1 1/4" brad nails to secure the long slats flush with the top and bottom of the box front plywood.
- Then cut to fit the front trim pieces.
- Mark and measure 13 3/4" from the front legs and secure the front trim with wood glue and 1 1/4" brad nails.
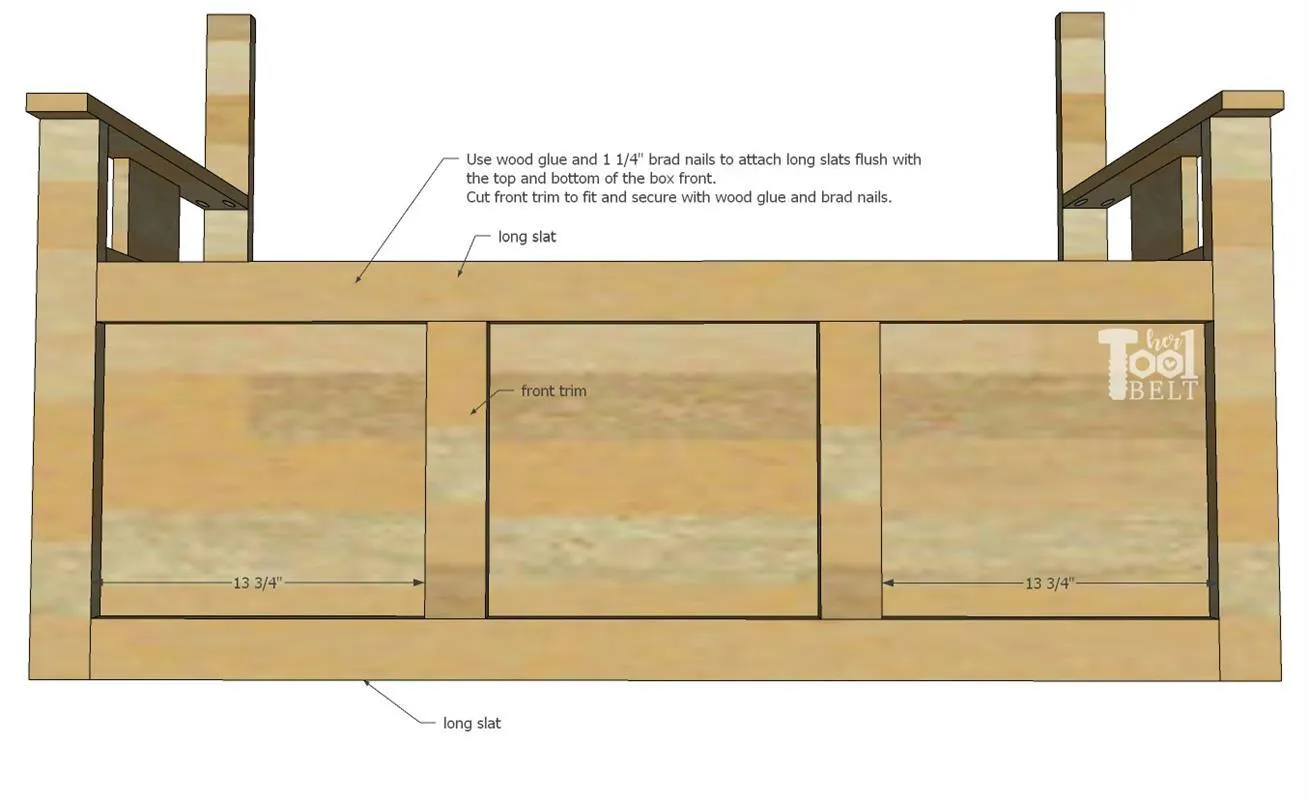
11. Back Rail
On the two long slats with pocket holes, measure and mark: 2 1/8", 5 1/8", 8 1/8" 11 3/4", 19 3/8", 22 3/8", 25 3/8" (repeat 2 1/8" - 11 3/4" for the other end). Use wood glue and 1 1/4" pocket hole screws to attach 3 thin slats, 1 wide, 3 thin, 1 wide and 3 thin slats between the long slats at the marks.
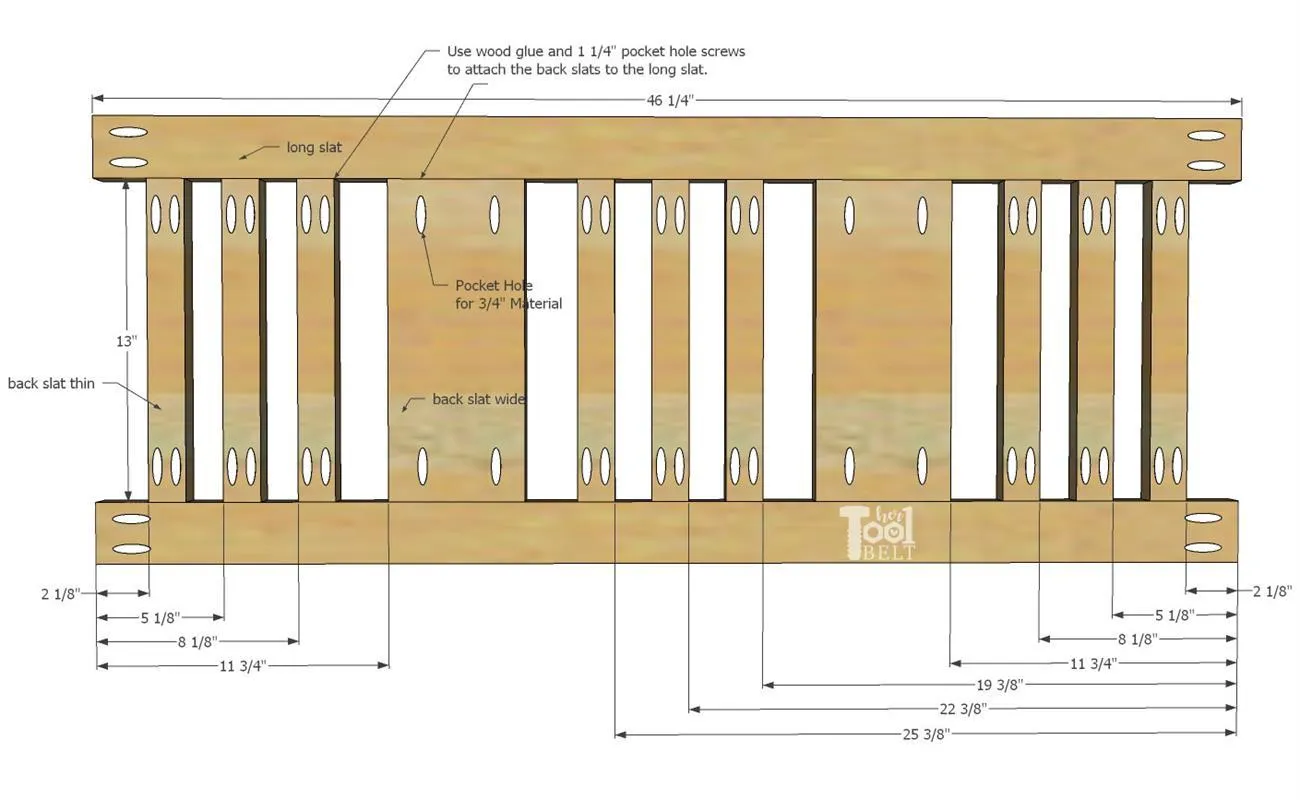
12. Attach Back Rail
- Measure and mark down 1/2" from the tops of the back legs.
- Attach the back rail assembly to the back legs with wood glue and 1 1/4" pocket hole screws.
- Also use a few 1 1/4" screws to secure the back rail assembly to the box back.
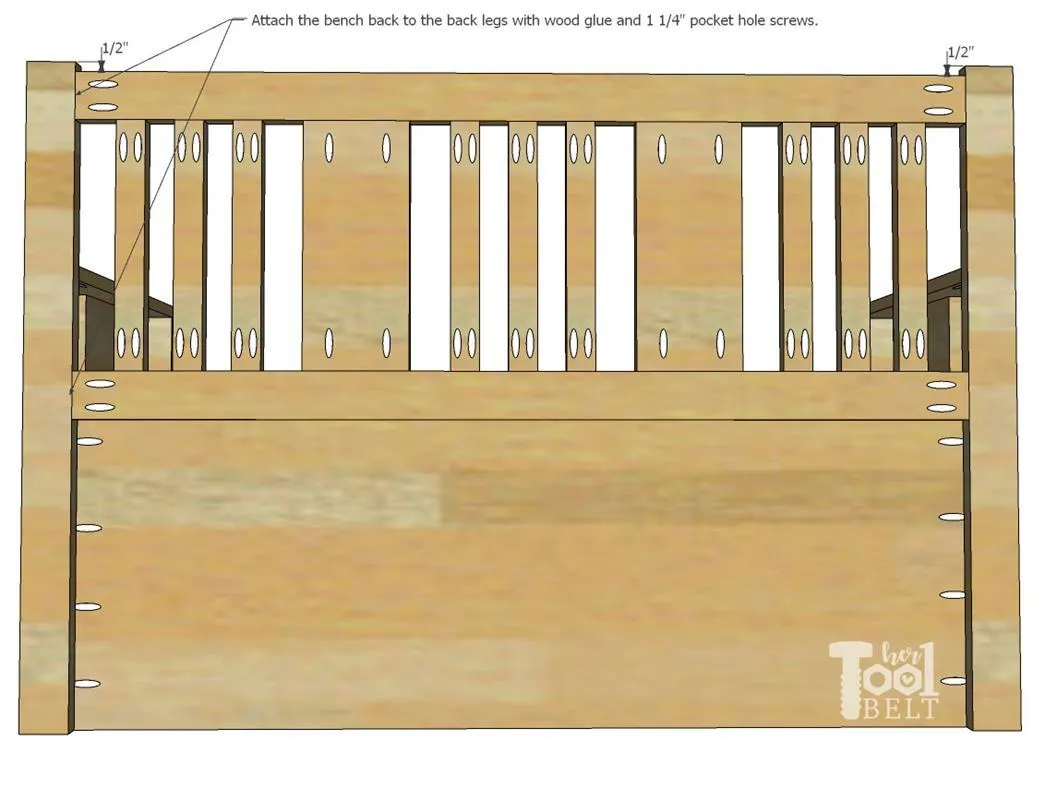
13. Prep Top and Install Hinges
Fit the toy box lid onto the bench, trim as necessary to fit. There should be a little gap between the toy box lid and the sides. Use a concealed hinge template or jig to install 2 full overlay euro hinges for frameless cabintes into the underside of the toy box top. Also you may want to use plywood edge banding to cover the front of the plywood, or you could add thin wood trim.
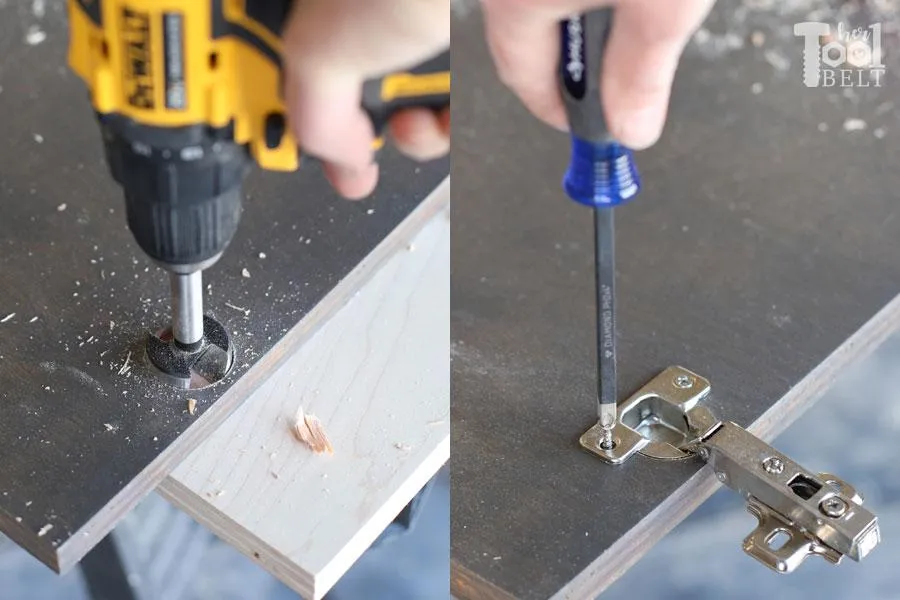
14. Install Toy Box Top
Install the hinges onto the box back plywood. The center-line of the hinge screws is usually about 1 1/2" from the top of the box back plywood. Adjust the hinge adjustment screws as necessary to straighten out the toy box top.
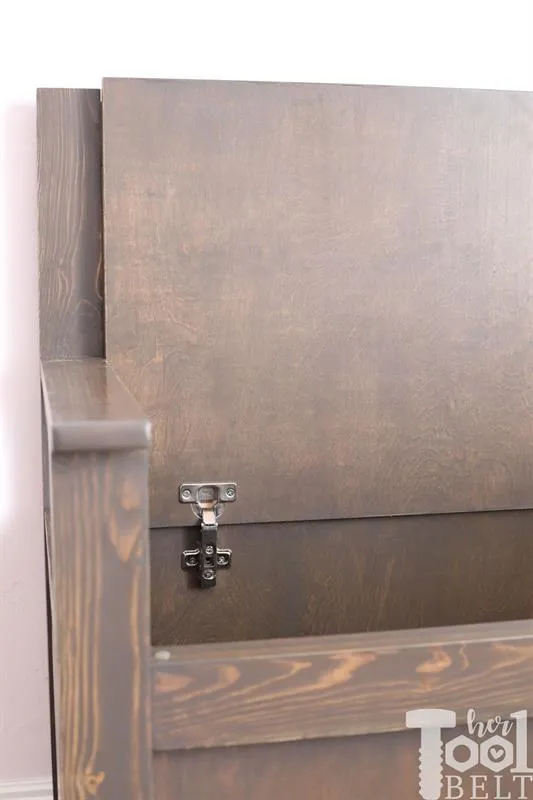
15. Sand, Stain and Top Coat
- Fill any nail holes, pocket holes or blemishes with wood filler/putty.
- Sand the toy box bench until smooth, start at 80 or 120 grit and work up to 220 grit.
- Stain or paint the toy box bench as desired. I used Varathane Briar Smoke, then applied a polyurethane in satin as the top coat.