Notch
← Back to the plan
Use your browser's Print (Ctrl/Cmd + P) and choose Save as PDF. This page works offline once you've opened it with a signal.
Craft Paint Storage
Make your craft paint visible and easily accessible with this craft paint storage box.
- Difficulty
- Intermediate
- Time
- 2.8–5 hours
- Cost
- $$
Cut list
| Part | Qty | T × W × L | Material | ✓ |
|---|---|---|---|---|
| Box top and bottom | 2 | 1/2" × 4" × 19" | — | ☐ |
| Box sides | 2 | 1/2" × 4" × 17" | — | ☐ |
| Horizontal dividers | 2 | 1/2" × 4" × 19" | — | ☐ |
| Vertical dividers | 2 | 1/2" × 4" × 16" | — | ☐ |
| Backing | 1 | 1/4" × 17" × 20" | — | ☐ |
Materials
| Item | Qty | ✓ |
|---|---|---|
| Plywood, 1/2" Thick Quarter Sheet | 1 board | ☐ |
| Plywood, 1/4" Thick 20" x 17" | 1 board | ☐ |
| 1 1/4" finish nails | 30 each | ☐ |
| 3/4" finish nails | 12 each | ☐ |
Overall cost: $$. Lumber varies by region, species, and season, so we give a band rather than a figure.
Tools
- Brad Nailer
- Circular Saw
- Jigsaw
- Miter Saw
- Random Orbit Sander
- Tape Measure — optional
Instructions
1. Dimensions
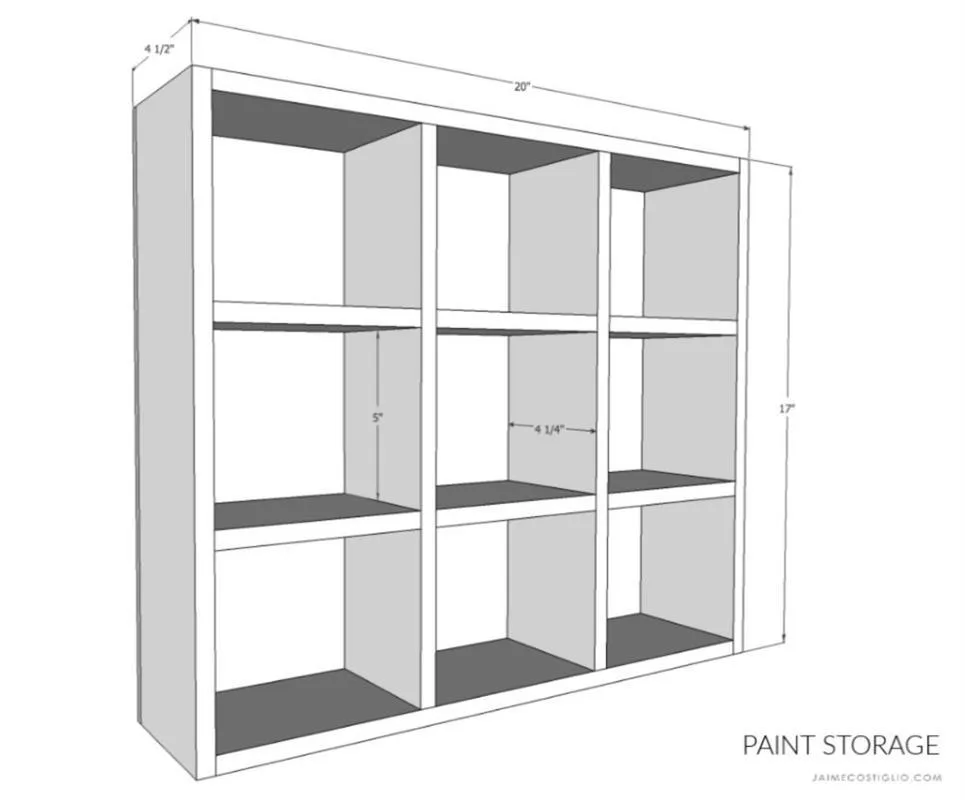
Overall dimensions: 20"w x 17"h x 4 1/2"d
2. Step 1
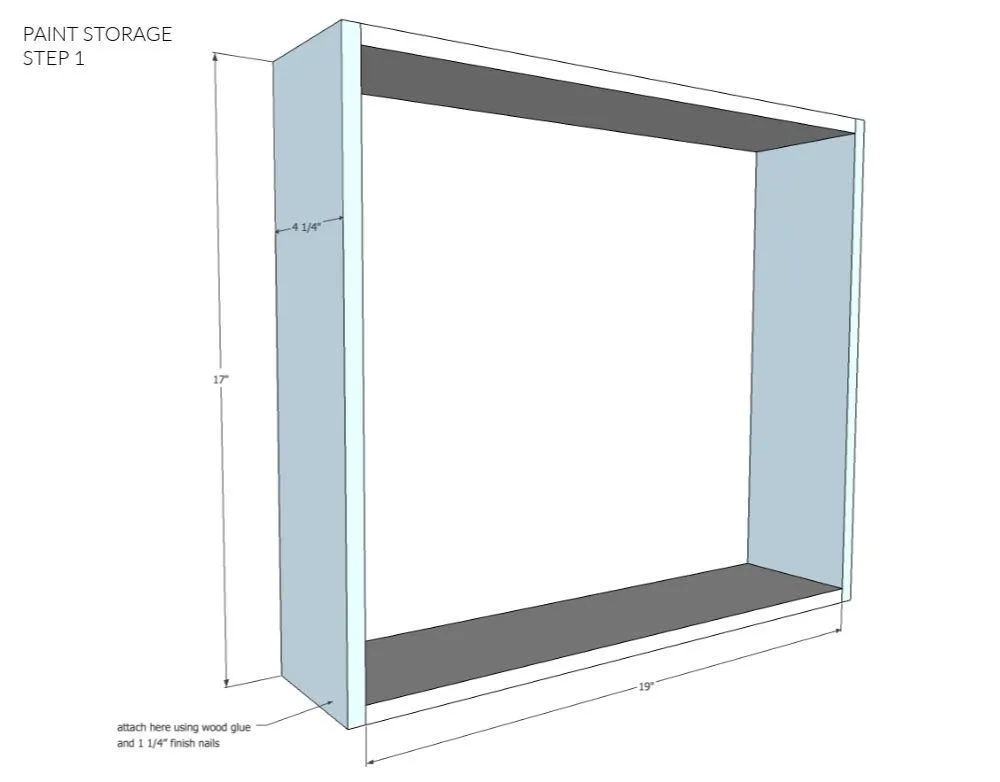
Attach box sides to top and bottom using wood glue and 1 ¼” finish nails.
3. Step 2
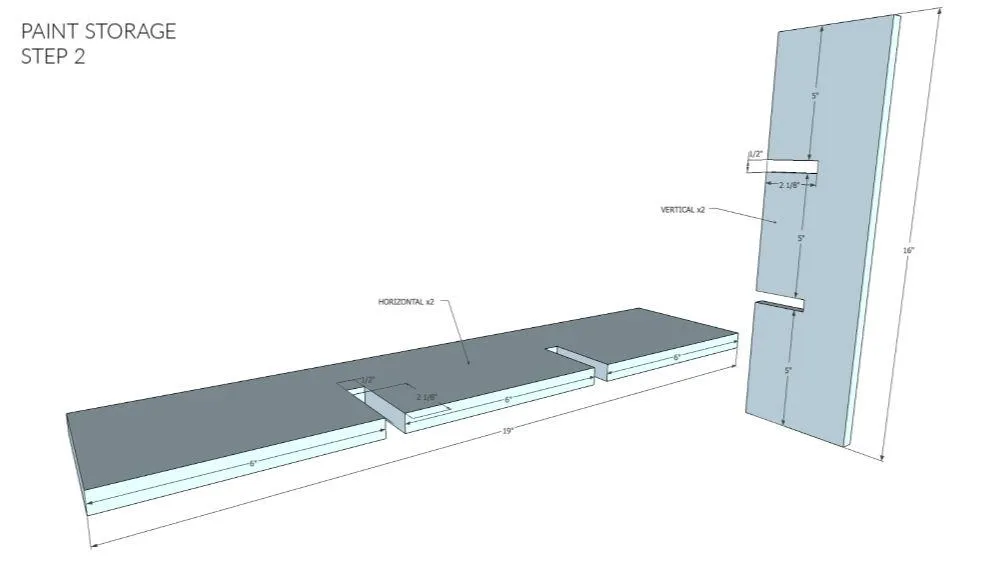
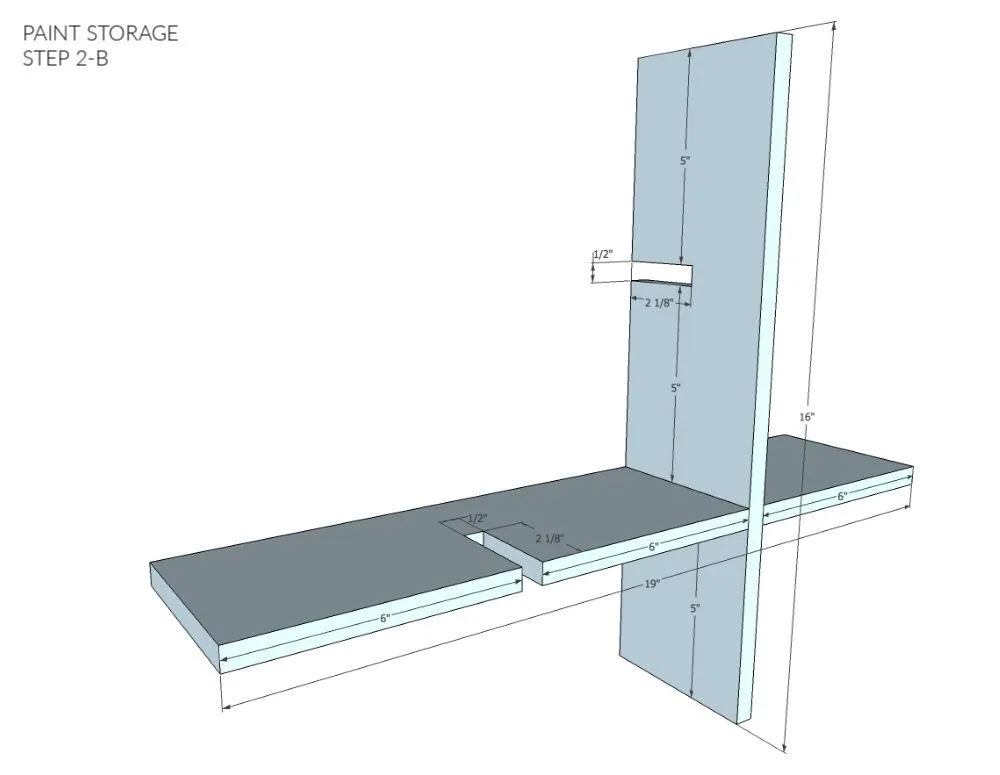
Make notches in the horizontal and vertical dividers as per the sketch above. Use a jigsaw to make notches.
4. Step 2B
Dividers should fit together as per sketch.
5. Step 3
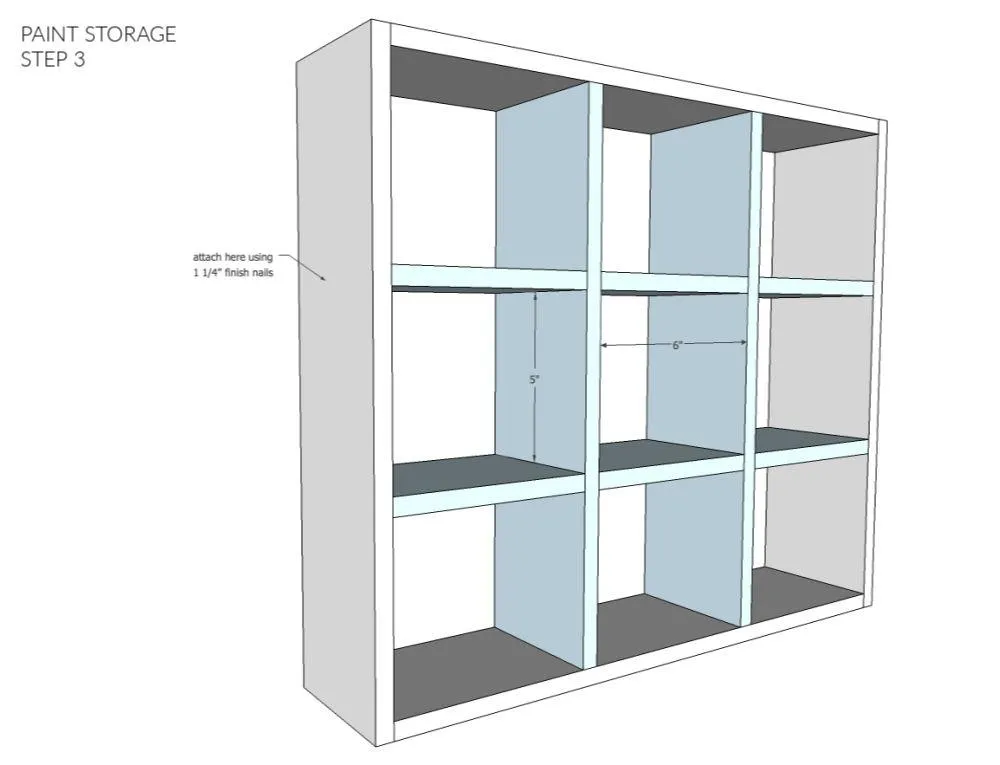
Insert dividers into box frame and attach to sides using 1 ¼” finish nails.
6. Step 4
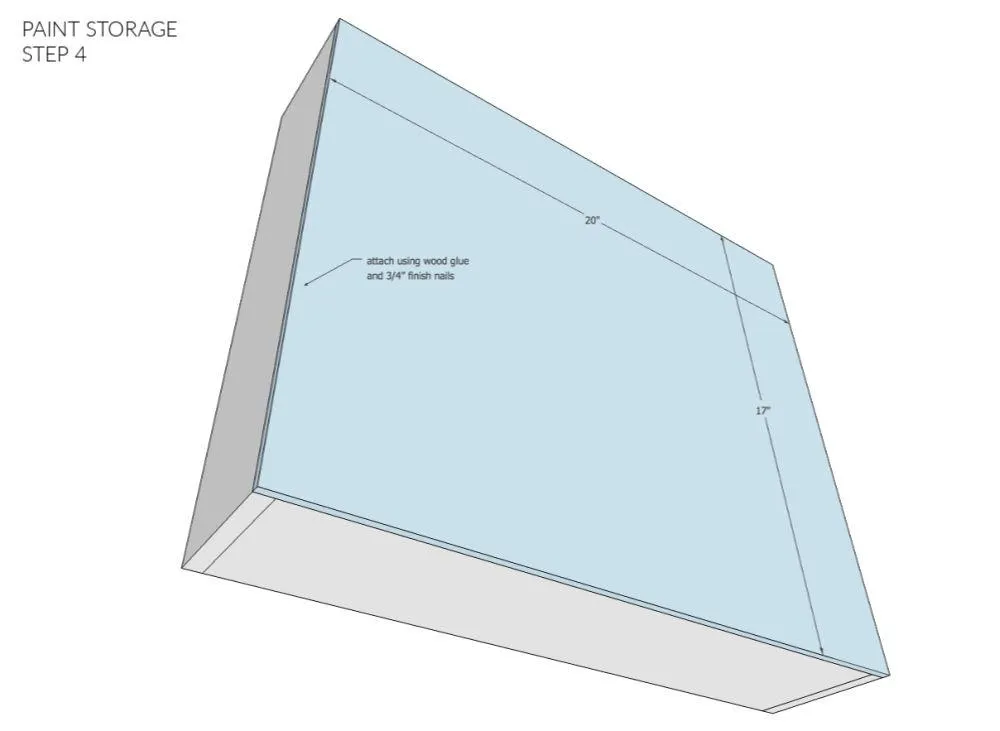
Attach backing to box and dividers using wood glue and ¾” finish nails.