Notch
Use your browser's Print (Ctrl/Cmd + P) and choose Save as PDF. This page works offline once you've opened it with a signal.
Beginner Miter Saw + Planer Stand
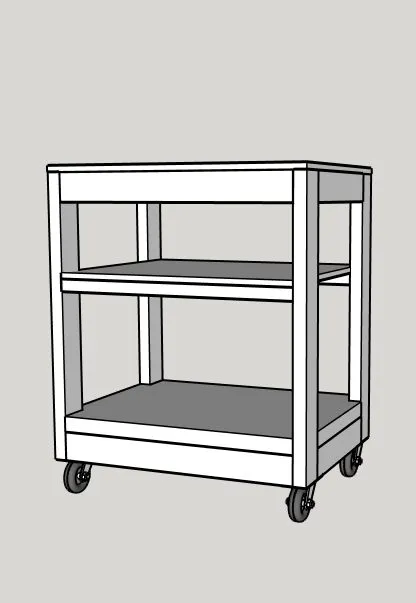
This beginner friendly miter saw and planer stand is a sturdy, compact solution for organizing your workspace.
- Difficulty
- Easy
- Time
- 2.8–5.5 hours
- Cost
- $$$
Cut list
| Part | Qty | T × W × L | Material | ✓ |
|---|---|---|---|---|
| Legs | 4 | 1" × 3" × 34" | — | ☐ |
| Front Supports | 4 | 1" × 3" × 29" | — | ☐ |
| Side Supports | 4 | 1" × 1 1/2" × 17" | — | ☐ |
| Shelf Supports | 2 | 1" × 3" × 29" | — | ☐ |
| Top | 1 | 3/4" × 24" × 32" | — | ☐ |
| Center Shelf | 1 | 3/4" × 24" × 29" | — | ☐ |
| Bottom Shelf | 1 | 3" × 24" × 32" | — | ☐ |
Materials
| Item | Qty | ✓ |
|---|---|---|
| 2 x 4 x 8 pine, 1.5" x 3.5" x 96" | 5 board | ☐ |
| 4' x 2' x 3/4" plywood, 48" x 24" x 3/4" | 3 board | ☐ |
| 2 1/2" pocket screws | 50 each | ☐ |
| Wood glue | 1 each | ☐ |
| Sandpaper | 1 each | ☐ |
Overall cost: $$$. Lumber varies by region, species, and season, so we give a band rather than a figure.
Tools
- Circular Saw
- Drill / Driver
- Pocket Hole Jig
Instructions
1. 1
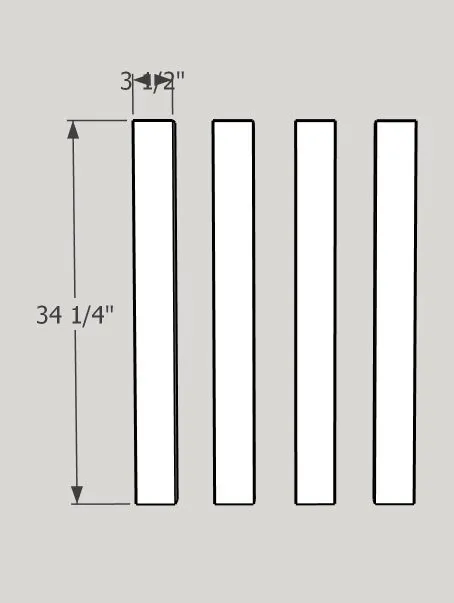
Cut the legs to size using a miter saw/circular saw.
2. 2
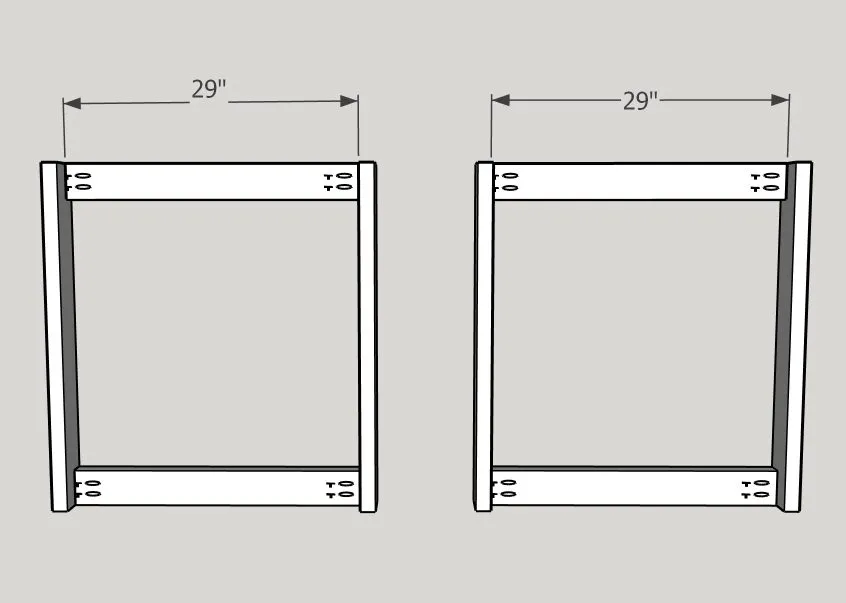
Attach the side supports to the legs using wood glue and 2 1/2" pocket screws. Make sure the supports are flush with the top and bottom of the legs.
3. 3
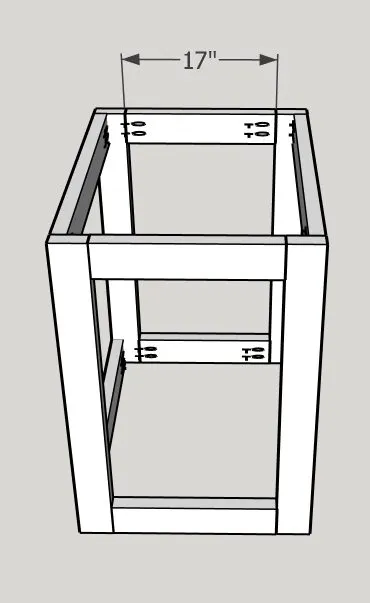
Attach the side supports to the legs using wood glue and 2 1/2" pocket screws.
4. 4
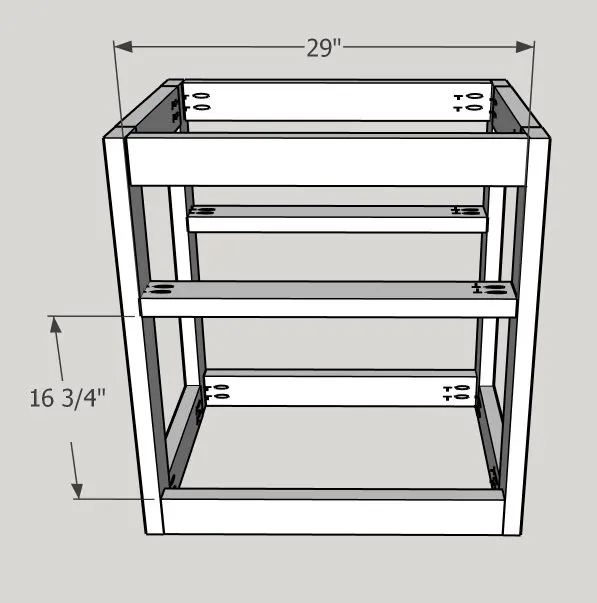
Attach the shelf supports 16 3/4" up from the bottom of the opening on the stand as shown in the picture. It is easier to keep them level if you use a scrap piece of wood cut to 16 3/4" and set the shelf supports on top before you screw them in. Use wood glue and 2 1/2" pocket screws to attach them to the front and back as shown in the picture.
5. 5
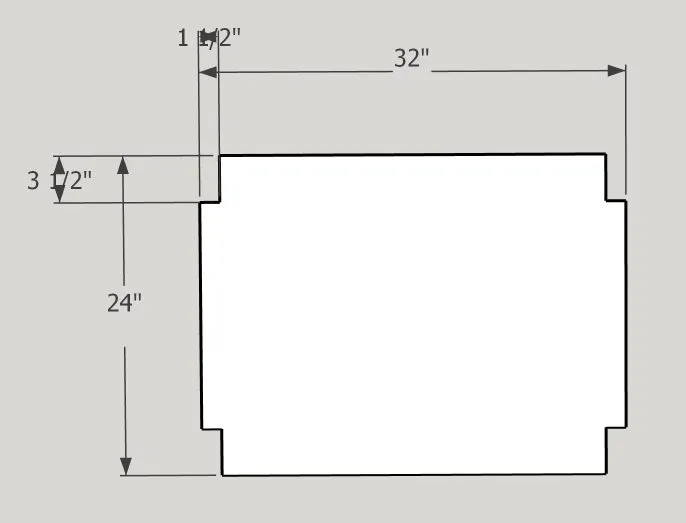
Cut the notches for the bottom shelf using an oscillating tool and a blade. I suggest marking where you need to cut with a square. You can also use a hand saw!
6. 6
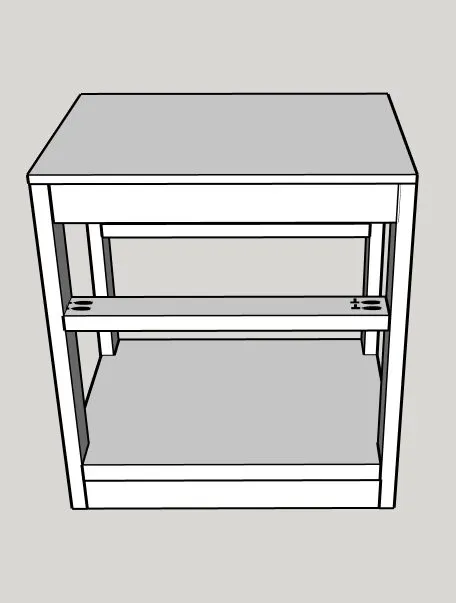
Attach the bottom shelf to the bottom of the stand using screws in from the top into the base. Do the same with the top.
7. 7
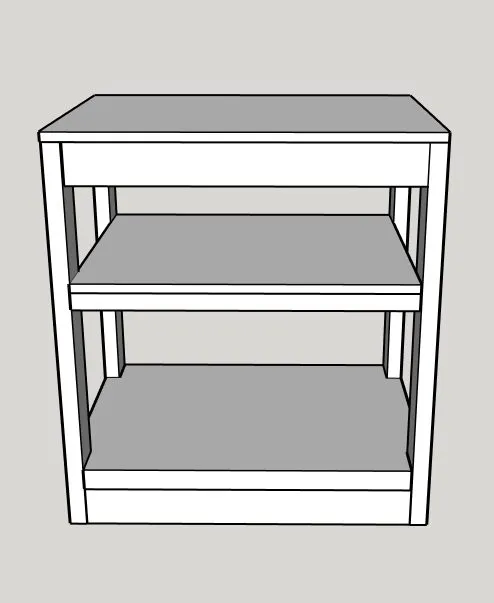
Add the middle shelf the same way you attached the top and bottom shelves.
8. 8
Optional: Add casters to make it easier to move around the shop! You can just leave as is or you can sand, stain/paint and you made an easy stand perfect for your workshop.