 Notch
- Difficulty
- Easy
- Time
- 2.8–5.5 hours
- Cost
- $$$
About this build
This beginner friendly miter saw and planer stand is a sturdy, compact solution for organizing your workspace. It features a flat top to support both tools and a fixed center shelf below for convenient storage. Built with basic materials and simple joinery, it’s ideal for new woodworkers looking for a practical, easy to build shop project.
Tools
Essential
- Circular Saw
- Drill / Driver
- Pocket Hole Jig
Materials
| Item | Qty |
|---|---|
| 2 x 4 x 8 pine, 1.5" x 3.5" x 96" | 5 board |
| 4' x 2' x 3/4" plywood, 48" x 24" x 3/4" | 3 board |
| 2 1/2" pocket screws | 50 each |
| Wood glue | 1 each |
| Sandpaper | 1 each |
Overall cost: $$$. Lumber prices vary by region, species, and season, so we give a band rather than a figure we would only be pretending to know.
Cut list
| Part | Qty | T × W × L |
|---|---|---|
| Legs | 4 | 1" × 3" × 34" |
| Front Supports | 4 | 1" × 3" × 29" |
| Side Supports | 4 | 1" × 1 1/2" × 17" |
| Shelf Supports | 2 | 1" × 3" × 29" |
| Top | 1 | 3/4" × 24" × 32" |
| Center Shelf | 1 | 3/4" × 24" × 29" |
| Bottom Shelf | 1 | 3" × 24" × 32" |
What to buy
Buy 7 boards at 8 ft.
3" × 24"
1 board
1" × 3"
4 boards
1" × 1 1/2"
1 board
3/4" × 24"
1 board
Assumes 8 ft stock, a 1/8" saw kerf, and buying each part at its own width. Change the board size or kerf on the full board plan →
Instructions
11
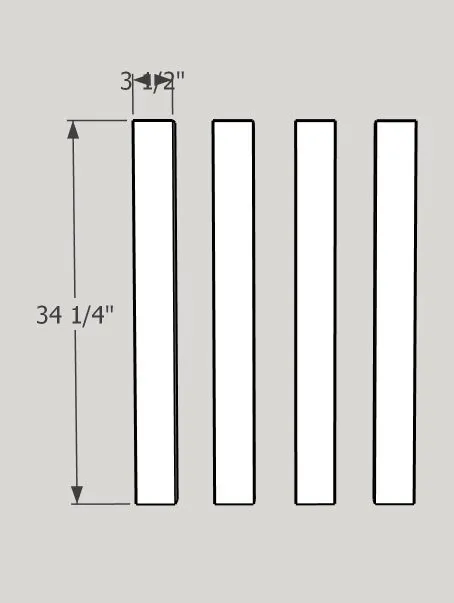
Cut the legs to size using a miter saw/circular saw.
22
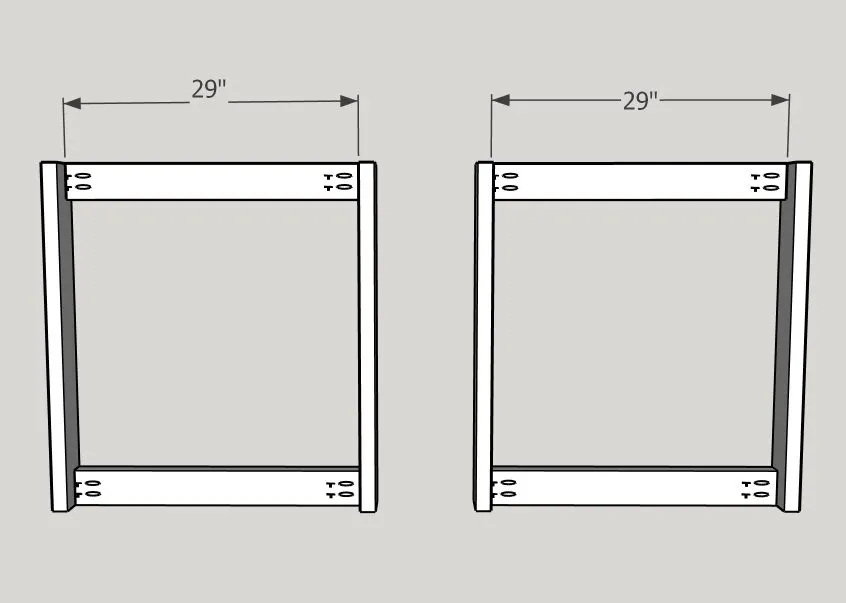
Attach the side supports to the legs using wood glue and 2 1/2" pocket screws. Make sure the supports are flush with the top and bottom of the legs.
33
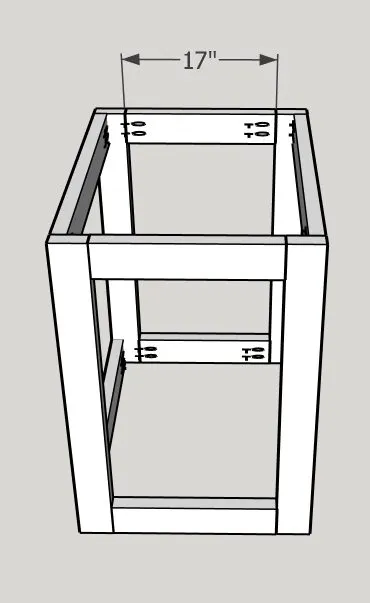
Attach the side supports to the legs using wood glue and 2 1/2" pocket screws.
44
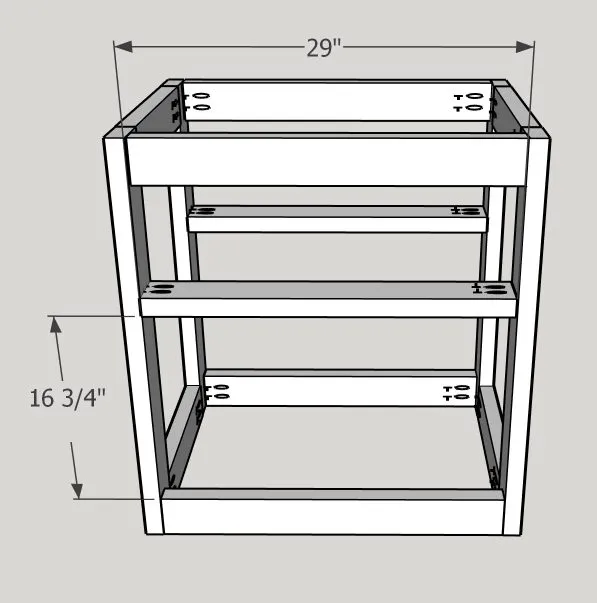
Attach the shelf supports 16 3/4" up from the bottom of the opening on the stand as shown in the picture. It is easier to keep them level if you use a scrap piece of wood cut to 16 3/4" and set the shelf supports on top before you screw them in. Use wood glue and 2 1/2" pocket screws to attach them to the front and back as shown in the picture.
55
Cut the notches for the bottom shelf using an oscillating tool and a blade. I suggest marking where you need to cut with a square. You can also use a hand saw!
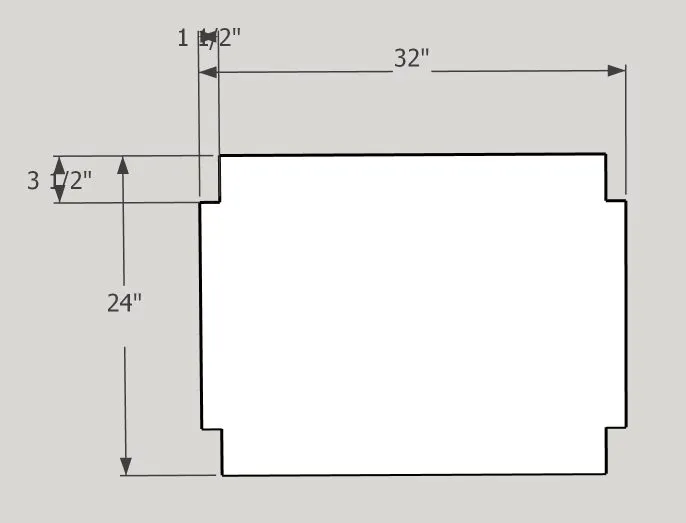
66
Attach the bottom shelf to the bottom of the stand using screws in from the top into the base. Do the same with the top.
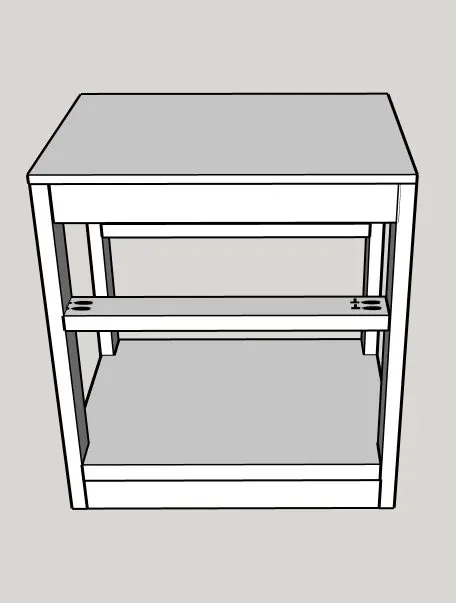
77
Add the middle shelf the same way you attached the top and bottom shelves.
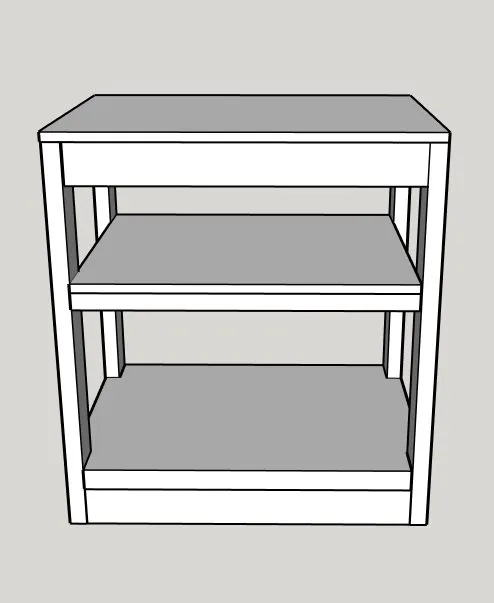
88
Optional: Add casters to make it easier to move around the shop! You can just leave as is or you can sand, stain/paint and you made an easy stand perfect for your workshop.
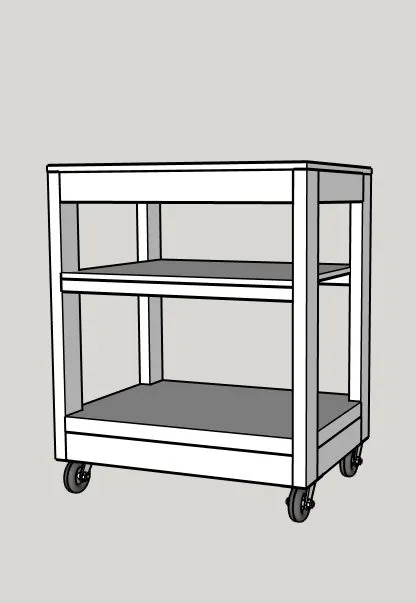
Tags
- Tool Storage
- Beginner
Reviews & builds
No reviews yet
Sign in to review this plan or share your build.
No reviews yet. Be the first to build this.