Notch
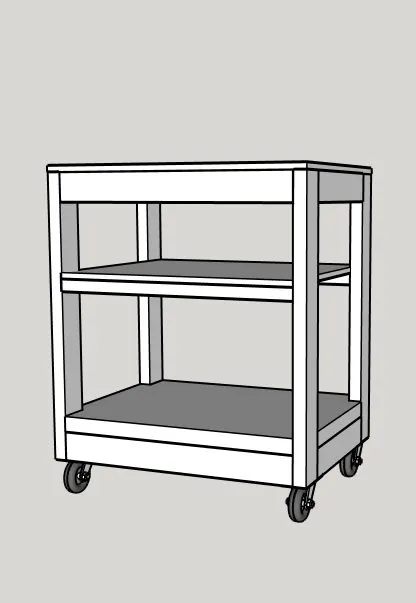
NotchBeginner Miter Saw + Planer Stand
Step-by-step build — 8 steps. Also available as a print sheet.
11
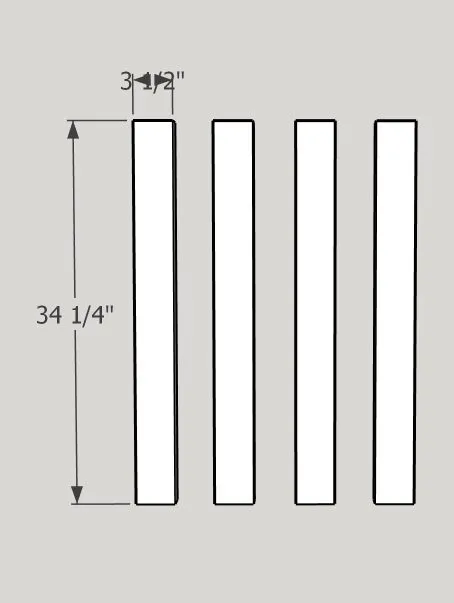
Cut the legs to size using a miter saw/circular saw.
22
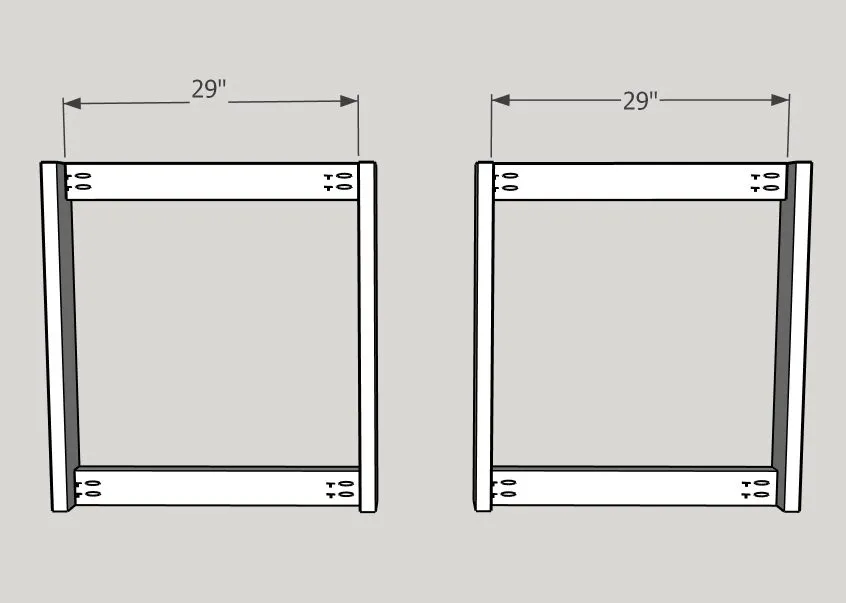
Attach the side supports to the legs using wood glue and 2 1/2" pocket screws. Make sure the supports are flush with the top and bottom of the legs.
33
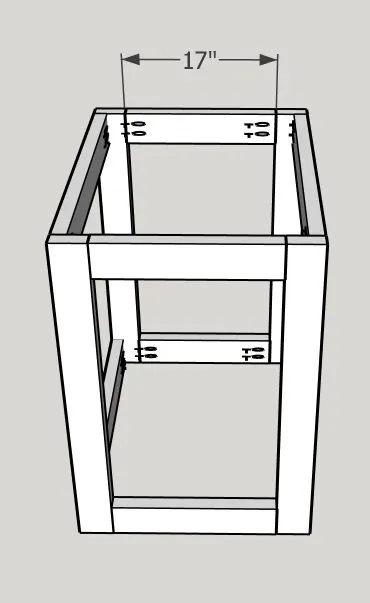
Attach the side supports to the legs using wood glue and 2 1/2" pocket screws.
44
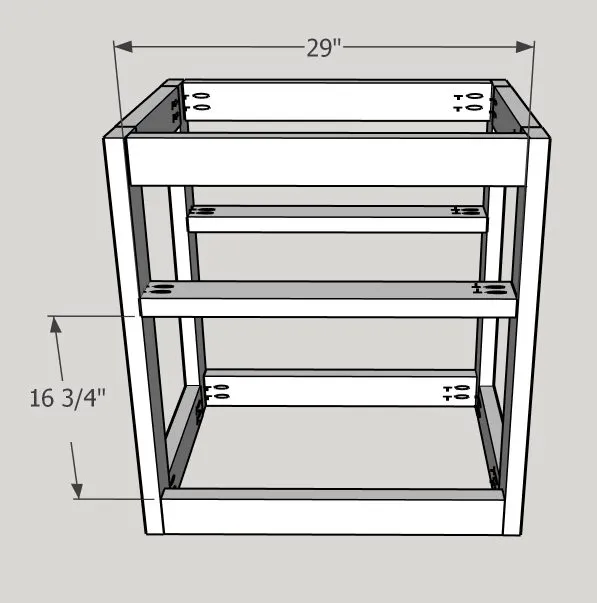
Attach the shelf supports 16 3/4" up from the bottom of the opening on the stand as shown in the picture. It is easier to keep them level if you use a scrap piece of wood cut to 16 3/4" and set the shelf supports on top before you screw them in. Use wood glue and 2 1/2" pocket screws to attach them to the front and back as shown in the picture.
55
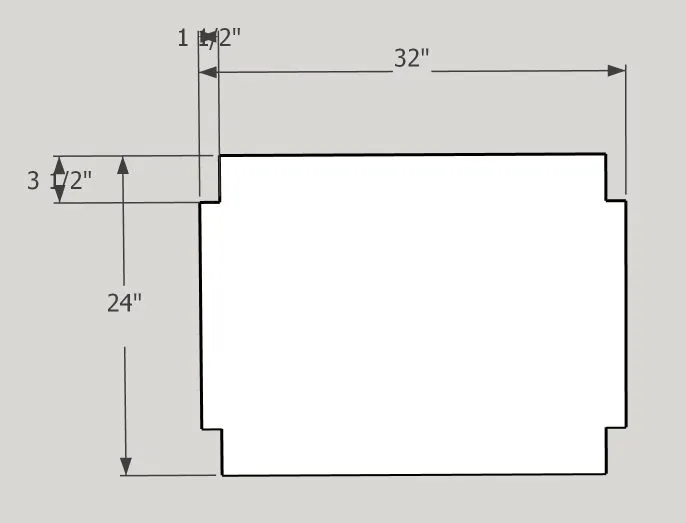
Cut the notches for the bottom shelf using an oscillating tool and a blade. I suggest marking where you need to cut with a square. You can also use a hand saw!
66
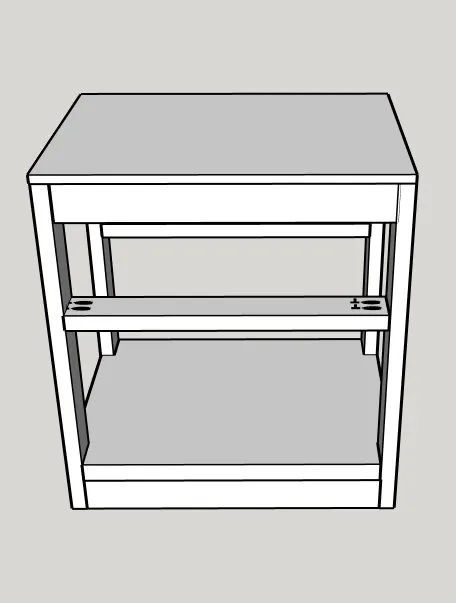
Attach the bottom shelf to the bottom of the stand using screws in from the top into the base. Do the same with the top.
77
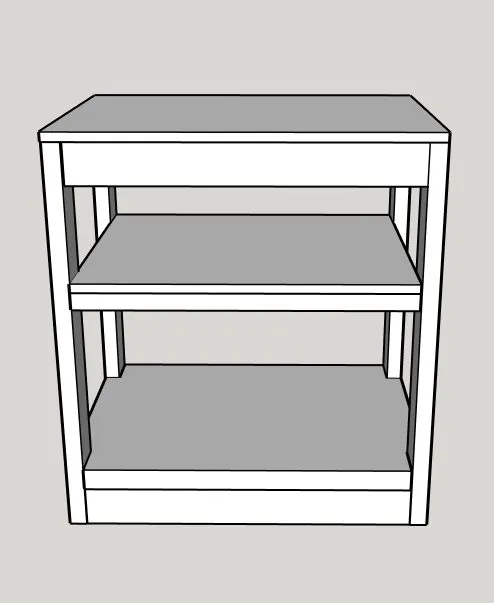
Add the middle shelf the same way you attached the top and bottom shelves.
88
Optional: Add casters to make it easier to move around the shop! You can just leave as is or you can sand, stain/paint and you made an easy stand perfect for your workshop.