Notch
NotchUse your browser's Print (Ctrl/Cmd + P) and choose Save as PDF. This page works offline once you've opened it with a signal.
DIY Counter Height Adirondack Chair – Free Project Plan
A comfortable and roomy Adirondack style chair with foot rest.
- Difficulty
- Expert
- Time
- 7–14 hours
- Cost
- $$$
Cut list
| Part | Qty | T × W × L | Material | ✓ |
|---|---|---|---|---|
| Foot rest | 1 | 3/4" × 4 1/2" × 4" | — | ☐ |
| Foot rest rails | 2 | 3/4" × 3 1/2" × 30" | — | ☐ |
| Foot rest front apron | 1 | 3/4" × 2 1/2" × 4" | — | ☐ |
| Back stretcher | 1 | 3/4" × 3 1/2" × 4" | — | ☐ |
| Arm rest | 2 | 3/4" × 3 1/2" × 27" | — | ☐ |
| Arms | 2 | 3/4" × 2 1/2" × 2" | — | ☐ |
| Bottom back support | 1 | 1 1/2" × 3 1/2" × 4" | — | ☐ |
| Middle back support | 1 | 3/4" × 4 1/2" × 4" | — | ☐ |
| Top back support | 1 | 3/4" × 3 1/2" × 19" | — | ☐ |
| Front legs | 2 | 1 1/2" × 1 1/2" × 30" | — | ☐ |
| Back legs | 2 | 1 1/2" × 1 1/2" × 30" | — | ☐ |
| Seat side supports | 2 | 3/4" × 5 1/2" × 2" | — | ☐ |
| Seat slats | 13 | 3/4" × 1 1/2" × 4" | — | ☐ |
| Back slats | 2 | 3/4" × 2 1/2" × 28" | — | ☐ |
| Back slats | 2 | 3/4" × 2 1/2" × 30" | — | ☐ |
| Back slats | 3 | 3/4" × 2 1/2" × 31" | — | ☐ |
Materials
| Item | Qty | ✓ |
|---|---|---|
| Board, 1x2 96" | 4 board | ☐ |
| Board, 1x3 96" | 3 board | ☐ |
| Board, 1x4 96" | 2 board | ☐ |
| Board, 1x5 72" | 1 board | ☐ |
| Board, 1x6 72" | 1 board | ☐ |
| Board, 2x2 72" | 2 board | ☐ |
| Board, 2x4 24" | 1 board | ☐ |
| 2" wood screws | 24 each | ☐ |
| 1 1/4" pocket hole screws | 24 each | ☐ |
| 1 1/4" wood screws | 24 each | ☐ |
| 2" pocket hole screws | 4 each | ☐ |
Overall cost: $$$. Lumber varies by region, species, and season, so we give a band rather than a figure.
Tools
- Drill / Driver
- Jigsaw
- Miter Saw
- Pocket Hole Jig
- Random Orbit Sander
- Bar / Pipe Clamps — optional
- Combination Square — optional
- Tape Measure — optional
Instructions
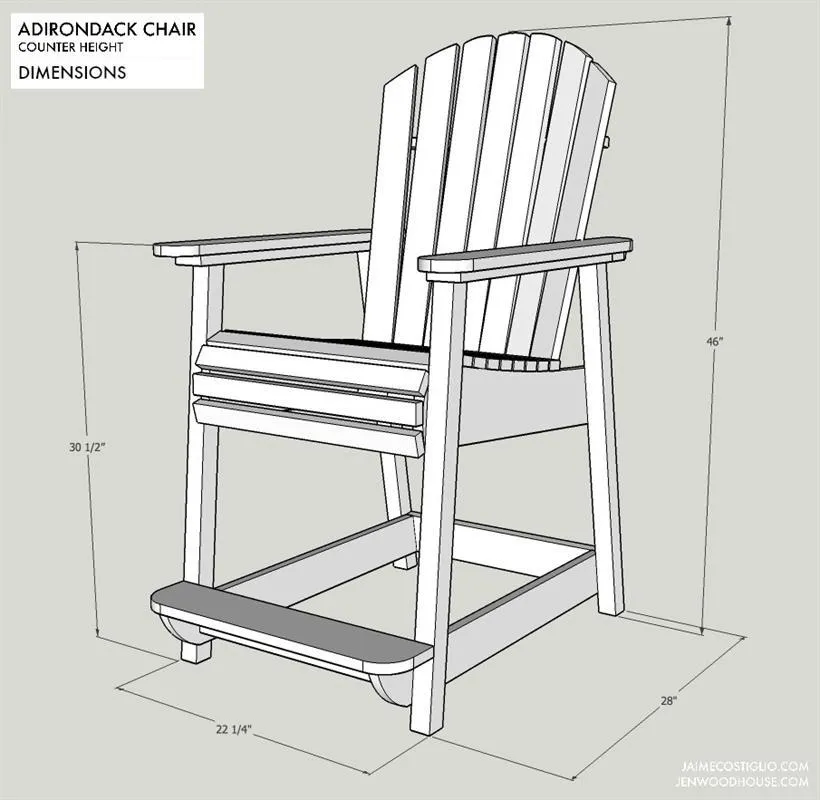
1. Dimensions
Overall size: 46"h x 28"d x 26 1/4"w
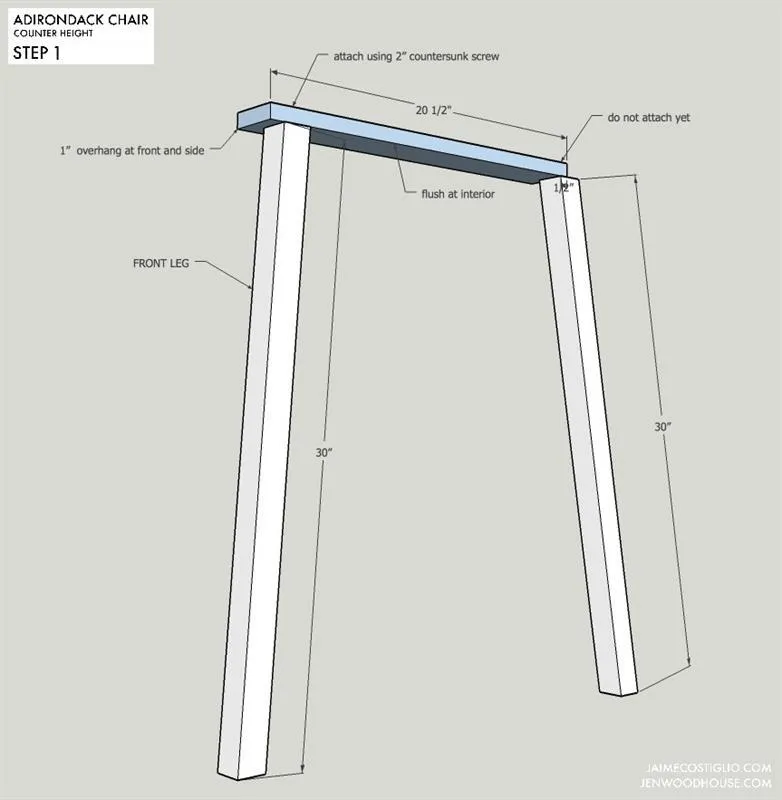
2. Step 1
STEP 1: Attach arms to front leg using 2” countersunk screws. Make two opposing sets.
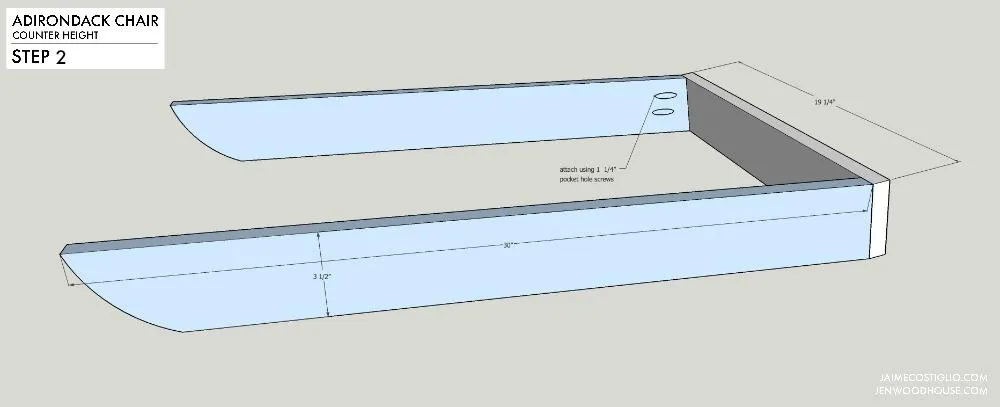
3. Step 2
STEP 2: Assemble lower stretcher. Attach foot rest side rails to back stretcher using 1 ¼” pocket hole screws.
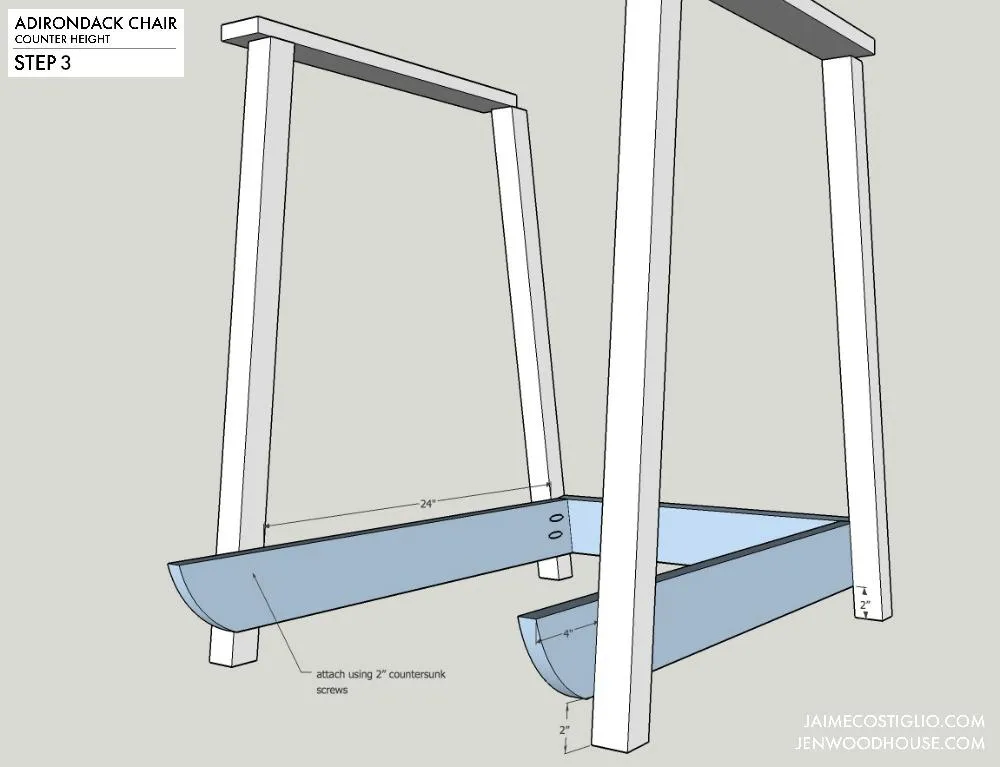
4. Step 3
STEP 3: Attach lower stretcher to legs using 2” countersunk wood screws.
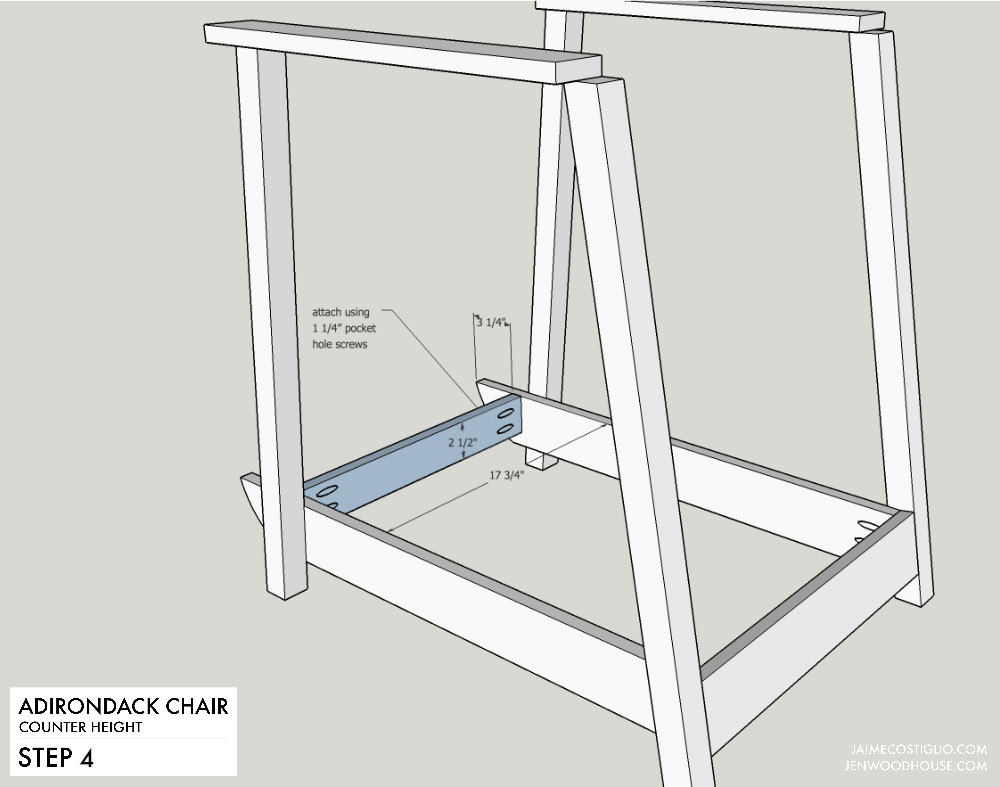
5. Step 4
STEP 4: Attach foot rest front apron to side rails using 1 ¼” pocket hole screws.
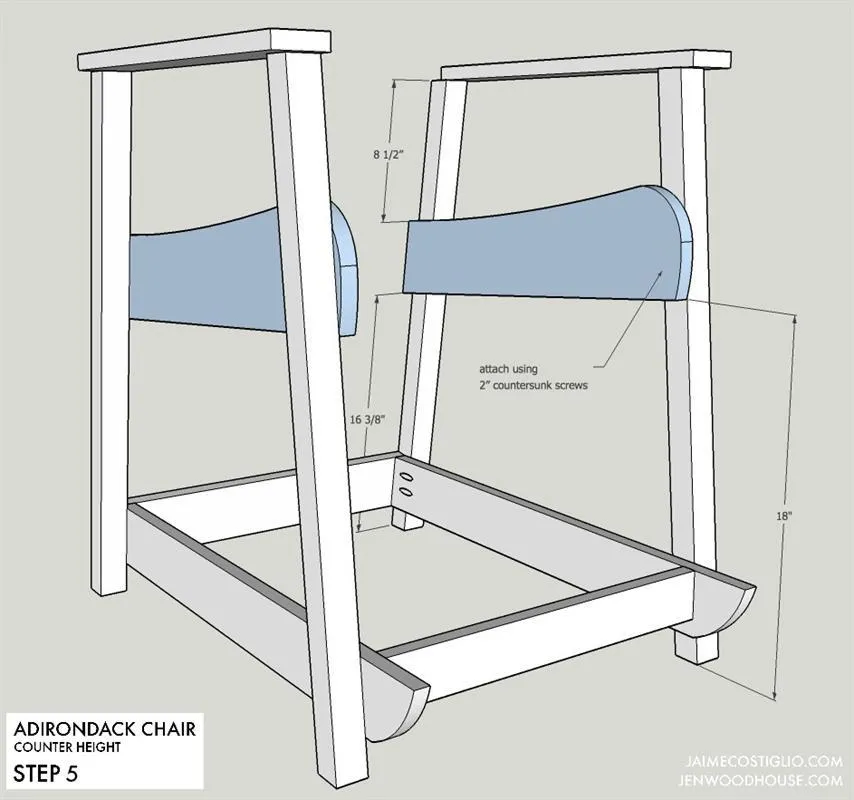
6. Step 5
STEP 5: Attach seat side supports to legs using 2” countersunk screws.
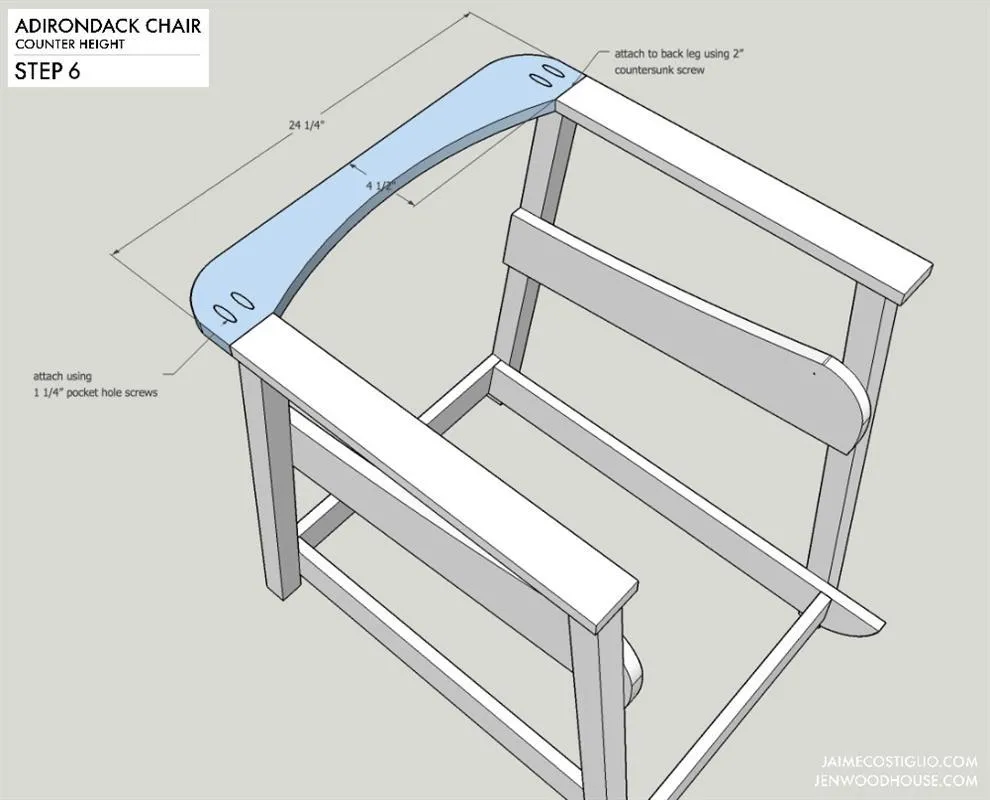
7. Step 6
STEP 6: Attach back middle support to arms using 1 ¼” pocket hole screws. Then attach to back leg using 2” countersunk wood screws.
8. Step 7
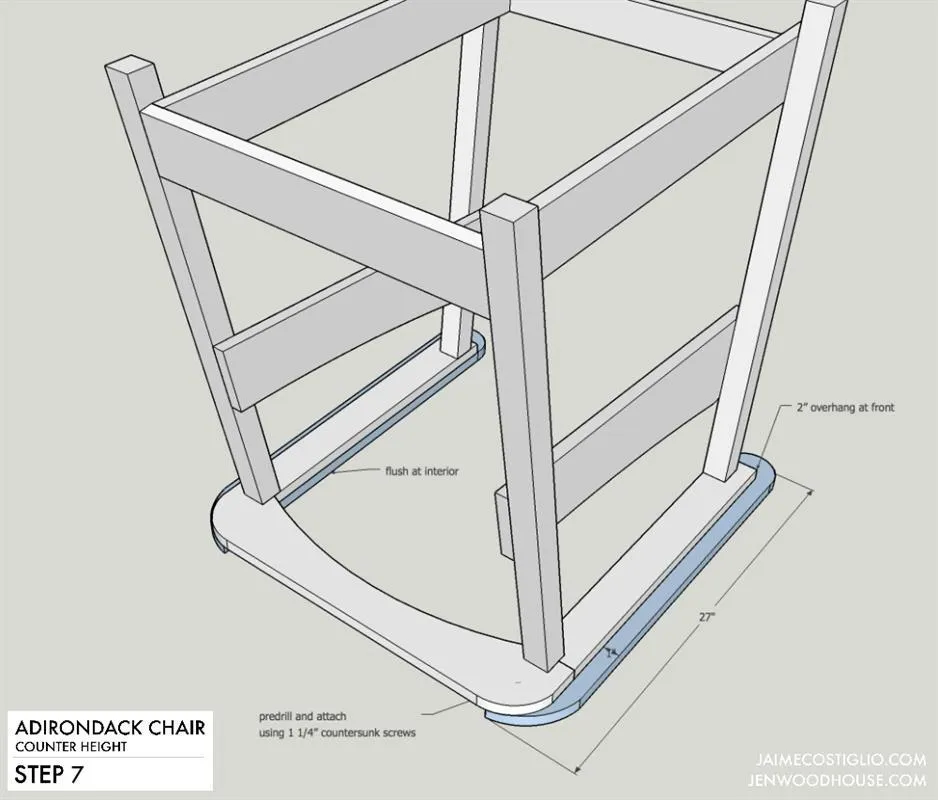
STEP 7: Attach arm rests to arm and back middle support using 1 ¼” countersunk screws from underside.
9. Step 8
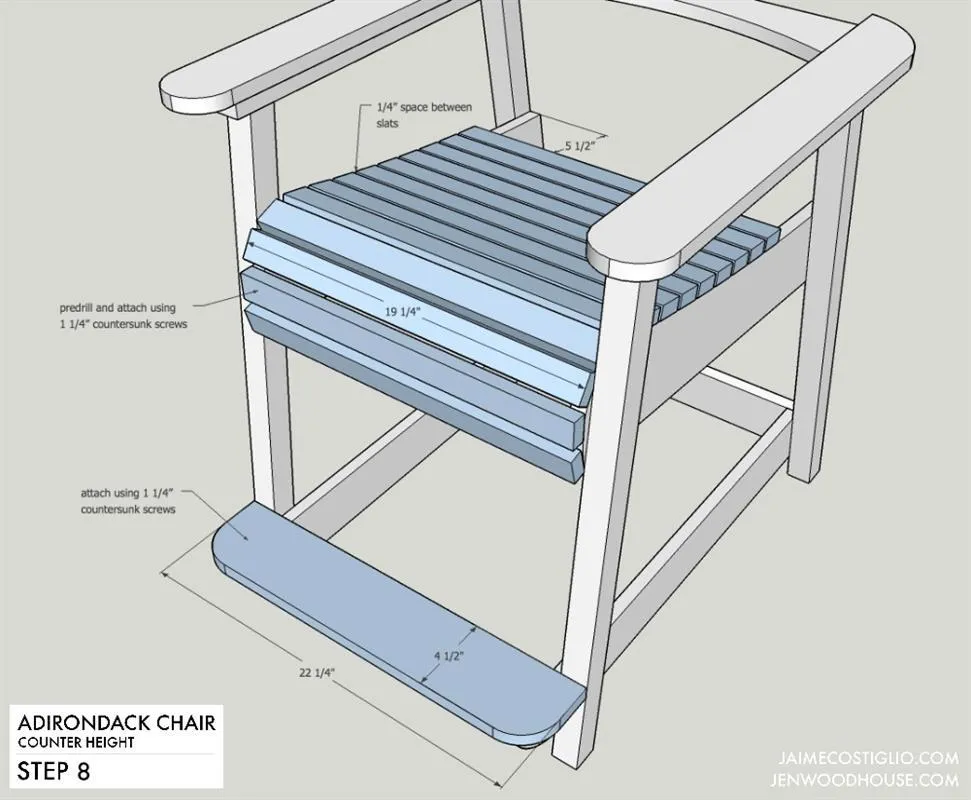
STEP 8: Attach foot rest to rails using 1 ¼” countersunk screws. Attach seat slats to supports using 1 ¼” countersunk screws.
10. Step 9A
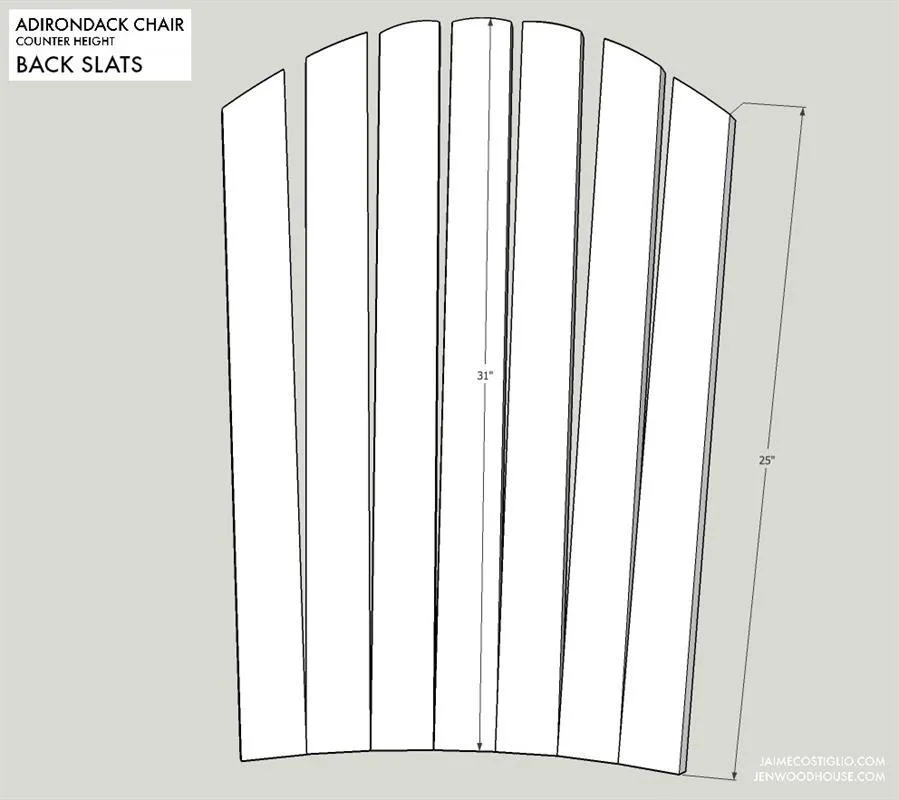
Use a jigsaw to cut curve into back slats before assembly.
11. Step 9
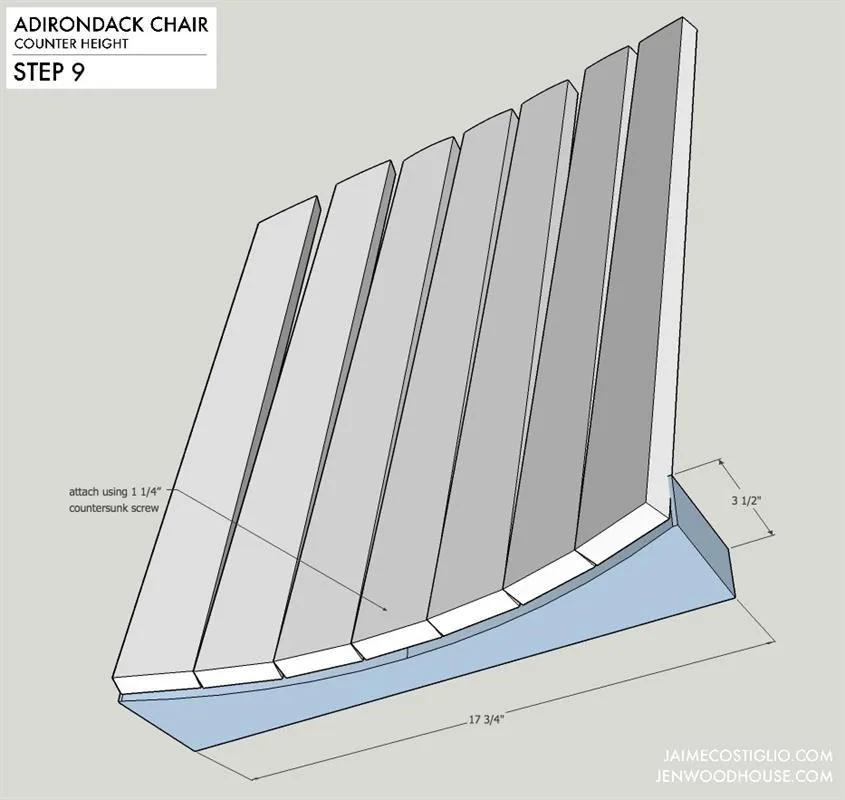
STEP 9: Attach back slats to back bottom support using (1) 1 1/4” countersunk wood screw at center of each board.
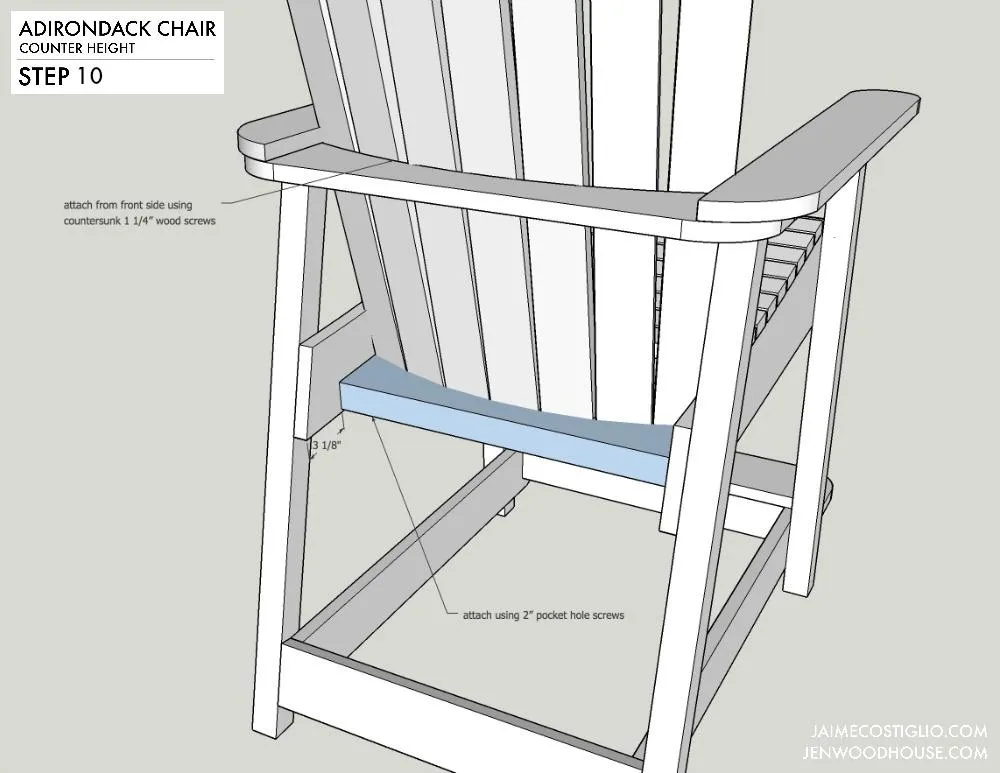
12. Step 10
- STEP 10: Attach back bottom support to seat side support rails using 2” pocket hole screw.
- Adjust back slats to fan out and rest against back middle support.
- Attach to back middle support using 1 ¼” countersunk screw from front.
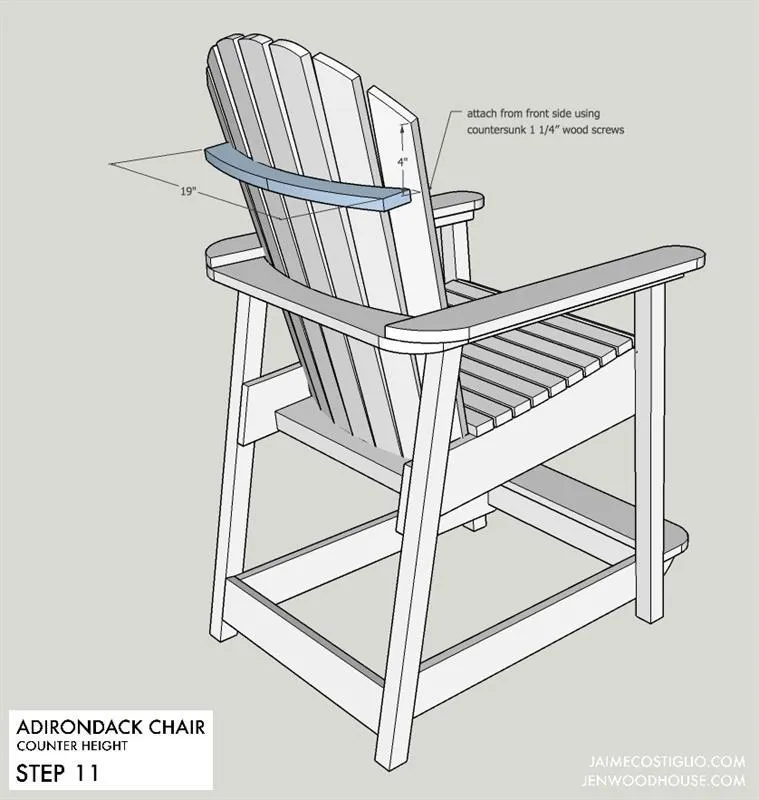
13. Step 11
STEP 11: Attach back top support to back slats if desired. Use 1 ¼” countersunk wood screws from front.