Notch
DIY Counter Height Adirondack Chair – Free Project Plan
Step-by-step build — 13 steps. Also available as a print sheet.
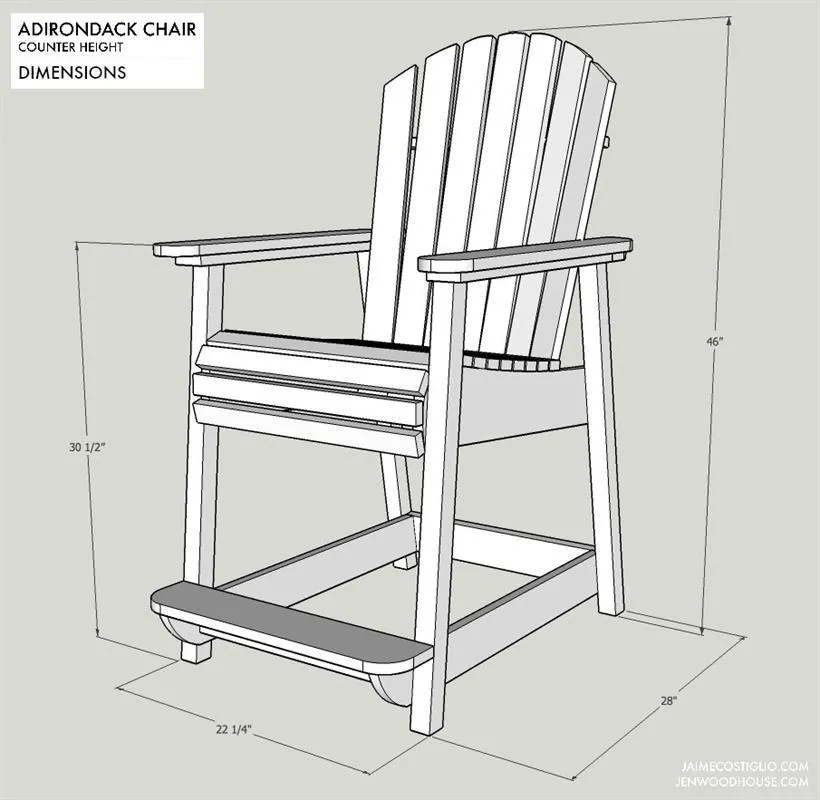
1Dimensions
Overall size: 46"h x 28"d x 26 1/4"w
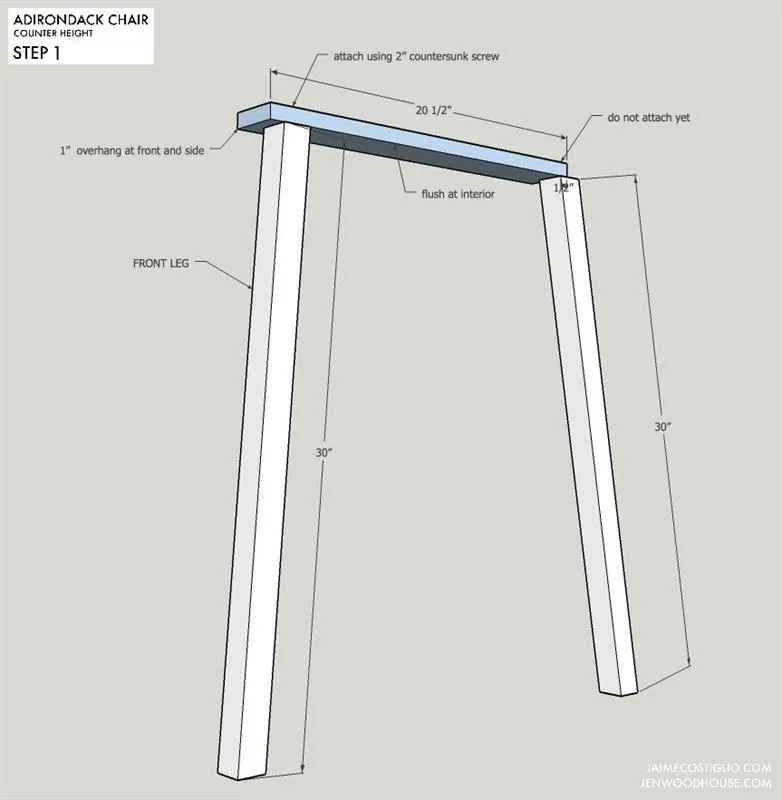
2Step 1
STEP 1: Attach arms to front leg using 2” countersunk screws. Make two opposing sets.
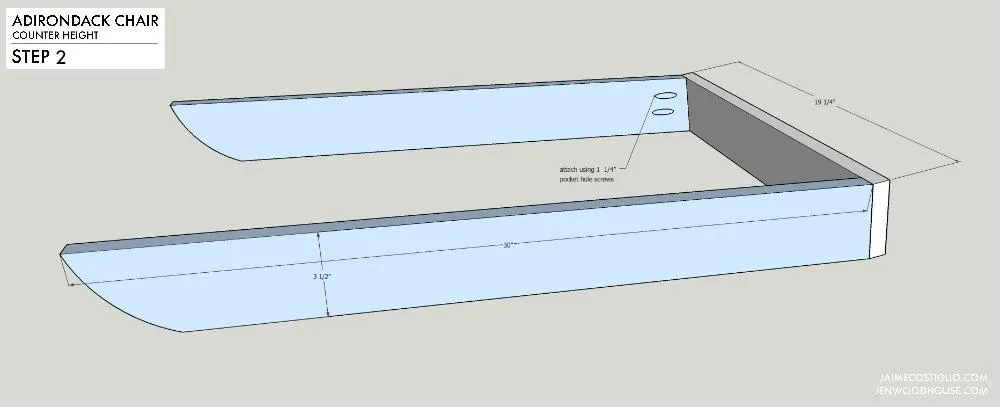
3Step 2
STEP 2: Assemble lower stretcher. Attach foot rest side rails to back stretcher using 1 ¼” pocket hole screws.
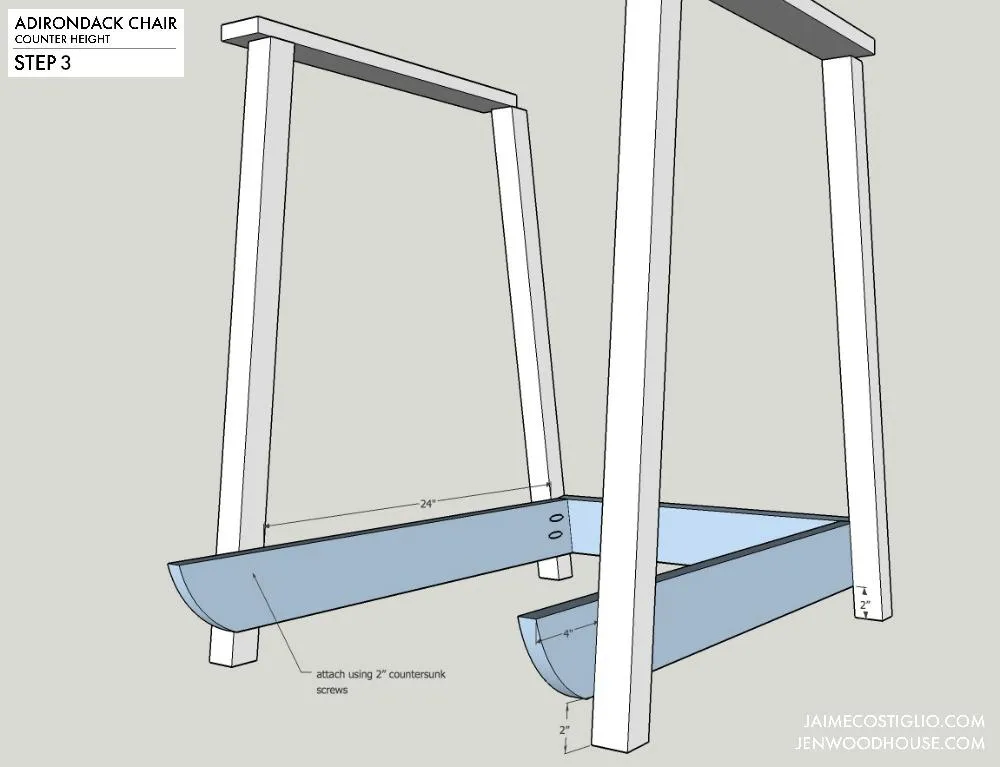
4Step 3
STEP 3: Attach lower stretcher to legs using 2” countersunk wood screws.
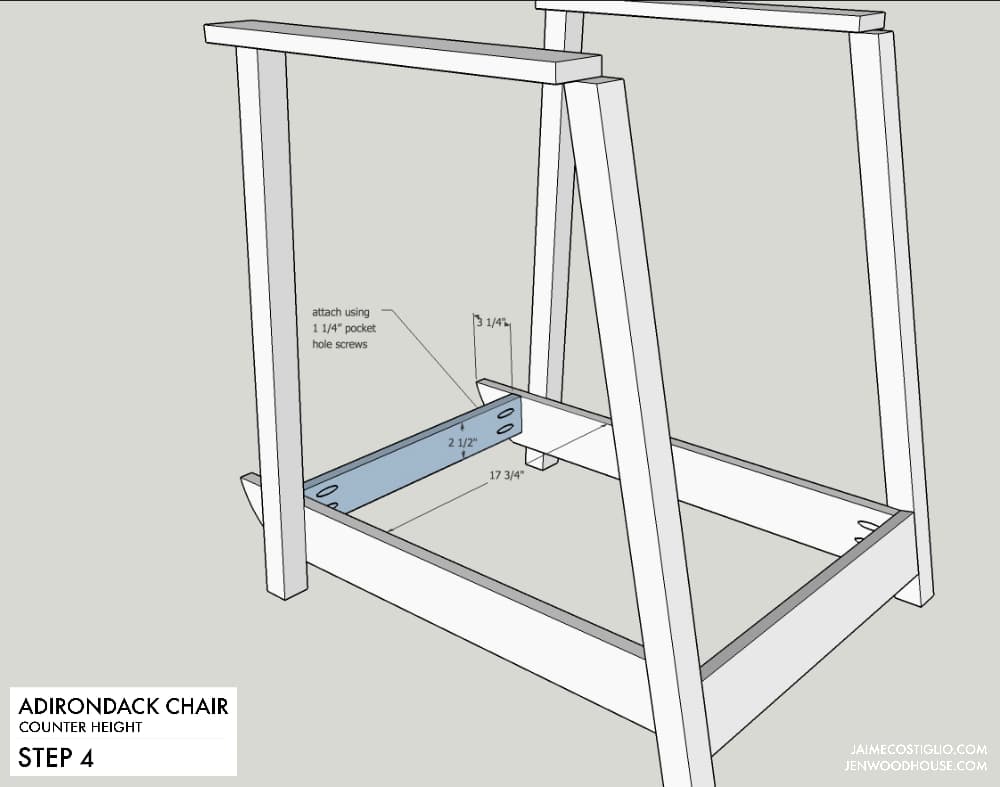
5Step 4
STEP 4: Attach foot rest front apron to side rails using 1 ¼” pocket hole screws.
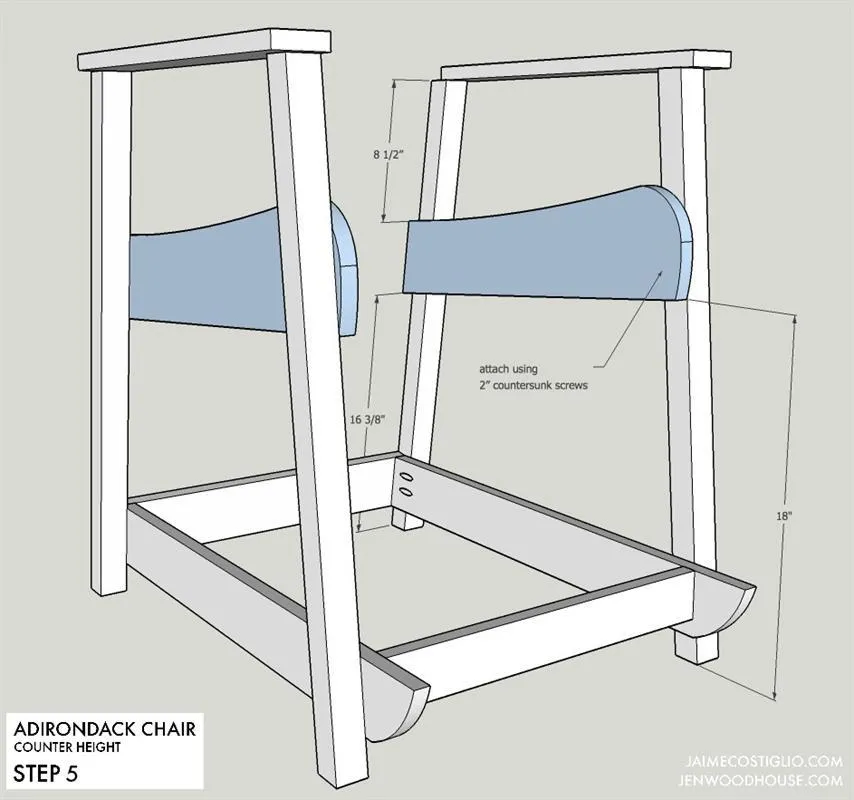
6Step 5
STEP 5: Attach seat side supports to legs using 2” countersunk screws.
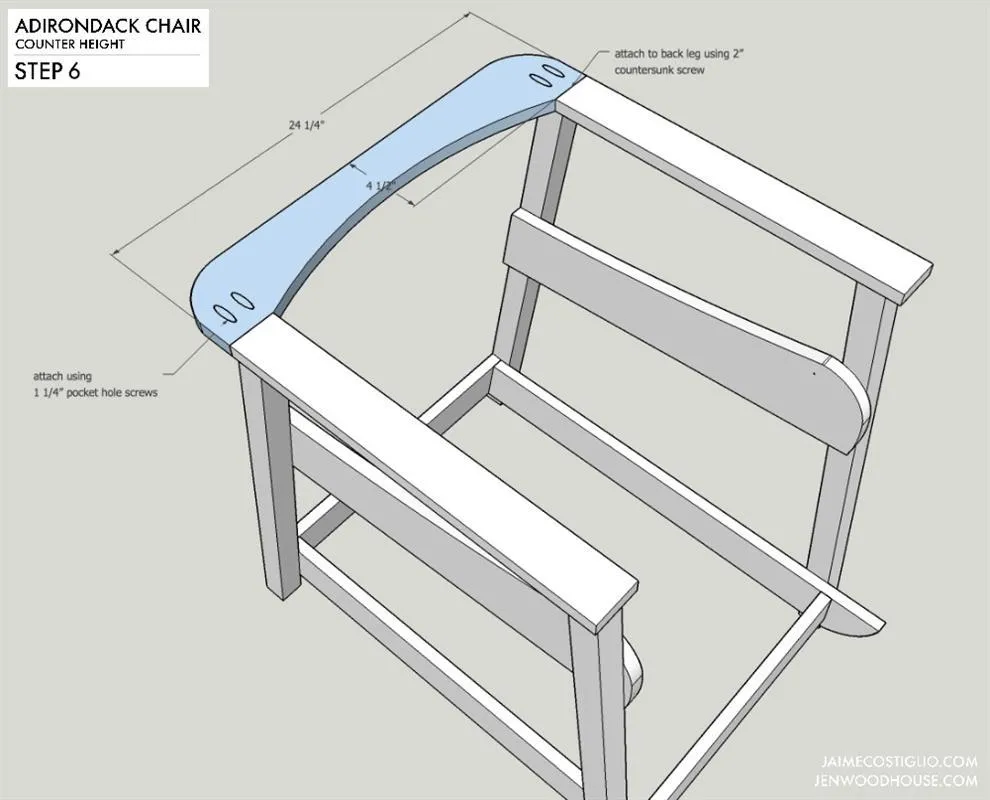
7Step 6
STEP 6: Attach back middle support to arms using 1 ¼” pocket hole screws. Then attach to back leg using 2” countersunk wood screws.
8Step 7
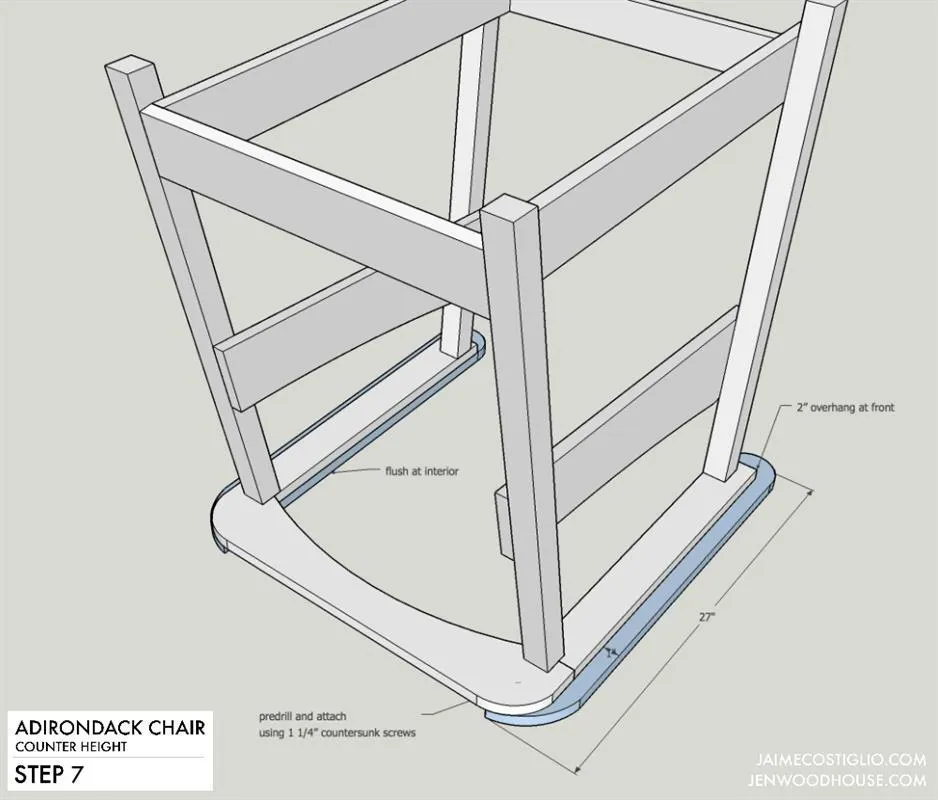
STEP 7: Attach arm rests to arm and back middle support using 1 ¼” countersunk screws from underside.
9Step 8
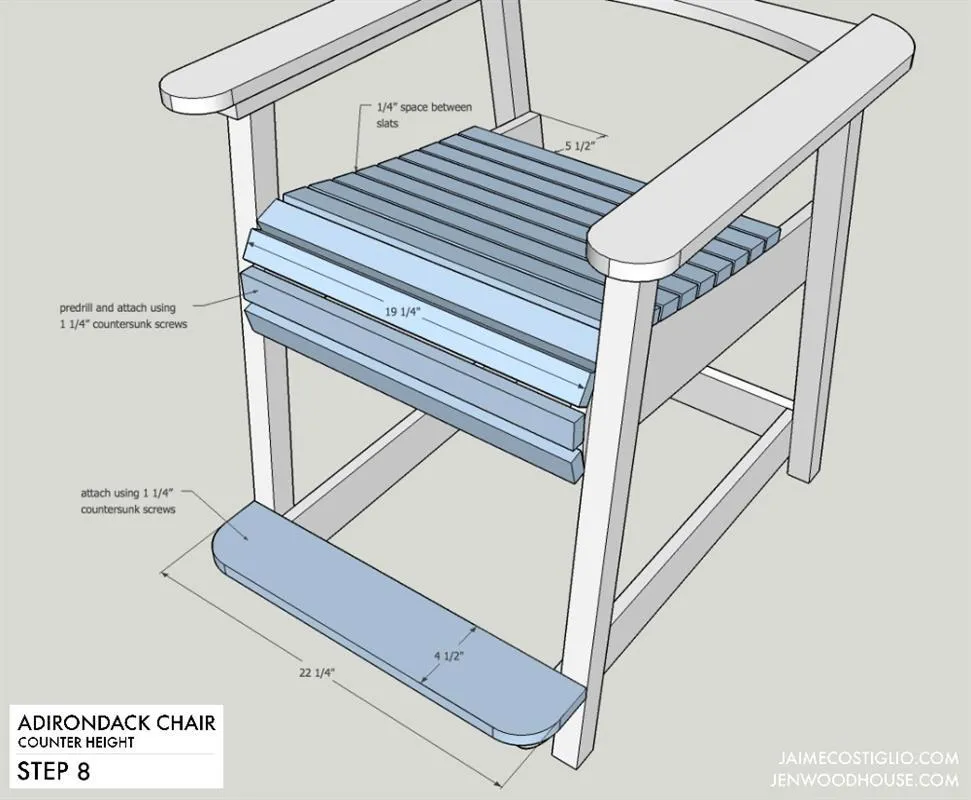
STEP 8: Attach foot rest to rails using 1 ¼” countersunk screws. Attach seat slats to supports using 1 ¼” countersunk screws.
10Step 9A
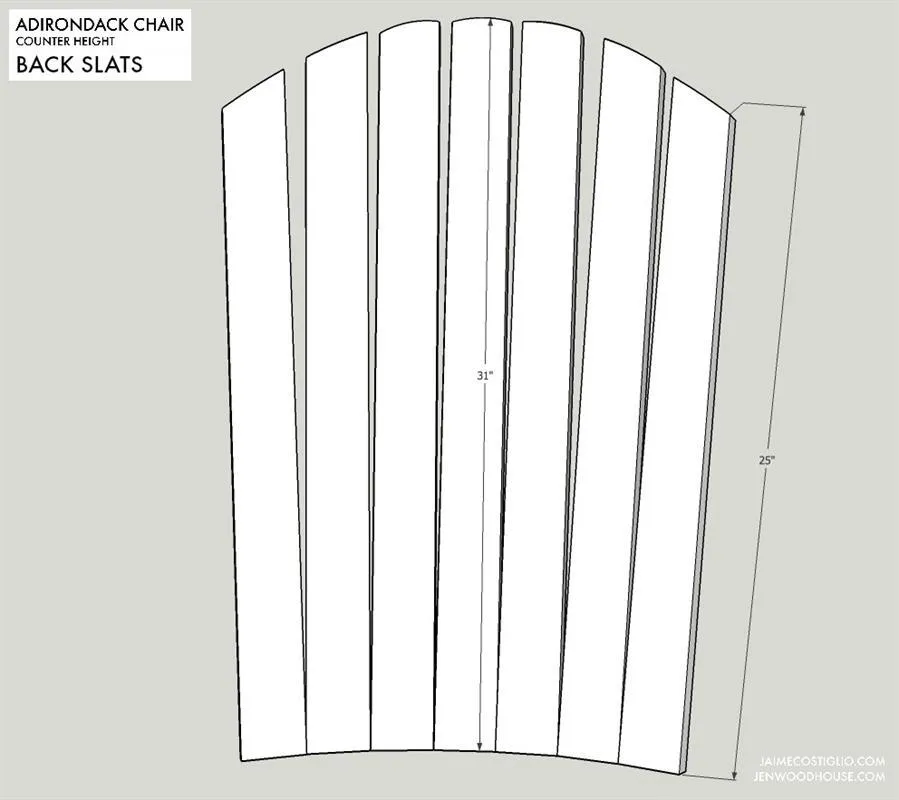
Use a jigsaw to cut curve into back slats before assembly.
11Step 9
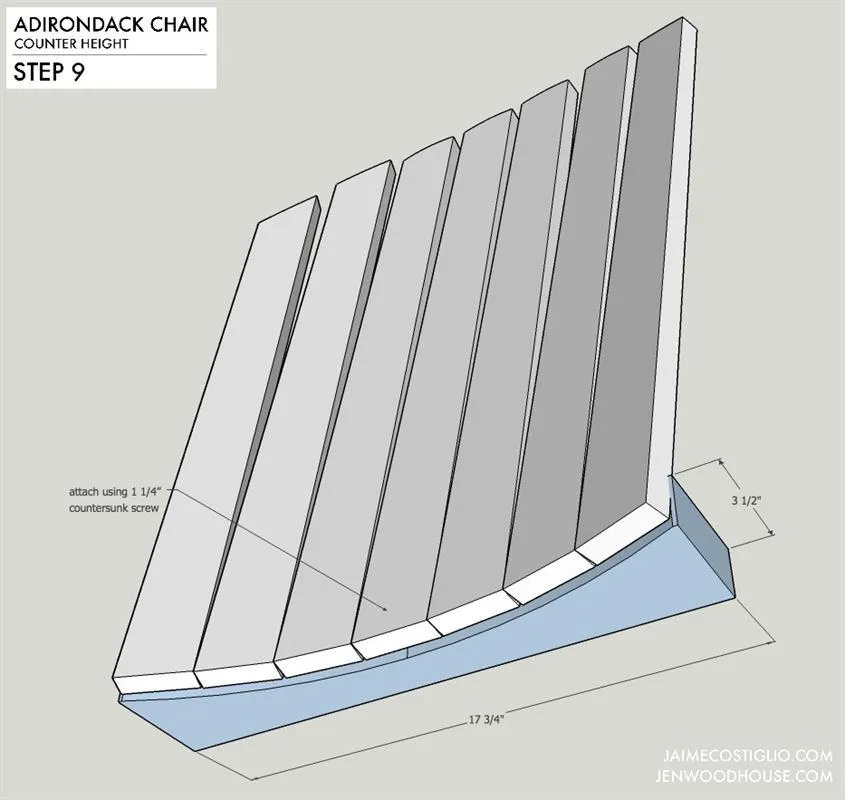
STEP 9: Attach back slats to back bottom support using (1) 1 1/4” countersunk wood screw at center of each board.
12Step 10
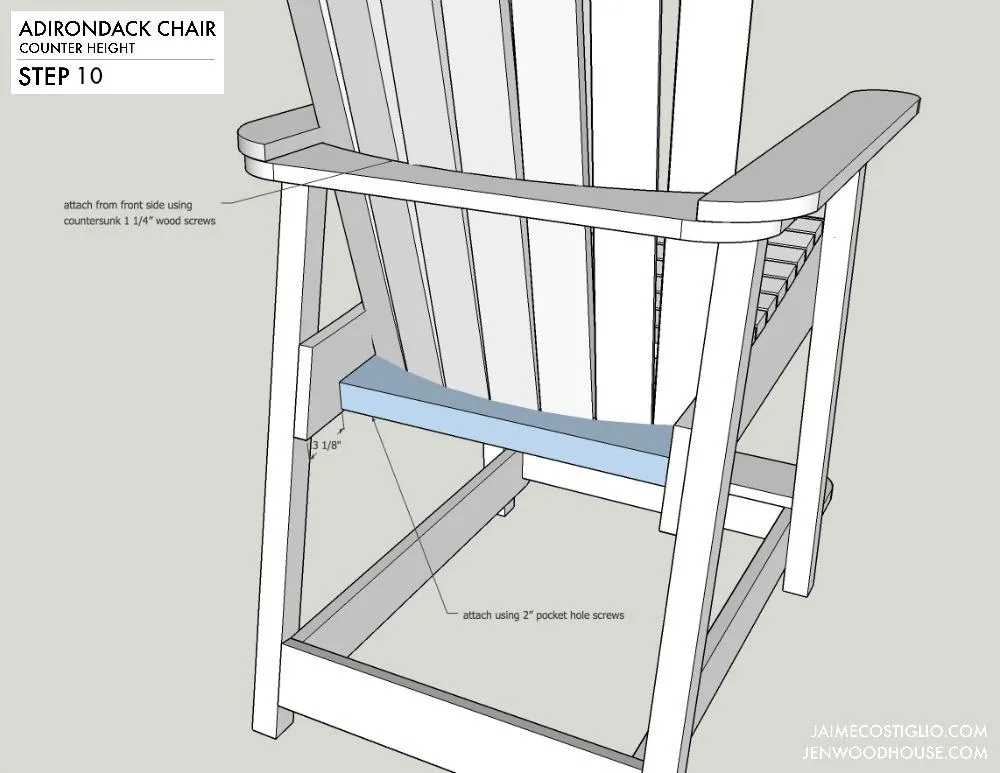
- STEP 10: Attach back bottom support to seat side support rails using 2” pocket hole screw.
- Adjust back slats to fan out and rest against back middle support.
- Attach to back middle support using 1 ¼” countersunk screw from front.
13Step 11
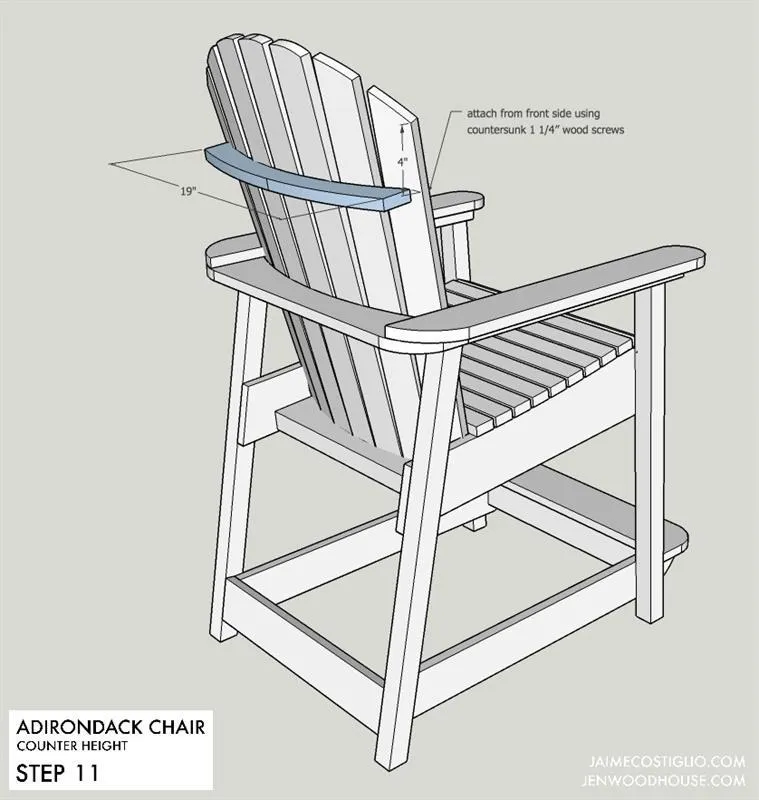
STEP 11: Attach back top support to back slats if desired. Use 1 ¼” countersunk wood screws from front.