Notch
NotchUse your browser's Print (Ctrl/Cmd + P) and choose Save as PDF. This page works offline once you've opened it with a signal.
9×13 Casserole Carrier
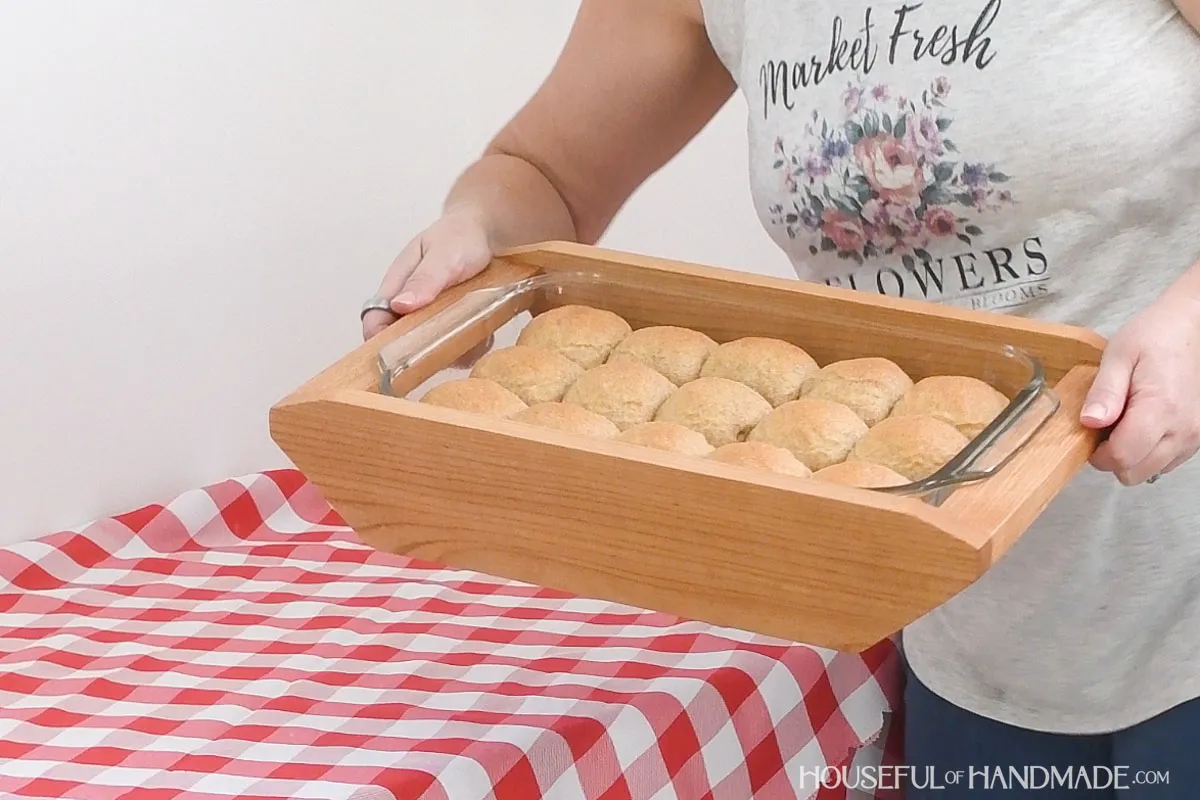
Take hot food to your next gathering with this easy to build carrier.
- Difficulty
- Beginner
- Time
- 2–3.8 hours
- Cost
- $
Cut list
| Part | Qty | T × W × L | Material | ✓ |
|---|---|---|---|---|
| Front/back, 1x4 | 2 | 3/4" × 3" × 17" | — | ☐ |
| Center supports, 1x2 | 4 | 3/4" × 1" × 9" | — | ☐ |
Materials
| Item | Qty | ✓ |
|---|---|---|
| Board, 1x4 (3/4" x 3 1/2") 3' long | 1 board | ☐ |
| Board, 1x2 (3/4" x 1 1/2") 4' long | 1 board | ☐ |
| 1 1/4" pocket hole screws | 16 each | ☐ |
| Wood glue | 1 each | ☐ |
Overall cost: $. Lumber varies by region, species, and season, so we give a band rather than a figure.
Tools
- Circular Saw
- Drill / Driver
- Pocket Hole Jig
- Random Orbit Sander
- Bar / Pipe Clamps — optional
Instructions
1. Cut shape in front/back
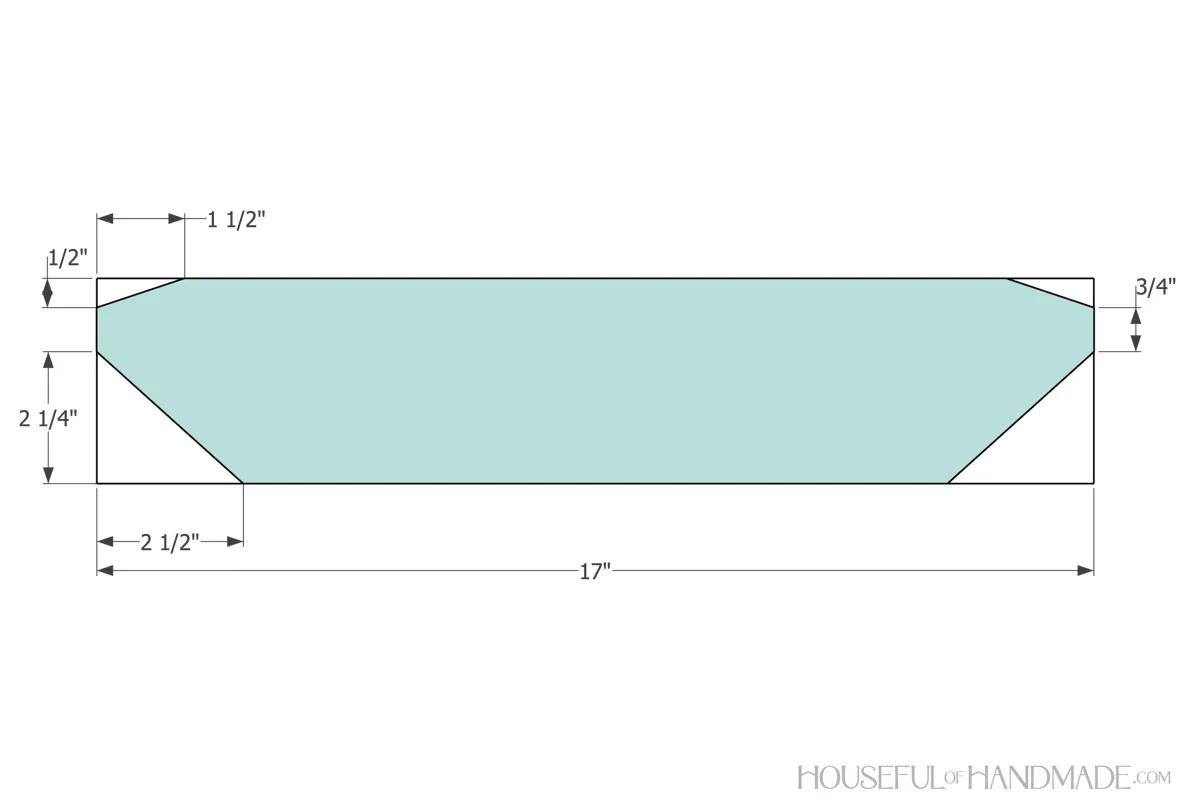
- The opening in the tray is 9 1/2" x 14".
- Measure your casserole dish to make sure it will fit inside the opening with the handles outside and adjust as needed. On the front and back pieces, measure and mark out the angles according to the diagram below.
- Cut the angles out with the circular saw.
2. Attach center pieces to one side
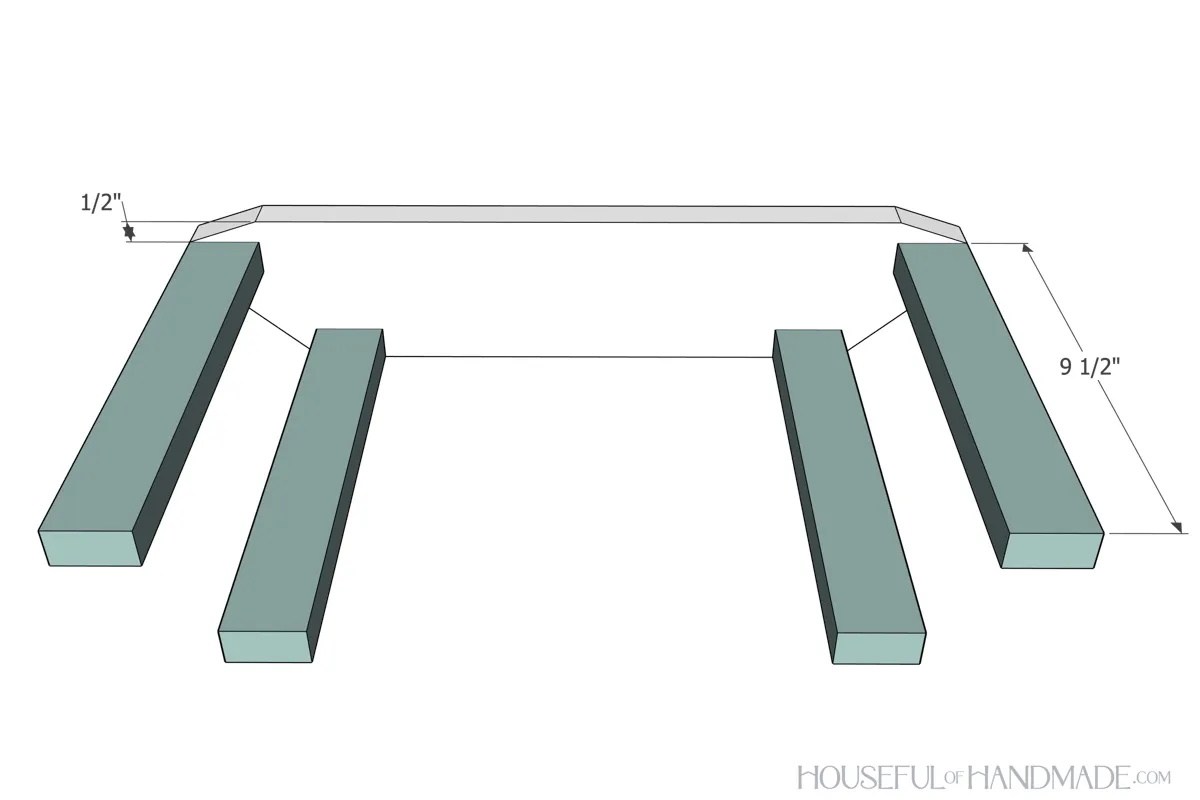
With your pocket hole jig set for 3/4" thick material, drill 2 pocket holes in each end of the 4 center pieces. Attach all 4 center pieces to the front or back piece. Secure with wood glue and 1 1/4" pocket hole screws. The top pieces will be attached so they are flush with the ends of the front/back and 1/2" below the top. The two lower pieces will be attached so they are flush with the bottom and even with the corner of the lower angled cut.
3. Optional Joinery Variation
If you do not want to have pocket holes on the underside of your carrier, you could attach the center pieces with dowels using Kreg's Dowel jig. But I suggest adding the dowel holes before cutting the angles as it can be harder to line things up with the angles cut.
4. Attach remaining front/back piece
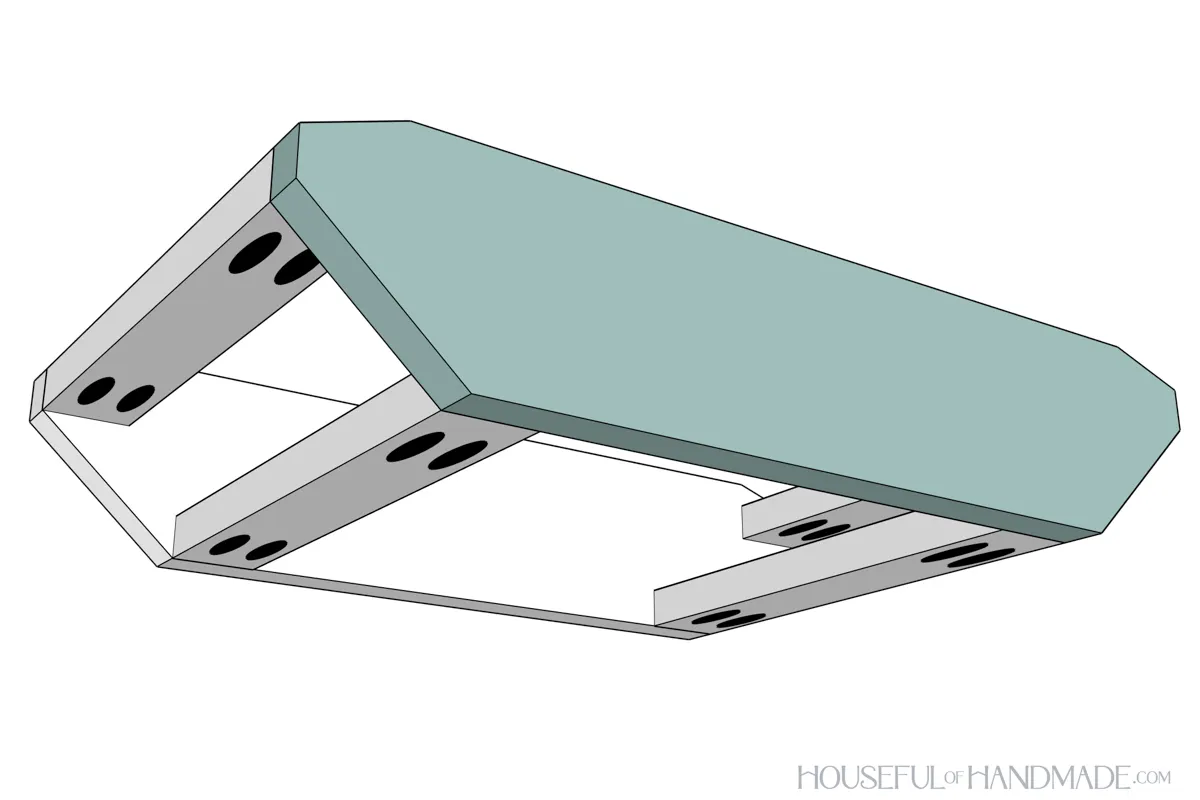
Once all the center pieces are secured to one front/back piece, line the other piece up and secure them all to it. Secure with glue and 1 1/4" pocket hole screws.
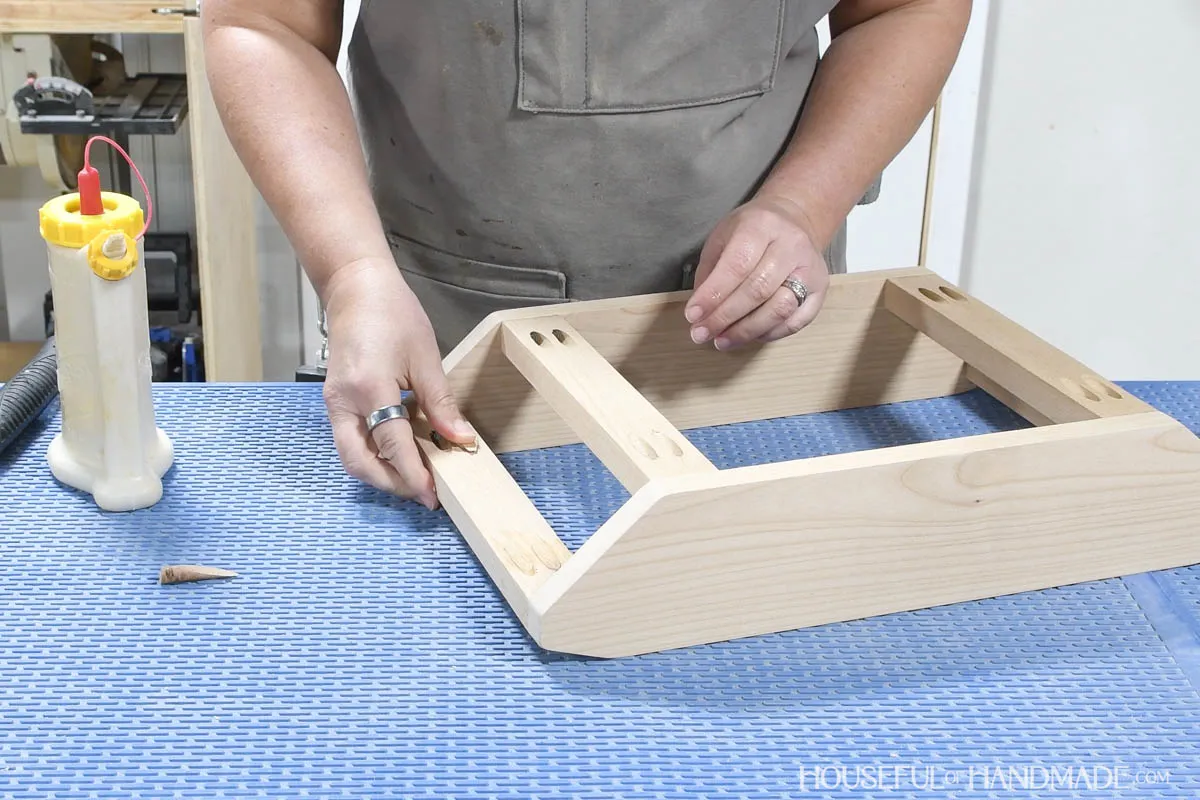
5. Fill pocket holes
To hide your pocket holes, glue pocket hole plugs into them, then sand till they are flush with the board. I like to use the plug cutter attachment on the pocket hole jig to make plugs that match my wood perfectly.
6. Finish and enjoy!
- Sand your new casserole carrier.
- Then stain/seal/paint it as desired. I built my carrier out of alder wood and finished it with a food safe linseed oil/beeswax sealer.
- Now you are ready to easily take your favorite hot dish to your next gathering. And make sure to visit me at Houseful of Handmade for more fun things to build for the kitchen.