 Notch
Notch- Difficulty
- Beginner
- Time
- 2–3.8 hours
- Cost
- $
About this build
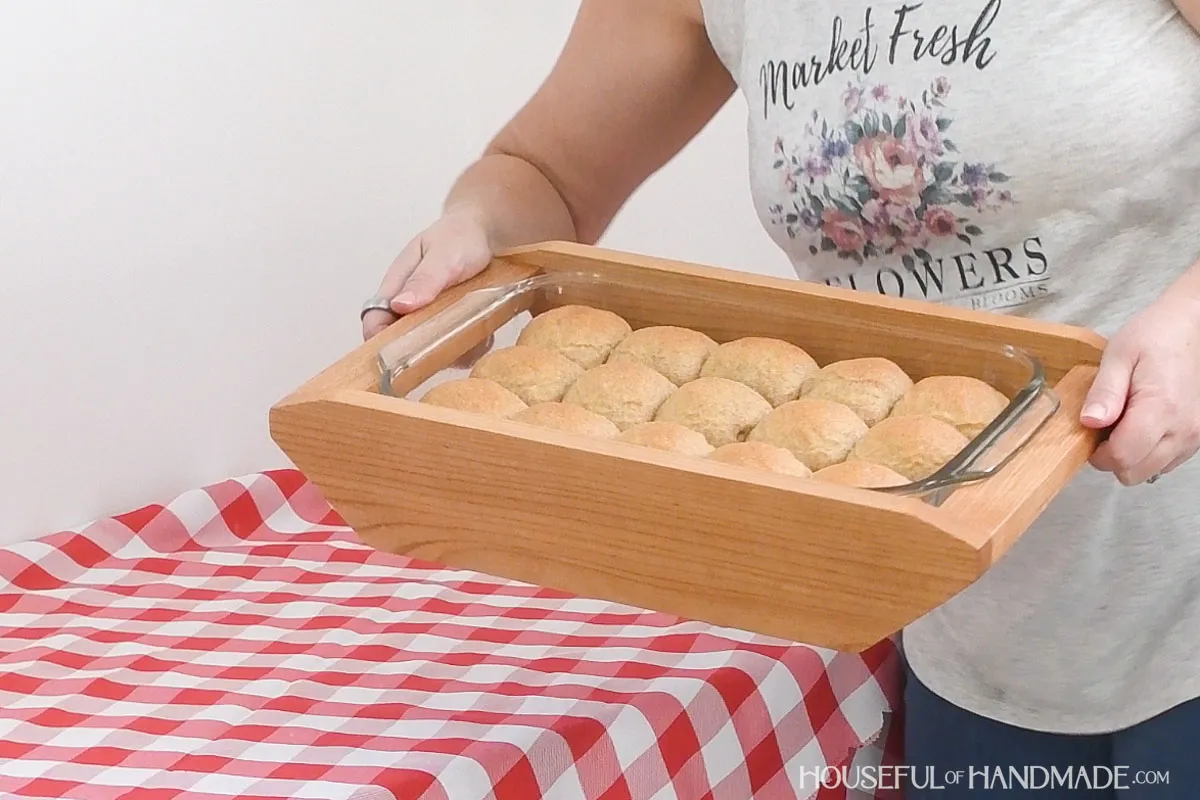
Take hot food to your next gathering with this easy to build carrier. The beautiful serving stand holds a glass 9x13 rectangular dish.
Tools
Essential
- Circular Saw
- Drill / Driver
- Pocket Hole Jig
- Random Orbit Sander
Optional / nice to have
- Bar / Pipe Clamps
Materials
| Item | Qty |
|---|---|
| Board, 1x4 (3/4" x 3 1/2") 3' long | 1 board |
| Board, 1x2 (3/4" x 1 1/2") 4' long | 1 board |
| 1 1/4" pocket hole screws | 16 each |
| Wood glue | 1 each |
Overall cost: $. Lumber prices vary by region, species, and season, so we give a band rather than a figure we would only be pretending to know.
Cut list
| Part | Qty | T × W × L |
|---|---|---|
| Front/back, 1x4 | 2 | 3/4" × 3" × 17" |
| Center supports, 1x2 | 4 | 3/4" × 1" × 9" |
What to buy
Buy 2 boards at 8 ft.
3/4" × 3"
1 board
3/4" × 1"
1 board
Assumes 8 ft stock, a 1/8" saw kerf, and buying each part at its own width. Change the board size or kerf on the full board plan →
Instructions
1Cut shape in front/back
- The opening in the tray is 9 1/2" x 14".
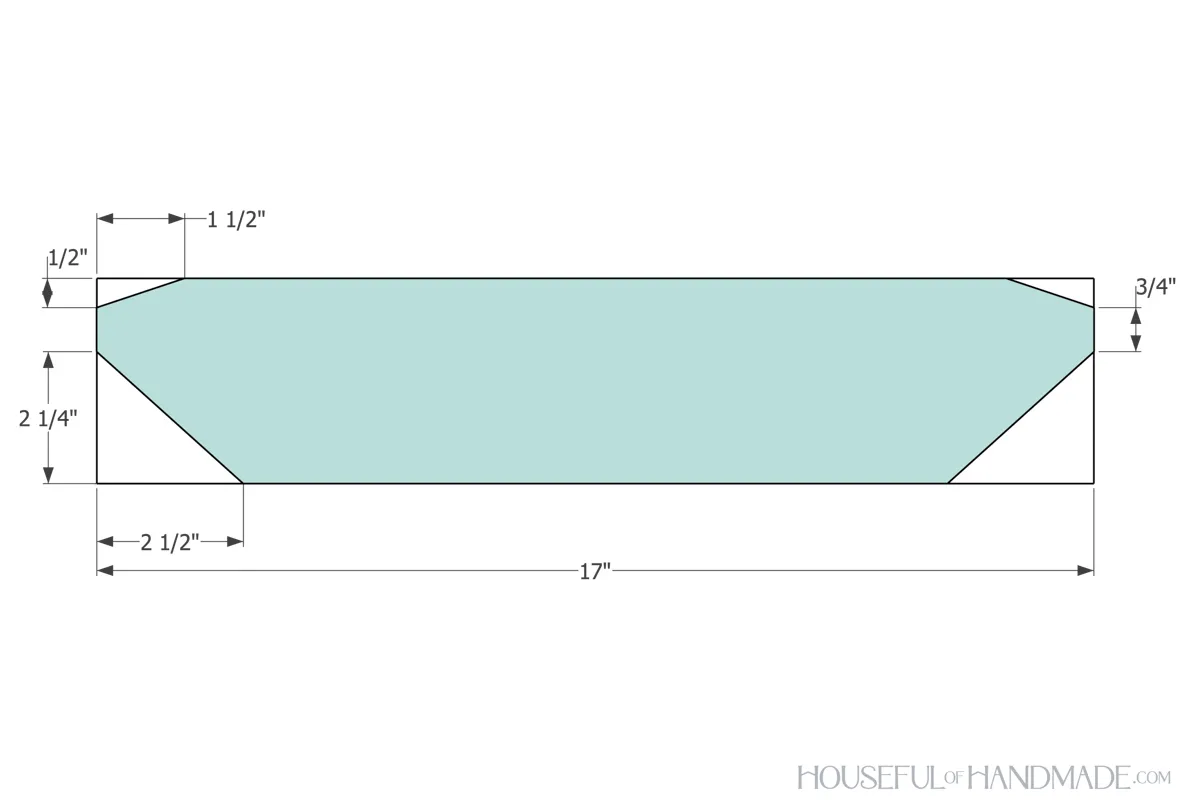
- Measure your casserole dish to make sure it will fit inside the opening with the handles outside and adjust as needed. On the front and back pieces, measure and mark out the angles according to the diagram below.
- Cut the angles out with the circular saw.
2Attach center pieces to one side
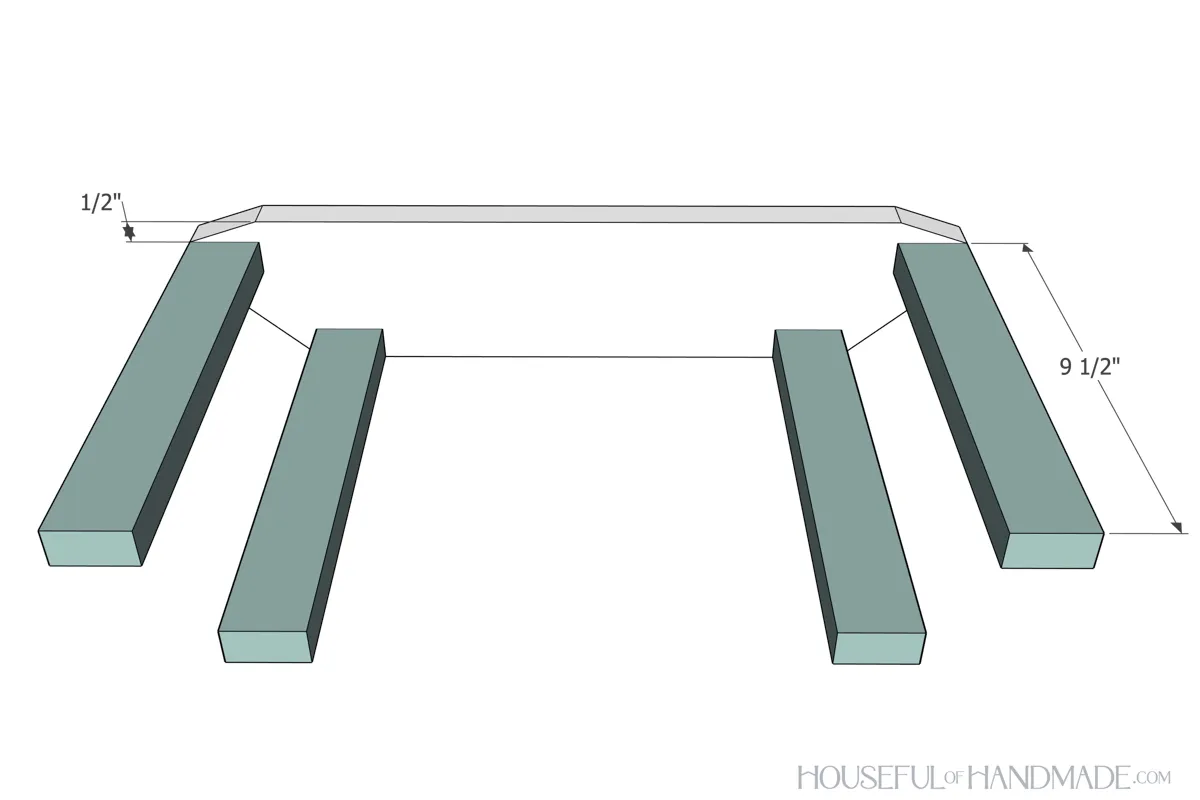
With your pocket hole jig set for 3/4" thick material, drill 2 pocket holes in each end of the 4 center pieces. Attach all 4 center pieces to the front or back piece. Secure with wood glue and 1 1/4" pocket hole screws. The top pieces will be attached so they are flush with the ends of the front/back and 1/2" below the top. The two lower pieces will be attached so they are flush with the bottom and even with the corner of the lower angled cut.
3Optional Joinery Variation
If you do not want to have pocket holes on the underside of your carrier, you could attach the center pieces with dowels using Kreg's Dowel jig. But I suggest adding the dowel holes before cutting the angles as it can be harder to line things up with the angles cut.
4Attach remaining front/back piece
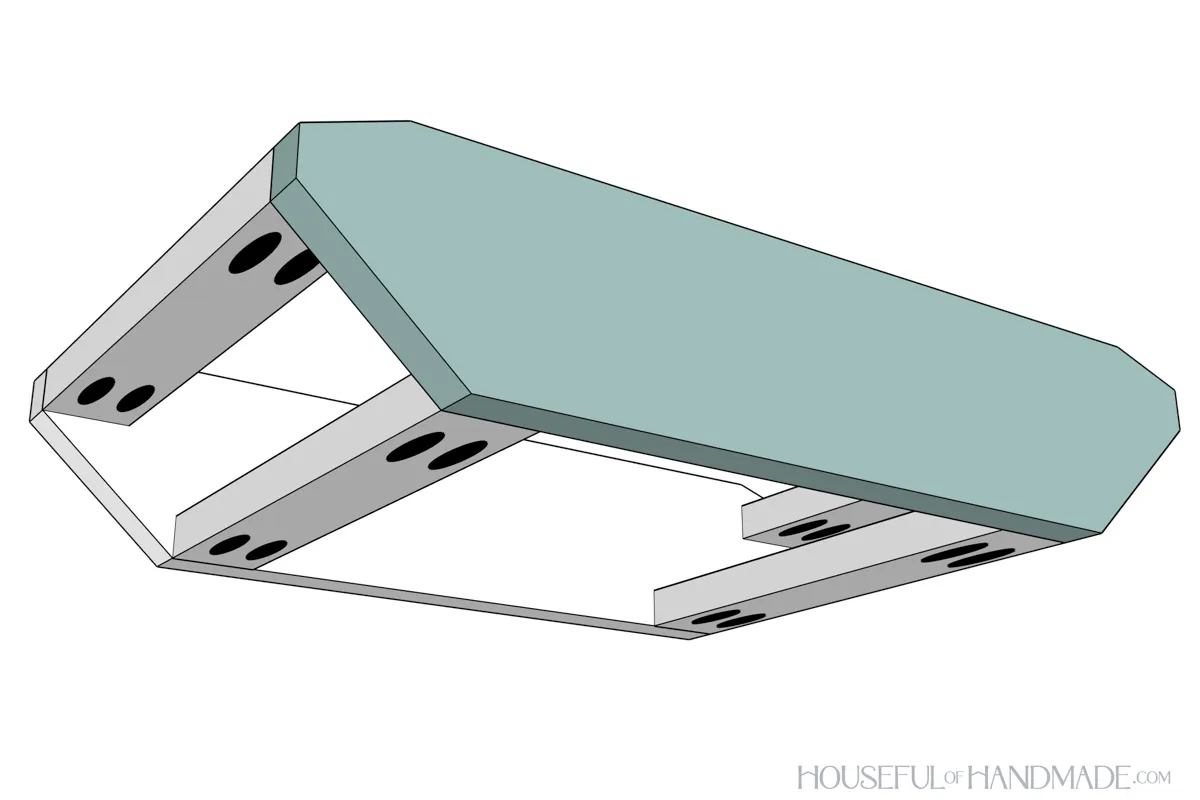
Once all the center pieces are secured to one front/back piece, line the other piece up and secure them all to it. Secure with glue and 1 1/4" pocket hole screws.
5Fill pocket holes
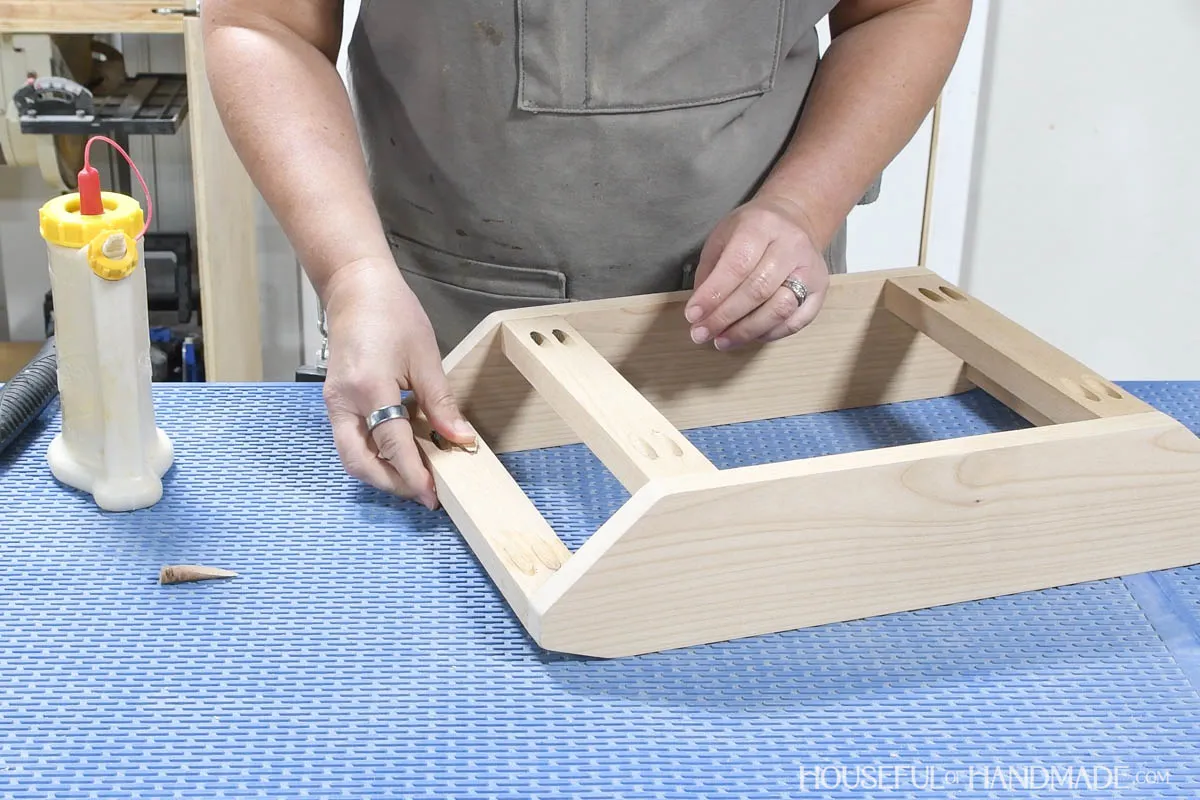
To hide your pocket holes, glue pocket hole plugs into them, then sand till they are flush with the board. I like to use the plug cutter attachment on the pocket hole jig to make plugs that match my wood perfectly.
6Finish and enjoy!
- Sand your new casserole carrier.
- Then stain/seal/paint it as desired. I built my carrier out of alder wood and finished it with a food safe linseed oil/beeswax sealer.
- Now you are ready to easily take your favorite hot dish to your next gathering. And make sure to visit me at Houseful of Handmade for more fun things to build for the kitchen.
Tags
- Beginning Woodworking Projects
- Beginner
Reviews & builds
No reviews yet
Sign in to review this plan or share your build.
No reviews yet. Be the first to build this.