Notch
Notch3 Drawer Nightstand
Step-by-step build — 11 steps. Also available as a print sheet.
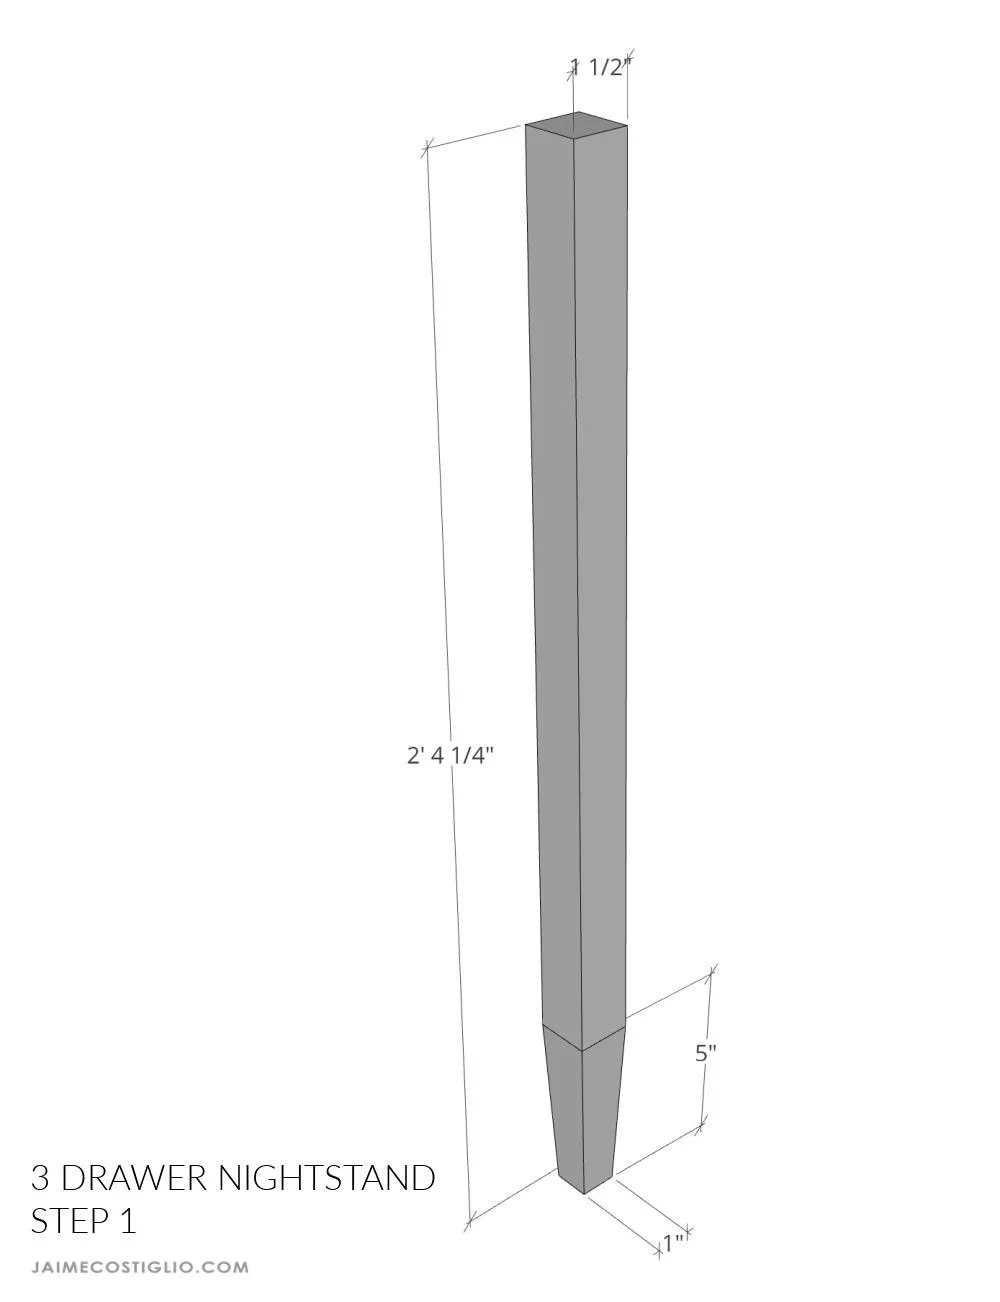
1Taper legs
If desired use a tapering jig to make bottom portion of legs tapered.
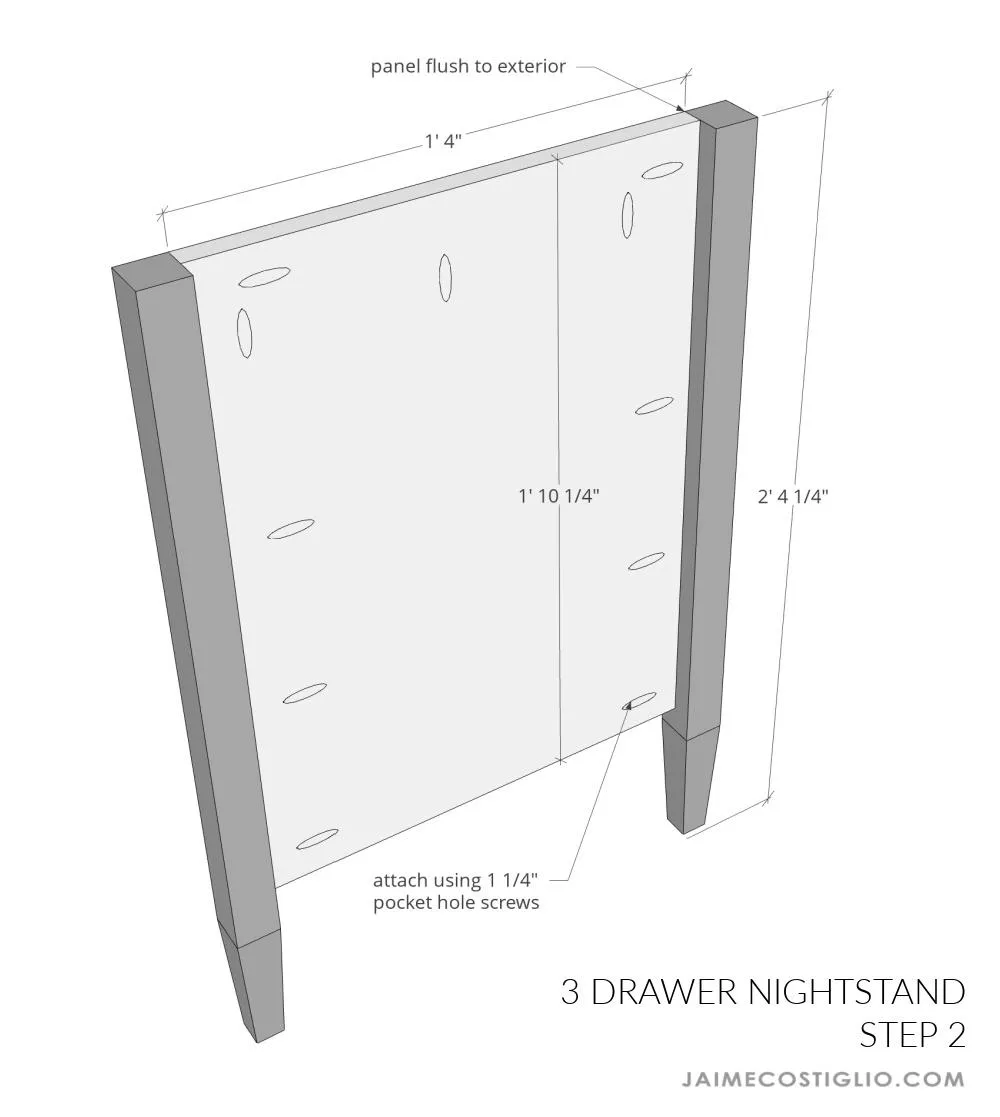
2Attach legs to side panels
Attach legs to side panels using 1 ¼” pocket hole screws. Keep side panel flush to leg at exterior. Make 2.
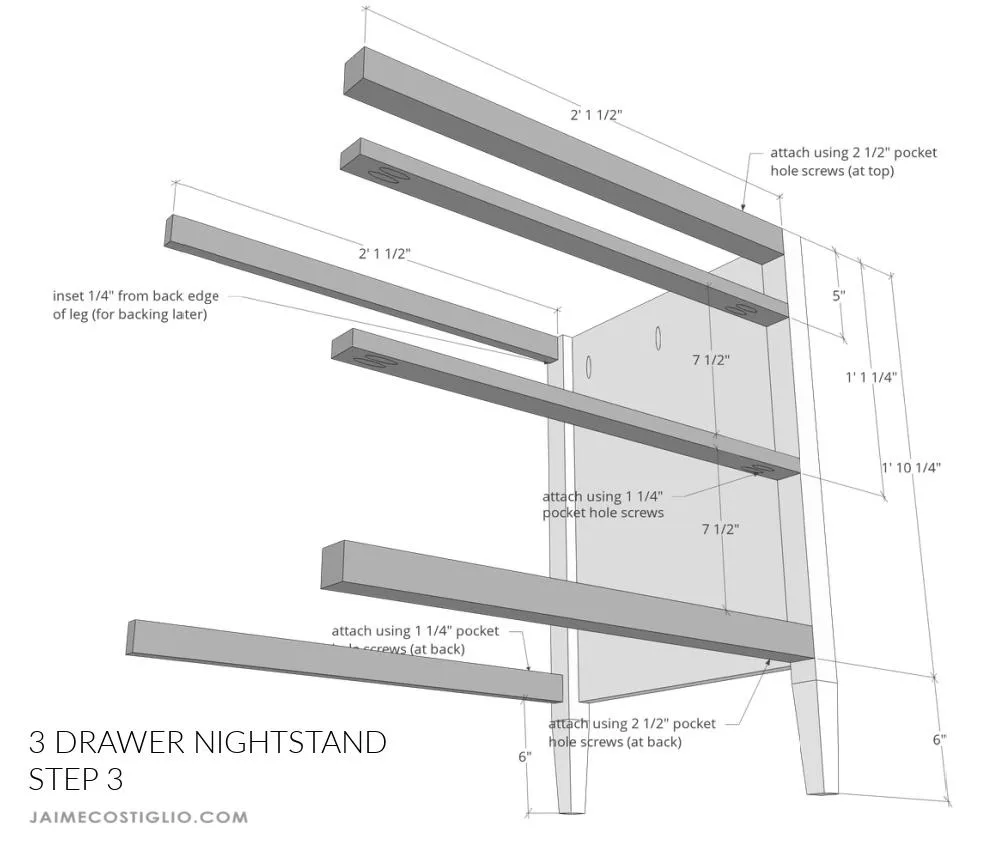
3Attach cross supports
Attach cross supports to side panel. Use wood glue and corresponding pocket hole screws. Keep pocket holes at back, top or underside when possible.
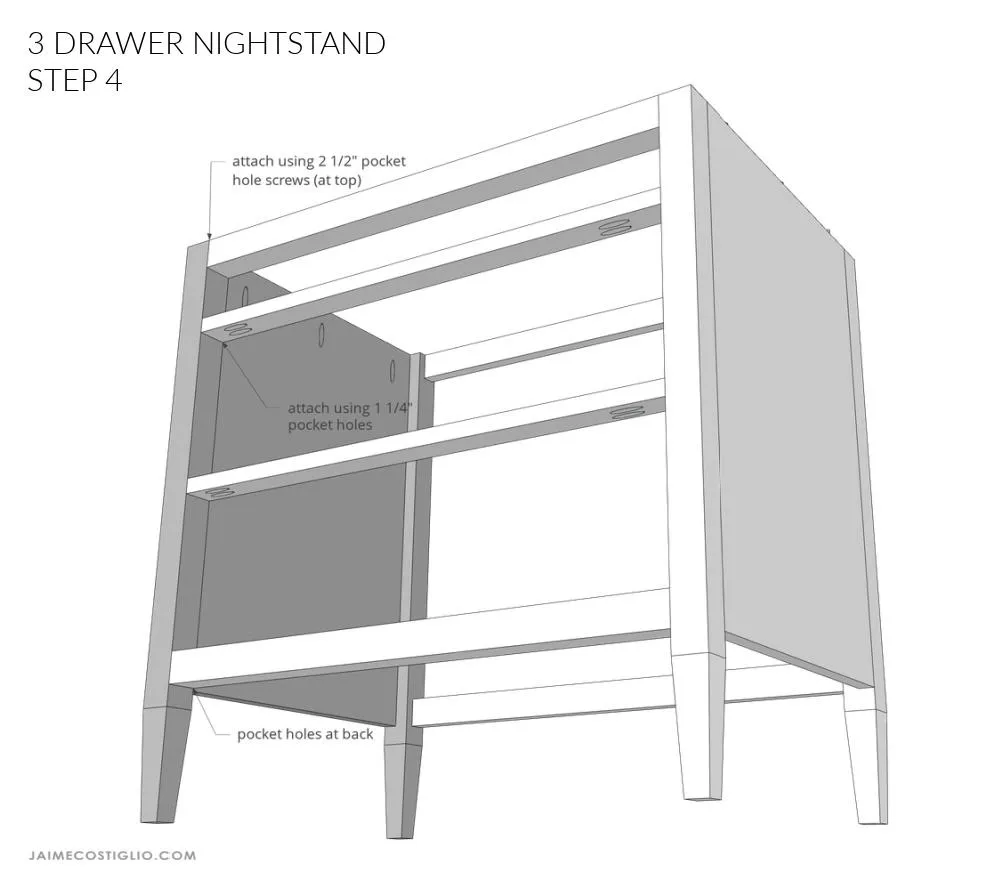
4Attach opposite side to supports
Attach other side panel to cross supports, same as Step 3.
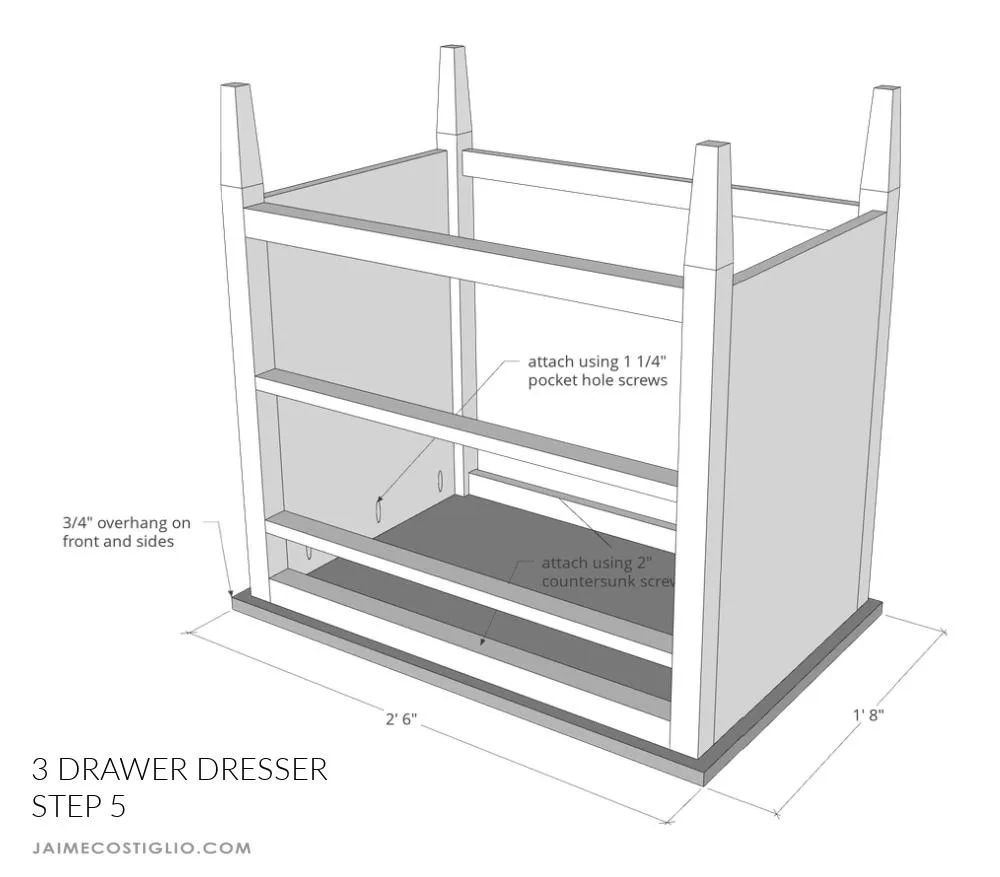
5Attach top
Attach top to body using 1 ¼” pocket hole screws. Keep ¾” overhang at front and sides. Secure front and back cross supports to top using 2” countersunk wood screws.
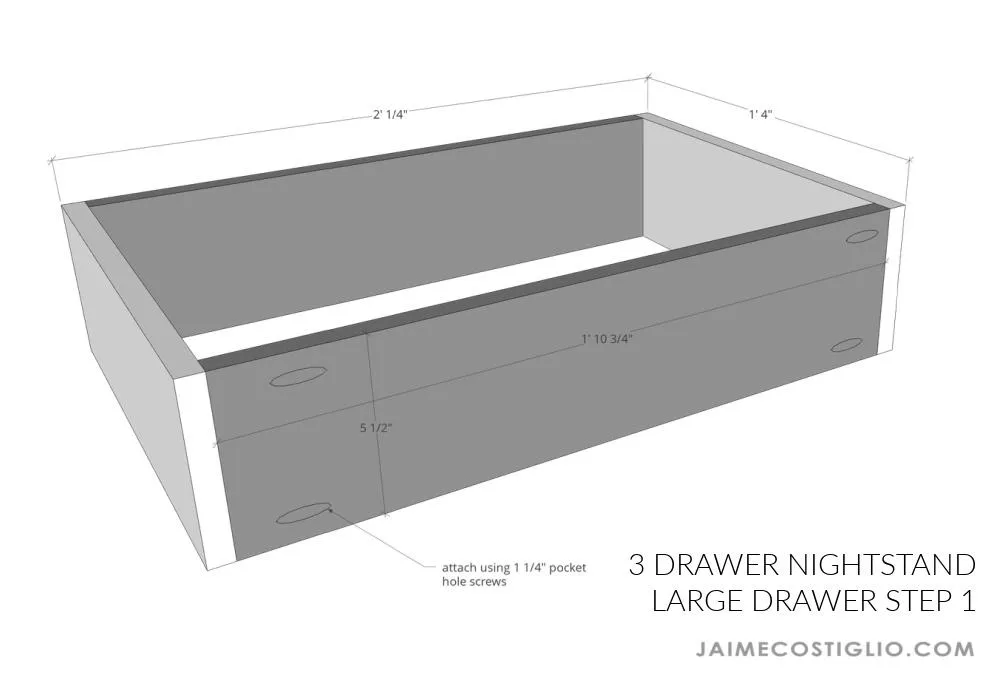
6Assemble large drawers
Attach long sides to short sides using wood glue and 1 ¼” pocket hole screws.
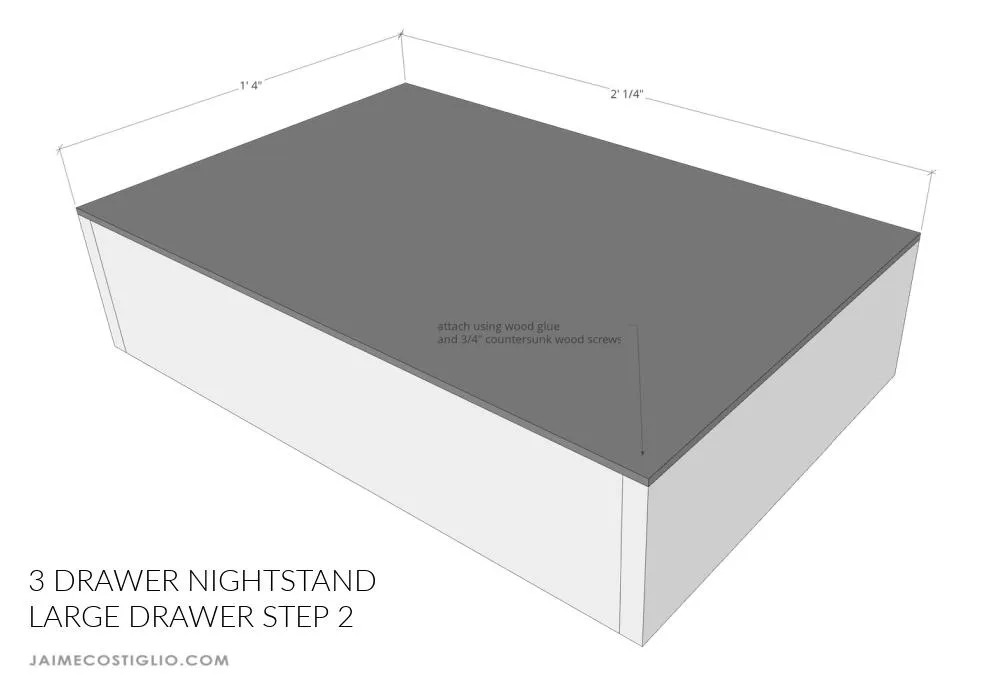
7Attach drawer bottom to large drawers
Attach drawer bottom to box using wood glue and ¾” countersunk wood screws.
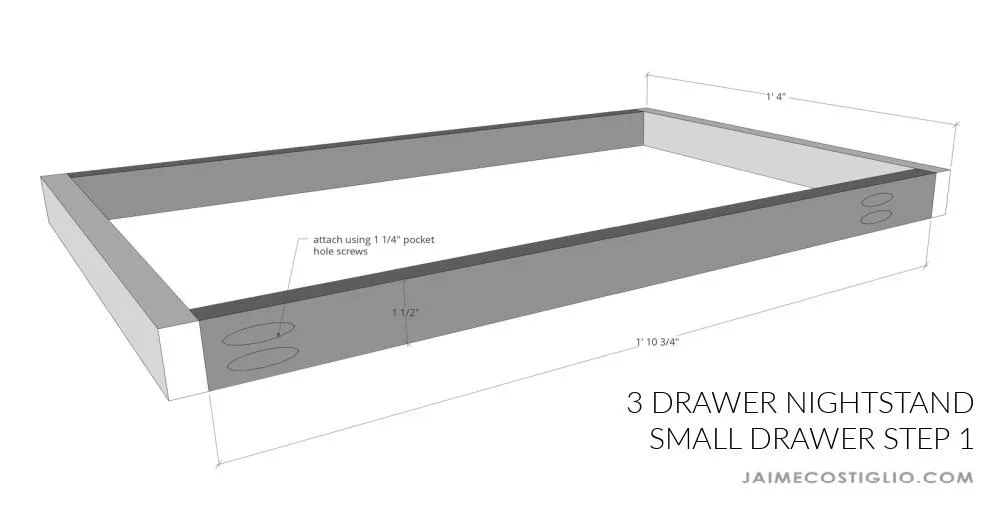
8Assemble small drawer
Attach long sides to short sides using wood glue and 1 ¼” pocket hole screws.
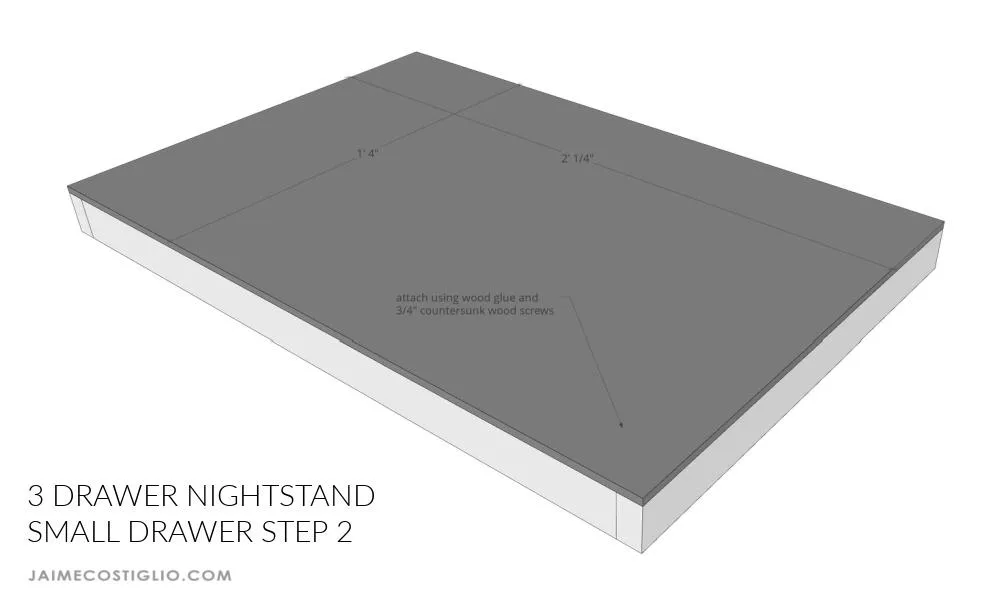
9Attach drawer bottom to small drawer
Attach drawer bottom to box using wood glue and ¾” countersunk wood screws.
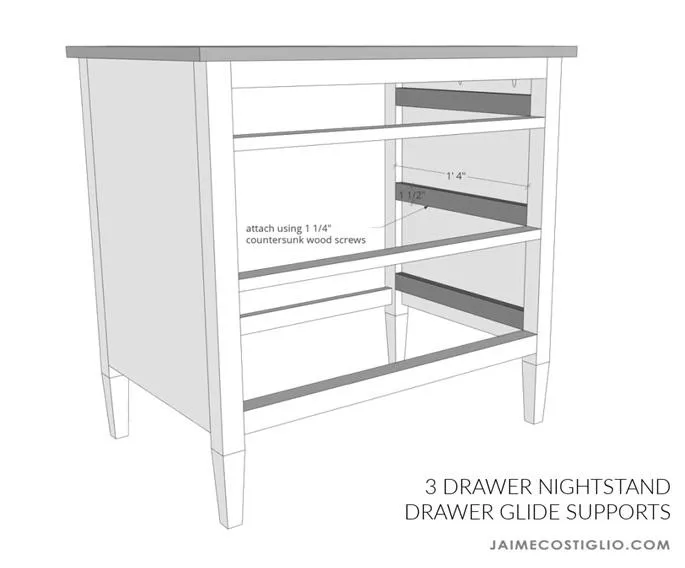
10Attach drawer glide supports
Before installing drawer glides attach supports to interior side panels using wood glue and 1 ¼” countersunk wood screws.
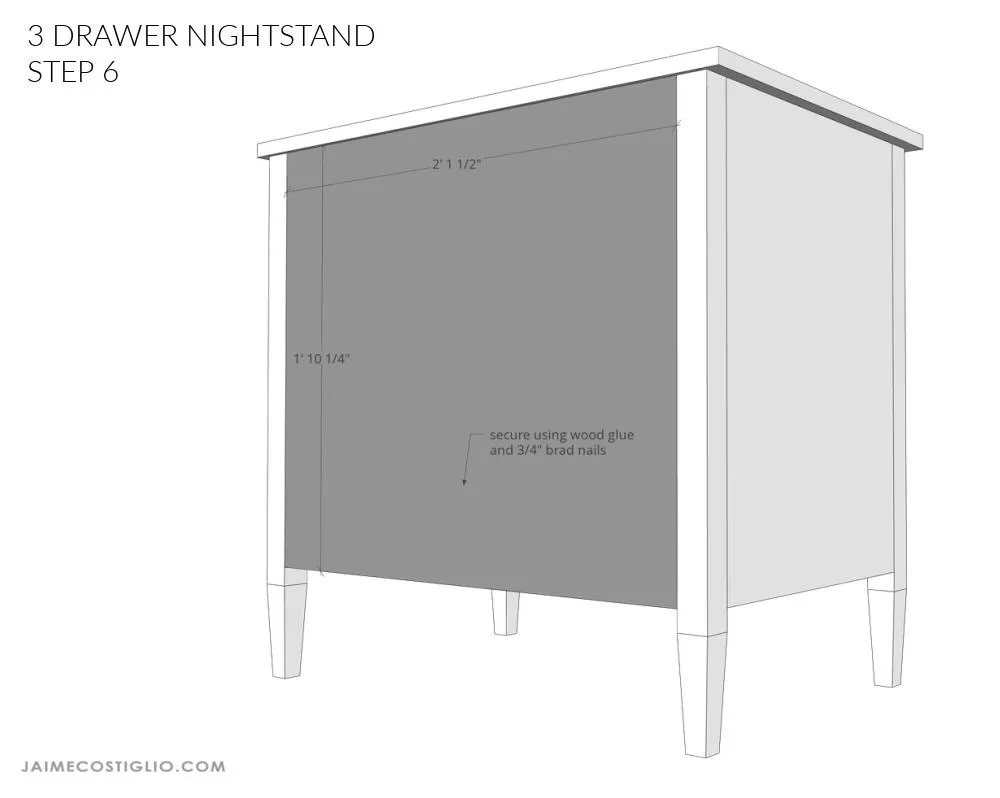
11Attach backing
Attach backing to cross supports using wood glue and ¾” brad nails.