 Notch
- Difficulty
- Intermediate
- Time
- 4.8–9.3 hours
- Cost
- $$$
About this build
A classic three drawer nightstand with simple lines and generous storage. This nightstand is the perfect blend of ample surface area at your bedside and lots of hidden storage space in the drawers below.
Tools
Essential
- Circular Saw
- Drill / Driver
- Miter Saw
- Pocket Hole Jig
- Random Orbit Sander
Optional / nice to have
- Bar / Pipe Clamps
- Tape Measure
Materials
| Item | Qty |
|---|---|
| Select pine board, 2x2x96" | 2 board |
| Select pine board, 1x2x96" | 3 board |
| Select pine board, 1x8x72" | 1 board |
| Select pine board, 1x3x72" | 1 board |
| Select pine board, 1x6x96" | 2 board |
| 3/4" plywood full sheet, 4' x 8' | 1 board |
| 1/4" plywood full sheet, 4' x 8' | 1 board |
| 2 1/2" pocket-hole screws | 8 each |
| 1 1/4" pocket-hole screws | 70 each |
| #8 x 2" wood screws | 6 each |
| #8 x 3/4" wood screws | 32 each |
| #8 x 1 1/4" wood screws | 20 each |
| 18 gauge 3/4" brad nails | 12 each |
| Wood glue | 1 each |
| Sets of 16" soft close side mount drawer glides | 3 each |
| Drawer pulls | 3 each |
Overall cost: $$$. Lumber prices vary by region, species, and season, so we give a band rather than a figure we would only be pretending to know.
Cut list
| Part | Qty | T × W × L |
|---|---|---|
| Legs | 4 | 1" × 1" × 29" |
| Side panels | 2 | 3/4" × 16" × 22" |
| Cross supports | 4 | 3/4" × 1" × 25" |
| Cross supports | 2 | 1" × 1" × 25" |
| Top | 1 | 3/4" × 20" × 30" |
| Large drawer fronts | 2 | 3/4" × 7" × 25" |
| Small drawer front | 1 | 3/4" × 7" × 25" |
| Large drawer short sides | 4 | 3/4" × 5" × 16" |
| Large drawer long sides | 4 | 3/4" × 5" × 22" |
| Small drawer short sides | 2 | 3/4" × 1" × 16" |
| Small drawer long sides | 2 | 3/4" × 1" × 22" |
| Drawer bottoms | 3 | 1/4" × 16" × 24" |
| Drawer glide supports | 6 | 3/4" × 1" × 16" |
| Backing | 1 | 1/4" × 22" × 25" |
What to buy
Buy 13 boards at 8 ft.
1" × 1"
2 boards
3/4" × 20"
1 board
3/4" × 16"
1 board
3/4" × 7"
1 board
3/4" × 5"
2 boards
3/4" × 1"
4 boards
1/4" × 22"
1 board
1/4" × 16"
1 board
Assumes 8 ft stock, a 1/8" saw kerf, and buying each part at its own width. Change the board size or kerf on the full board plan →
Instructions
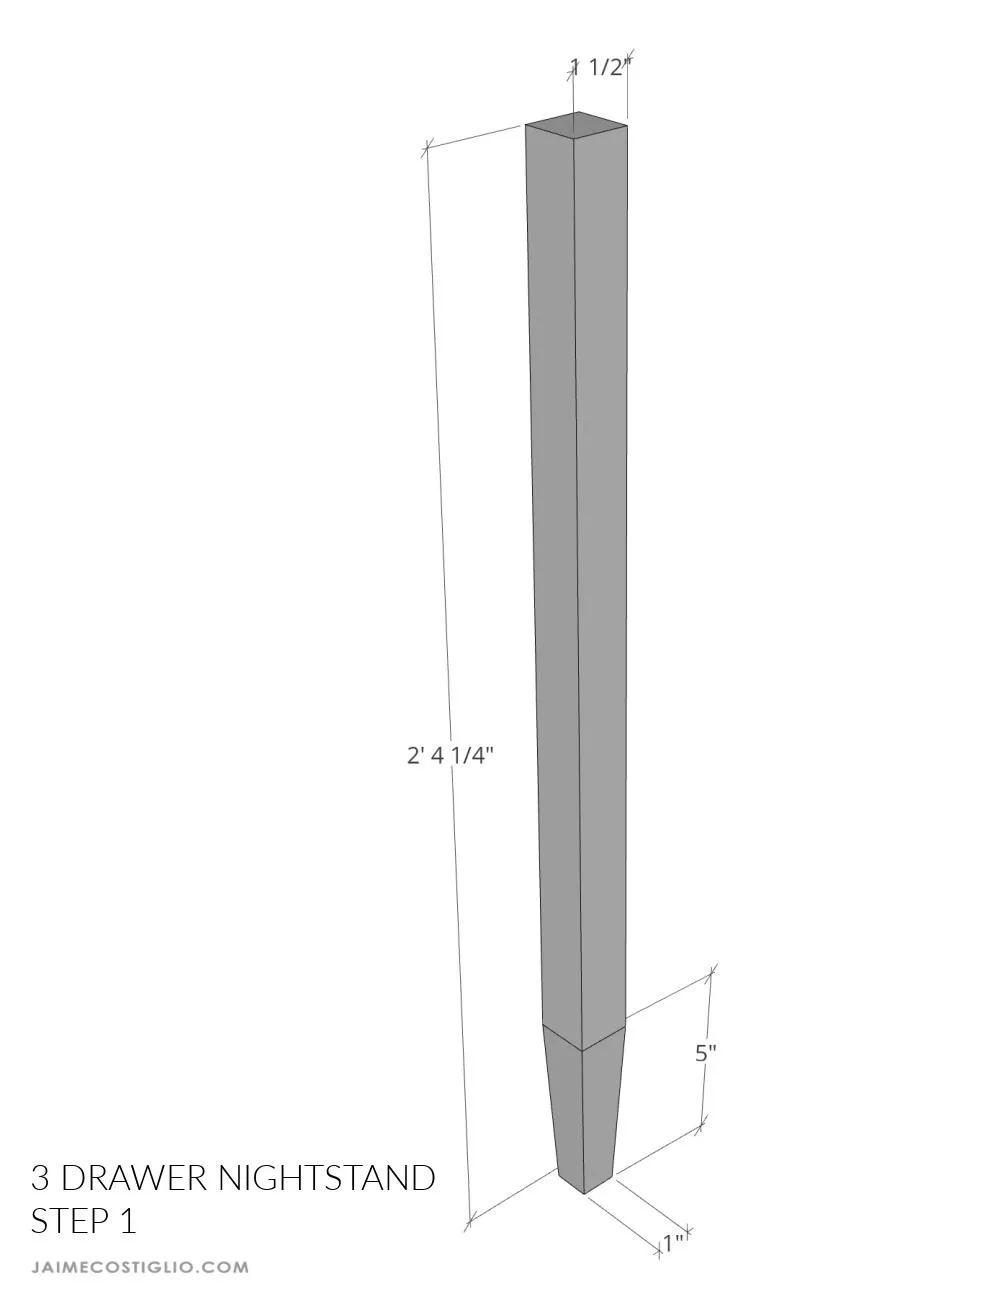
1Taper legs
If desired use a tapering jig to make bottom portion of legs tapered.
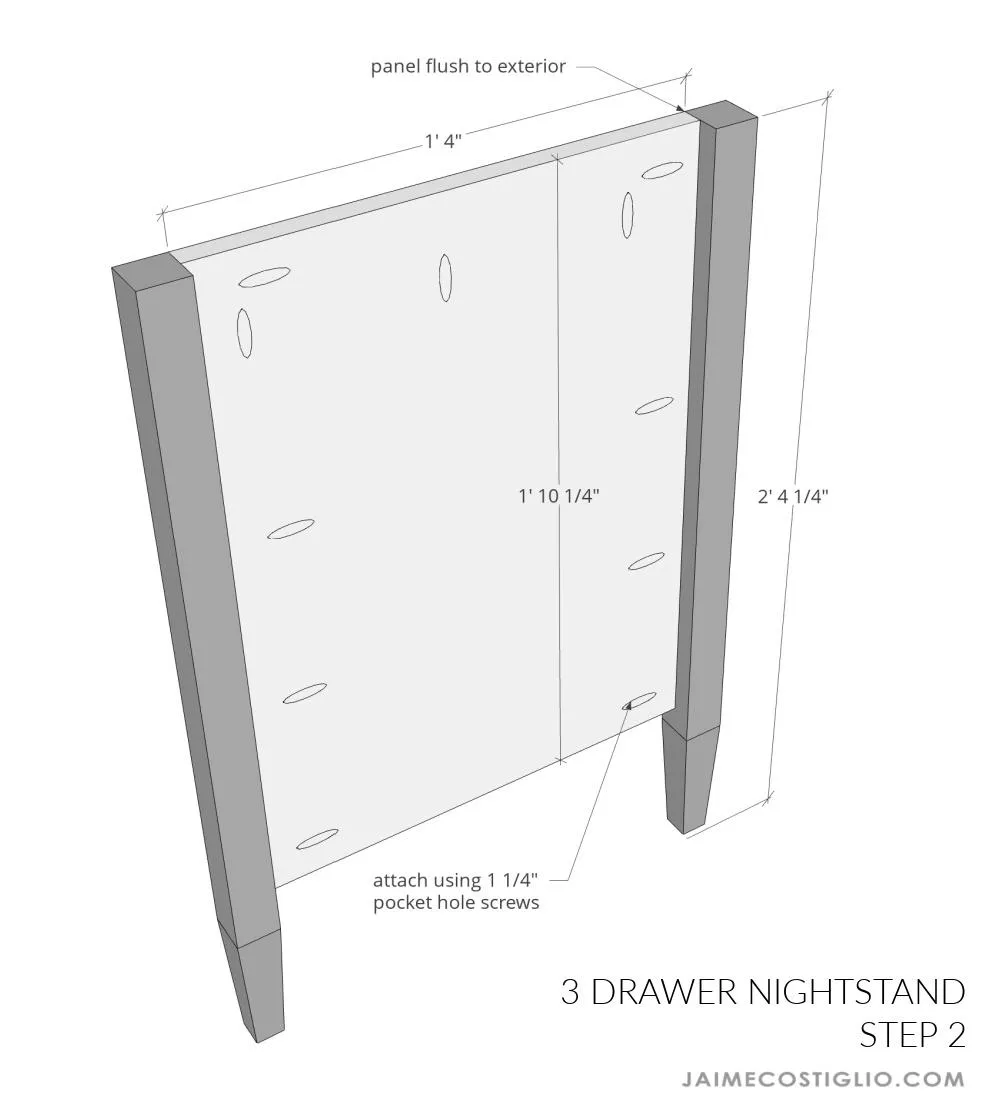
2Attach legs to side panels
Attach legs to side panels using 1 ¼” pocket hole screws. Keep side panel flush to leg at exterior. Make 2.
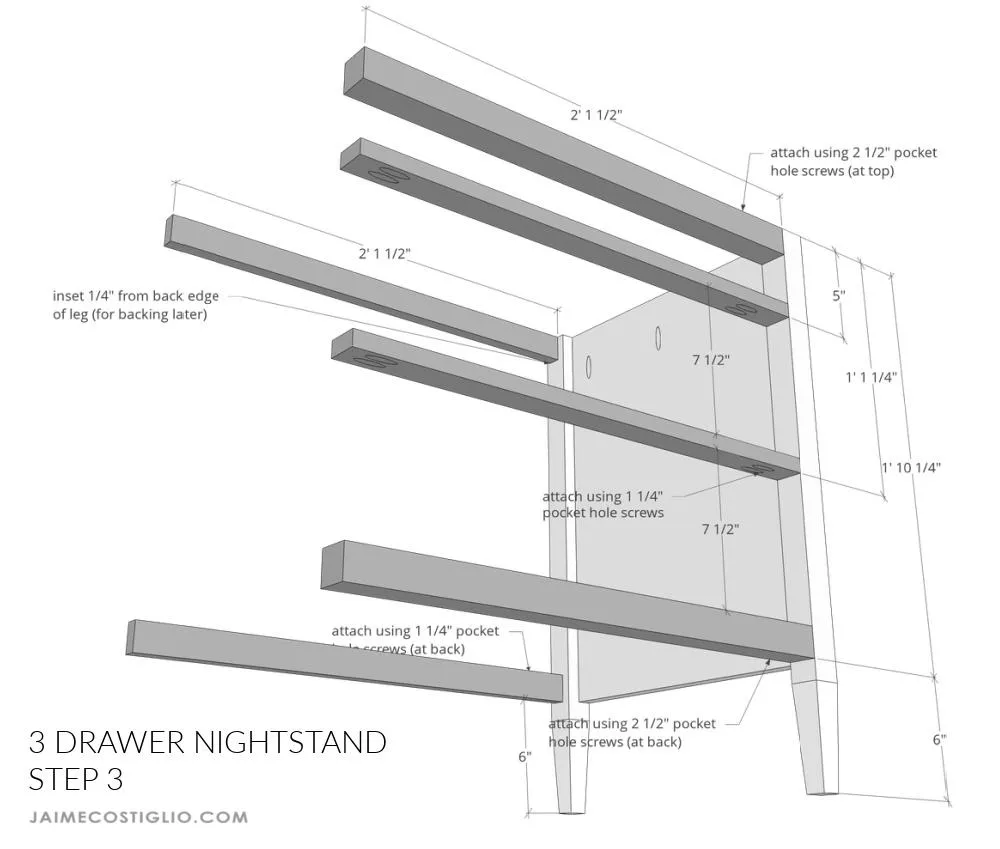
3Attach cross supports
Attach cross supports to side panel. Use wood glue and corresponding pocket hole screws. Keep pocket holes at back, top or underside when possible.
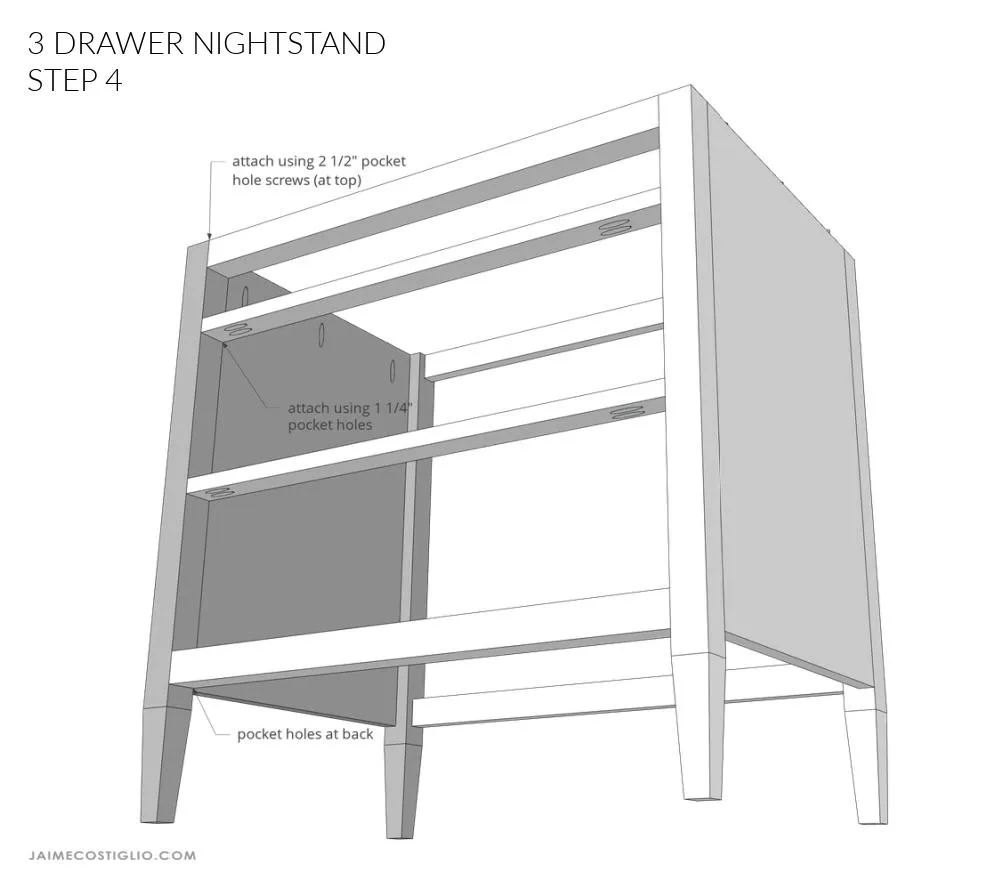
4Attach opposite side to supports
Attach other side panel to cross supports, same as Step 3.
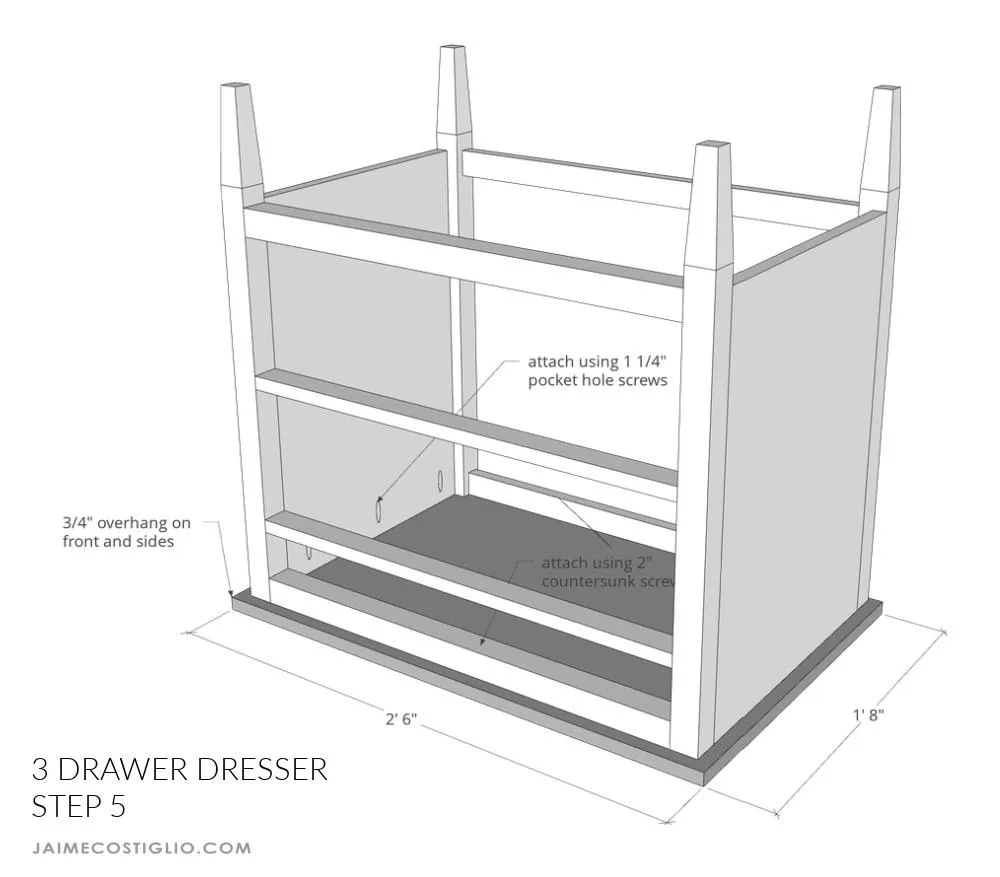
5Attach top
Attach top to body using 1 ¼” pocket hole screws. Keep ¾” overhang at front and sides. Secure front and back cross supports to top using 2” countersunk wood screws.
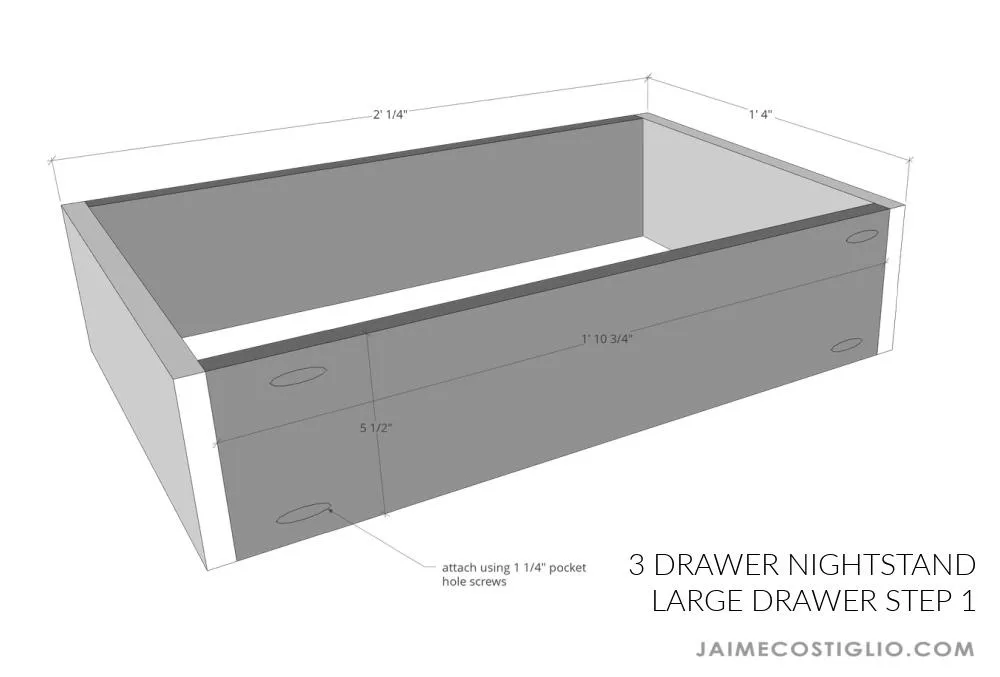
6Assemble large drawers
Attach long sides to short sides using wood glue and 1 ¼” pocket hole screws.
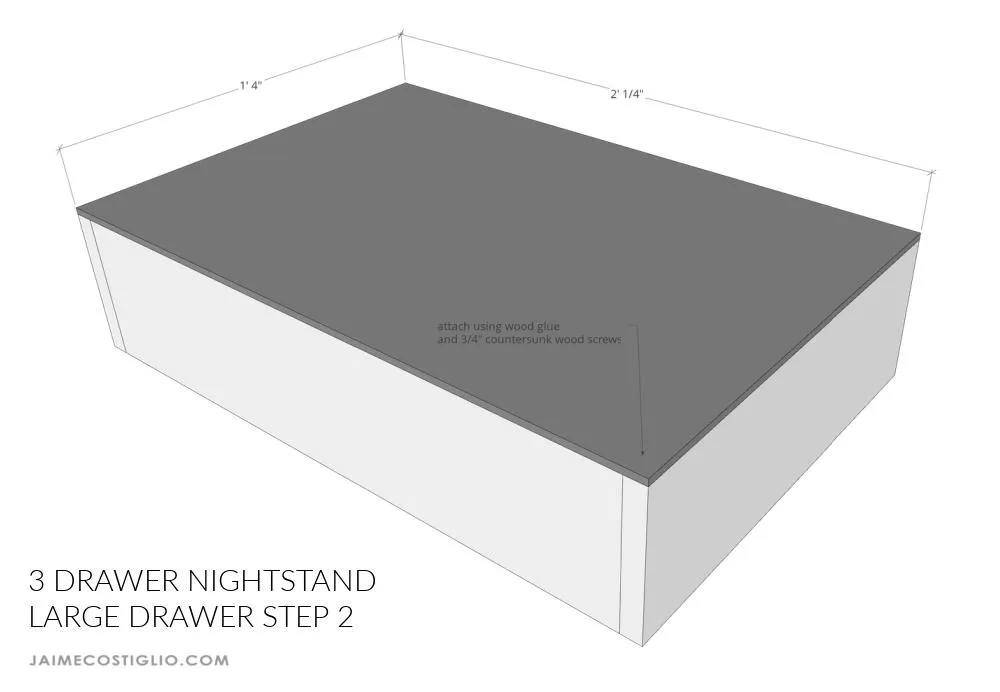
7Attach drawer bottom to large drawers
Attach drawer bottom to box using wood glue and ¾” countersunk wood screws.
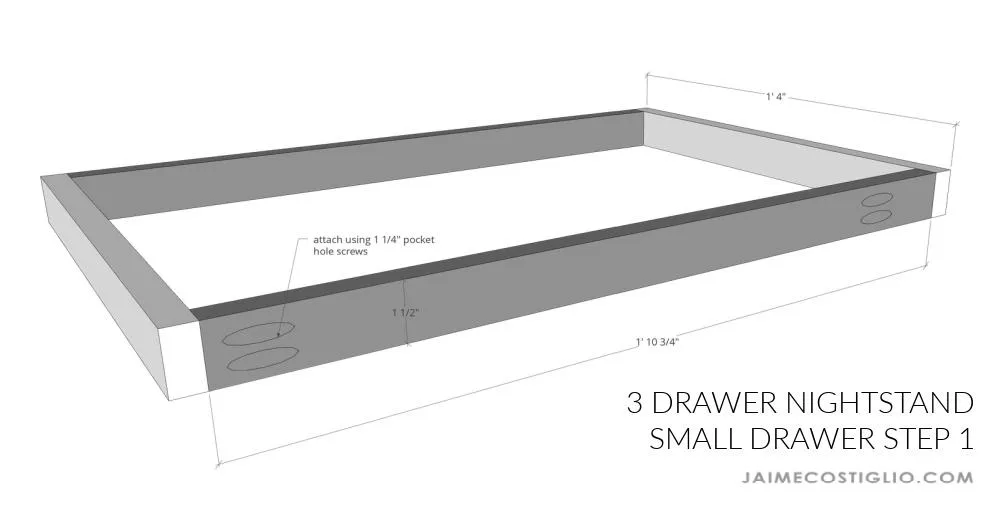
8Assemble small drawer
Attach long sides to short sides using wood glue and 1 ¼” pocket hole screws.
9Attach drawer bottom to small drawer
Attach drawer bottom to box using wood glue and ¾” countersunk wood screws.
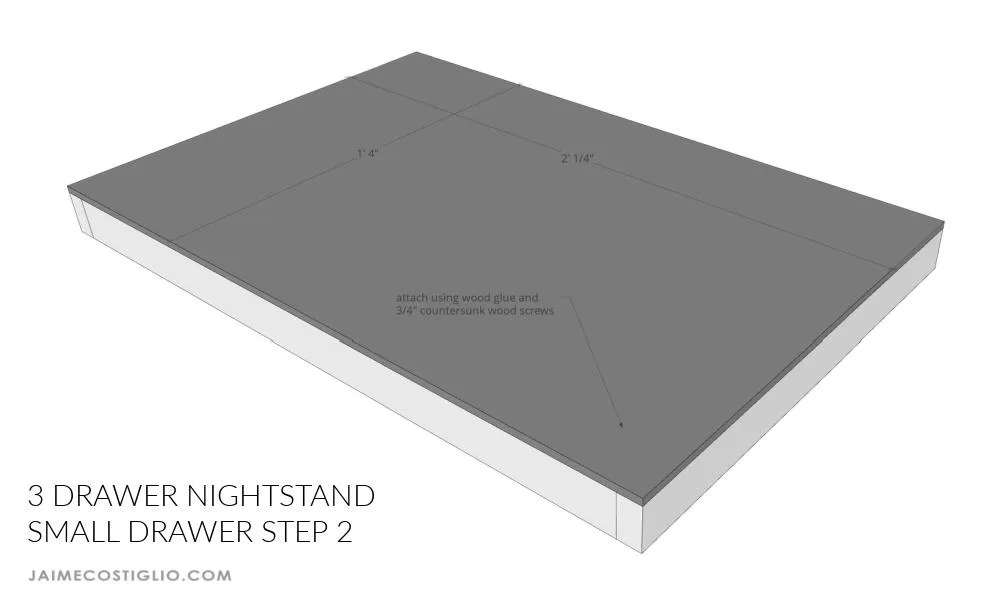
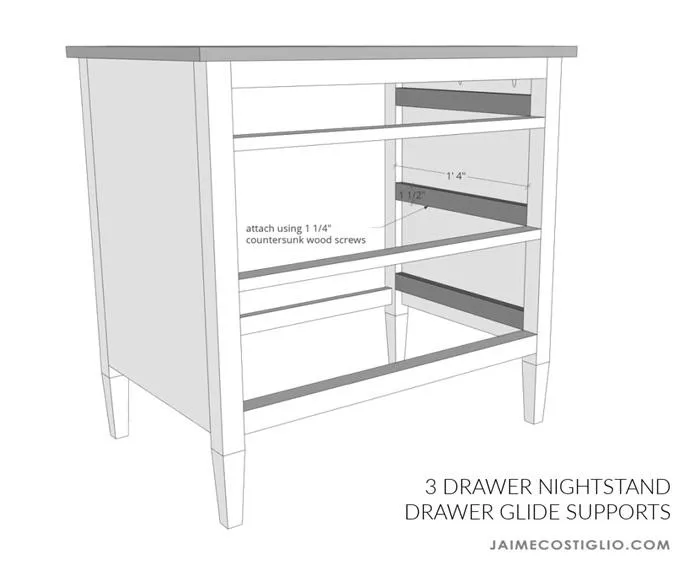
10Attach drawer glide supports
Before installing drawer glides attach supports to interior side panels using wood glue and 1 ¼” countersunk wood screws.
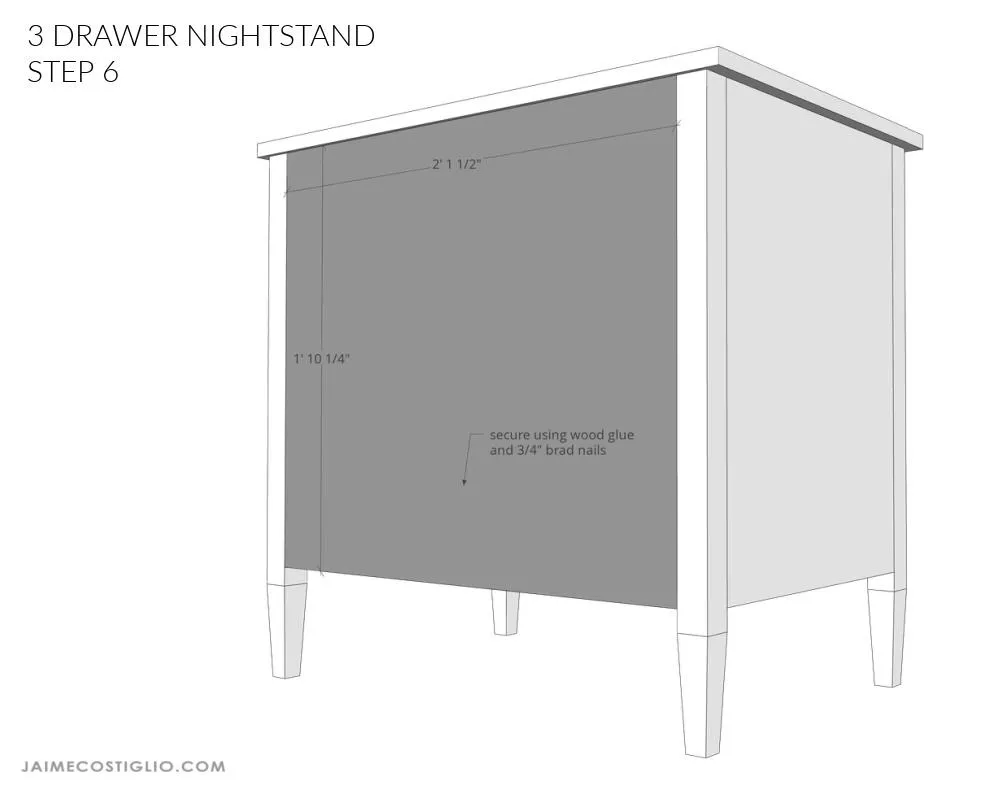
11Attach backing
Attach backing to cross supports using wood glue and ¾” brad nails.
Tags
- Bedroom
- Intermediate
Reviews & builds
No reviews yet
Sign in to review this plan or share your build.
No reviews yet. Be the first to build this.