 Notch
Use your browser's Print (Ctrl/Cmd + P) and choose Save as PDF. This page works offline once you've opened it with a signal.
X-leg Console Table with shelves
Looking for the perfect entryway table?
- Difficulty
- Intermediate
- Time
- 3.3–6 hours
- Cost
- $$
Cut list
| Part | Qty | T × W × L | Material | ✓ |
|---|---|---|---|---|
| Leg Supports | 4 | 2" × 4" × 16" | — | ☐ |
| Bottom Divider | 1 | 2" × 6" × 12" | — | ☐ |
| Top divider | 2 | 2" × 6" × 14" | — | ☐ |
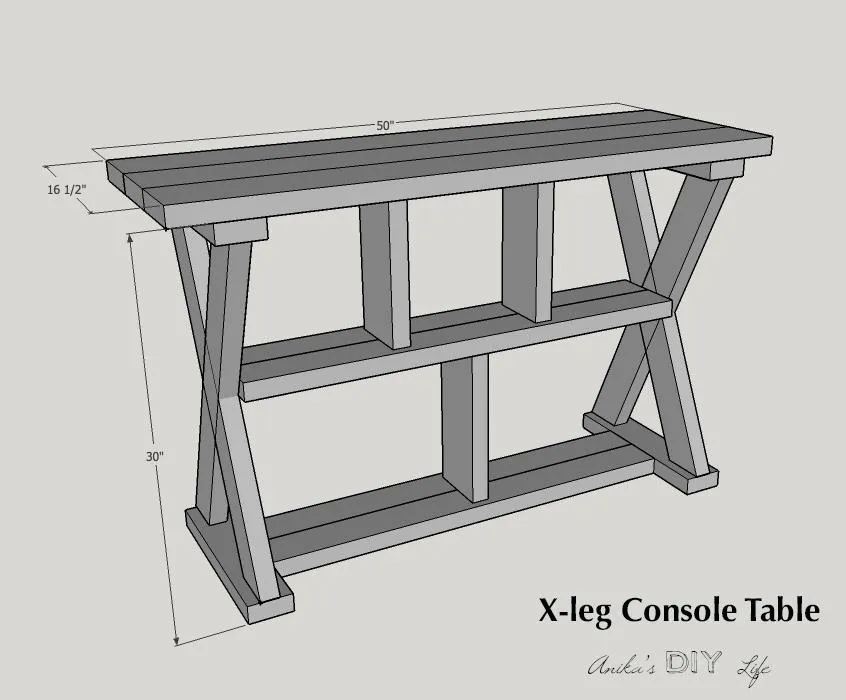
| Top | 3 | 2" × 6" × 50" | — | ☐ |
| Middle shelf | 2 | 2" × 6" × 39" | — | ☐ |
| Bottom Shelf | 2 | 2" × 6" × 37" | — | ☐ |
| Long Angled cut (see picture) | 2 | 2" × 4" × 30" | — | ☐ |
| Short Angled Cut (See Picture) | 4 | 2" × 4" × 15" | — | ☐ |
Materials
| Item | Qty | ✓ |
|---|---|---|
| Board, 2x4 96" | 2 board | ☐ |
| Board, 2x6 120" | 3 board | ☐ |
| 2 1/2" pocket hole screws | 50 each | ☐ |
| 1 1/2" wood screws | 6 each | ☐ |
| Wood glue | 1 each | ☐ |
| Wood filler | 1 each | ☐ |
Overall cost: $$. Lumber varies by region, species, and season, so we give a band rather than a figure.
Tools
- Drill / Driver
- Miter Saw
- Pocket Hole Jig
- Random Orbit Sander
Instructions
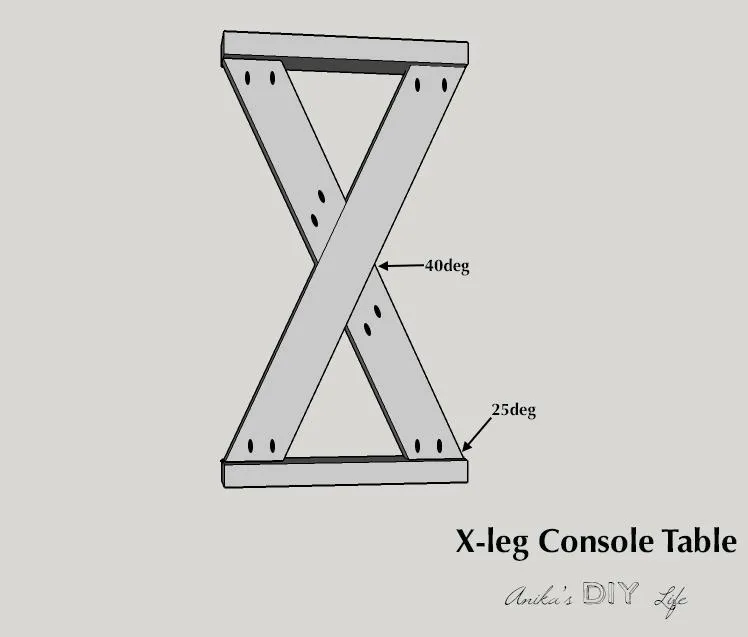
1. Build the legs
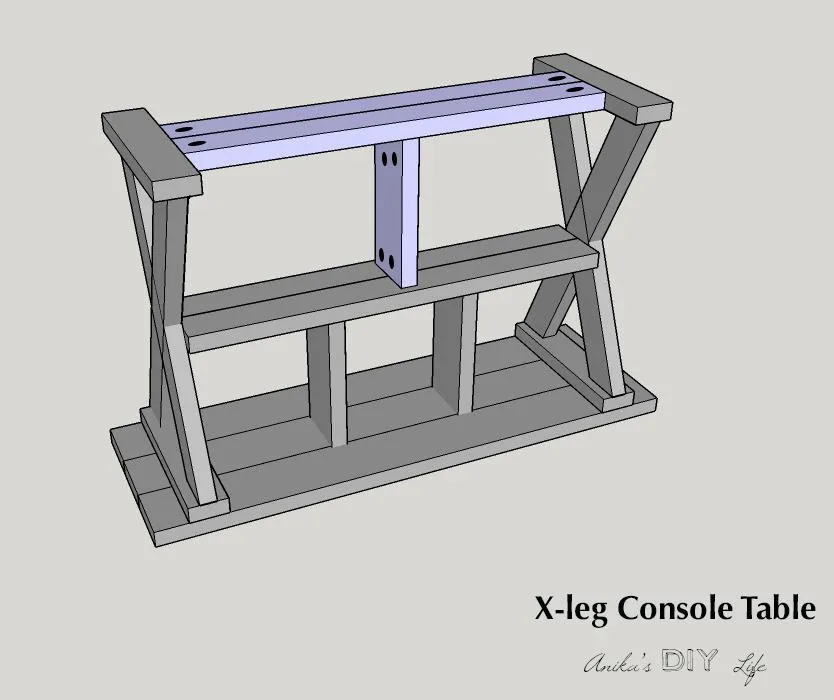
- Drill 1 1/2" pocket hole screws and attach the long angled cut to the legs supports using 2 1/2" pocket screws.
- Attach the short angled cuts using 2 1/2" pocket screws to create the X. Note - the 40-degree angle is towards the middle of the X.
2. Build shelves and Top
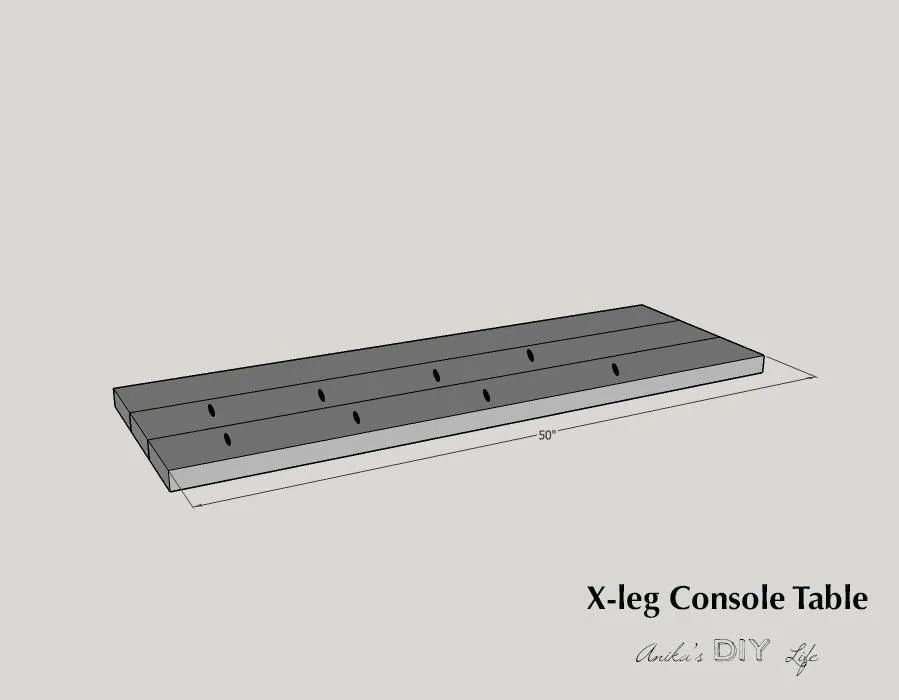
Drill 1 1/2" pocket hole screws and put together the two shelves and top using 2 1/2" pocket screws.
3. Attach legs to top
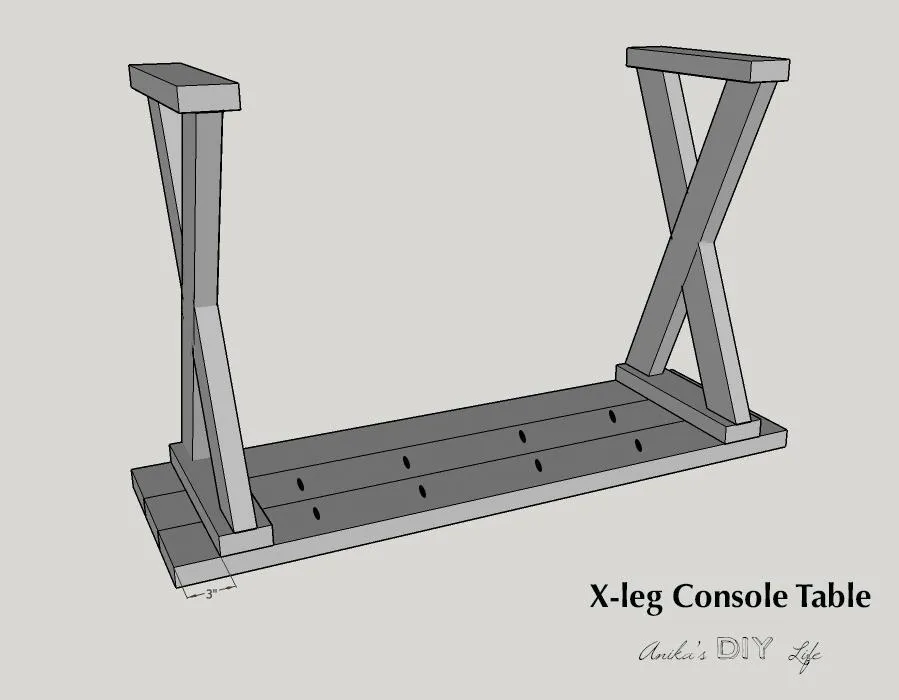
Lay the top face down and attach the two X-legs using 1 1/2" wood screws drilled into the leg supports. Make sure the pocket holes face inside.
4. Attach middle shelf
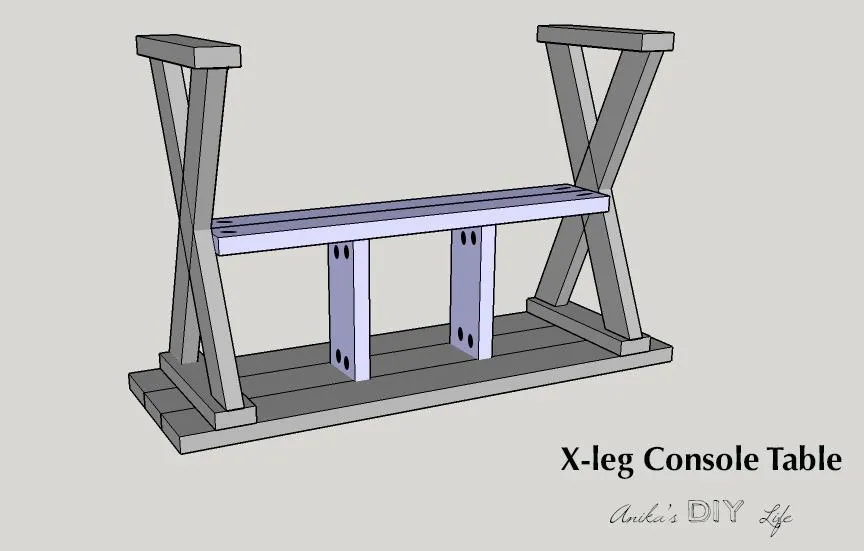
Attach the top dividers and the middle shelf. Use 1 1/2" pocket holes and 2 1/2" pocket screws. The dividers are 12 1/4" from each end. The shelf is 13 1/2"" from the Top. There are pocket holes on the ends of the shelf that attach to the middle of the X.
5. Attach bottom shelf
Attach the bottom divider and the bottom shelf using 1 1/2" pocket holes and 2 1/2" pocket screws. The divider is 18 1/4"" from one end. The Bottom shelf is attached to the leg supports using pocket holes and screws.
6. Final steps
The X-leg console table is ready. Sand and finish as desired.
7. Visit anikasdiylife.com
For lots more plans and projects visit www.anikasdiylife.com