 Notch
- Difficulty
- Intermediate
- Time
- 6.3–11.8 hours
- Cost
- $$
About this build
This wall mounted wine bar is a stylish space-saving storage solution for wine bottles and wine glasses. It can also serve as an attractive display option for liquor and bar accessories.
Tools
Essential
- Drill / Driver
- Jigsaw
- Miter Saw
- Pocket Hole Jig
- Random Orbit Sander
- Table Saw
Optional / nice to have
- Bar / Pipe Clamps
- Combination Square
- Tape Measure
Materials
| Item | Qty |
|---|---|
| Board, 1x4 96" | 2 board |
| Board, 1x8 72" | 1 board |
| Board, 1x3 96" | 1 board |
| Board, 1x5 96" | 1 board |
| 1-1/4" pocket screws | 40 each |
| 1-1/4" wood screws | 18 each |
| 2-1/2" wood screws | 4 each |
| Wood glue | 1 each |
| Sandpaper | 1 each |
| Walnut wood stain | 1 each |
| Polyurethane | 1 each |
| Hanger | 1 each |
Overall cost: $$. Lumber prices vary by region, species, and season, so we give a band rather than a figure we would only be pretending to know.
Cut list
| Part | Qty | T × W × L |
|---|---|---|
| Back | 6 | 3/4" × 3 1/2" × 22 3/4" |
| Middle Upright | 2 | 3/4" × 5 5/8" × 6 1/4" |
| Bottle Holder Front | 3 | 3/4" × 2 1/2" × 9 3/8" |
| Bottle Holder Side | 4 | 3/4" × 2 1/2" × 5 5/8" |
| Bottle Holder Bottom | 5 | 3/4" × 4 1/2" × 9 3/8" |
| Bottle/Glass Holder Side | 2 | 3/4" × 3 3/4" × 5 5/8" |
| Bottle/Glass Holder Front | 2 | 3/4" × 3 3/4" × 9 3/8" |
| Glass Holder | 4 | 3/4" × 1 7/8" × 9 3/8" |
What to buy
Buy 7 boards at 8 ft.
3/4" × 5 5/8"
1 board
3/4" × 4 1/2"
1 board
3/4" × 3 3/4"
1 board
3/4" × 3 1/2"
2 boards
3/4" × 2 1/2"
1 board
3/4" × 1 7/8"
1 board
Assumes 8 ft stock, a 1/8" saw kerf, and buying each part at its own width. Change the board size or kerf on the full board plan →
Instructions
1Make the Back
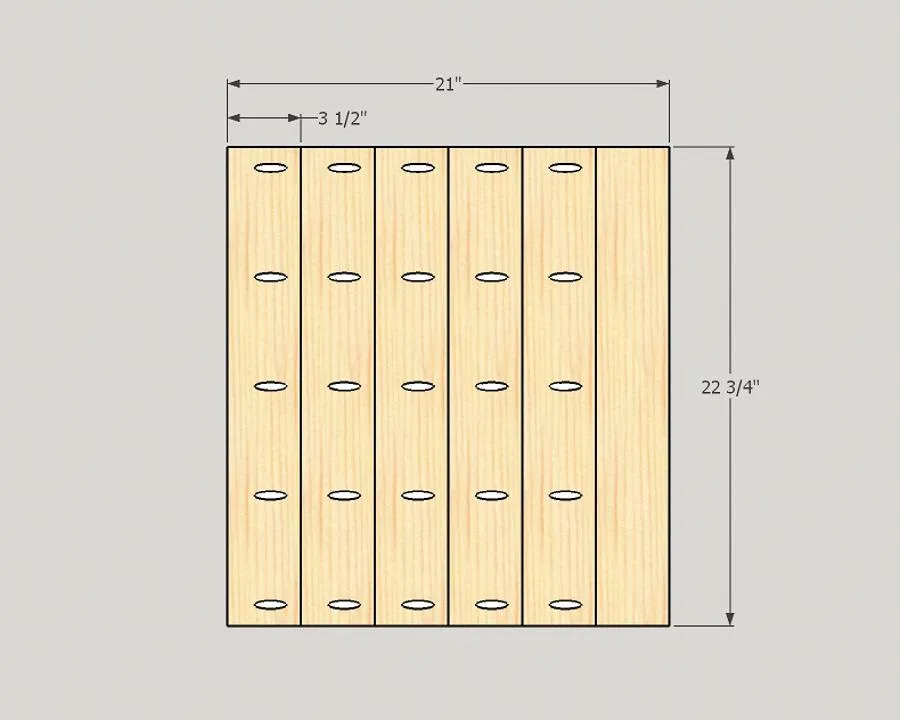
Cut 6 pieces of 1x4 to 22-3/4". Drill pocket holes, apply glue to the edges, clamp and attach using 1-1/4" pocket screws.
2Cut Bottle Holder Middle Upright
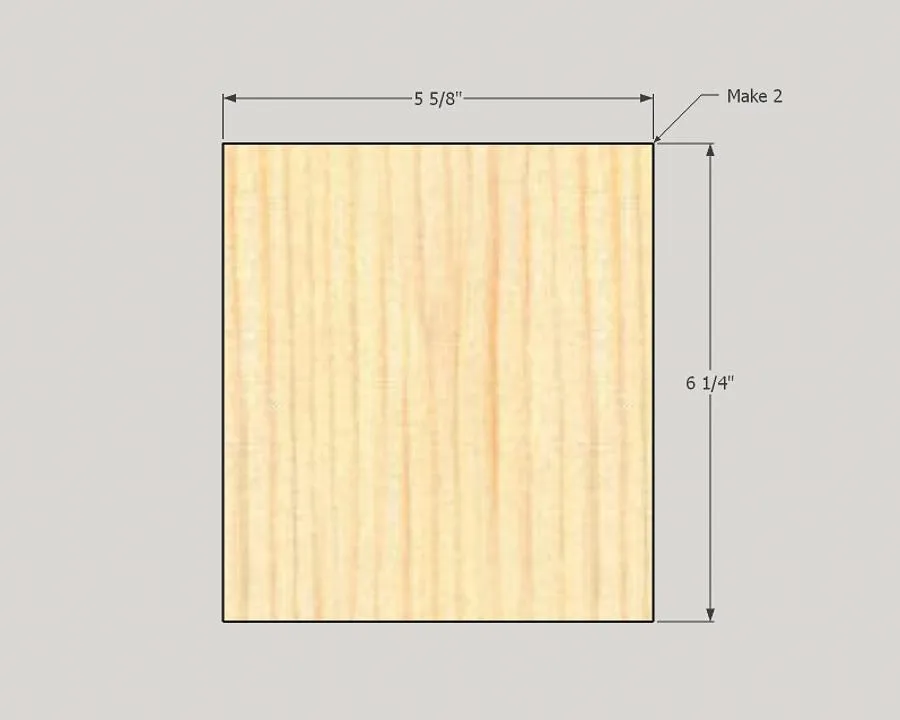
Cut 2 pieces of 1x8 to 6-1/4" and rip to 5-5/8".
3Cut the Bottle Holder Front
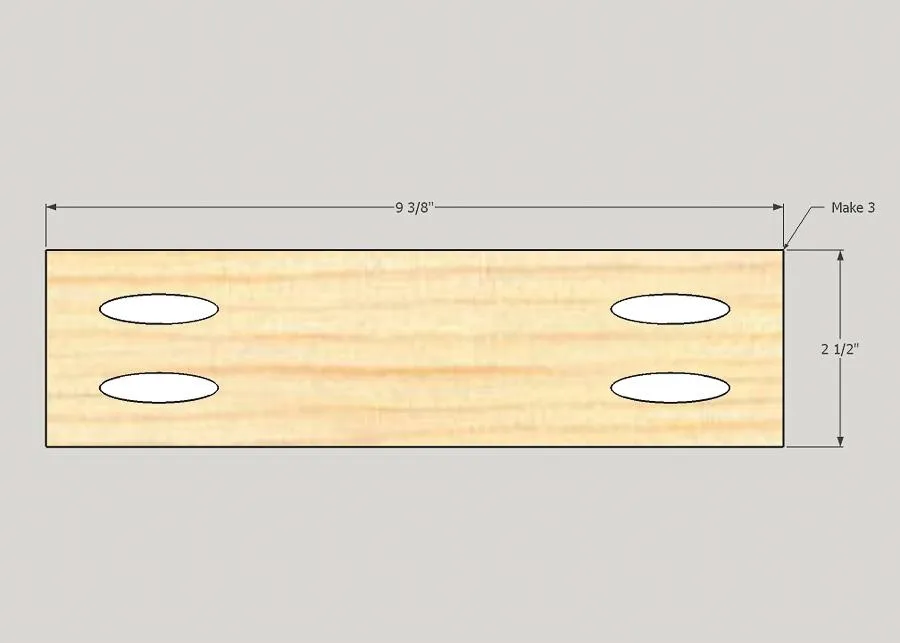
Cut 3 pieces of 1x3 to 9-3/8" and drill pocket holes in each end. 2 pieces will be used for the top and bottom bottle holders and 1 piece will be used for the middle bottle holder.
4Cut the Bottle Holder Side
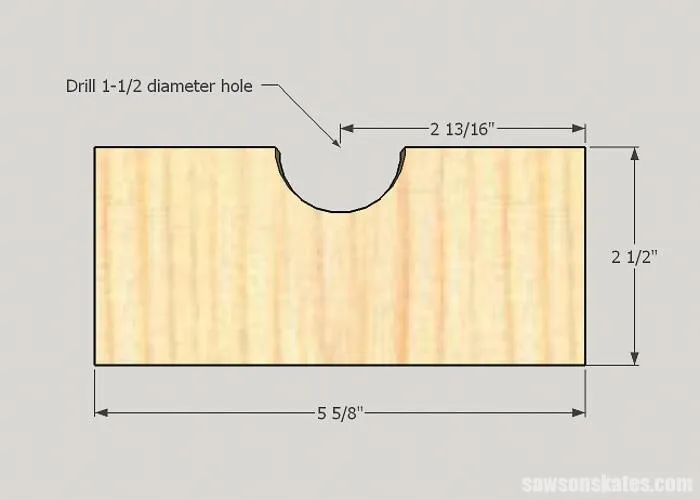
- Cut 4 pieces of 1x8 to 2-1/2" and rip to 5-5/8". In 3 of the pieces, you will drill a hole and these pieces will be used as the left side of the top, bottom and middle bottle holders. 1 piece will remain solid (no hole) and will be used in Step 13 as the right side of the middle bottle holder.
- Measure in 2-13/16" and make a mark. Temporarily clamp a piece of scrap wood and use a 1-1/2" diameter Forstner bit to drill a hole.
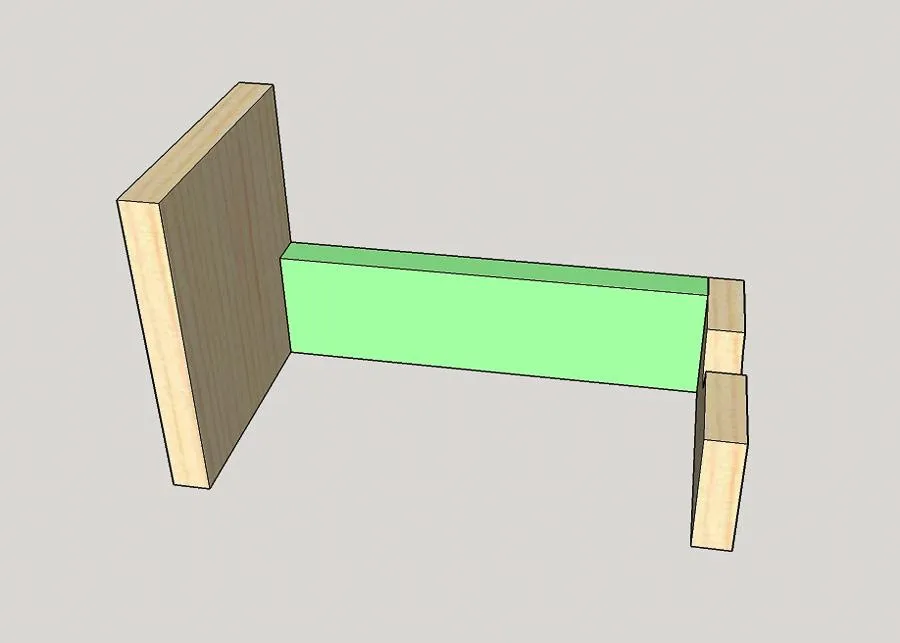
5Assemble Top/Bottom Bottle Holders
Apply glue to ends of the front, clamp to the sides and attach using 1-1/4" pocket screws. Repeat for the other bottle holder assembly.
6Attach the Bottle Holder Bottom
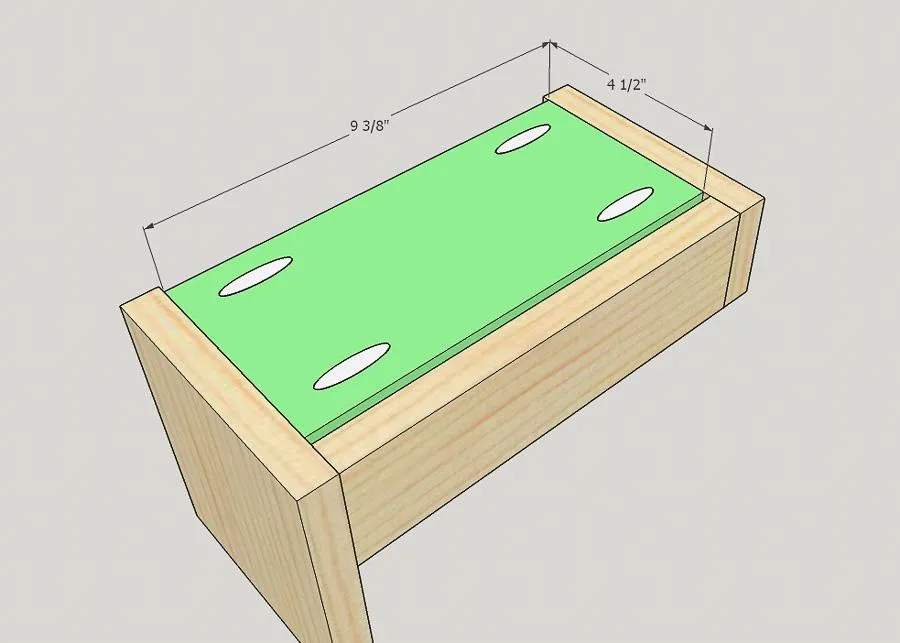
- Cut 5 pieces of 1x5 to 9-3/8" and drill pocket holes in each end. 2 will be used in this step for the top and bottom bottle holders. 2 will be used in Step 9 for the bottle/glass holders and 1 will be used in Step 14 for the middle bottle holder.
- Center the bottom on the sides, clamp in position and attach using 1-1/4" pocket screws.
- Repeat for the other bottle holder assembly.
7Cut the Bottle/Glass Holder Side
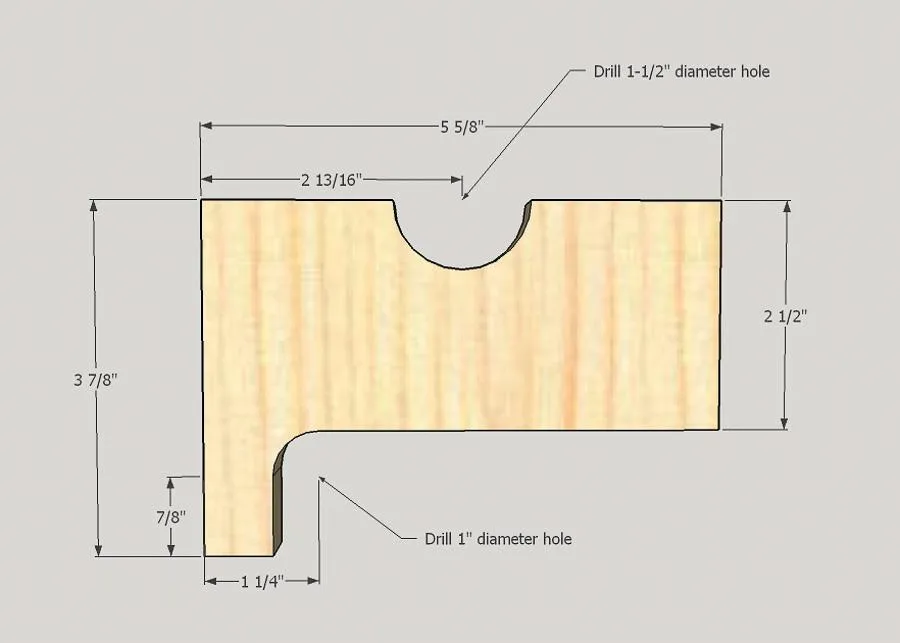
- Cut 2 pieces of 1x8 to 3-7/8" and rip to 5-5/8".
- Measure in 2-13/16" and make a mark. Temporarily clamp a piece of scrap wood and use a 1-1/2" diameter Forstner bit to drill a hole. On the bottom measure up 7/8" and in 1-1/4" and make a mark. Using a 1" Forstner bit drill a hole at the mark. Use a jigsaw or bandsaw remove the remaining wood and form the opening for the wine glasses.
8Assemble the Bottle/Glass Holders
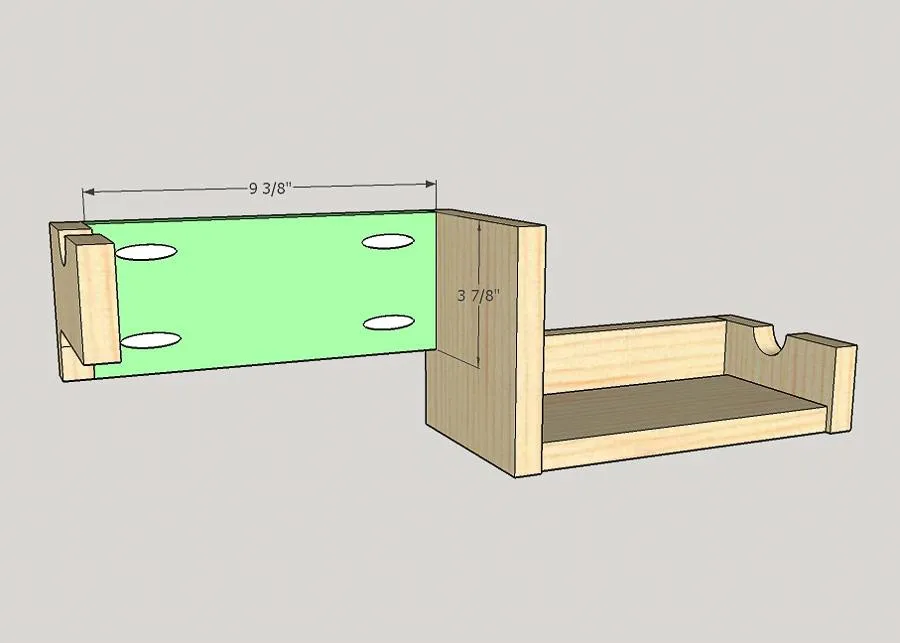
- Cut 2 pieces of 1x5 to 9-3/8" and rip to 3-7/8".
- Drill pocket holes in each end.
- Clamp the front to the sides and attach using 1-1/4" pocket screws.
- Repeat for the other bottle/glass holder assembly.
9Attach Bottle/Glass Holder Bottom
Center the bottom on the sides, clamp in position and attach using 1-1/4" pocket screws. Repeat for the other bottle/glass holder assembly.
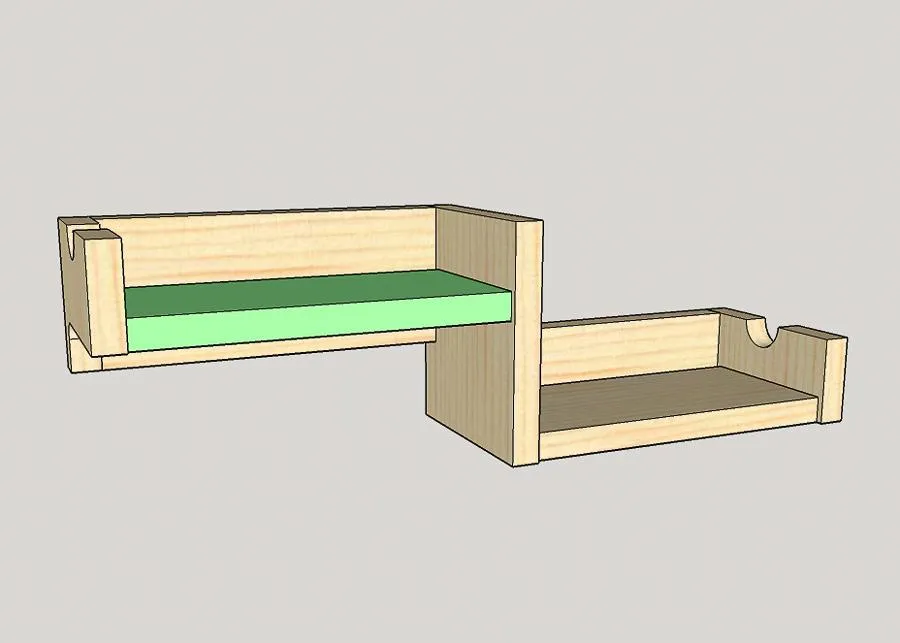
10Cut and Install the Glass Holders
- Cut 4 pieces of 1x3 to 9-3/8" and rip to 1-7/8".
- Drill countersink holes in the edges of the pieces. 2 of the holders will be used in this step and 2 will be used in the next step.
- Place a holder at the bottom of the bottle/glass holder, clamp and attach using 2-1/2" wood screws.
- Repeat for the other bottle/glass holder assembly.
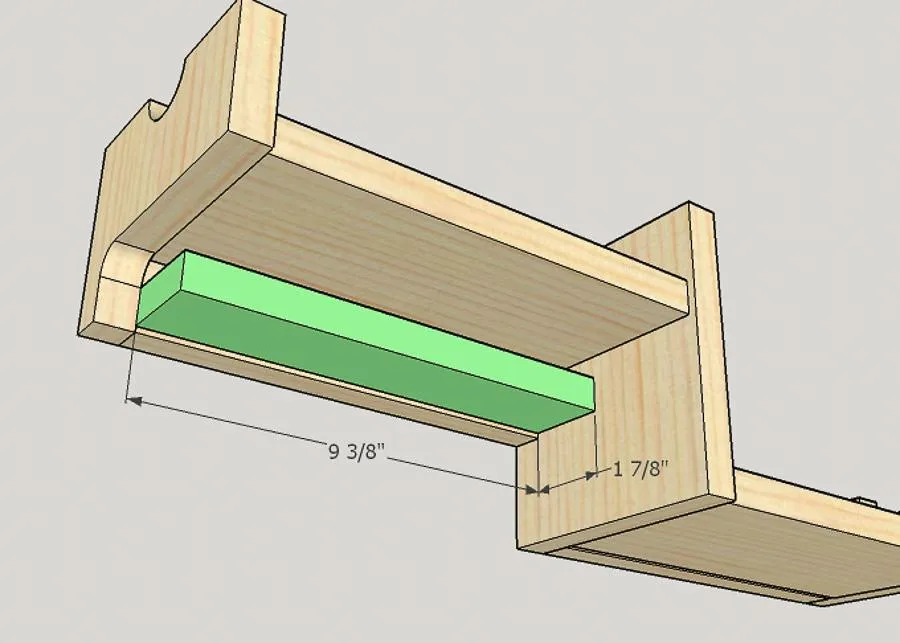
11Install the Remaining Glass Holders
Temporarily place the bottle holder assemblies on the back and clamp. The bottom assembly is flush with the bottom. The right side of the top assembly sets down a 1/2" from the top. Use a speed square to place the remaining glass holders so they are flush with the front glass holders. Remove the bottle holder assemblies and attach the glass holders to the back using 2-1/2" wood screws.
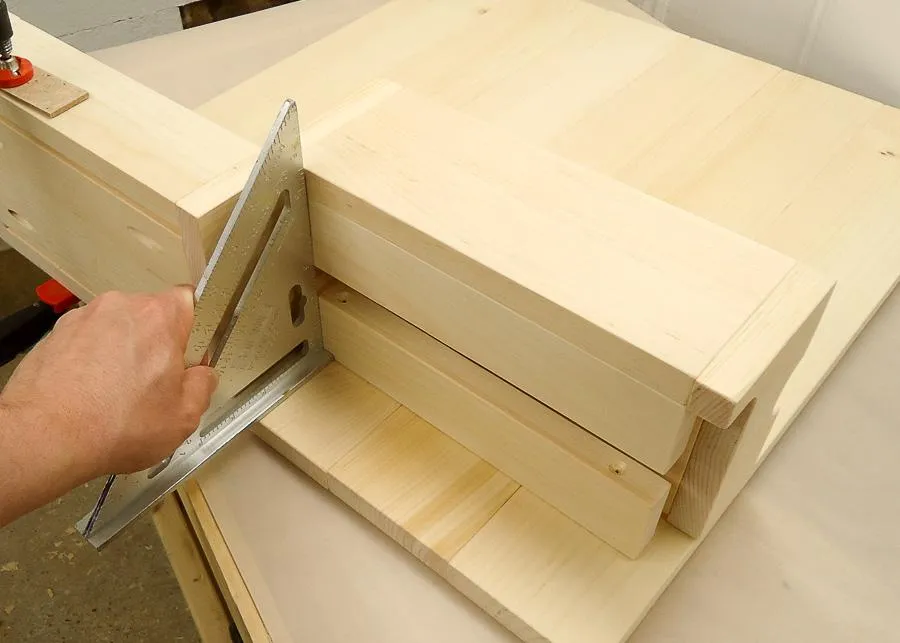
12Attach the Top/Bottom Assemblies
- Place the holder assemblies on the back. The bottom assembly is flush with the bottom. The right side of the top assembly sets down a 1/2" from the top. Lightly trace the sides and middle uprights onto the back with a pencil. From the front drill holes within the pencil lines. From the back use the holes you just drilled as pilot holes to drill countersink holes into the assemblies.
- Attach the assemblies using 1-1/4" wood screws.
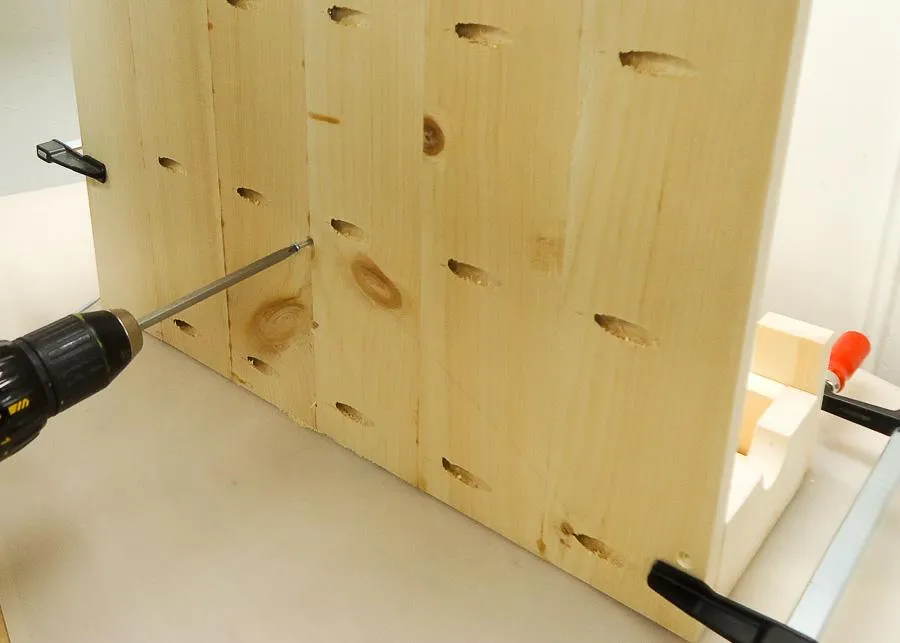
13Assemble the Middle Bottle Holder
Clamp the front to the sides and attach using 1-1/4" pocket screws.
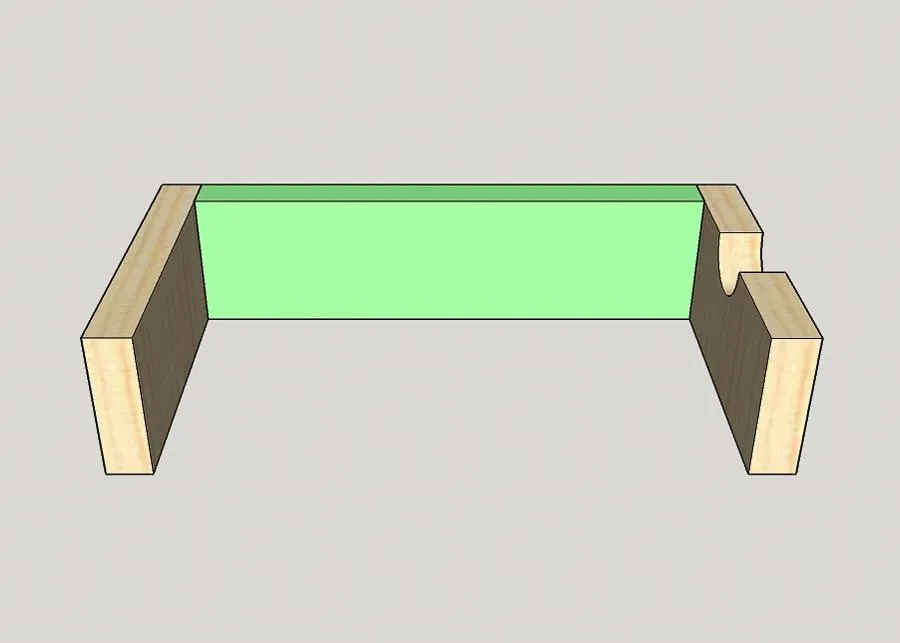
14Attach Middle Bottle Holder Bottom
Center the bottom on the sides, clamp in position and attach using 1-1/4" pocket screws.
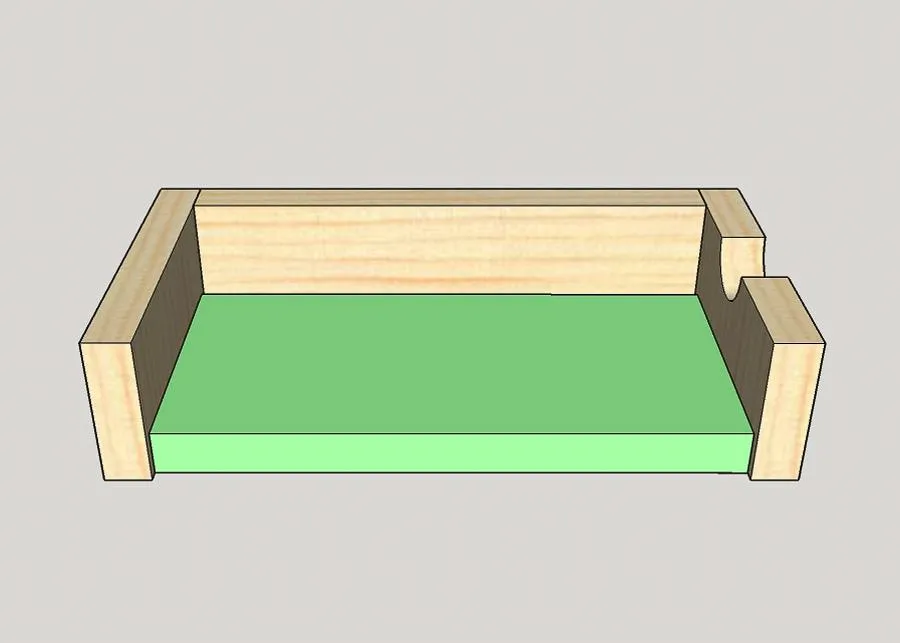
15Attach Middle Holder Assembly
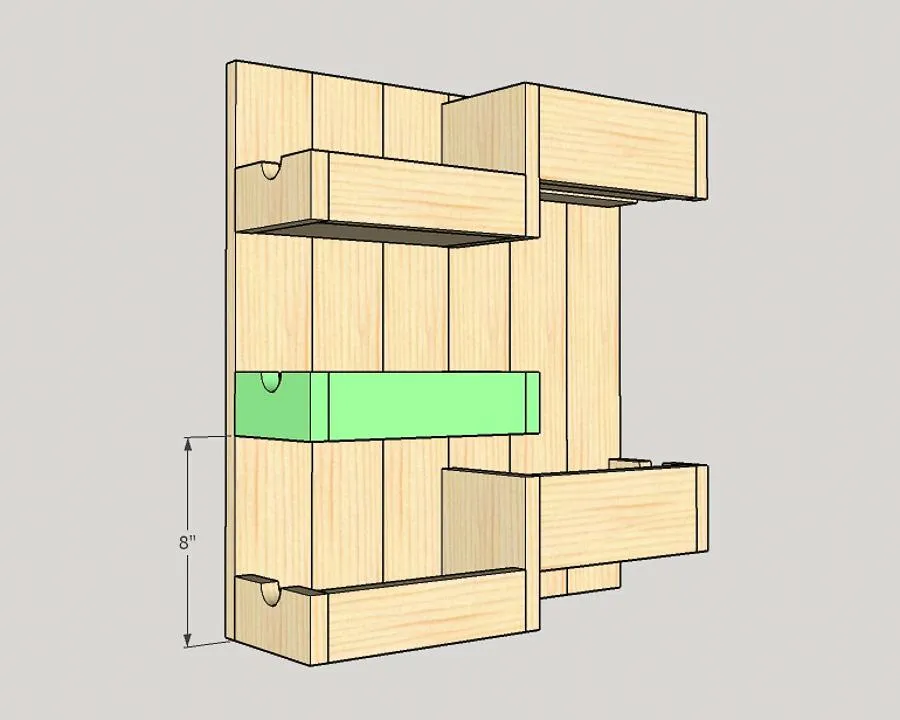
- Place the middle bottle holder on the back. The holder sets up 8" from the bottom. Lightly trace the sides with a pencil onto the back. From the front drill holes within the pencil lines. From the back use the holes you just drilled as pilot holes to drill countersink holes into the holder.
- Attach using 1-1/4" wood screws.
16Attach the Hanger
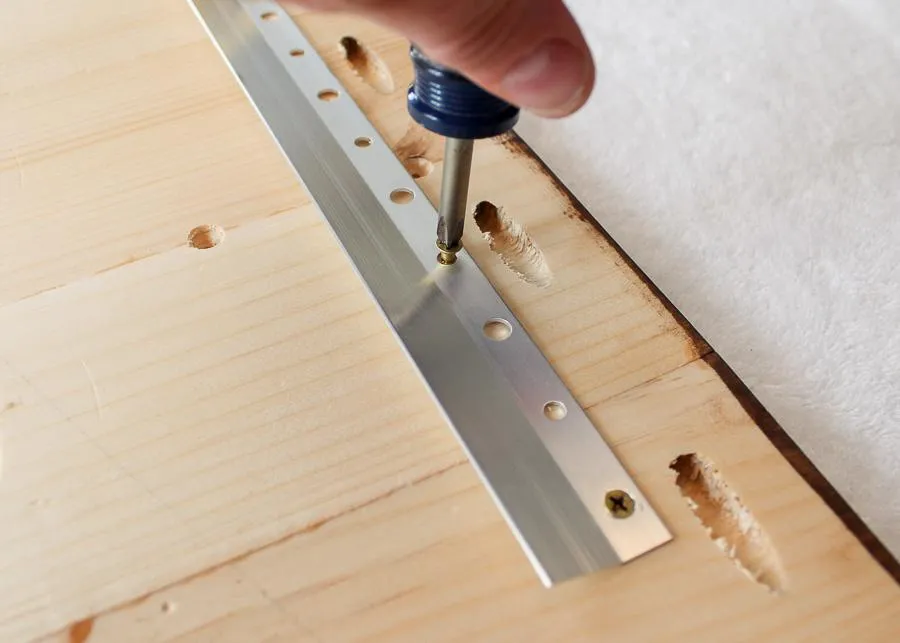
Attach the hanger according to the manufacturer's instructions.
17Sand, Stain, and Finish
It's easiest to disassemble the wine bar, then stain, and finish. Please head over to Saws on Skates for useful finishing tips and tricks.
Tags
- Beverage
- Intermediate
Reviews & builds
No reviews yet
Sign in to review this plan or share your build.
No reviews yet. Be the first to build this.