Notch
Use your browser's Print (Ctrl/Cmd + P) and choose Save as PDF. This page works offline once you've opened it with a signal.
Upholstered Bench with Faux Metal Frame
This bench is perfect for small spaces.
- Difficulty
- Beginner
- Time
- 1.3–2.5 hours
- Cost
- $$
Cut list
| Part | Qty | T × W × L | Material | ✓ |
|---|---|---|---|---|
| Frame-See Diagram | 4 | 2" × 2" × 8" | — | ☐ |
| Seat- To be upholstered | 1 | 1" × 12" × 54" | — | ☐ |
Materials
| Item | Qty | ✓ |
|---|---|---|
| Board, 2x2 96" | 4 board | ☐ |
| Board, 1x12 72" | 1 board | ☐ |
| 2-1/2" Pocket Hole Screws | 24 each | ☐ |
| 2" Wood Screws | 8 each | ☐ |
Overall cost: $$. Lumber varies by region, species, and season, so we give a band rather than a figure.
Tools
- Impact Driver
- Miter Saw
- Pocket Hole Jig
- Random Orbit Sander
- Tape Measure — optional
Instructions
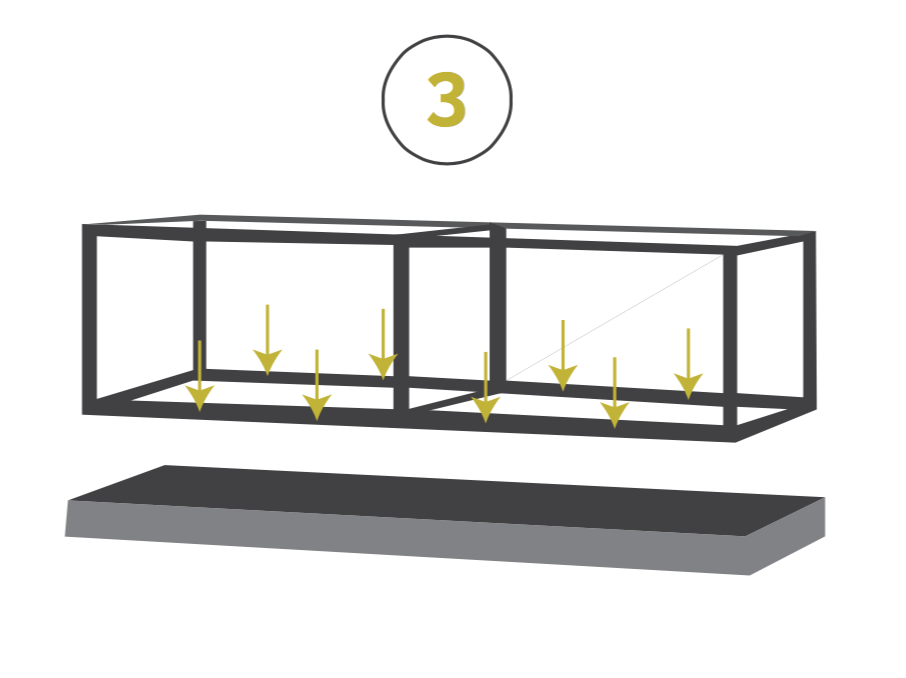
1. Build the top & bottom of the frame
- Cut the 2x2 pieces as shown on the cut list.
- Drill pocket holes on the 8-1/2" pieces, where the blue arrows point.
- Then assemble the pieces as shown, using 2-1/2" pocket screws. You will end up with two identical pieces that will make the top and bottom of the frame.
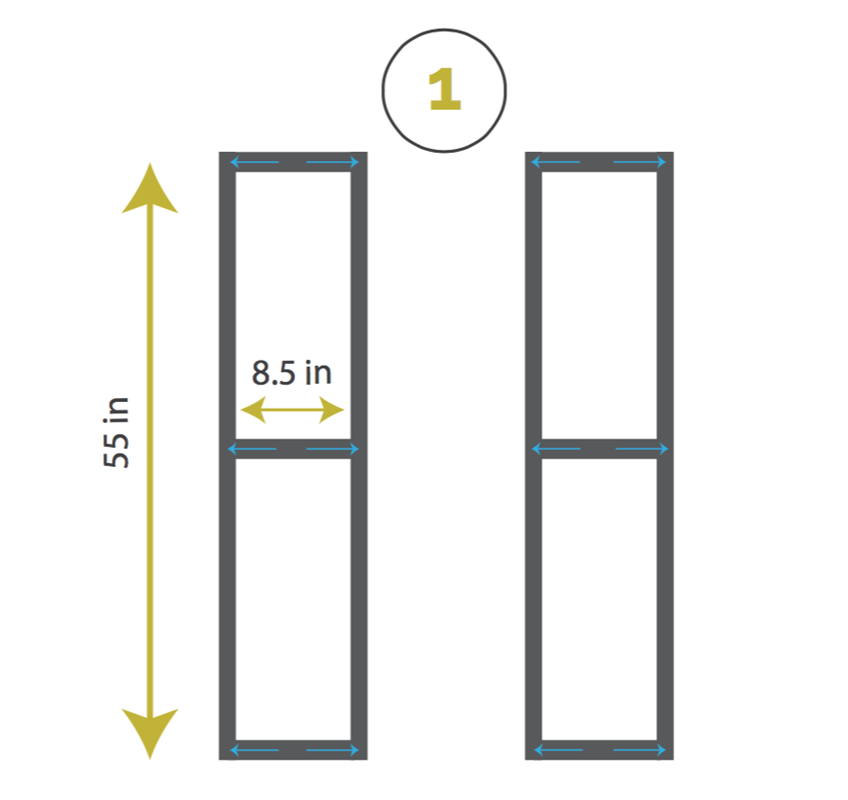
2. Put the top and bottom together
Drill pocket holes on the 14" inch vertical pieces and use them to put the two pieces together using 2-1/2" pocket screws. Make sure the pocket holes face the inside of the frame.
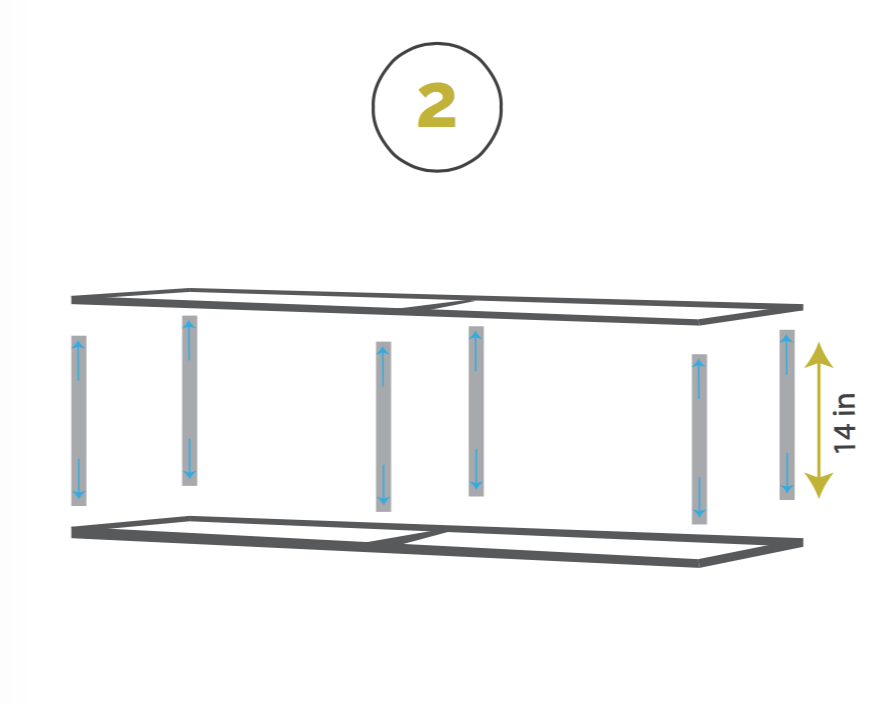
3. Attach the Seat
At this point I sanded and painted the frame. I used a metallic silver spray paint to give the wood the appearance of metal. I also upholstered the seat. Once the paint is dry and upholstery completed, I attached the frame to the seat using 2" wood screws as shown by the arrows. Tip: Visit the link under the "Extras" tab for more details, including video instructions for upholstering the seat. Enjoy your bench!