Notch
three drawer dresser
Step-by-step build — 12 steps. Also available as a print sheet.
1Dimensions
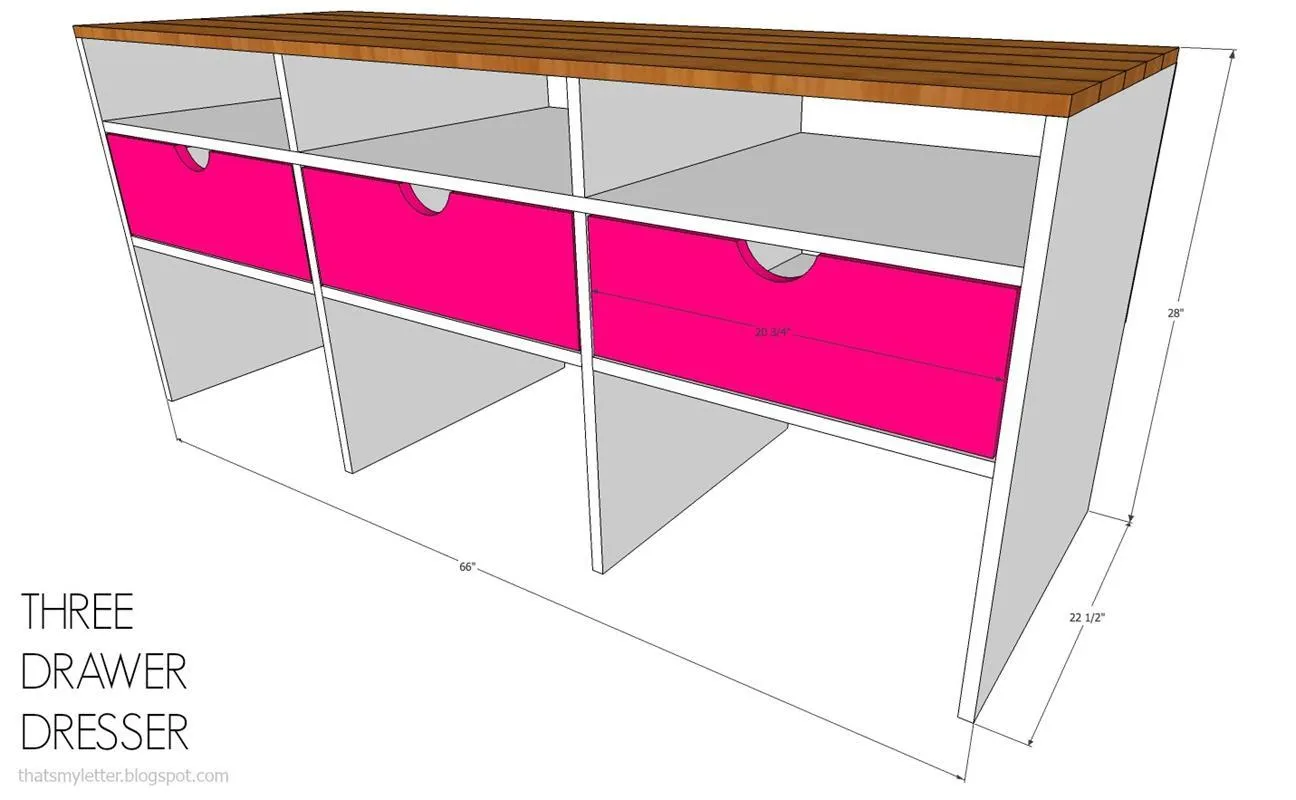
Overall dimensions 66"w x 22 1/2"d x 28"h
2Step 1: top
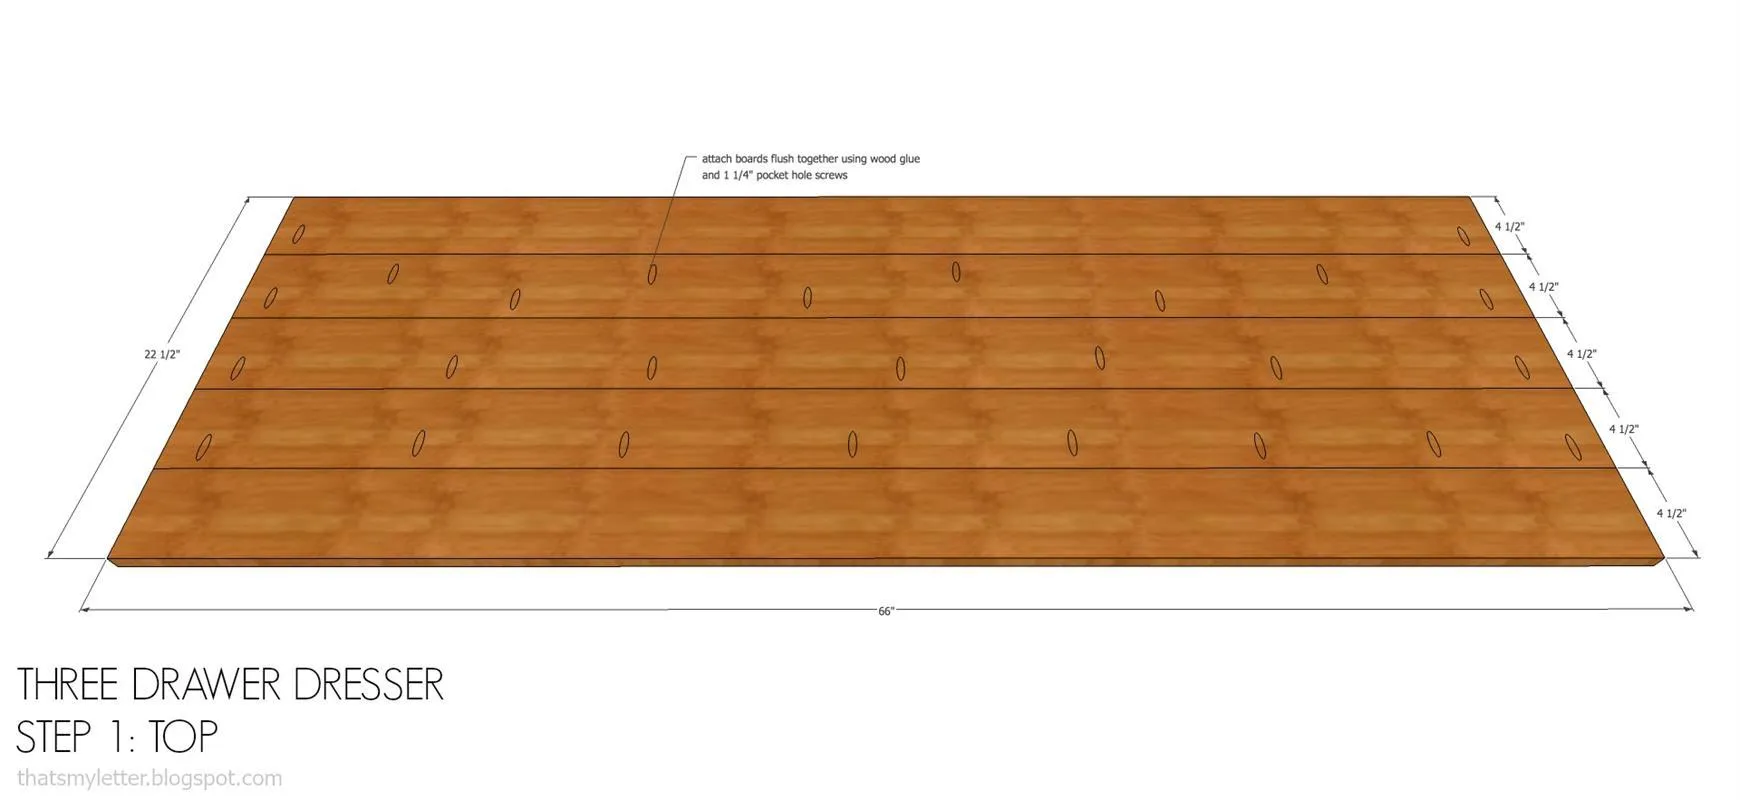
- Attach the top boards using wood glue, pocket holes and 1 1/4" pocket hole screws. Keep boards flush to form one smooth surface.
- Once all boards are attached measure the width to confirm 22 1/2" before cutting plywood sheets for remaining steps as 1x5 boards can vary in width.
3Step 2: sides
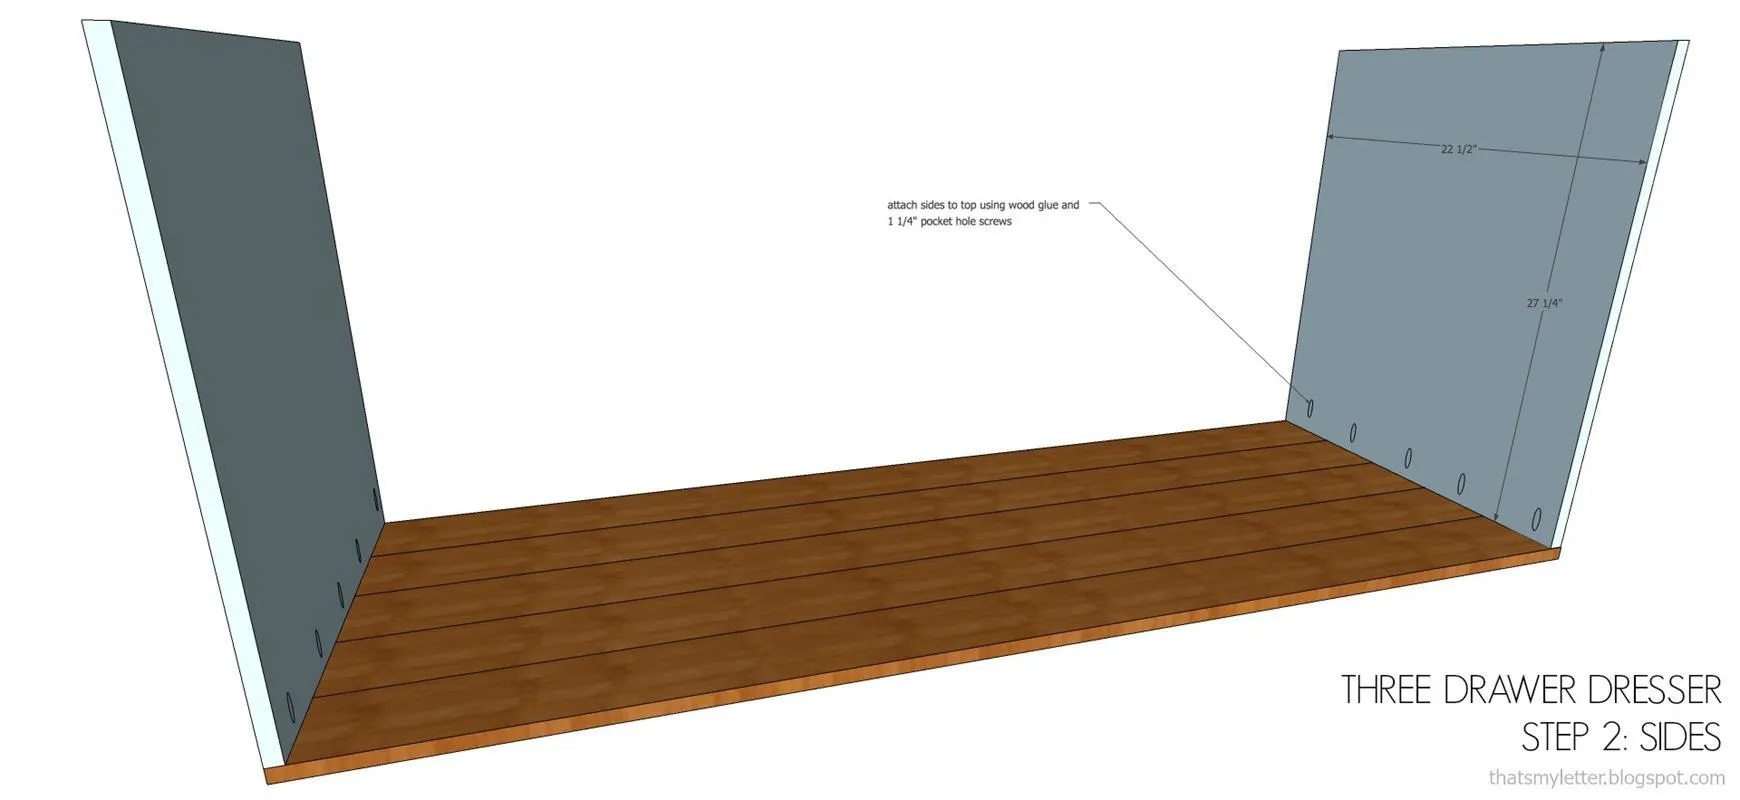
Attach sides to underside of top using wood glue, pocket holes and 1 1/4" pocket hole screws.
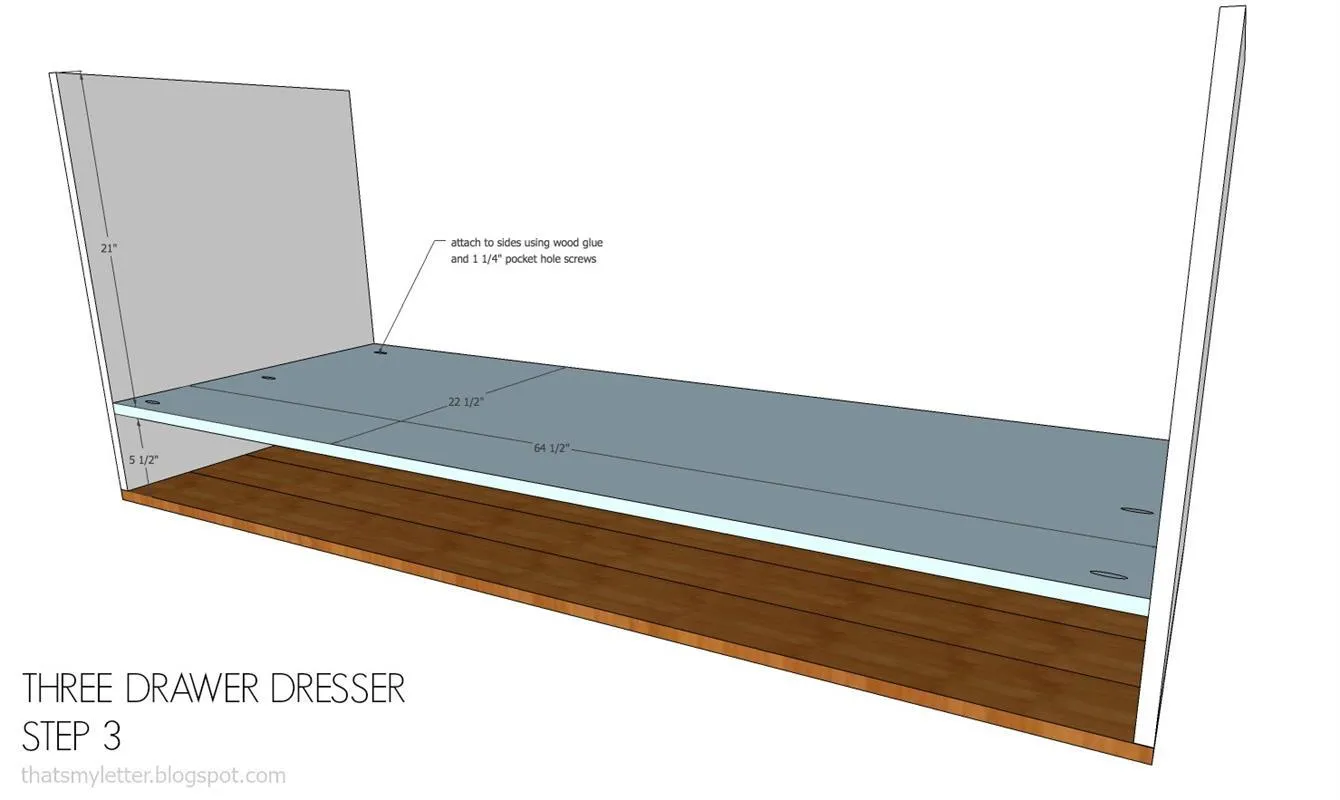
4Step 3: cubby shelf
Attach cubby shelf to sides using wood glue, pocket holes and 1 1/4" pocket hole screws.
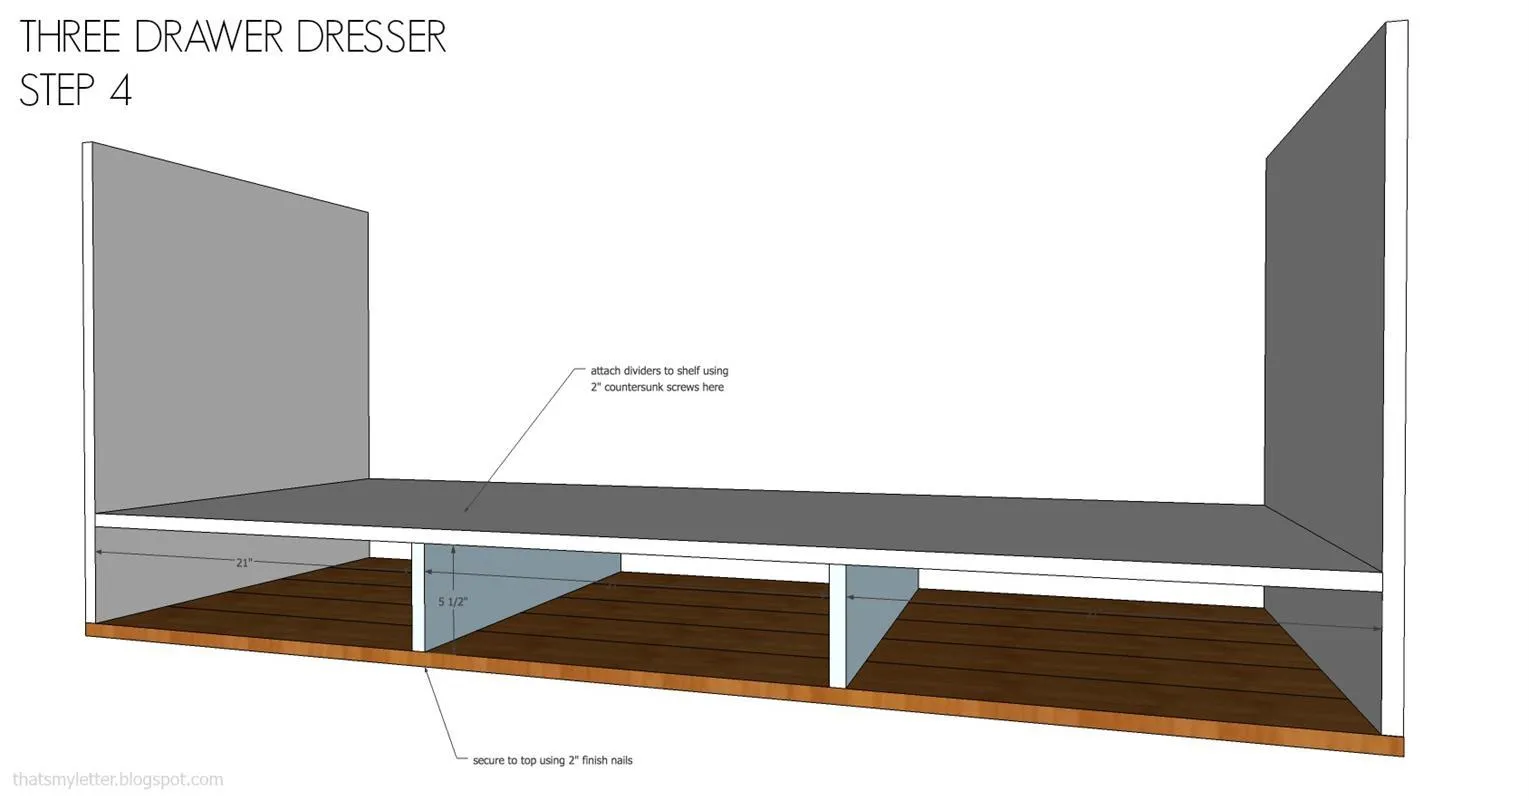
5Step 4: cubby dividers
Attach cubby dividers using countersunk 2" wood screws from underneath and 2" finish nails from the top.
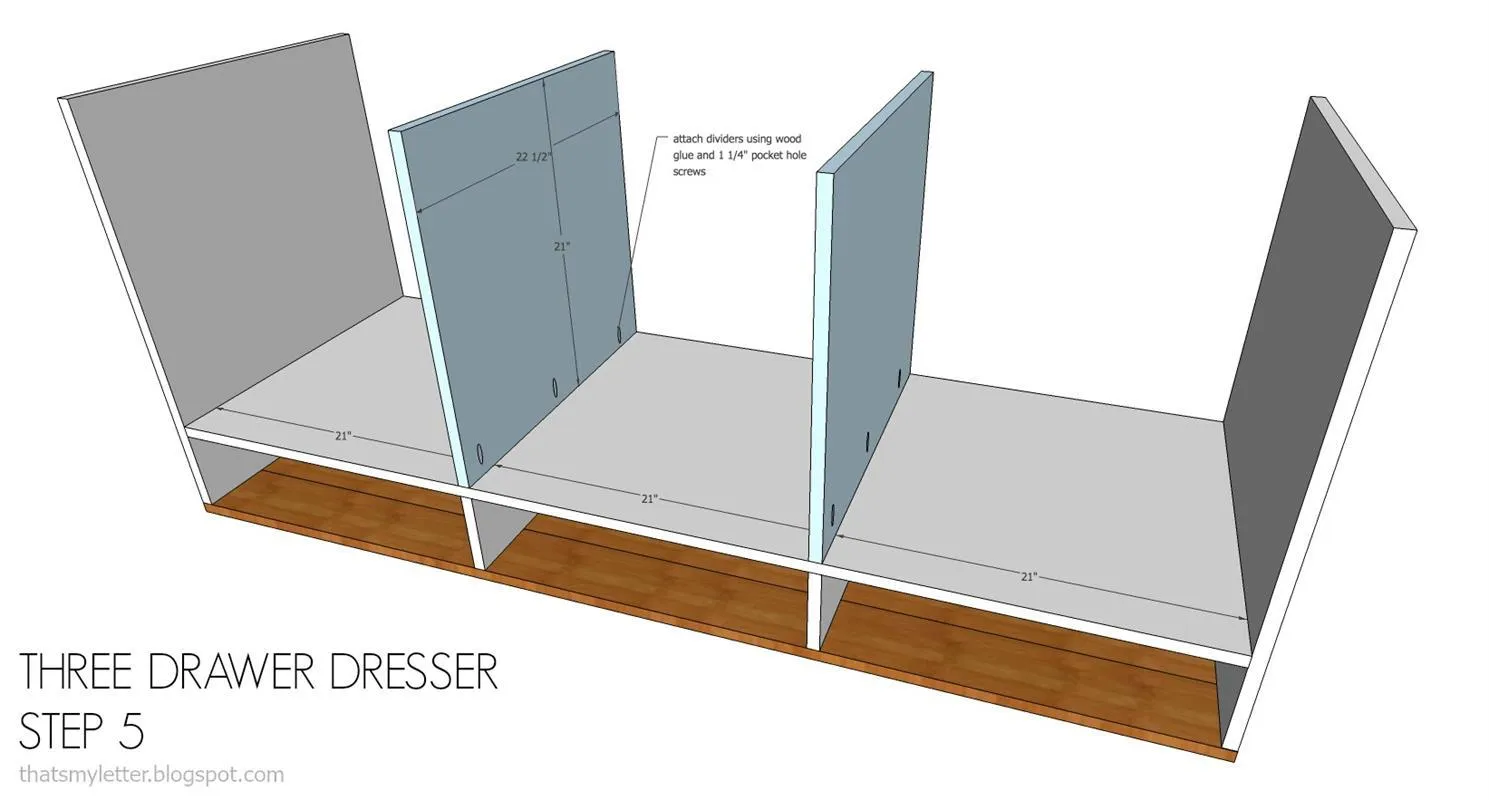
6Step 5: drawer dividers
Attach drawer dividers to shelf using wood glue, pocket holes and 1 1/4" pocket hole screws.
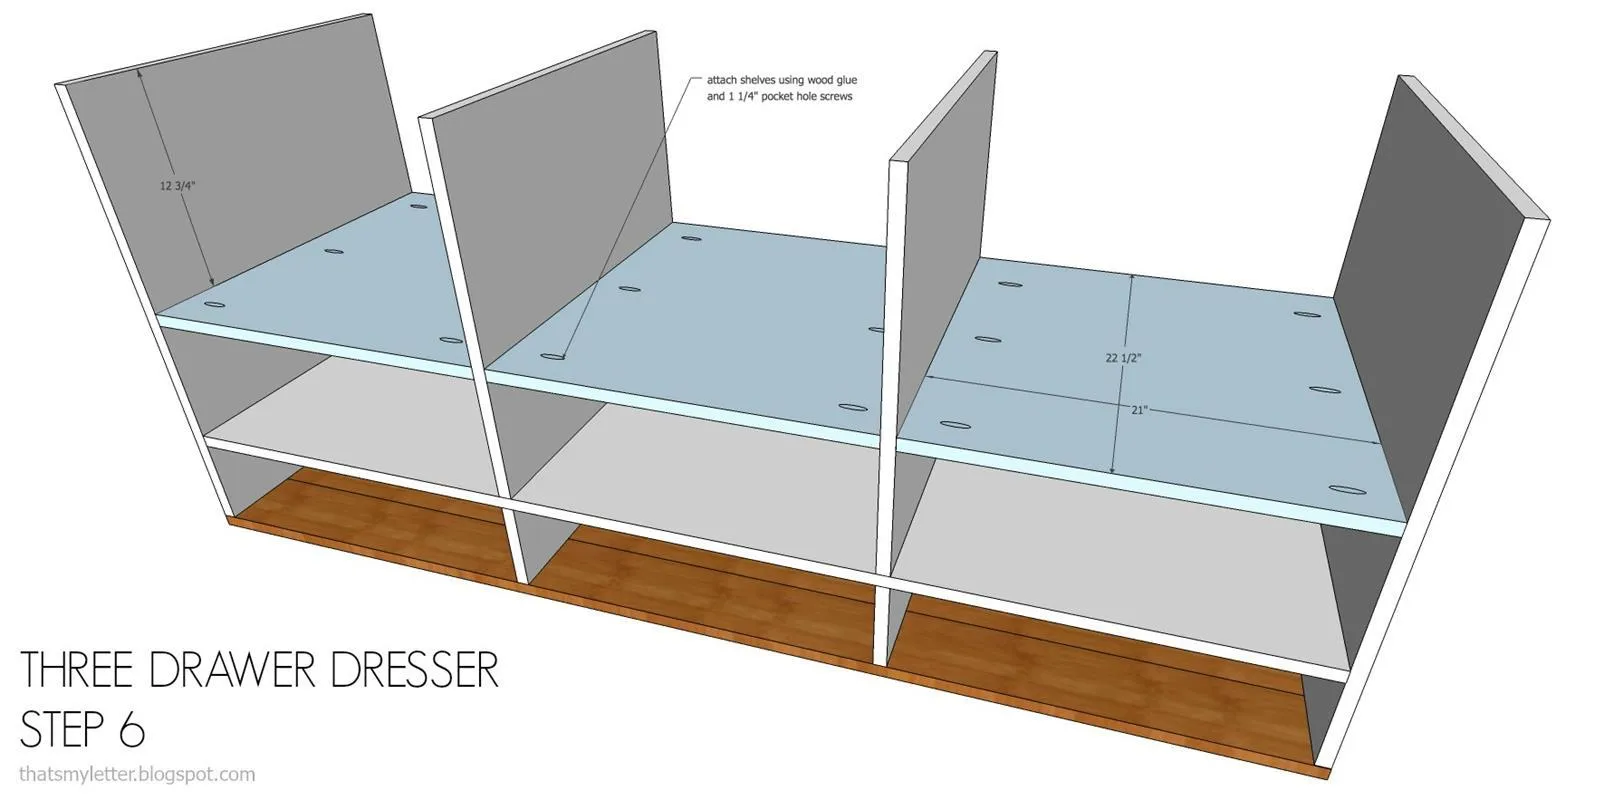
7Step 6: drawer supports
Attach drawer supports using wood glue, pocket holes and 1 1/4" pocket hole screws.
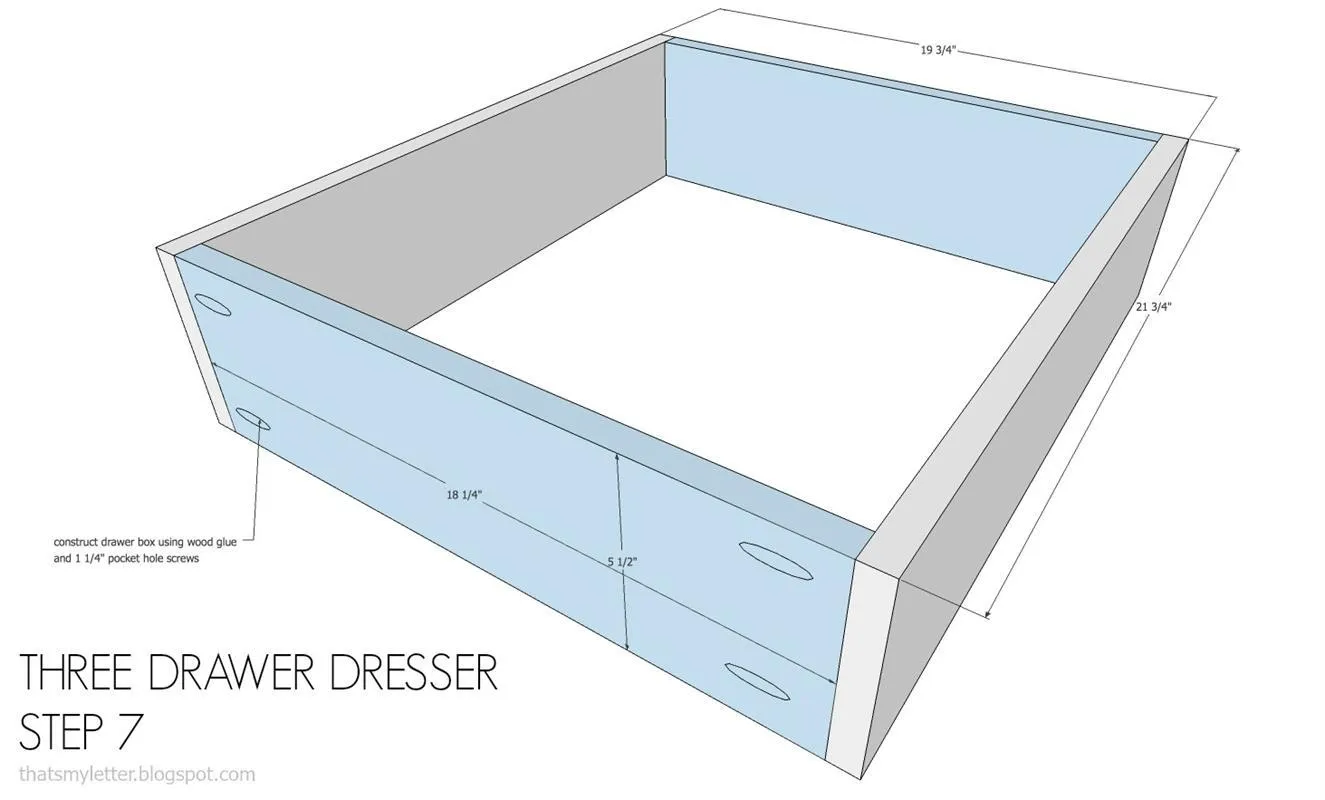
8Step 7: drawer box
Construct drawer box using wood glue, pocket holes and 1 1/4" pocket hole screws.
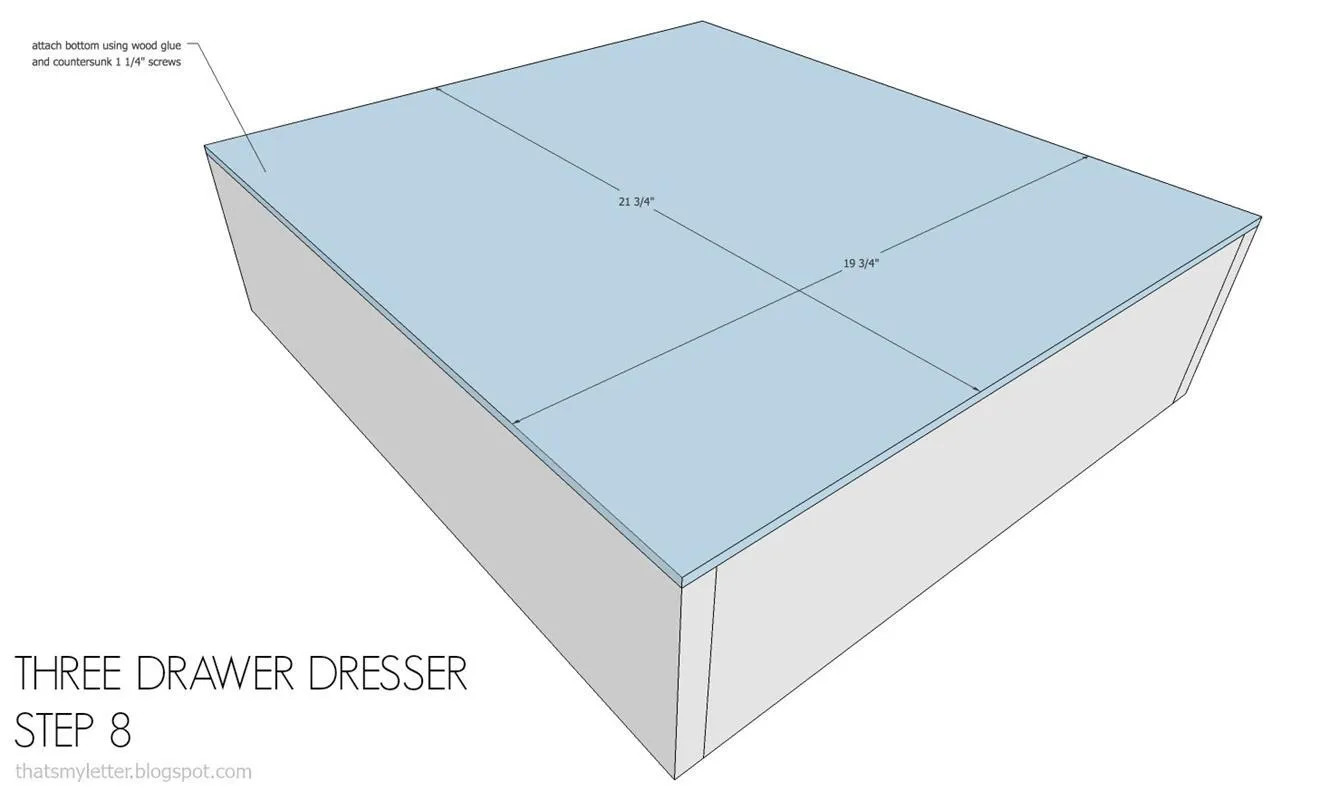
9Step 8: drawer base
Attach base to drawer using wood glue and countersunk 1 1/4" screws.
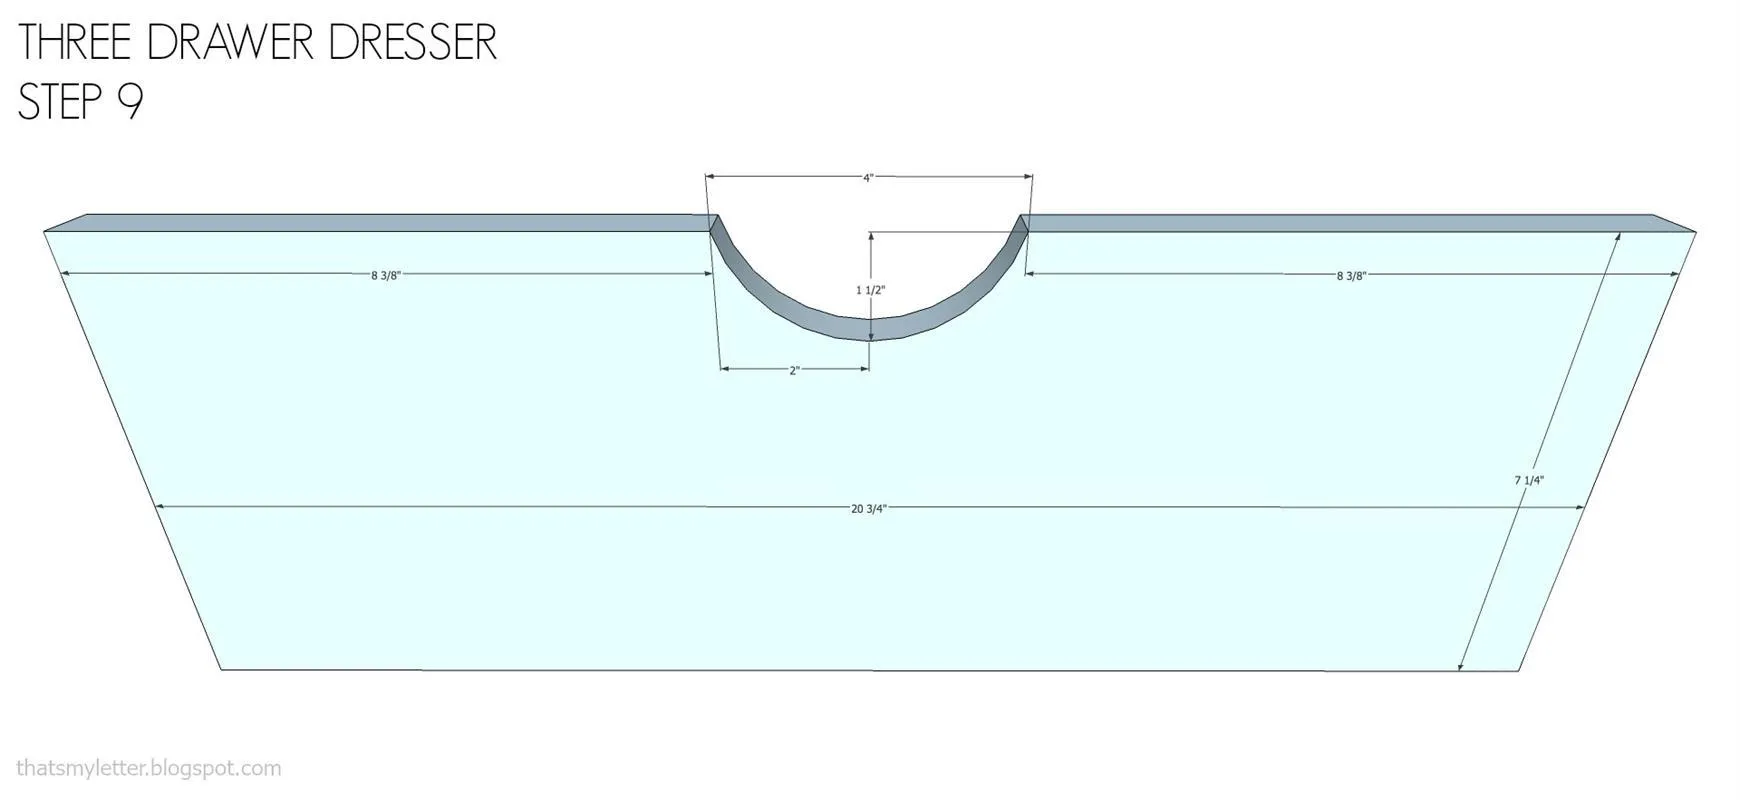
10Step 9: drawer front
Cut out drawer front handle pull as per sketch.
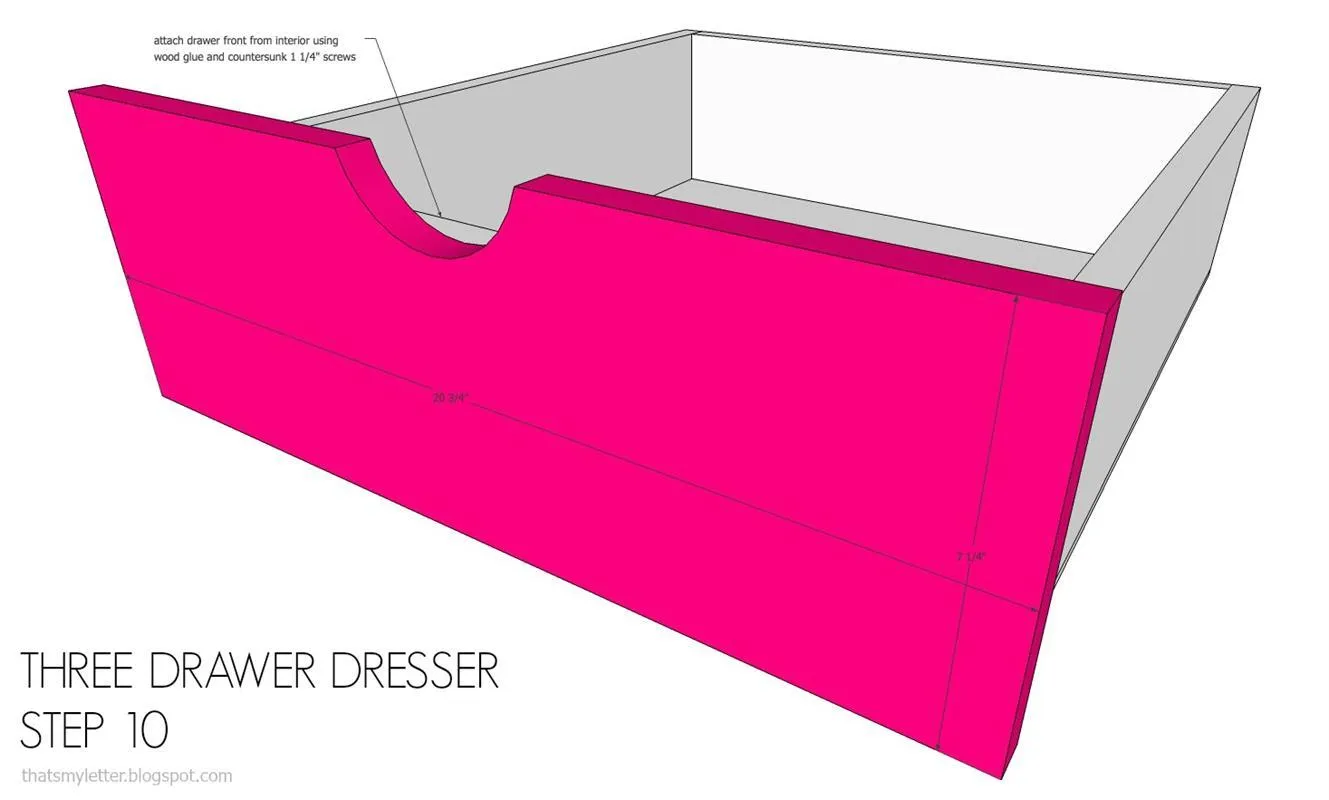
11Step 10: drawer front
Attach drawer glides as per hardware instructions. Put drawer front in place with wood glue and finish nails then remove drawer and secure front to box using countersunk 1 1/4" wood screws from interior.
12Step 11: backing
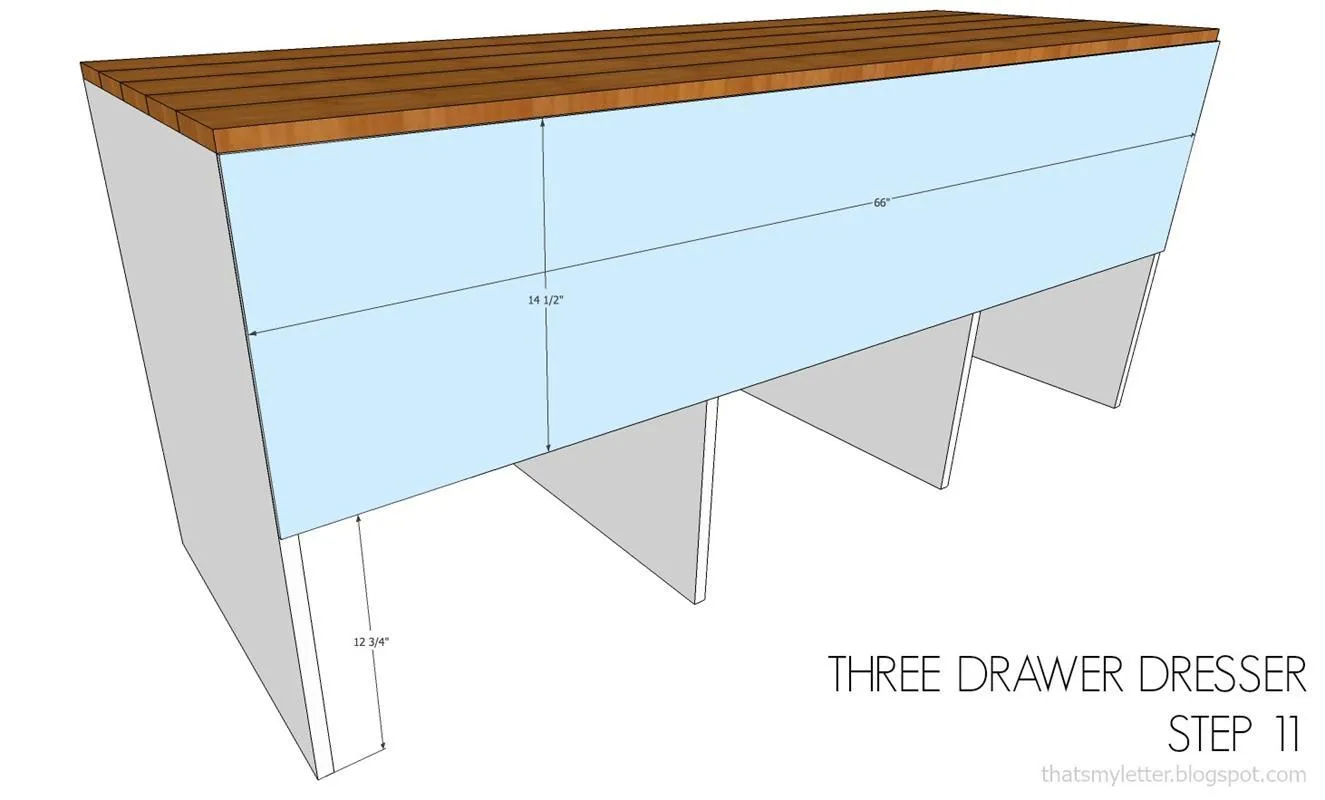
Attach backing to unit using wood glue and 3/4" finish nails.