 Notch
NotchUse your browser's Print (Ctrl/Cmd + P) and choose Save as PDF. This page works offline once you've opened it with a signal.
Sunroom Loveseat
Turn your sunroom or porch into a comfortable place to hang out with this love seat.
- Difficulty
- Intermediate
- Time
- 4–7.8 hours
- Cost
- $$$
Cut list
| Part | Qty | T × W × L | Material | ✓ |
|---|---|---|---|---|
| Side Panels | 2 | 3" × 15" × 29" | — | ☐ |
| Back Panel | 1 | 3" × 24" × 46" | — | ☐ |
| Seat Panel | 1 | 3" × 23" × 46" | — | ☐ |
| Arms | 2 | 3/4" × 1" × 29" | — | ☐ |
| Legs | 4 | 1" × 1" × 12" | — | ☐ |
| Side Rails | 4 | 1" × 1" × 21" | — | ☐ |
| Front/Back Rails | 4 | 1" × 1" × 46" | — | ☐ |
Materials
| Item | Qty | ✓ |
|---|---|---|
| Board, 1x2 72" | 1 board | ☐ |
| Board, 2x2 72" | 5 board | ☐ |
| Plywood, 3/4" Thick Full Sheet | 1 board | ☐ |
| 1 1/4" exterior pocket hole screws | 25 each | ☐ |
| 2 1/2" exterior pocket hole screws | 32 each | ☐ |
| 1 1/2" brad nails | 12 each | ☐ |
| 2" wood screws | 6 each | ☐ |
| 24" x 24" outdoor cushions with backs | 2 each | ☐ |
| Exterior wood glue | 1 each | ☐ |
| Deep seat cushions, approximately 23" x 23" | 4 each | ☐ |
Overall cost: $$$. Lumber varies by region, species, and season, so we give a band rather than a figure.
Tools
- Circular Saw
- Drill / Driver
- Hammer
- Miter Saw
- Pocket Hole Jig
- Random Orbit Sander
- Tape Measure — optional
Instructions
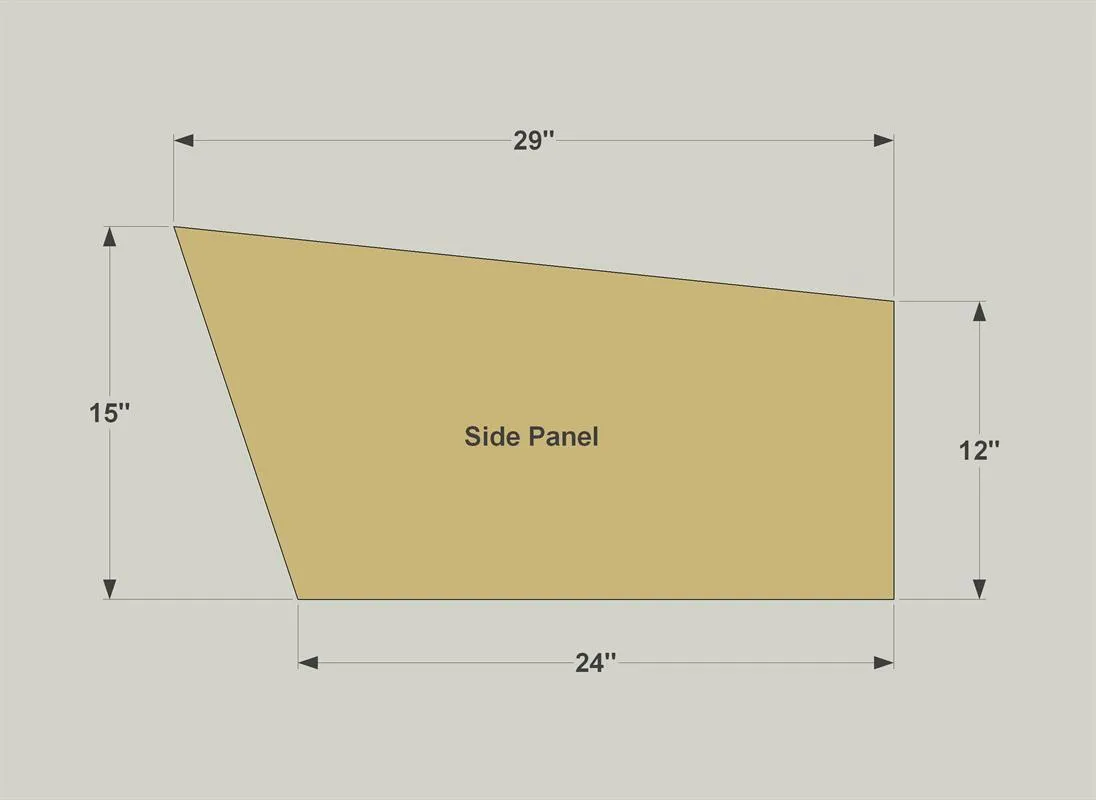
1. Make a Pair of Side Panels
Cut two Side Panels from 3/4" plywood, as shown in the cutting diagram. The easiest way to do this is to cut a long rectangle first, then lay out the angles, and cut the pieces to final shape.
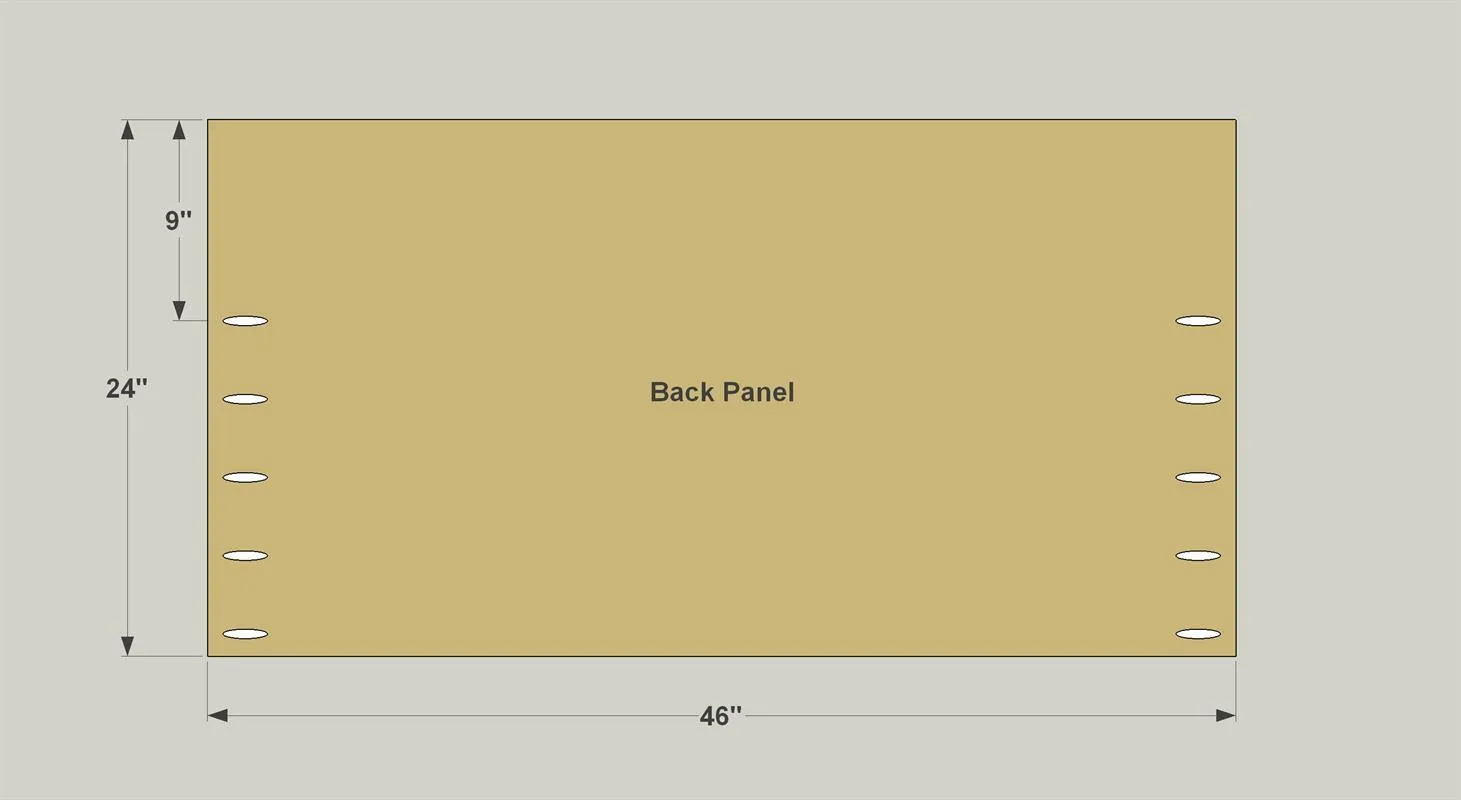
2. Make the Back Panel
Cut the Back Panel to size from 3/4" plywood, as shown in the cutting diagram. Then, with your pocket hole jig set up for 3/4" material, drill pocket holes where shown.
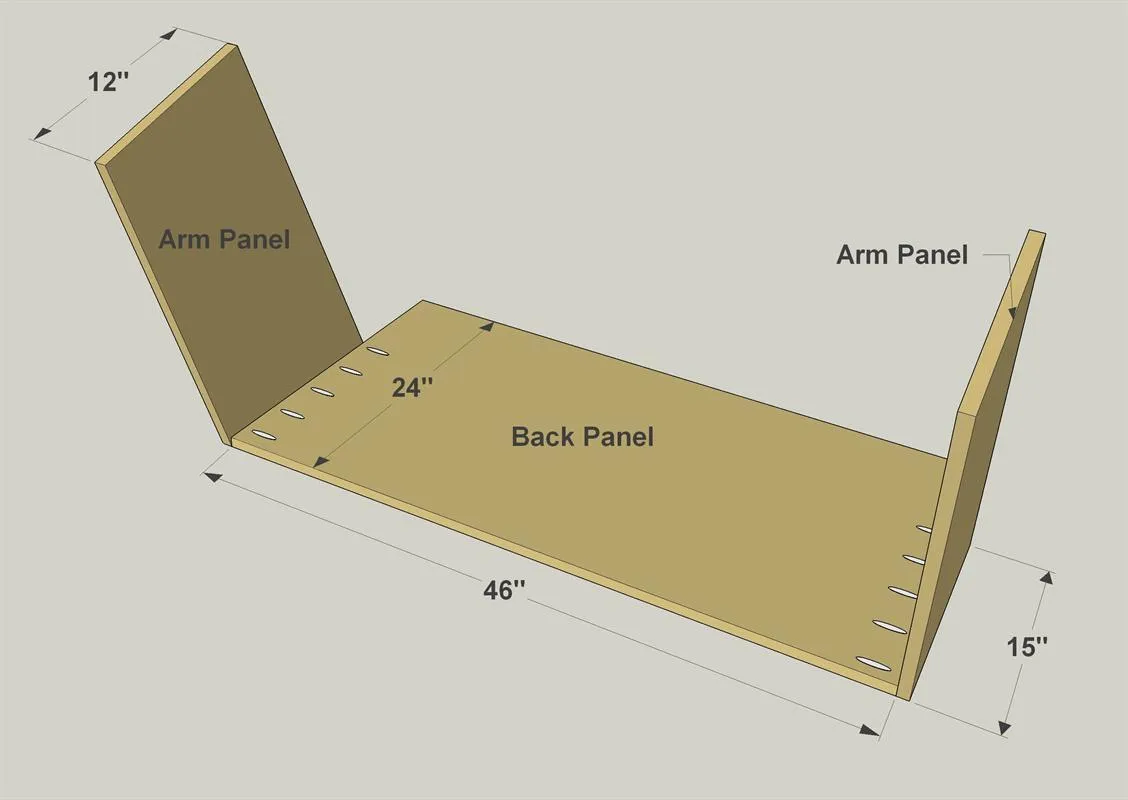
3. Attach the Back to the Sides
Attach the Side Panels to the Back Panel using 1 1/4" exterior pocket holes screws, as shown.
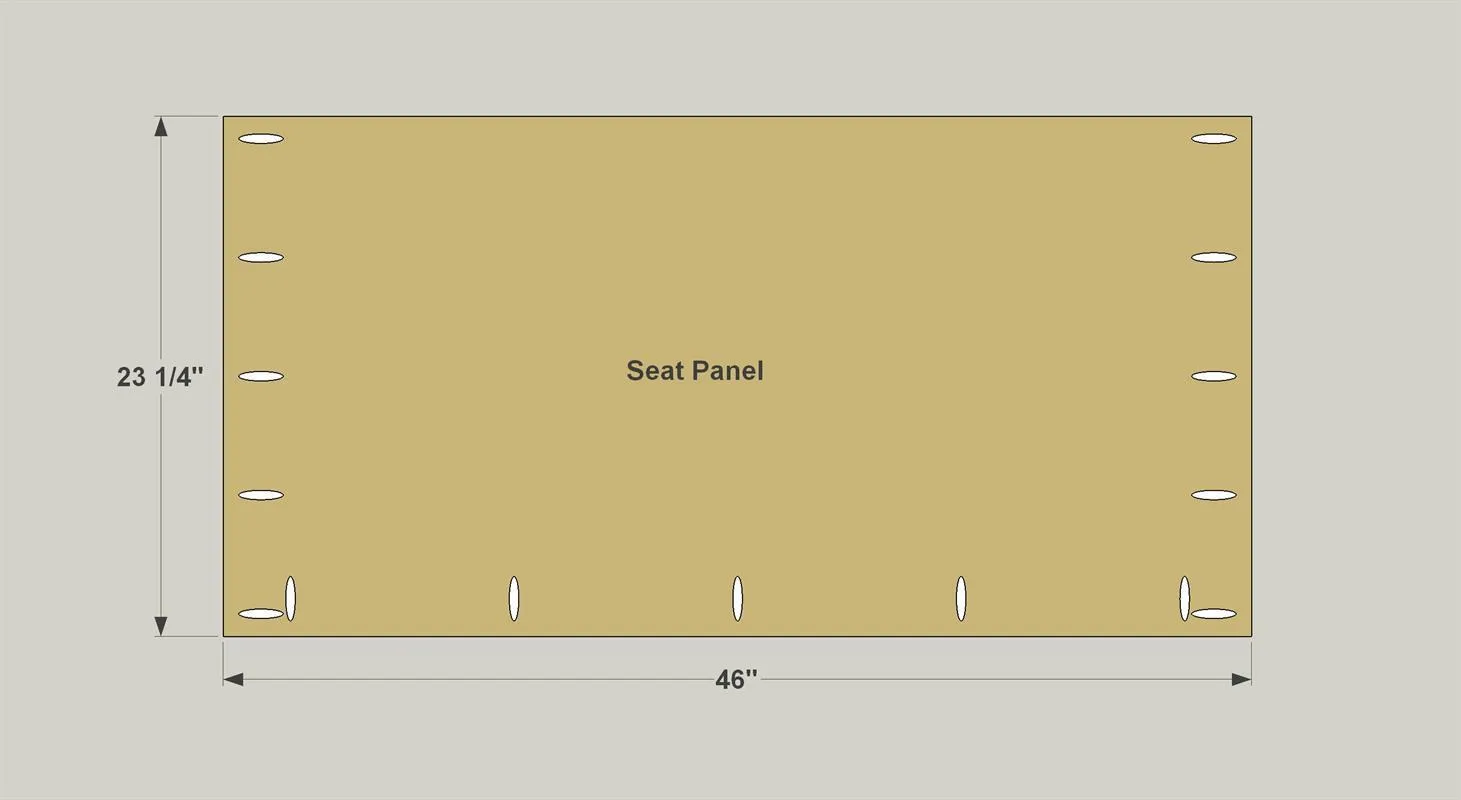
4. Make a Seat Panel
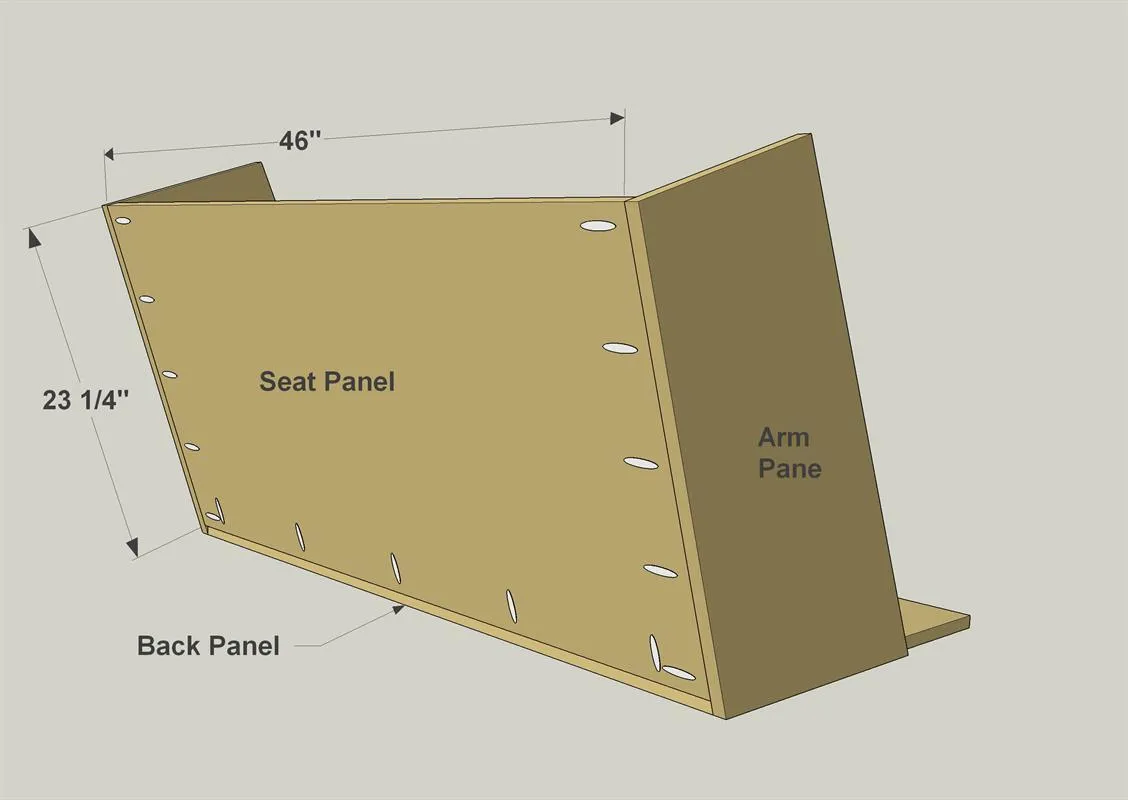
Cut the Seat Panel to size from 3/4" plywood, as shown on the cutting diagram. With your pocket hole jig set up for 3/4" material, drill pocket holes where shown.
5. Attach the Seat Panel
Lay the Side/Back assembly on its back. Secure the Seat Panel using 1 1/4" pocket hole screws.
6. Create a Pair of Arms
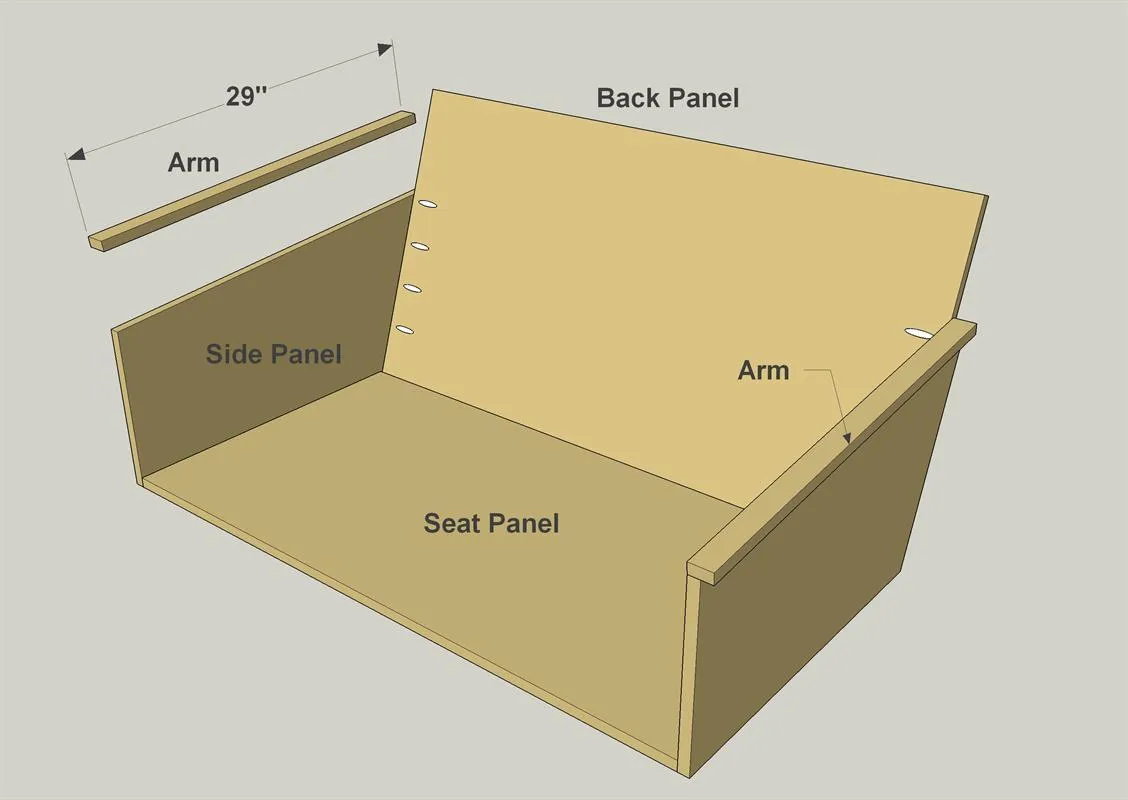
Cut two arms from a 1 x 2 board, as shown in the cutting diagram. Then attach the Arms to the Side Panels, as shown, using exterior-rated wood glue and brad nails.
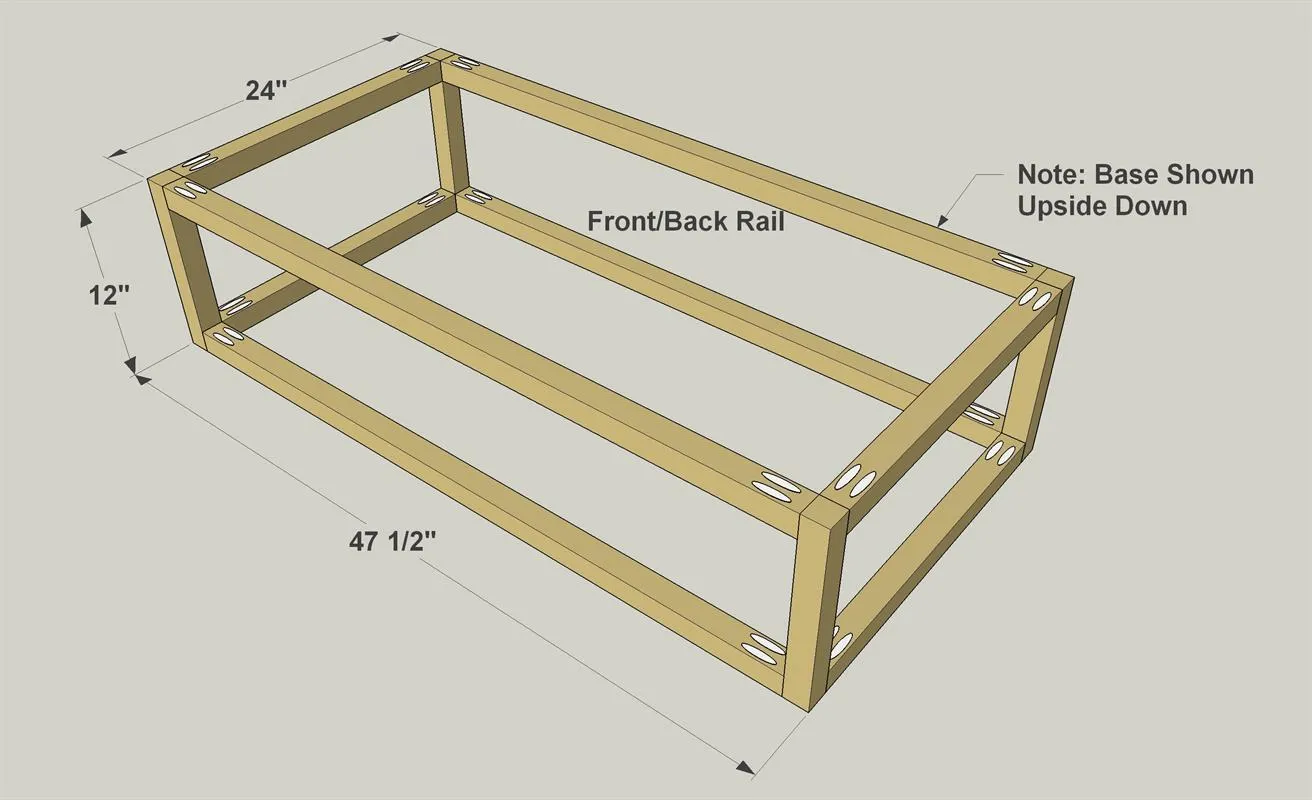
7. Make Legs and Side Rails
- Cut four Legs and to length from a 2 x 2 board, as shown in the cutting diagram, and then set them aside.
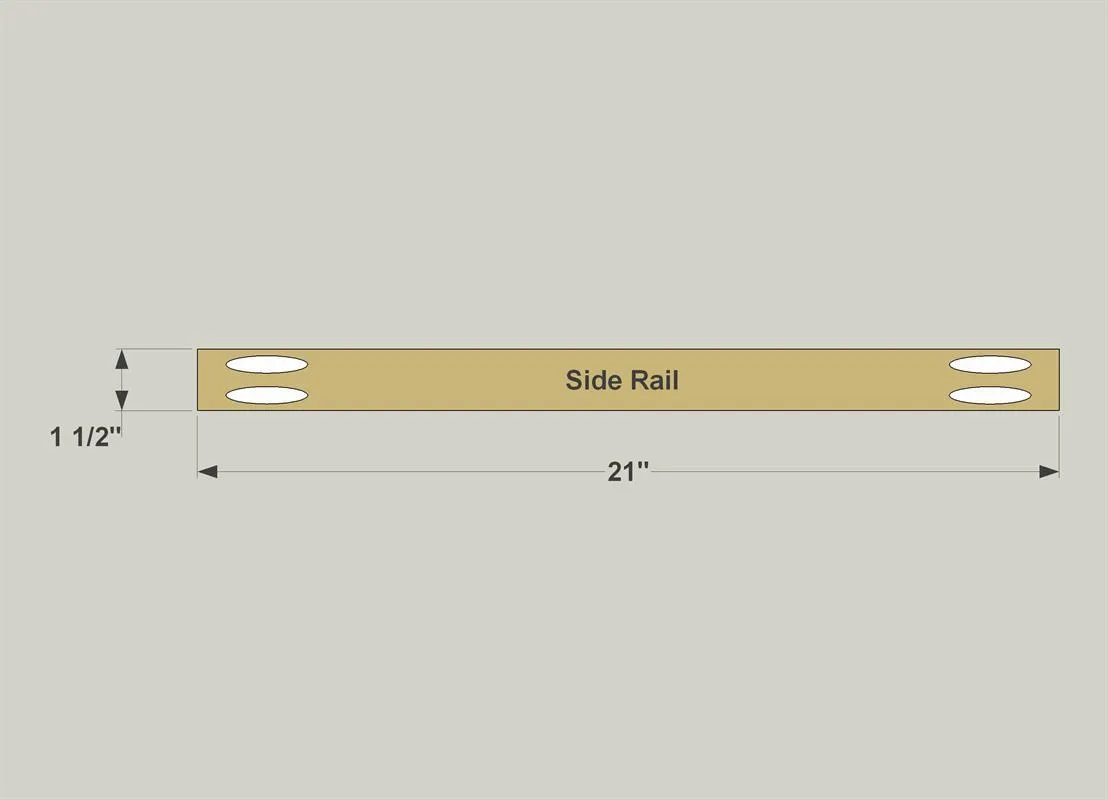
- Then cut four Side Rails to length. With your pocket hole jig set up for 1 1/2" material, drill pocket holes where shown in the Side Rails.
8. Make Front and Back Rails
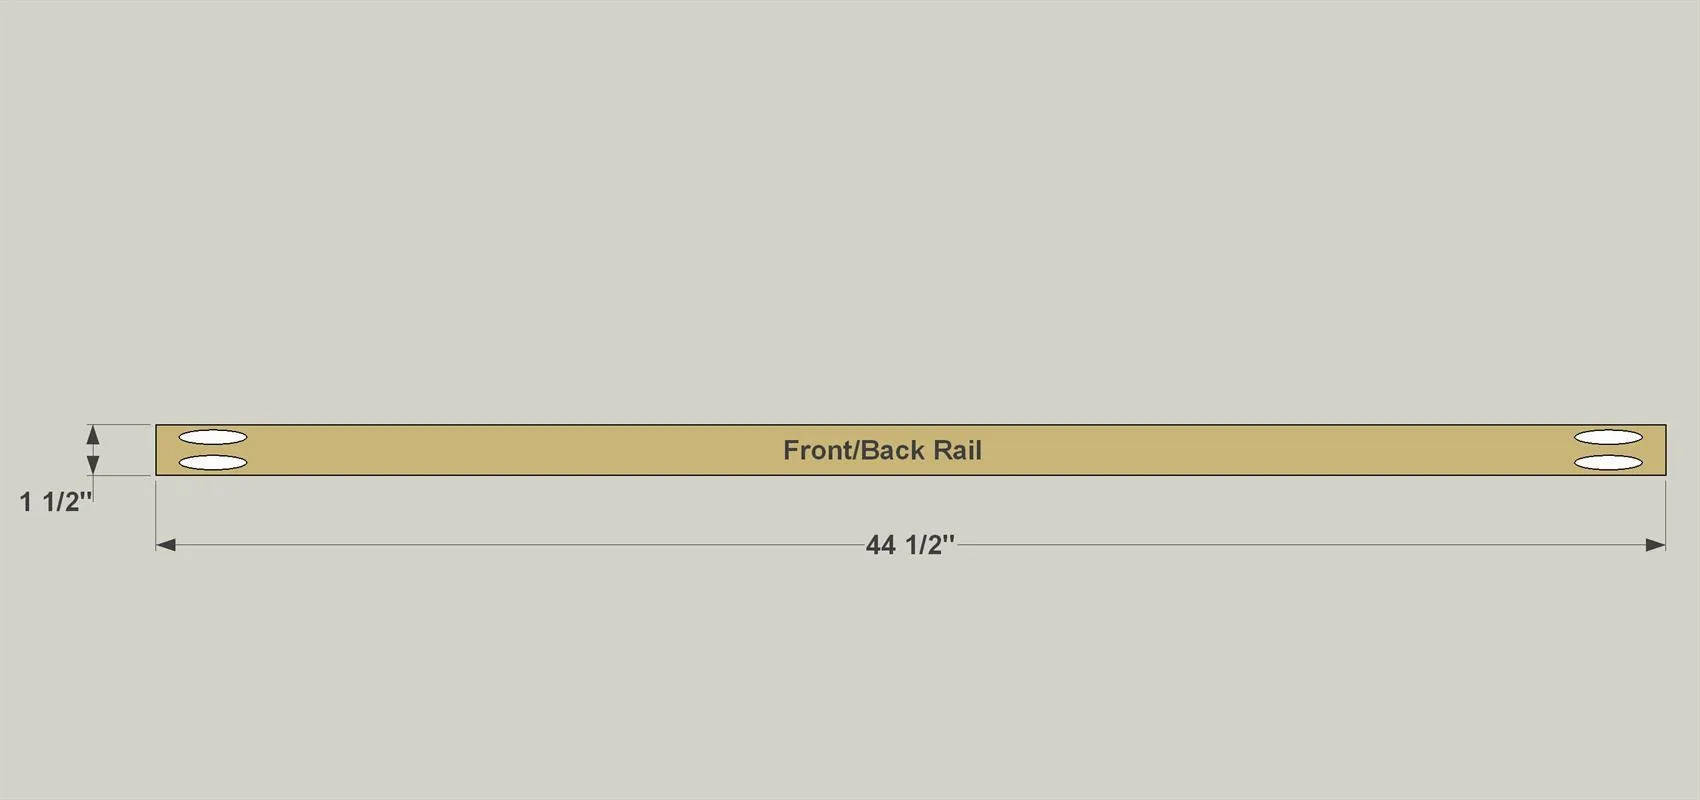
Cut four Front/Back Rails to length from a 2 x 2 board, as shown in the cutting diagram. With your pocket hole jig set for 1 1/2" thick material, drill pocket holes where shown in the Front/Back Rails.
9. Assemble the Base
- Attach the Side Rails to the Legs with 2 1/2" exterior pocket hole screws to create two assemblies.
- Then join these assemblies by attaching the Front and Back Rails using 2 1/2" exterior pocket hole screws. Note the pocket holes are all on the same side of the base parts. This will be the bottom.
10. Paint and Do Final Assembly
- Sand and paint the Base and the Seat separately then secure the base to the Seat with glue and 2" wood screws. Use two screws through each upper Front/Back Rail, and one through each upper Side Rail.
- Drill pilot holes through the Rails before you drive the screws.