Notch
NotchUse your browser's Print (Ctrl/Cmd + P) and choose Save as PDF. This page works offline once you've opened it with a signal.
Simple Stepstool
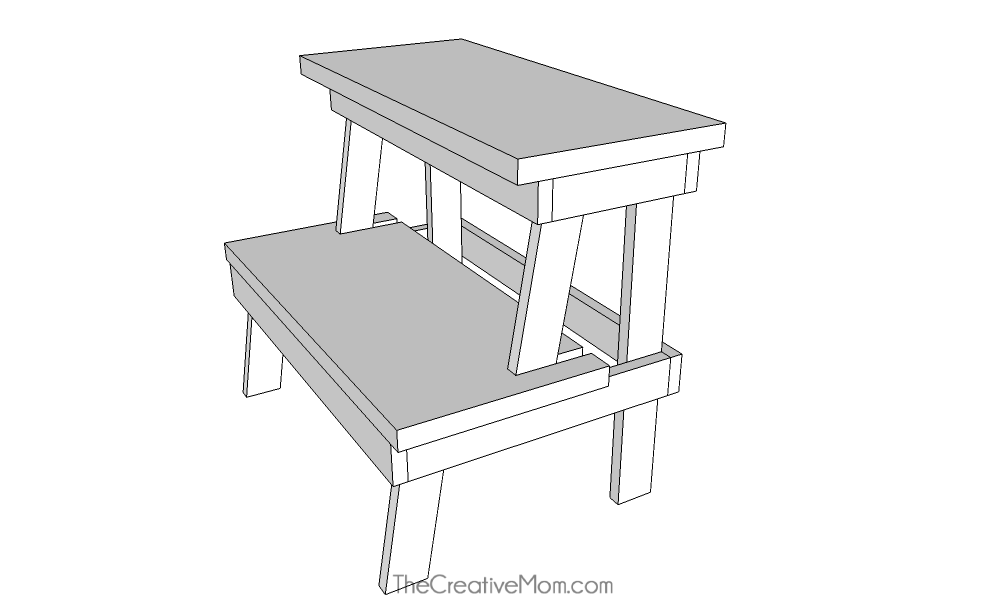
This simple stepstool is a quick and easy build.
- Difficulty
- Easy
- Time
- 3–6 hours
- Cost
- $$
Cut list
| Part | Qty | T × W × L | Material | ✓ |
|---|---|---|---|---|
| Frame fronts & backs | 4 | 3/4" × 1 1/2" × 16" | — | ☐ |
| Small frame sides | 2 | 3/4" × 1 1/2" × 5" | — | ☐ |
| Large frame sides | 2 | 3/4" × 1 1/2" × 10" | — | ☐ |
| Back legs | 2 | 3/4" × 1 1/2" × 4" | — | ☐ |
| Middle supports | 2 | 3/4" × 1 1/2" × 9" | — | ☐ |
| Front legs | 2 | 3/4" × 1 1/2" × 6" | — | ☐ |
| Steps | 2 | 3/4" × 7 1/4" × 17" | — | ☐ |
Materials
| Item | Qty | ✓ |
|---|---|---|
| Board, 1x8 48" | 1 board | ☐ |
| Board, 1x2 96" | 2 board | ☐ |
| 1 1/4" pocket hole screws | 25 each | ☐ |
| 1 1/4" grabber screws | 25 each | ☐ |
| Wood glue | 1 each | ☐ |
Overall cost: $$. Lumber varies by region, species, and season, so we give a band rather than a figure.
Tools
- Brad Nailer
- Drill / Driver
- Jigsaw
- Miter Saw
- Pocket Hole Jig
- Random Orbit Sander
- Tape Measure — optional
Instructions
1. Build step frames
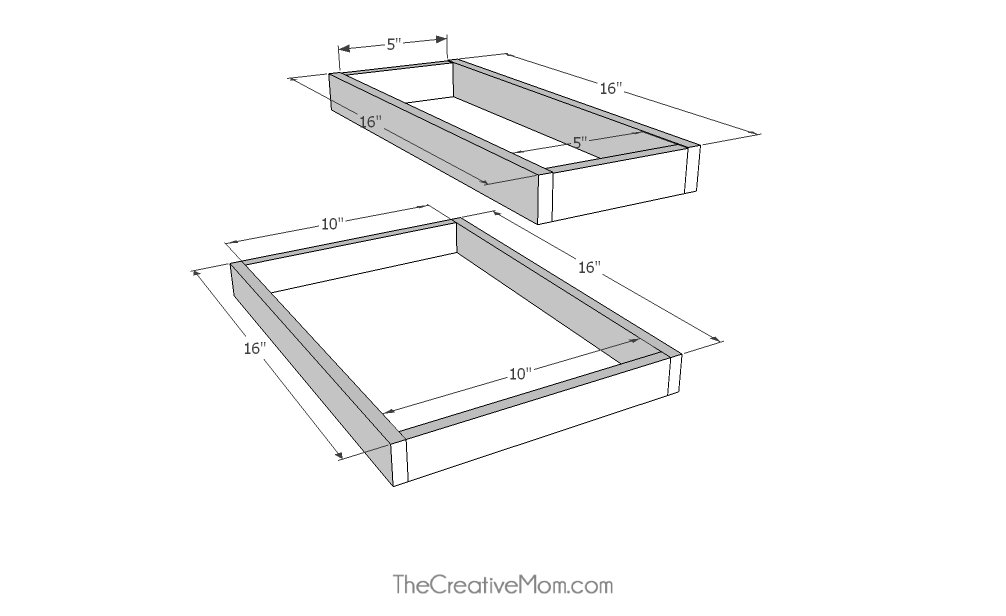
- Begin by building the frames for your steps.
- Cut 4- 16" 1x2's.
- Cut 2- 5" 1x2's.
- Drill pocket holes in each end of the 5" boards.
- Cut 2- 10" 1x2's.
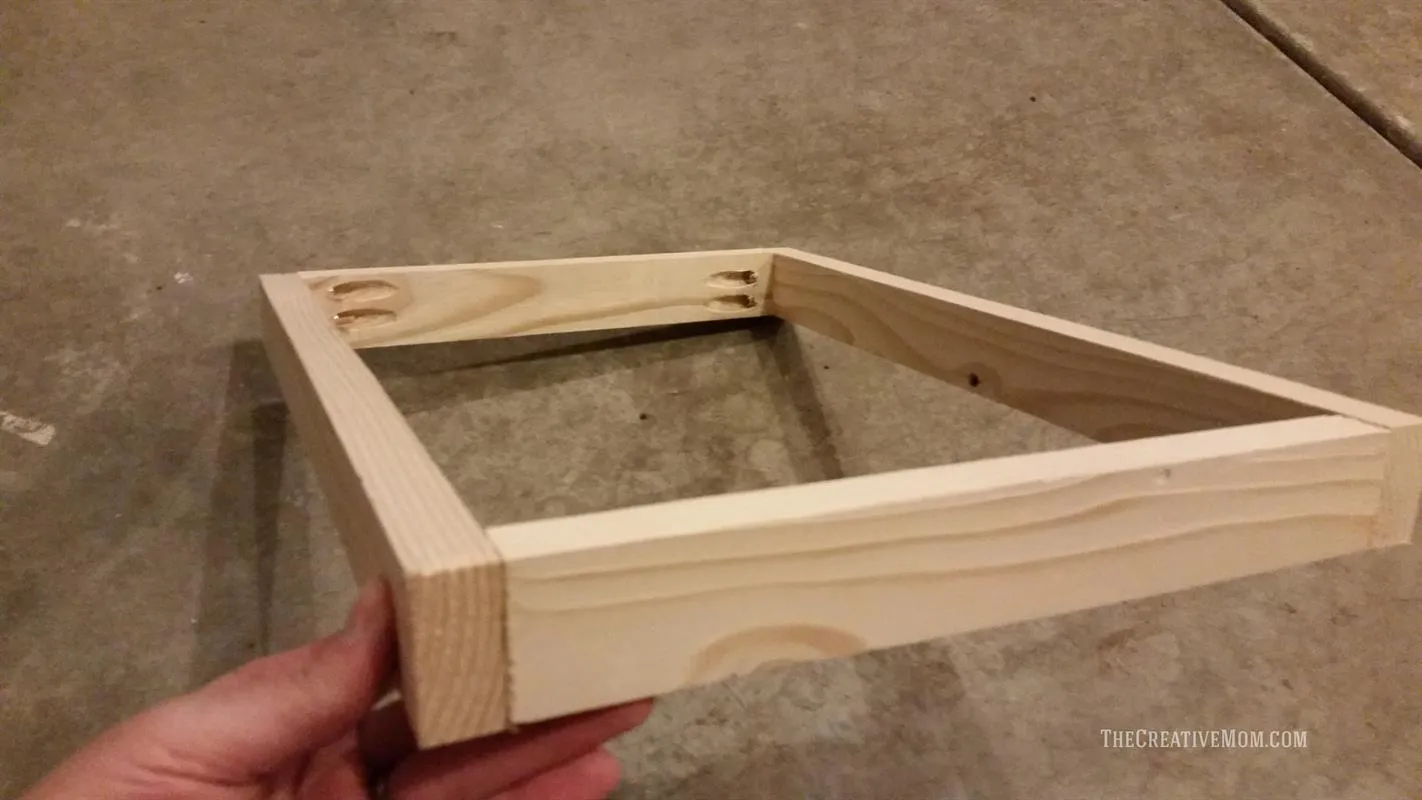
- Drill pocket holes in each end of the 10" boards. Use 1 1/4" pocket hole screws and wood glue to build two frames.
2. Add front legs
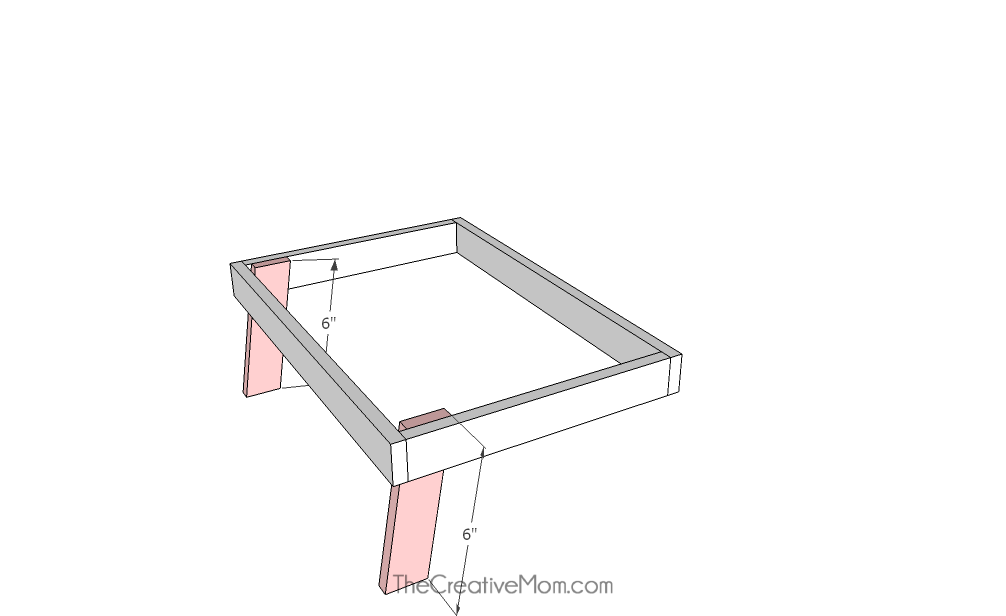
Cut 2- 6" 1x2 boards, with both ends mitered at 10 degrees off square. To the larger frame, attach both boards so they are flush with the top of the frame. Keep boards toward the front of the frame as far as they can go, while keeping the bottom of the legs level with the top of the frame (see plans). Boards are attached with wood glue and 1 1/4" grabber screws, screwed from the inside.
3. Stepstool frames built
You should now have two frames built for the steps of your stepstool.
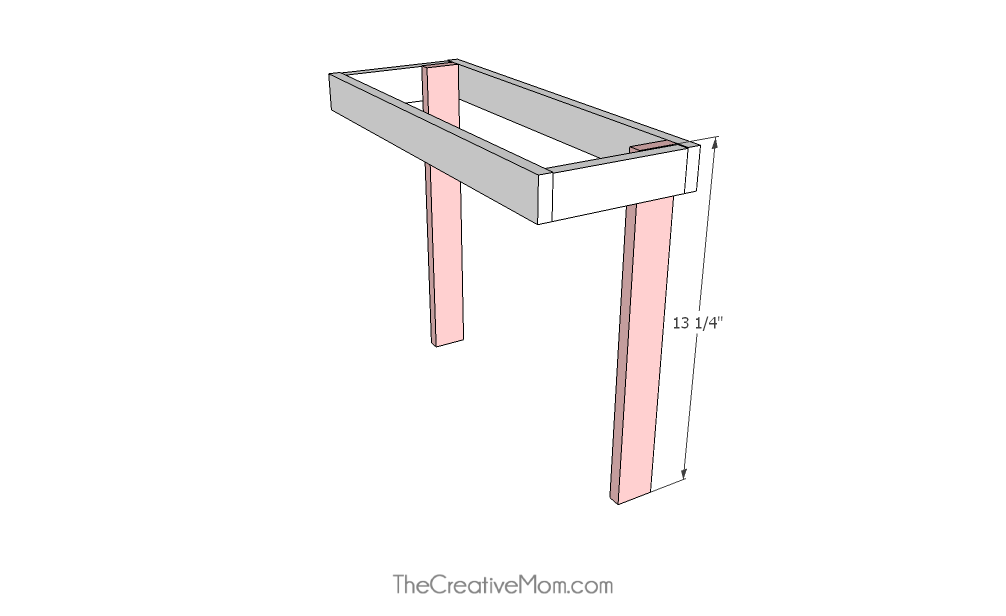
4. Add back legs
Cut 2- 13 1/4" 1x2's. To the smaller frame, attach both boards, so they are flush with the top and the back (see plans). Boards are attached with wood glue and 1 1/4" grabber screws, screwed from the inside.
5. Add side supports
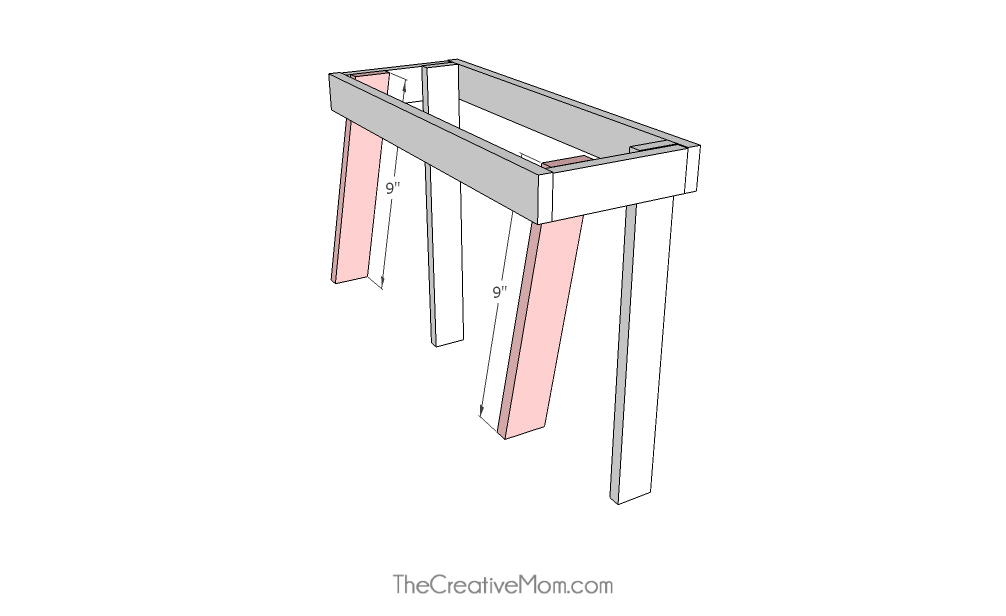
Cut 2- 9" 1x2 boards, with both ends mitered at 10 degrees off square. To the smaller frame, attach both boards so they are flush with the top of the frame. Keep boards toward the front of the frame as far as they can go, while keeping the bottom of the legs level with the top of the frame (see plans). Boards are attached with wood glue and 1 1/4" grabber screws, screwed from the inside.
6. Attach frames together
- Attach the back legs to the bigger frame.
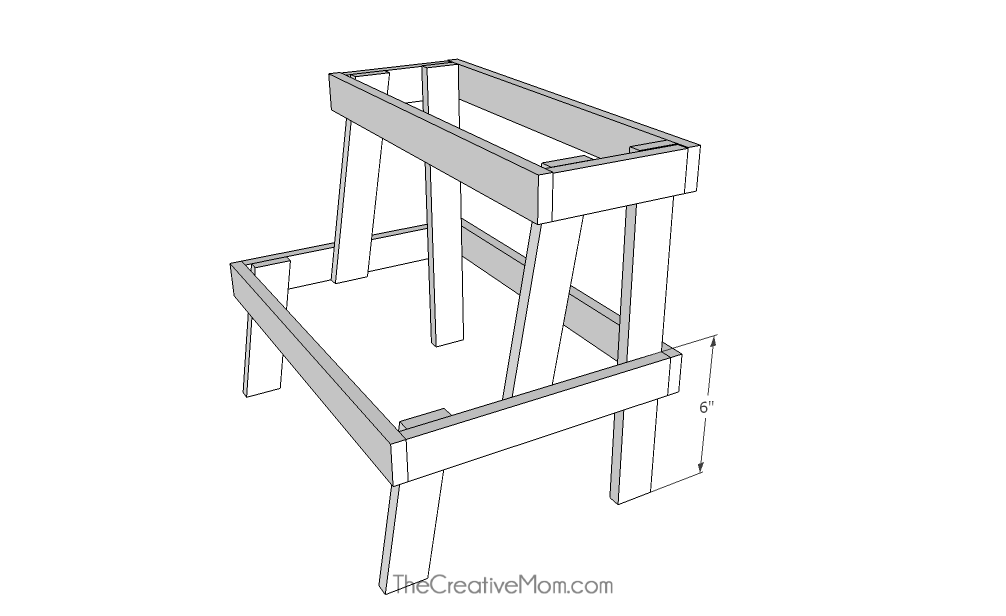
- Measure 6 inches from the bottom of the legs. This will be where the top of your frame will sit (see plans).
- Also attach the middle supports so the bottom of the supports is even with the bottom of the bigger frame. Boards are attached with wood glue and 1 1/4" grabber screws, screwed from the inside.
7. Cut steps
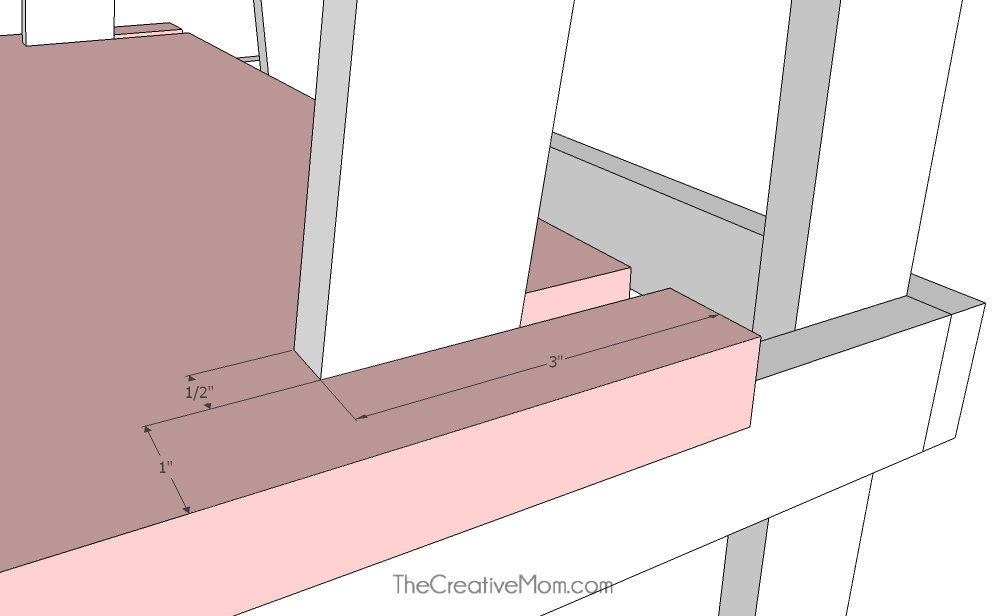
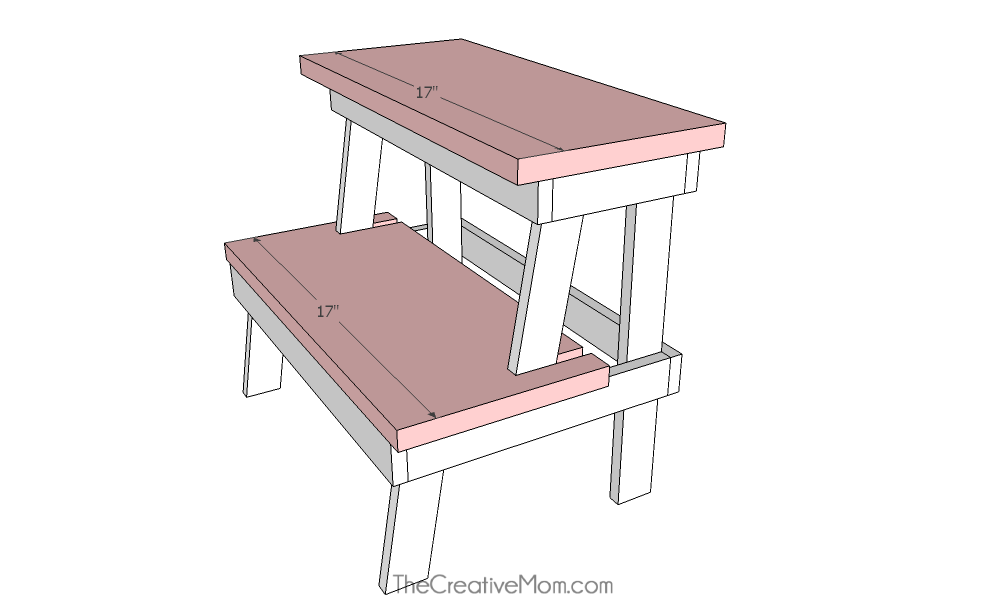
- Cut 2- 17" 1x8 boards. The bottom step will need some notches cut out so it fits with the frame we built. Using a jigsaw, a band saw, or a scroll saw, cut 2 slits out of the board.
- Measure in 1" from the sides, and 3 inches from the back.
- Then cut a 1/2" slit (see plans for clarification).
- Once the slits are cut, slide the step in place.
8. Attach steps
Using wood glue and brad nails, secure the steps into place. The top step should be flush with the back, and have 1/2" overhang on each side. The bottom step should overhang the sides by 1/2", and about 1/2" in the front as well.
9. Finish the stepstool
Sand the stepstool. Paint or stain to finish.