 Notch
← Back to the plan
Use your browser's Print (Ctrl/Cmd + P) and choose Save as PDF. This page works offline once you've opened it with a signal.
Simple shoe storage rack
Simple shoe storage rack.
- Difficulty
- Beginner
- Time
- 1.5–3 hours
- Cost
- $$
Cut list
| Part | Qty | T × W × L | Material | ✓ |
|---|---|---|---|---|
| End panels | 2 | 3/4" × 11" × 15" | — | ☐ |
| Shelf | 2 | 3/4" × 11" × 40" | — | ☐ |
Materials
| Item | Qty | ✓ |
|---|---|---|
| Board, 1x12 48" | 1 board | ☐ |
| Board, 1x12 72" | 1 board | ☐ |
| 1 1/4" Kreg Pocket hole screws | 12 each | ☐ |
Overall cost: $$. Lumber varies by region, species, and season, so we give a band rather than a figure.
Tools
- Miter Saw
- Pocket Hole Jig
- Random Orbit Sander
- Combination Square — optional
- Tape Measure — optional
Instructions
1. Cut shelves
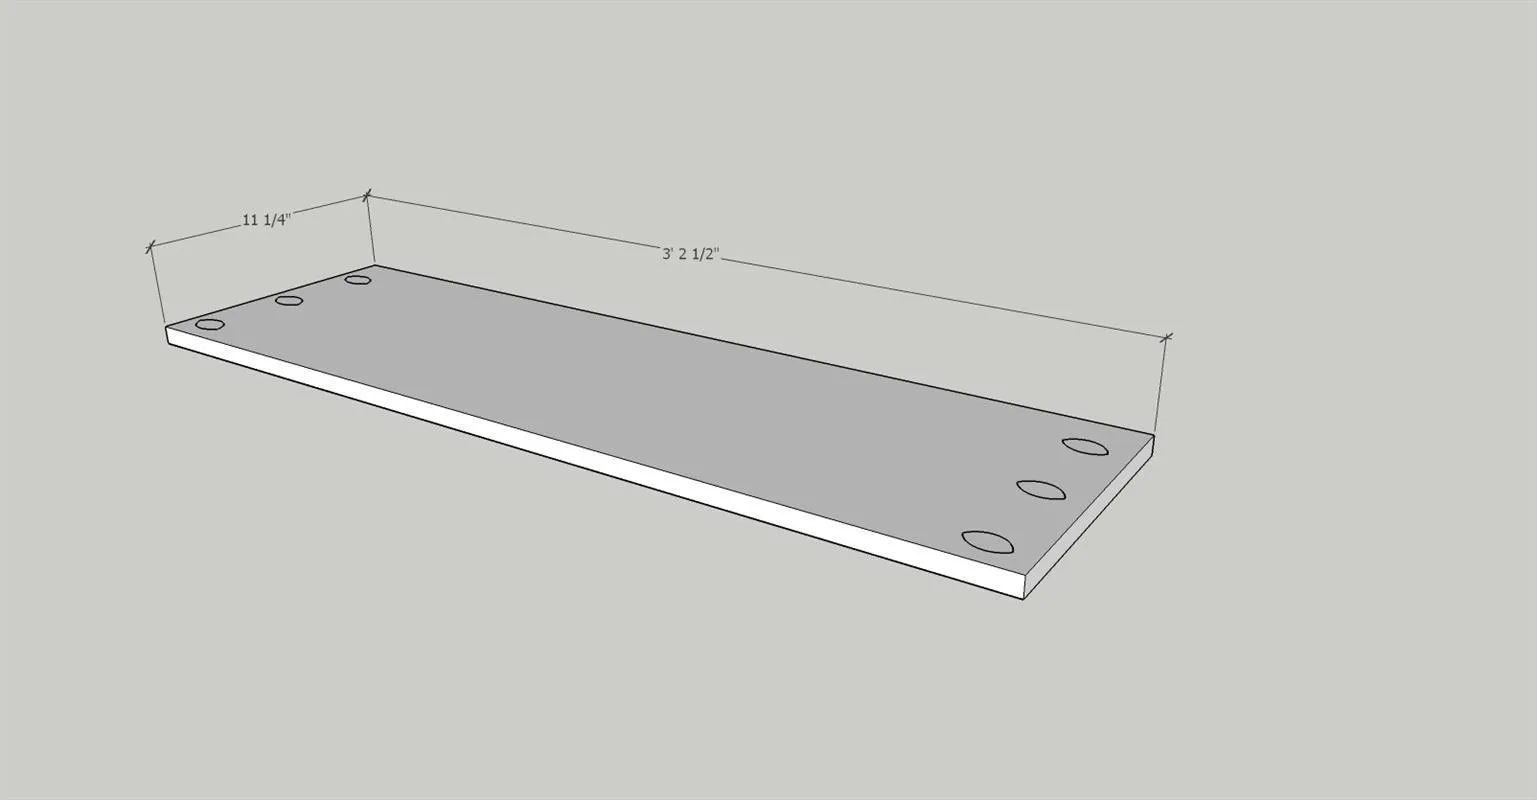
- Cut two shelves.
- Cut one shelf from a 6' 1x12 at 38 1/2" long and the other shelf from a 4' 1x12 at 38 1/@" long.
- Drill (3) pocket holes in each end of each shelf for 1 1/4" pocket hole screws
2. Cut end panels
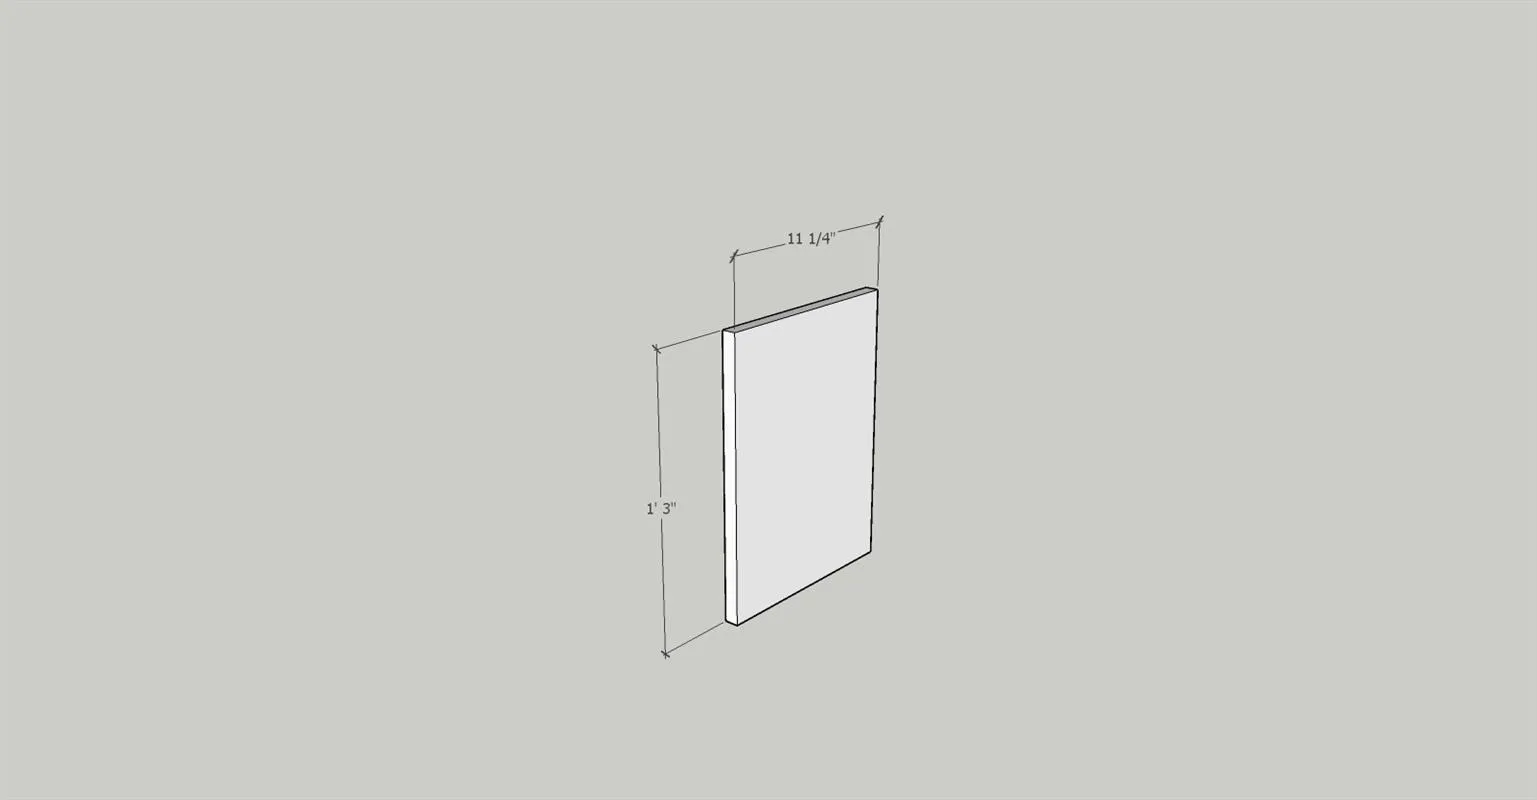
Cut two end panels from the remainder of the 6' 1x12. Cut each end panel 15" long
3. Assemble the unit
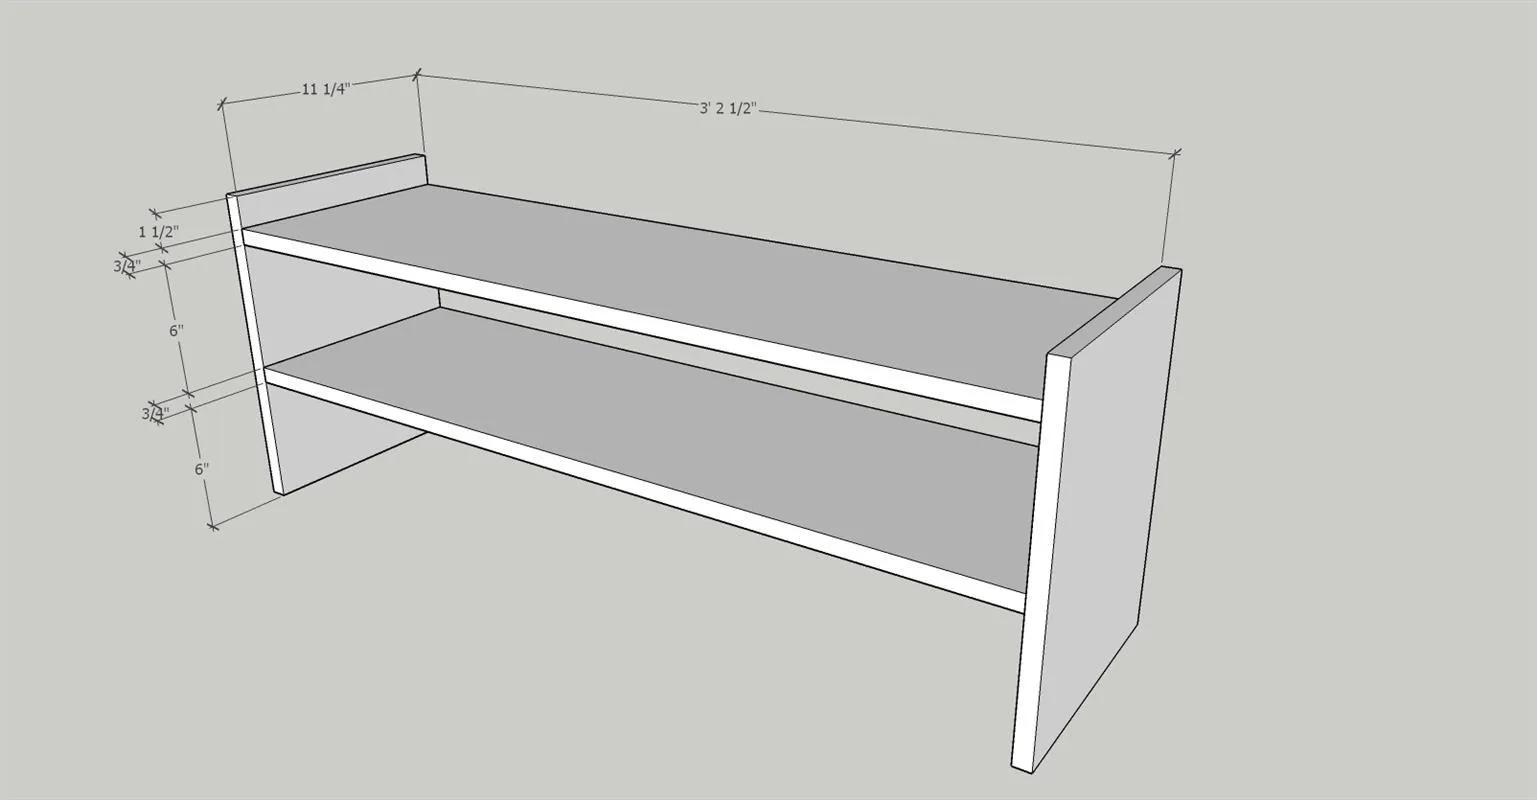
Assemble the shelves and end panels by using (3) 1 1/4" Kreg pocket hole screws in each end of each shelf.
4. Finish
Fill pocket holes and finish by painting or staining.....your preference.