Notch
Simple Kids Craft Table
Step-by-step build — 8 steps. Also available as a print sheet.
1Cut, Drill Pocket Holes & Router
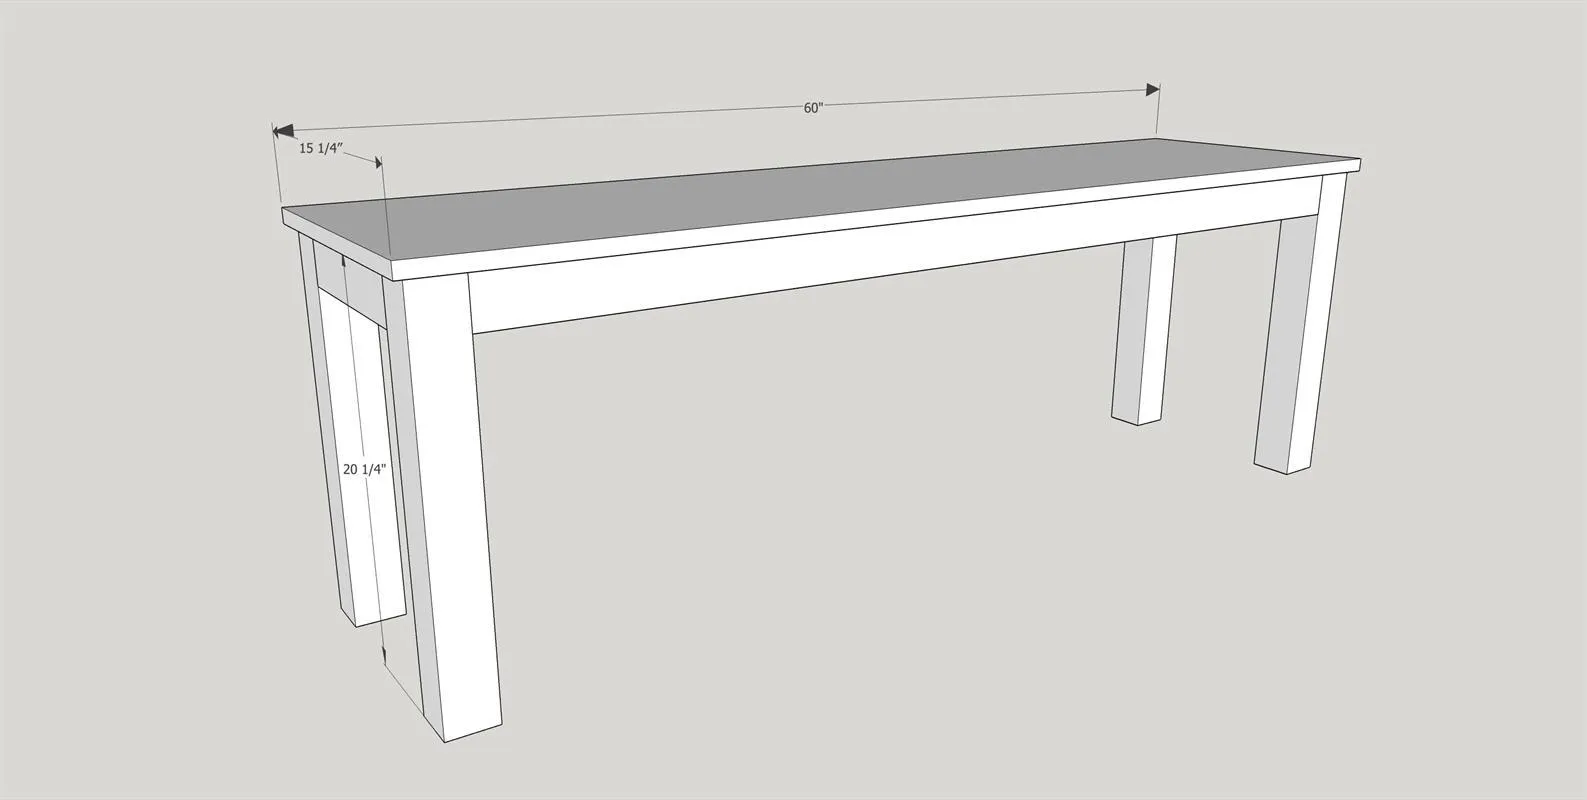
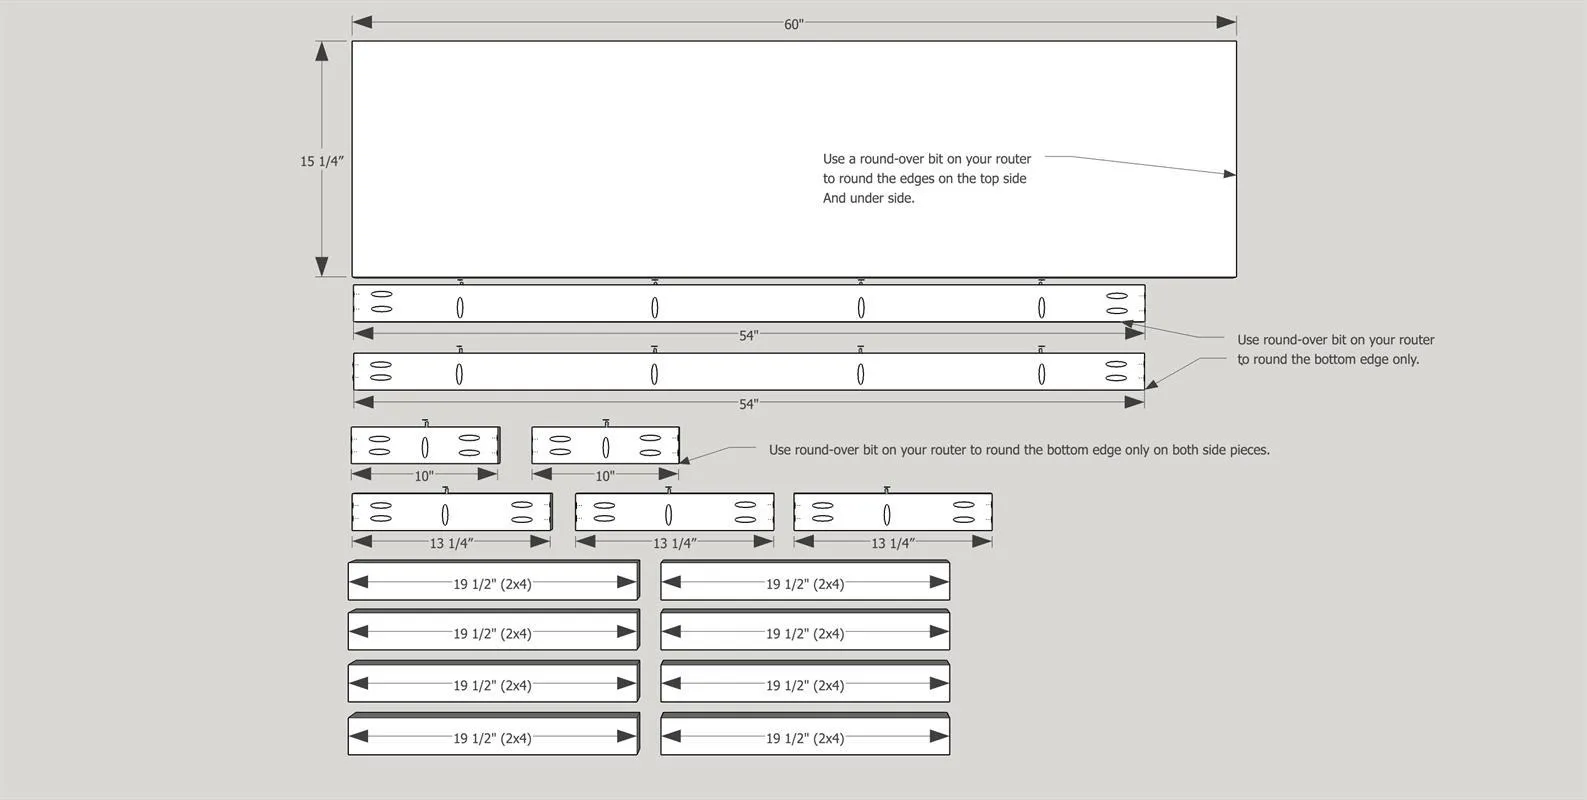
Cut the wood pieces according to the diagram and drill 3/4" pocket holes to accommodate 1 1/4" pocket hole screws. Router edges indicated on the digram if desired. This just softens the edges to avoid hard corners on children's furniture.
2Glueup Legs
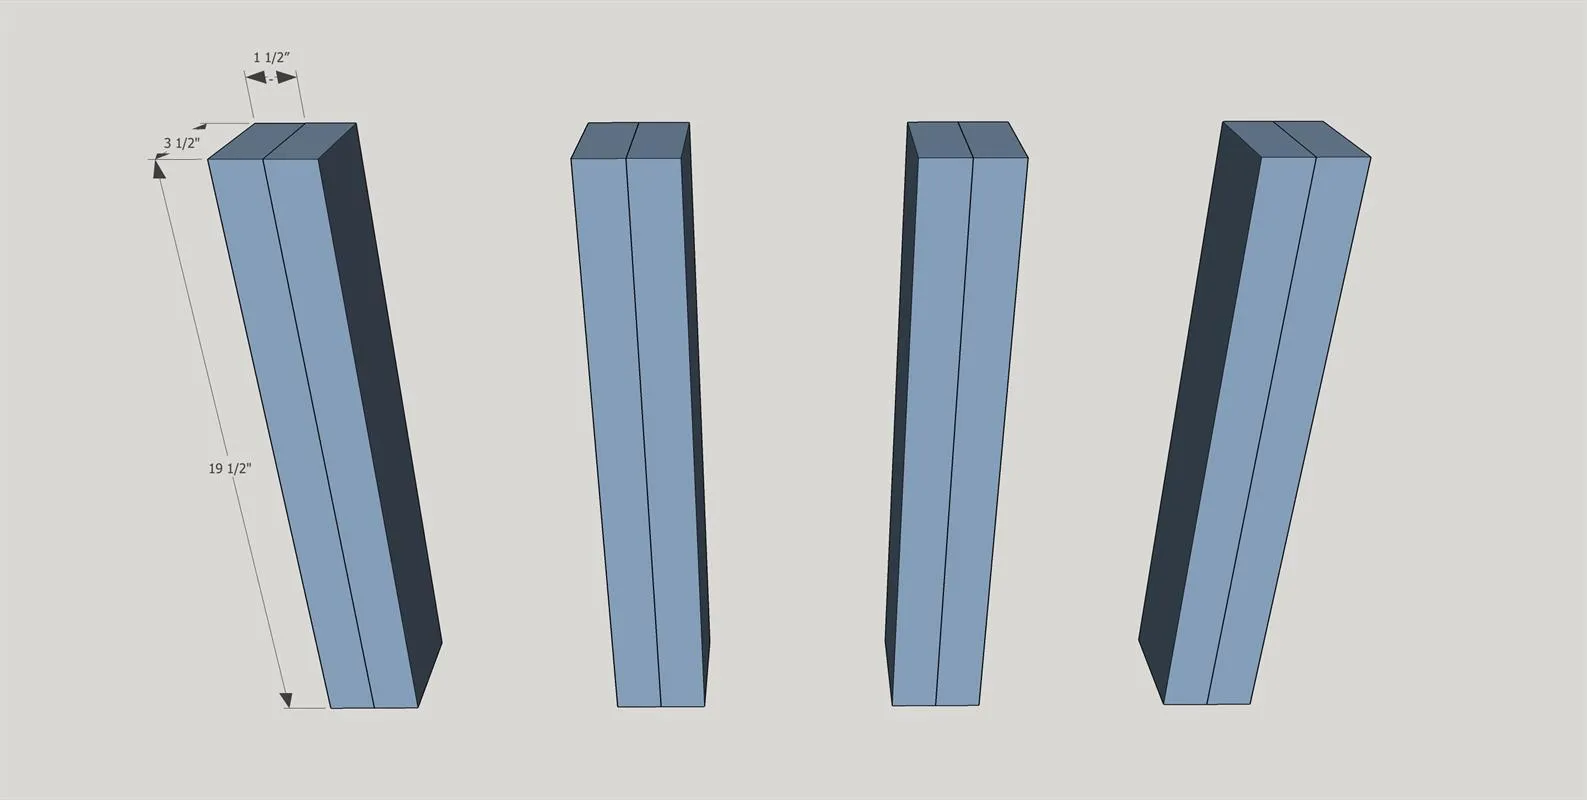
I wanted to create legs that matched the width of the spans/skirt around the table. Glue the faces of the the 19 1/2" 2x4's together and clamp overnight.
3Trim Legs to Size
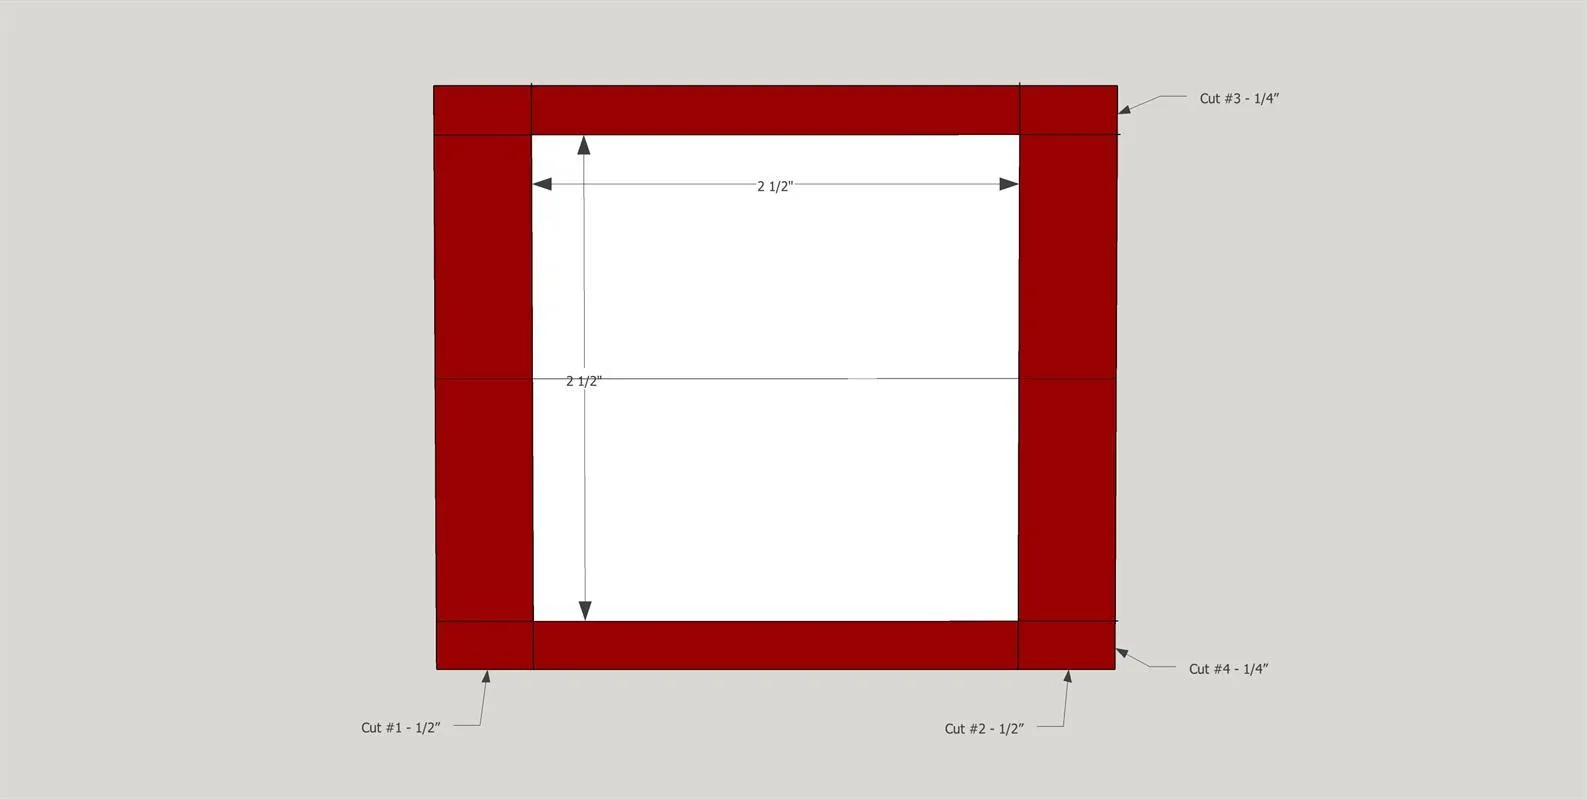
Trim the legs using your table saw by removing 1/2" from each side of the 3 1/2" width. Then trim 1/4" from each side of the 3" width.
4Join Legs to Face Spans
Join the legs to the face spans using wood glue and four 1 1/4" pocket hole screws on each set in the diagram.
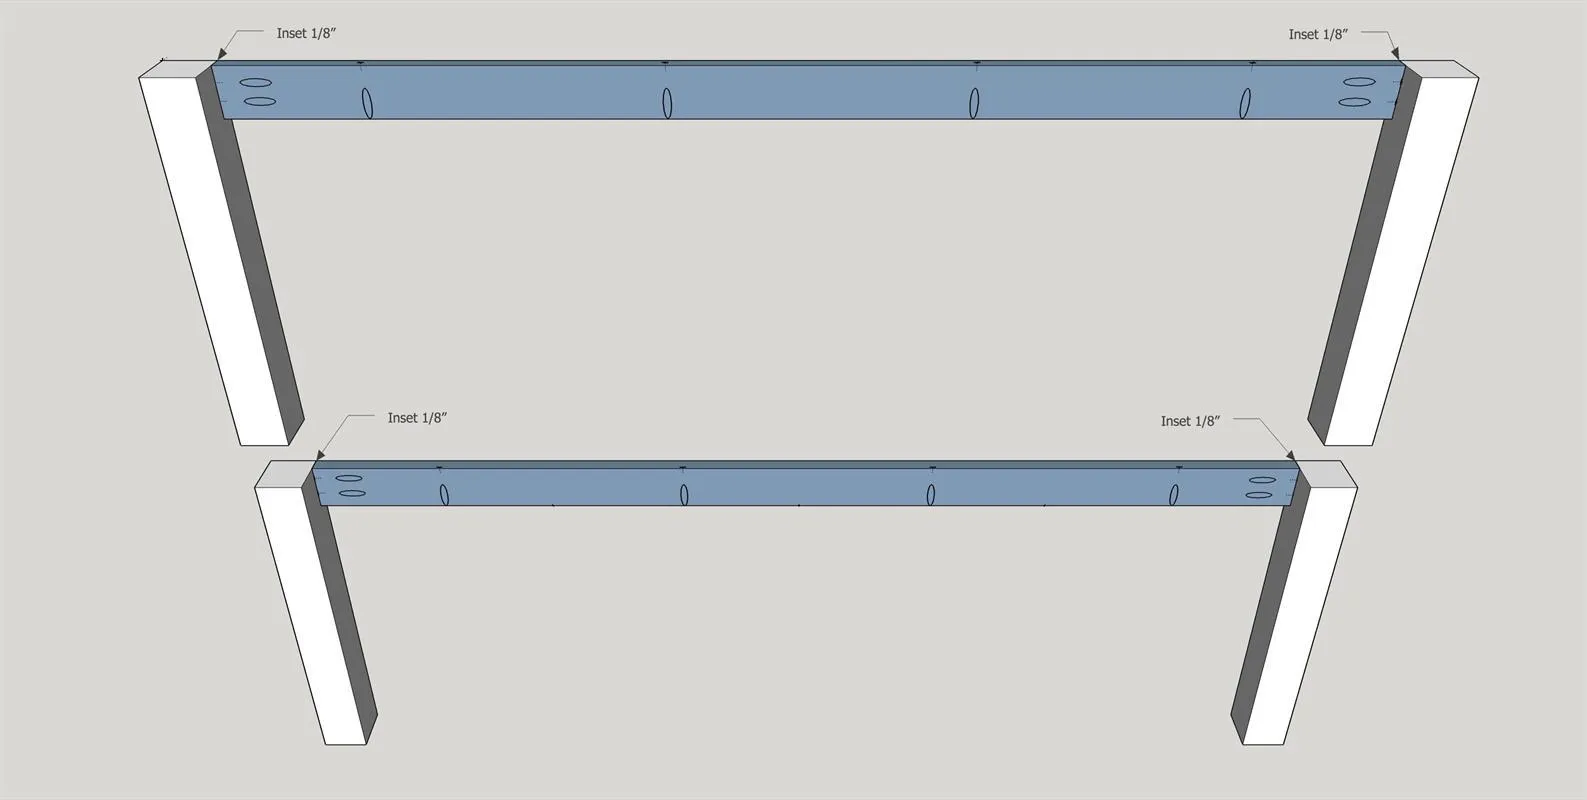
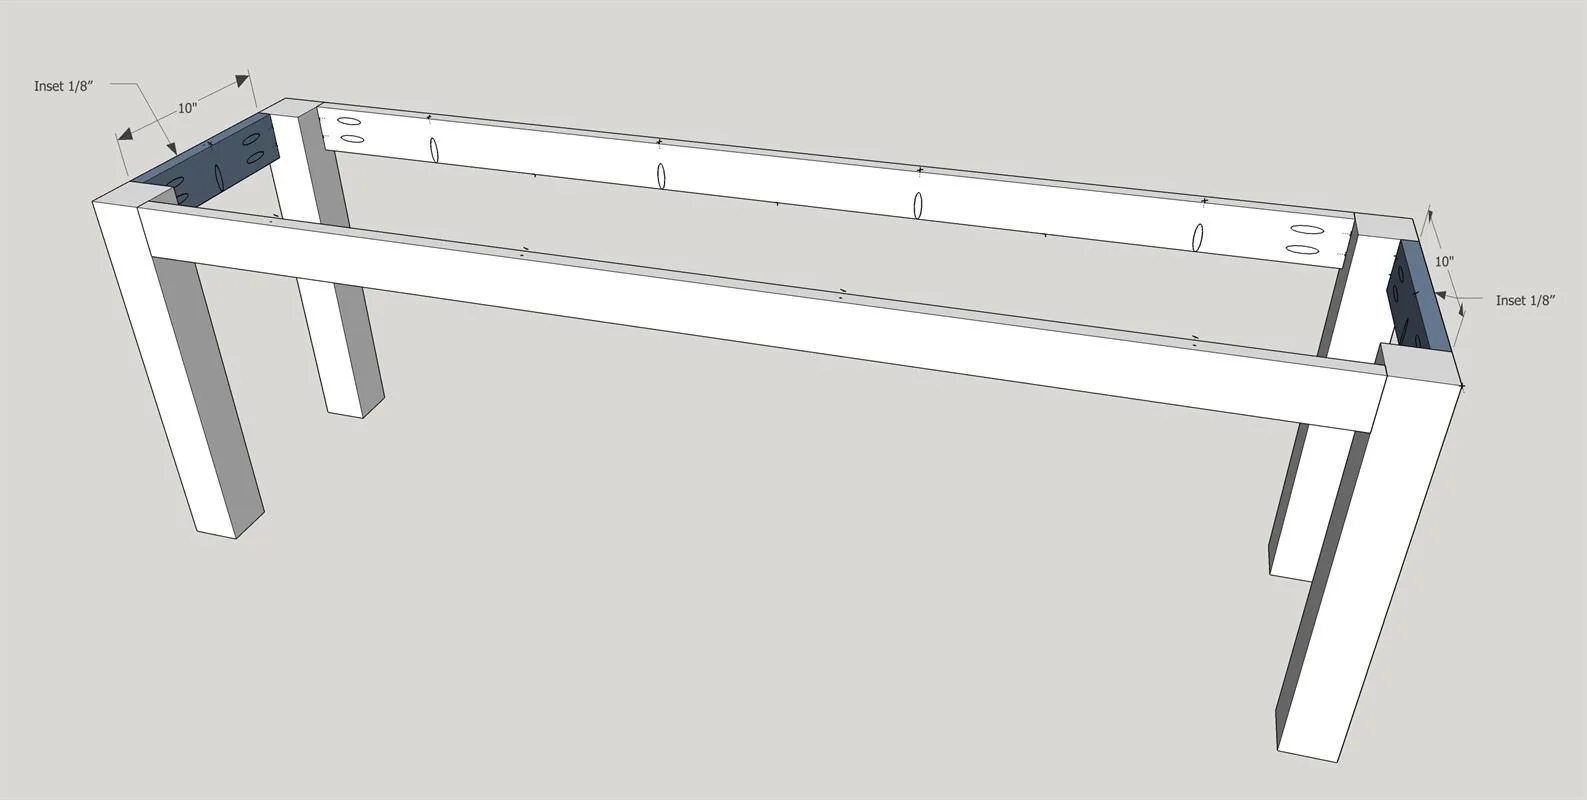
5Join Legs to Side Spans
Join the two pieces from step 4 using wood glue and 1 1/4" pocket hole screws.
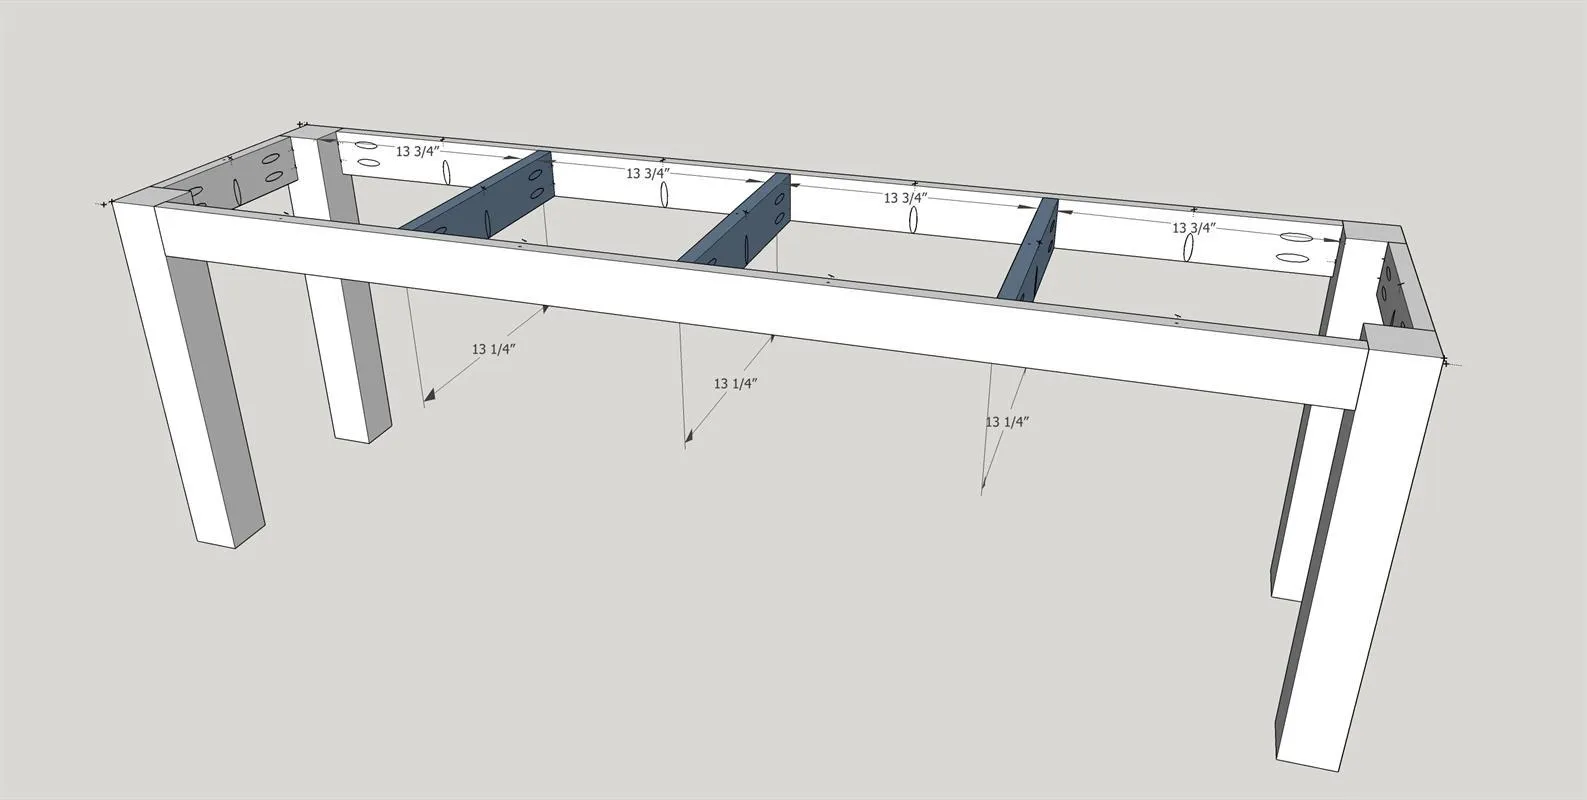
6Add Mid Spans
Add supporting spans in the middle using four 1 1/4" pocket hole screws on each. The boards will be 13 3/4" apart as shown on the diagram.
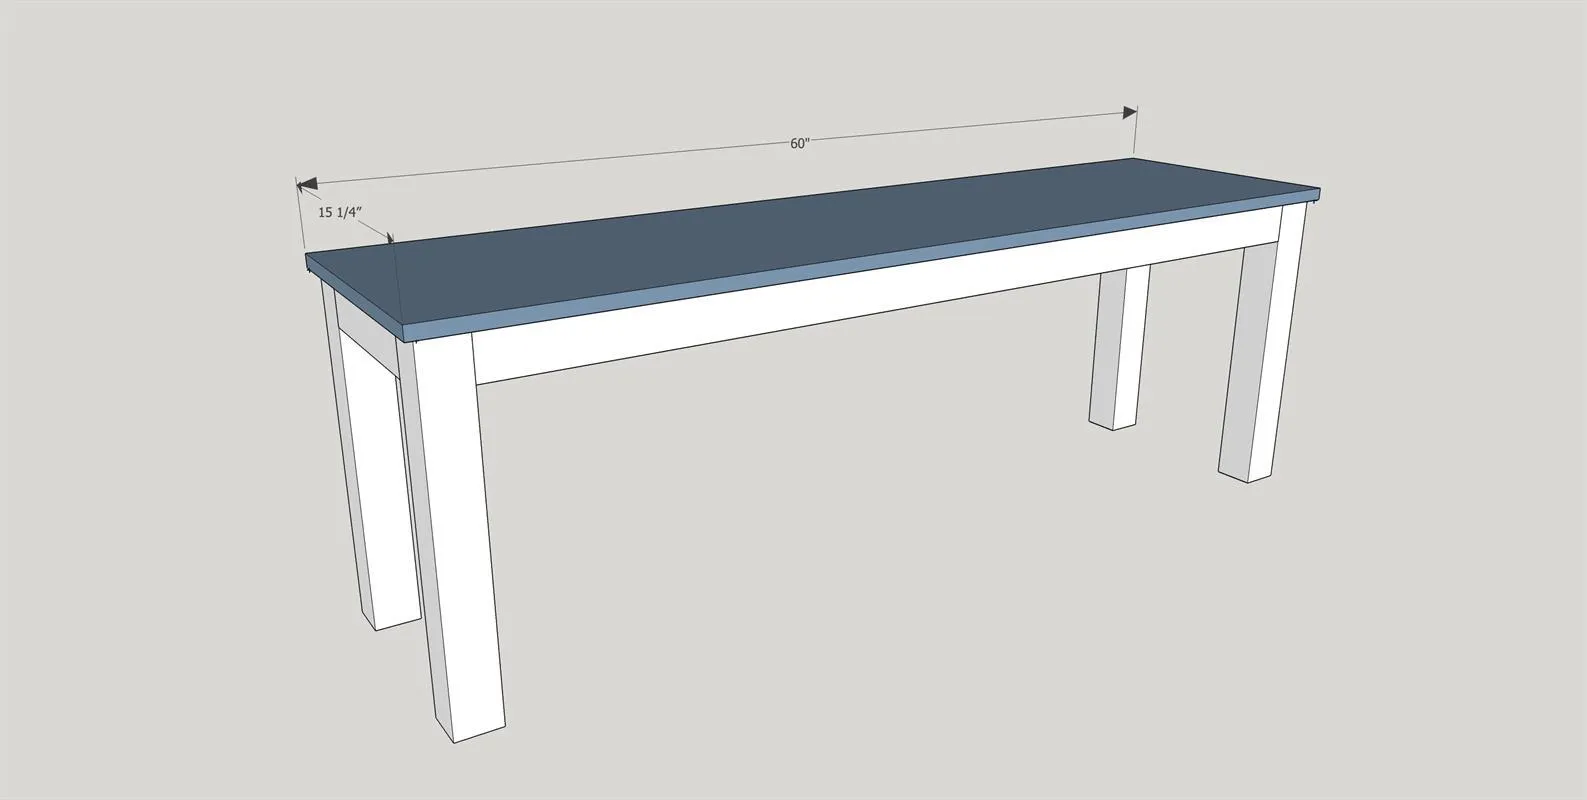
7Attach Top
Attach top from the under-side along the outer perimeter and each mid-span using 1 1/4 Pocket hole screws being very careful not to over-drill the screws so they don't poke through the table top.
8Sand, Paint, Stain & Seal
- Sand using 80 grit, followed by 120 and finish with 220 grit sandpaper.
- Paint the base of the table and stain the tabletop in your desired color. The color we used is called Golden Oak.
- Seal with two coats of satin polyurethane. If your toddler outgrows this, you can just create new legs to suit any height. Make it a taller desk, an entry table, a sofa table, a bench...the possibilities are endless!