 Notch
- Difficulty
- Intermediate
- Time
- 3.3–6.3 hours
- Cost
- $$
About this build
This simple, budget friendly project is an easy weekend build. It's long and narrow so it doesn't take up too much space. It can be placed up against a wall or in the center of a room. It can be converted to a sofa table once the kids have outgrown it by replacing the legs with longer ones.
Tools
Essential
- Drill / Driver
- Miter Saw
- Pocket Hole Jig
- Random Orbit Sander
- Router
- Router Table
- Table Saw
Optional / nice to have
- Bar / Pipe Clamps
- Tape Measure
Materials
| Item | Qty |
|---|---|
| Pine, 2x4 96" | 2 board |
| Laminated Pine Project Board, 3/4" Thick 16" x 60" | 1 board |
| Pine, 1x3 96" | 2 board |
| 1 1/4" Kreg Pocket Hole Screws | 28 each |
| Wood Glue | 1 each |
| Stain | 1 each |
| Polyurethane (Satin Finish) | 1 each |
| Paint | 1 each |
Overall cost: $$. Lumber prices vary by region, species, and season, so we give a band rather than a figure we would only be pretending to know.
Cut list
| Part | Qty | T × W × L |
|---|---|---|
| Front Skirt | 2 | 3/4" × 2" × 54" |
| Side Skirt | 2 | 3/4" × 2" × 10" |
| Mid Spans | 3 | 3/4" × 2" × 13" |
| Desktop | 1 | 3/4" × 15" × 60" |
| Leg Halves | 8 | 1" × 3" × 19" |
What to buy
Buy 5 boards at 8 ft.
1" × 3"
2 boards
3/4" × 15"
1 board
3/4" × 2"
2 boards
Assumes 8 ft stock, a 1/8" saw kerf, and buying each part at its own width. Change the board size or kerf on the full board plan →
Instructions
1Cut, Drill Pocket Holes & Router
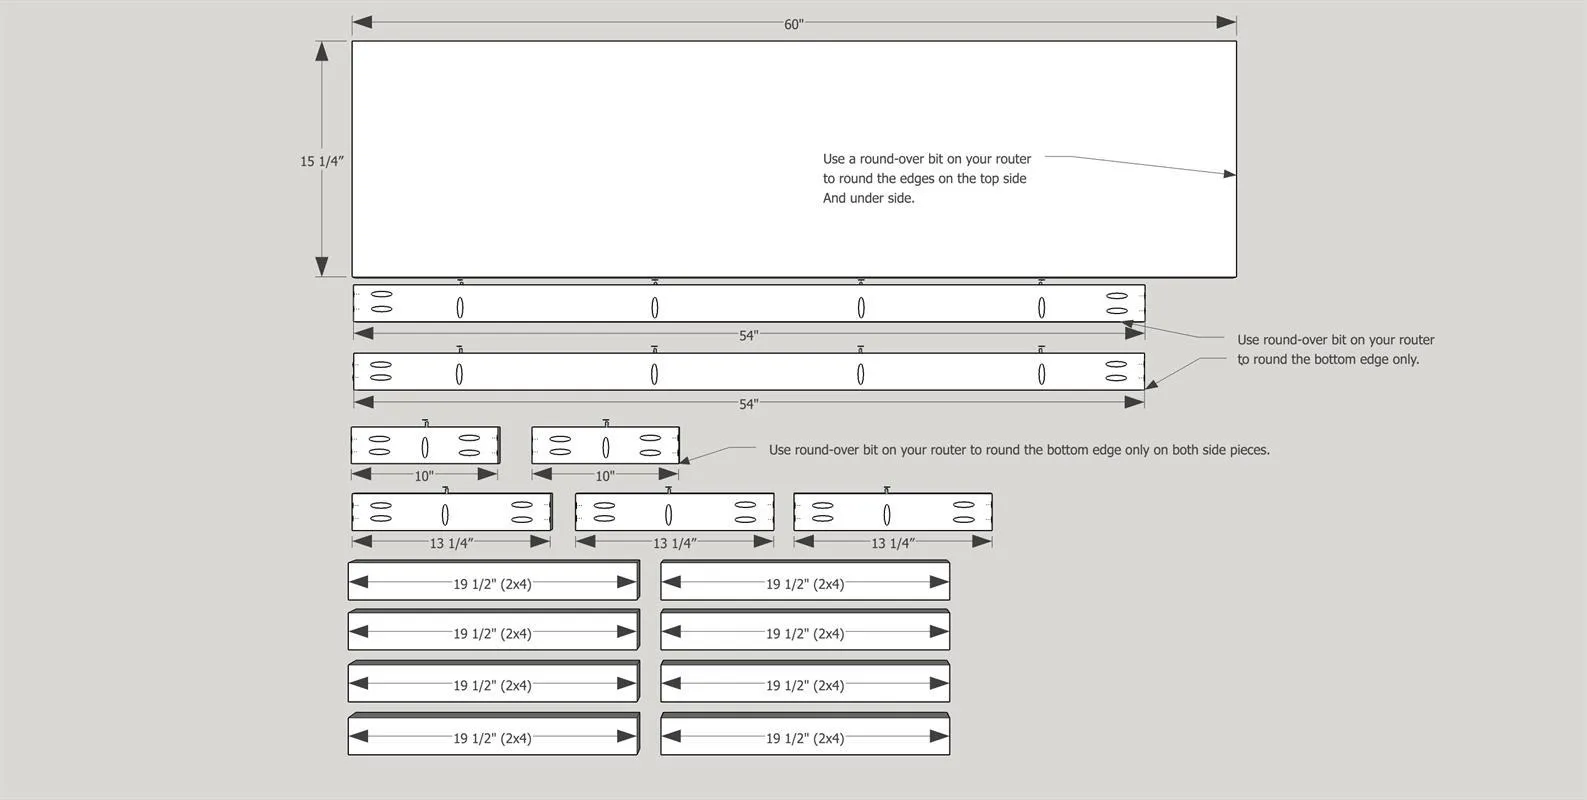
Cut the wood pieces according to the diagram and drill 3/4" pocket holes to accommodate 1 1/4" pocket hole screws. Router edges indicated on the digram if desired. This just softens the edges to avoid hard corners on children's furniture.
2Glueup Legs
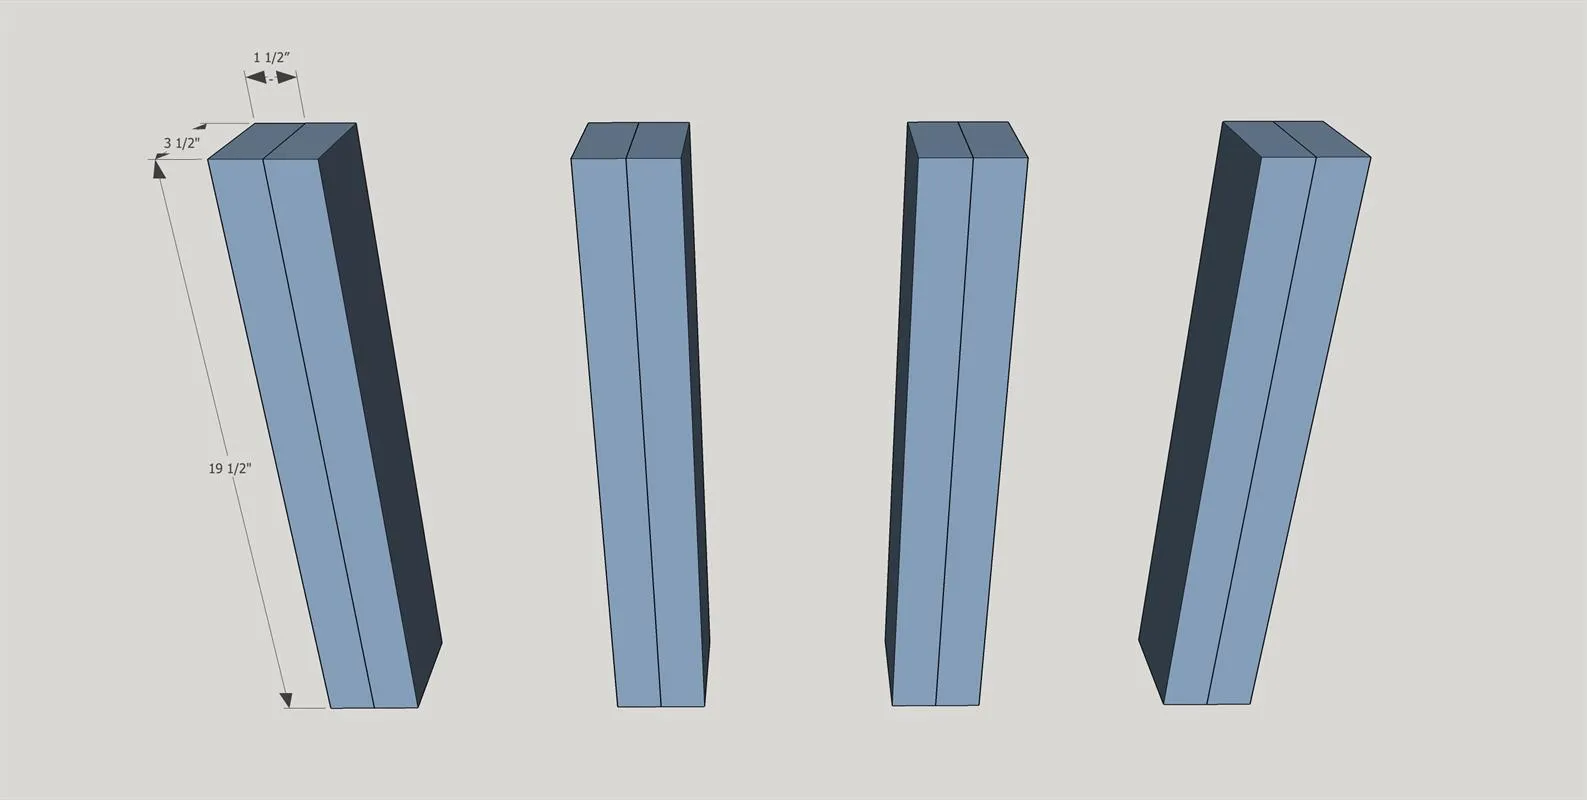
I wanted to create legs that matched the width of the spans/skirt around the table. Glue the faces of the the 19 1/2" 2x4's together and clamp overnight.
3Trim Legs to Size
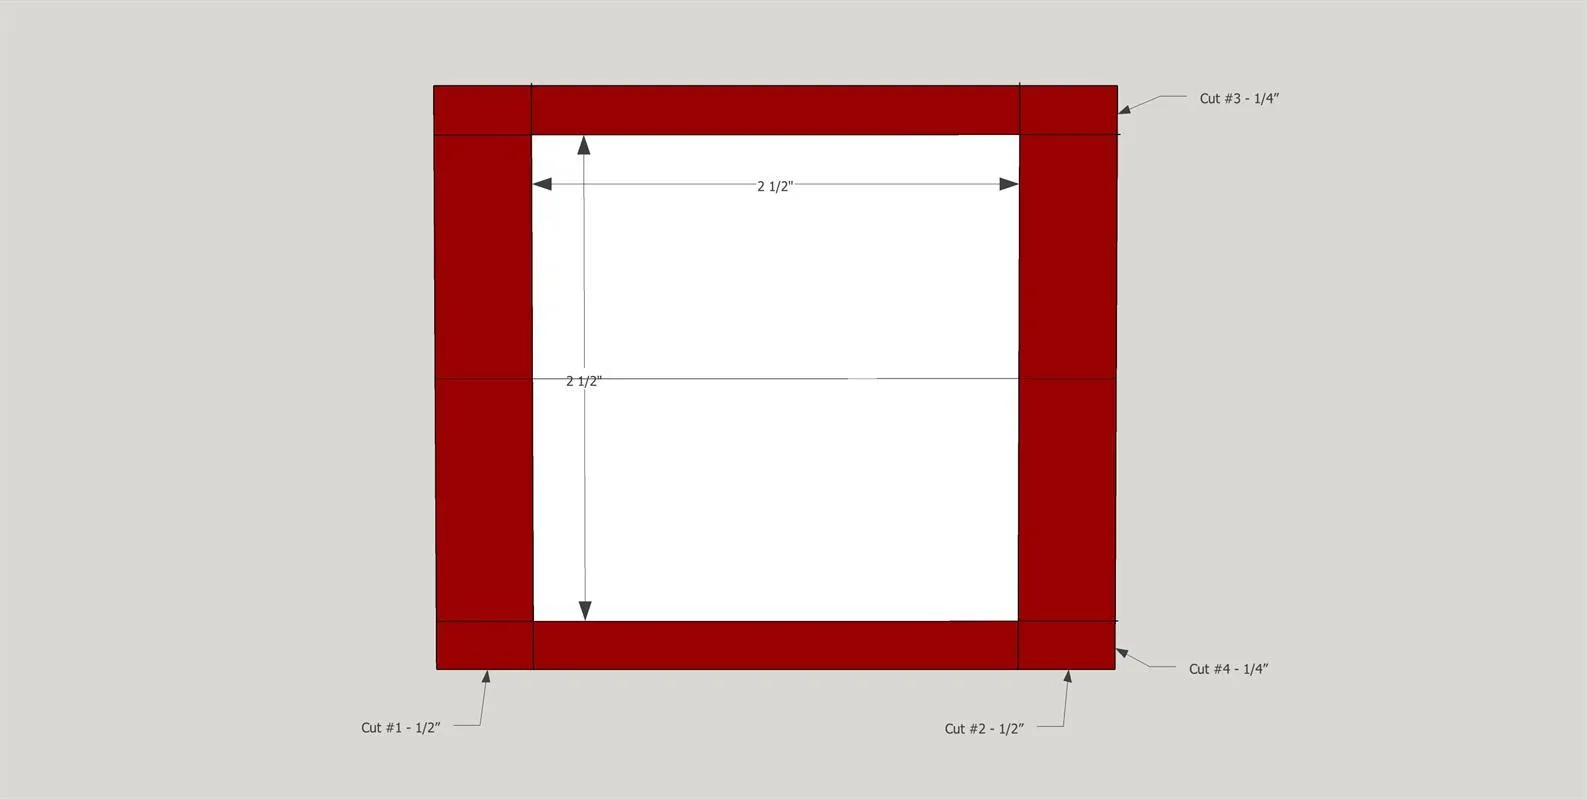
Trim the legs using your table saw by removing 1/2" from each side of the 3 1/2" width. Then trim 1/4" from each side of the 3" width.
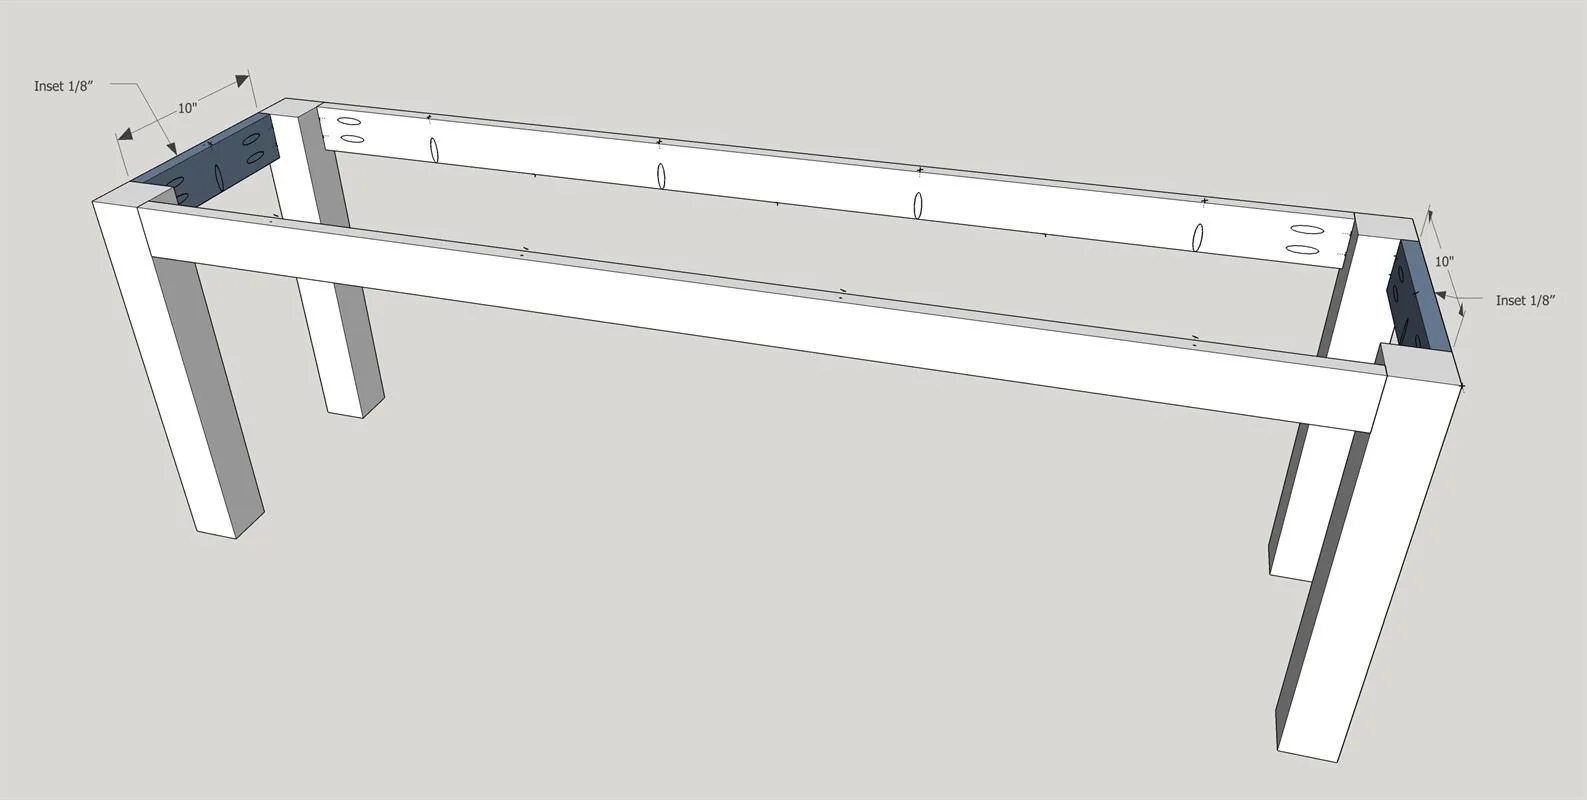
4Join Legs to Face Spans
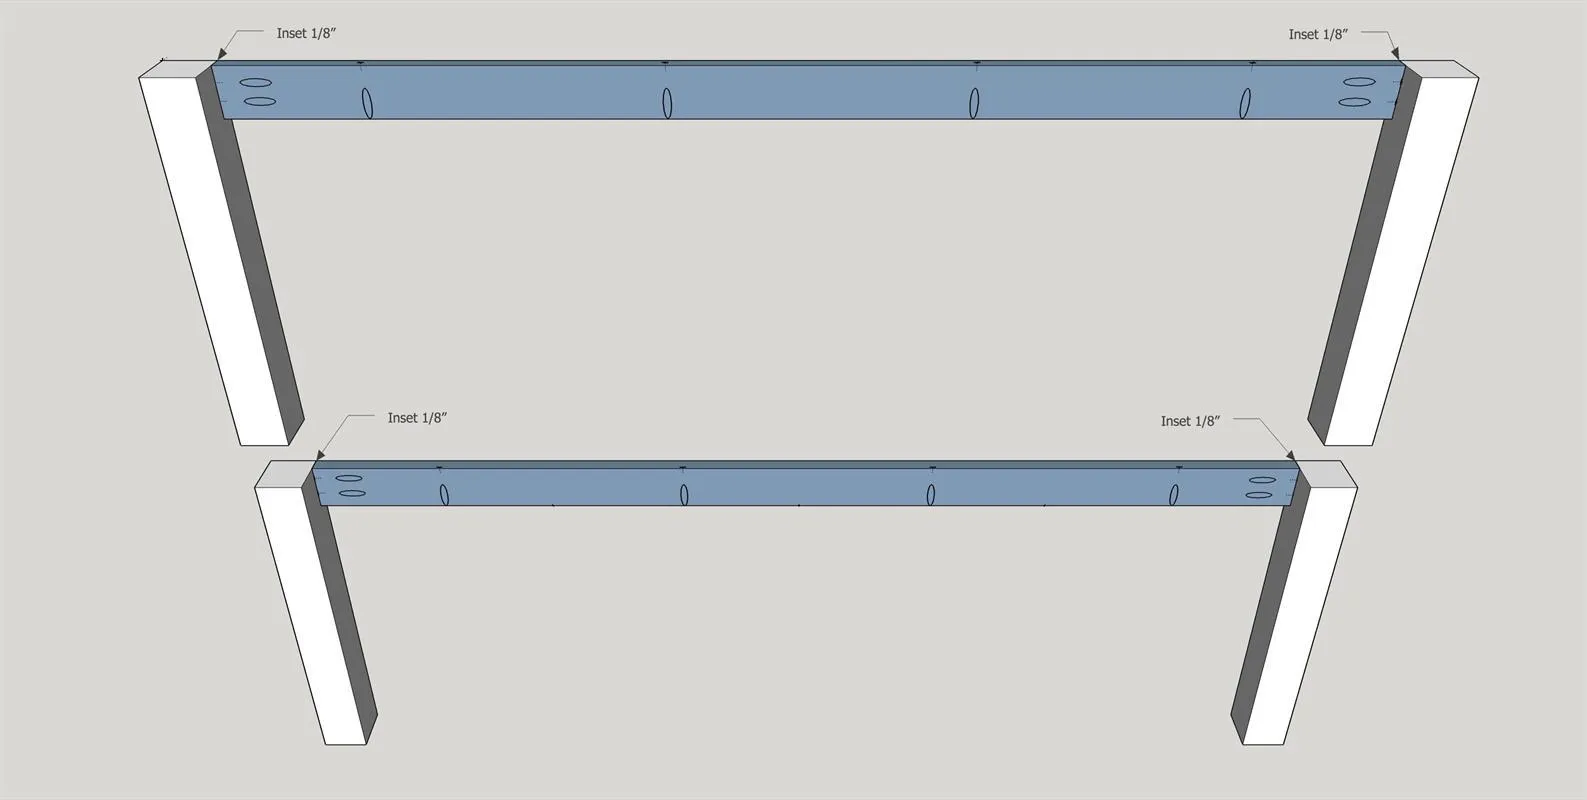
Join the legs to the face spans using wood glue and four 1 1/4" pocket hole screws on each set in the diagram.
5Join Legs to Side Spans
Join the two pieces from step 4 using wood glue and 1 1/4" pocket hole screws.
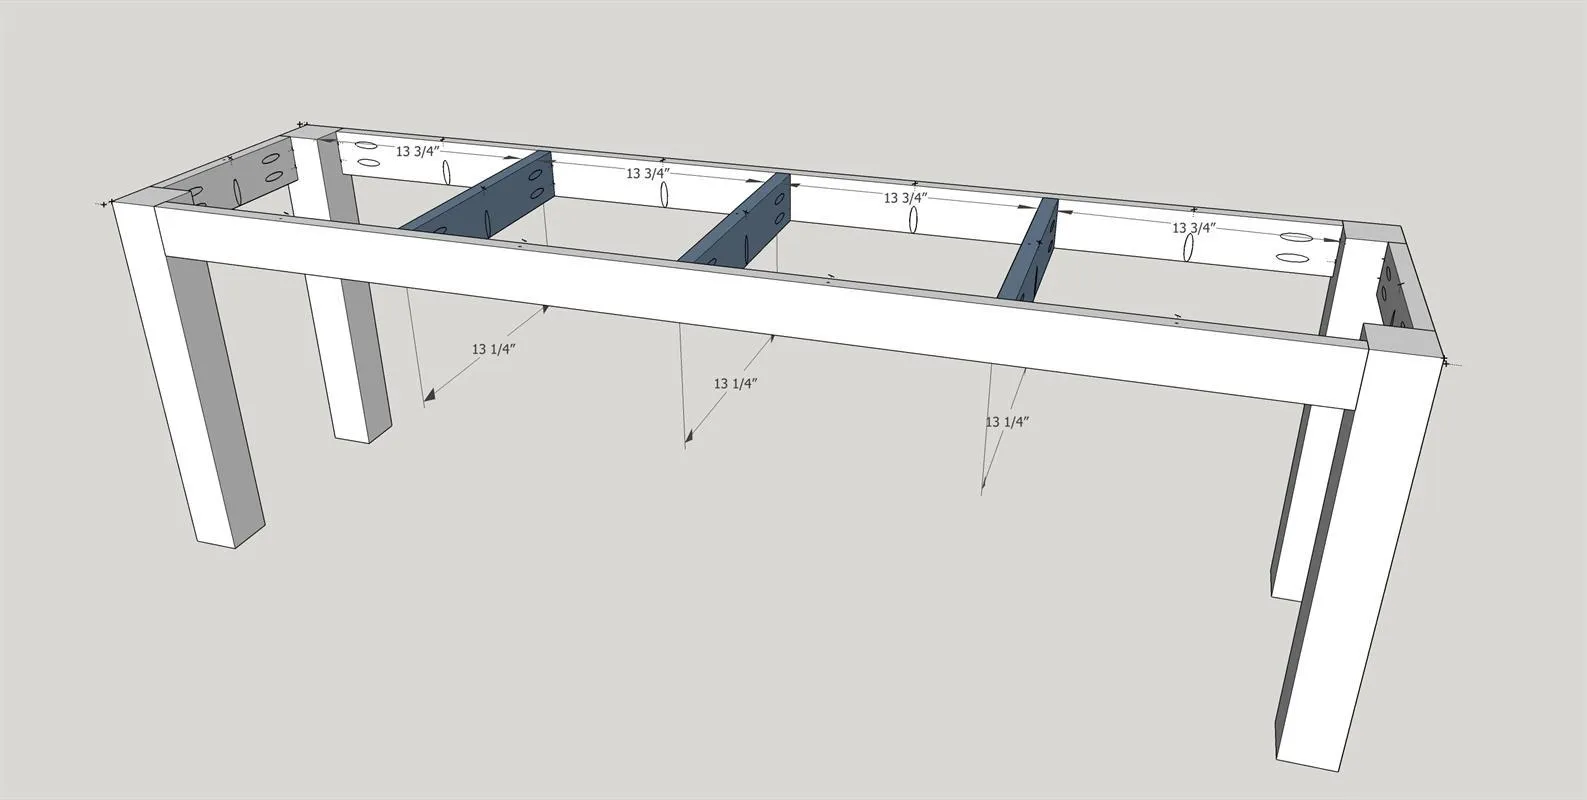
6Add Mid Spans
Add supporting spans in the middle using four 1 1/4" pocket hole screws on each. The boards will be 13 3/4" apart as shown on the diagram.
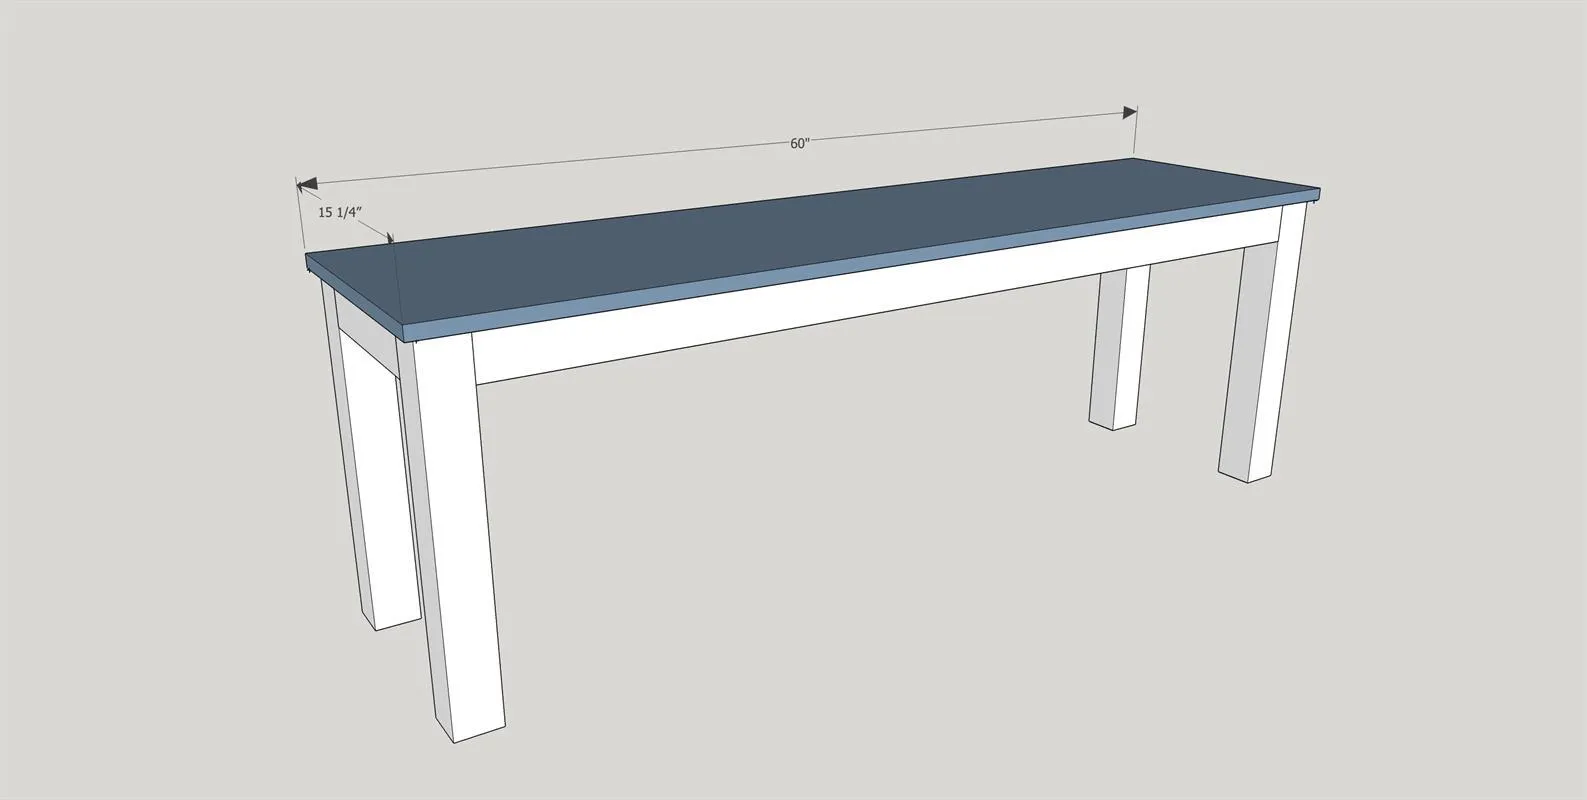
7Attach Top
Attach top from the under-side along the outer perimeter and each mid-span using 1 1/4 Pocket hole screws being very careful not to over-drill the screws so they don't poke through the table top.
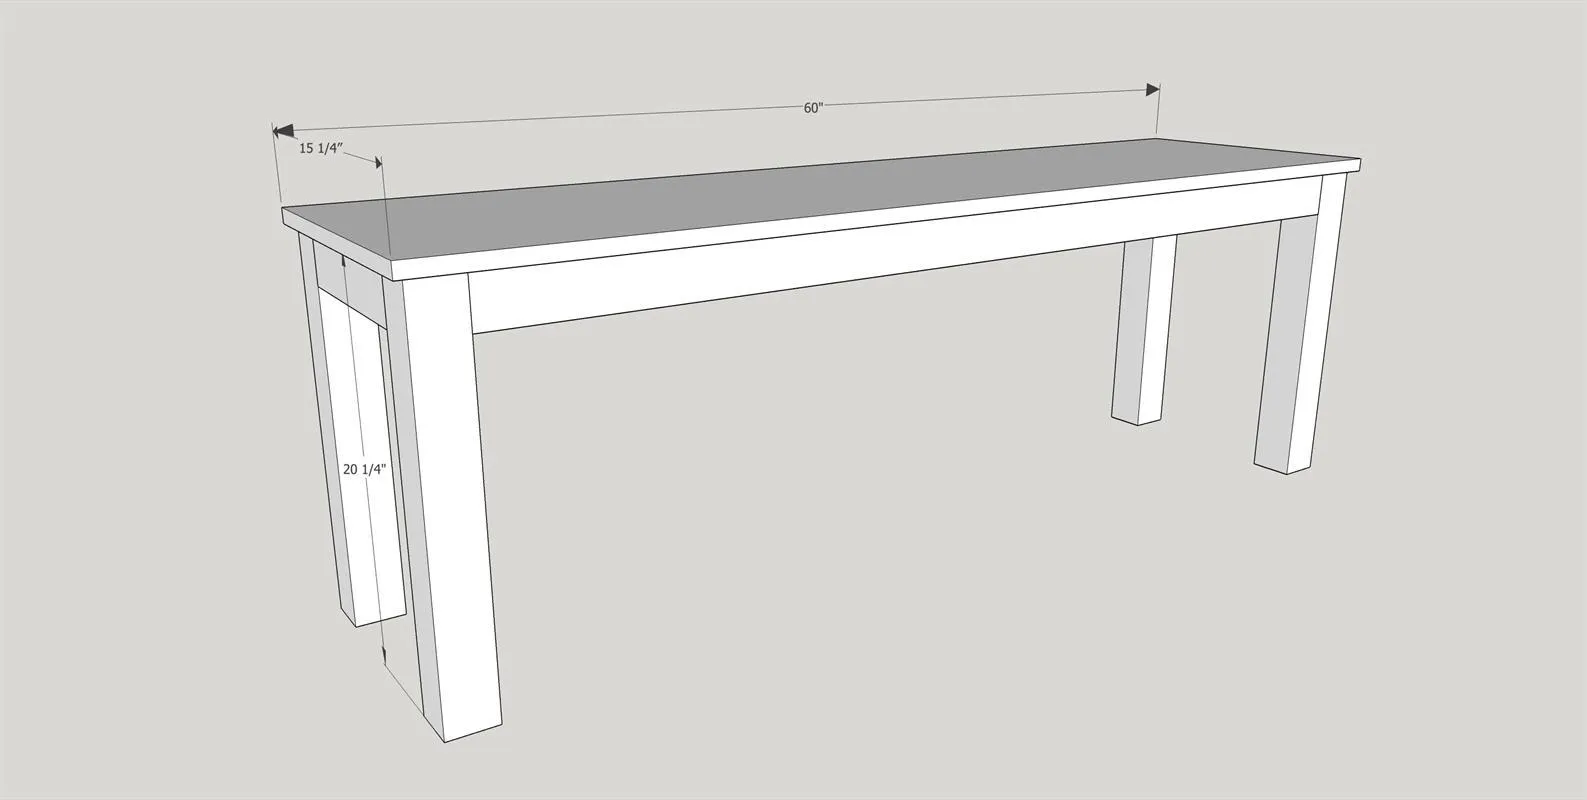
8Sand, Paint, Stain & Seal
- Sand using 80 grit, followed by 120 and finish with 220 grit sandpaper.
- Paint the base of the table and stain the tabletop in your desired color. The color we used is called Golden Oak.
- Seal with two coats of satin polyurethane. If your toddler outgrows this, you can just create new legs to suit any height. Make it a taller desk, an entry table, a sofa table, a bench...the possibilities are endless!
Tags
- Arts and Crafts
- Intermediate
Reviews & builds
No reviews yet
Sign in to review this plan or share your build.
No reviews yet. Be the first to build this.