Notch
Use your browser's Print (Ctrl/Cmd + P) and choose Save as PDF. This page works offline once you've opened it with a signal.
Rustic Coffee Table
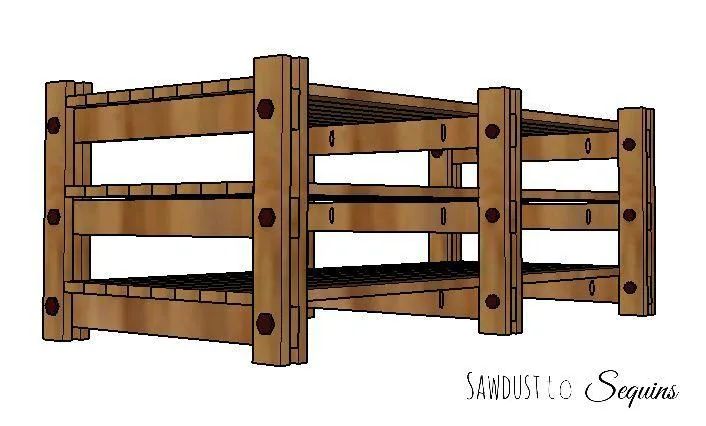
This rustic coffee table is an easy weekend build.
- Difficulty
- Easy
- Time
- 2.3–4 hours
- Cost
- $$$
Cut list
| Part | Qty | T × W × L | Material | ✓ |
|---|---|---|---|---|
| Shelf Boards | 24 | 3/4" × 2 1/2" × 48" | — | ☐ |
| Table Leg Height Boards | 12 | 3/4" × 2 1/2" × 19" | — | ☐ |
| Table Leg Width Boards | 9 | 2 1/2" × 3" × 25" | — | ☐ |
| Shelf Joiner Boards | 6 | 3/4" × 1 1/2" × 18" | — | ☐ |
Materials
| Item | Qty | ✓ |
|---|---|---|
| Board, 1x3 96" | 18 board | ☐ |
| Board, 1x2 96" | 2 board | ☐ |
| 1 ¼” Pocket Hole Screws | 18 each | ☐ |
| 3/8-in-16 x 3-in bolts | 18 each | ☐ |
| 3/8-in-16 hex nuts | 18 each | ☐ |
| 3/8-in x 7/8-in flat washers | 18 each | ☐ |
| 1 ¼” wood screws | 48 each | ☐ |
| 120 Sandpaper | 1 each | ☐ |
| Kona Wood Stain | 1 each | ☐ |
Overall cost: $$$. Lumber varies by region, species, and season, so we give a band rather than a figure.
Tools
- Drill / Driver
- Miter Saw
- Pocket Hole Jig
- Random Orbit Sander
- Tape Measure — optional
Instructions
1. Cut boards and drill holes needed
- Cut all boards according to the cut list.
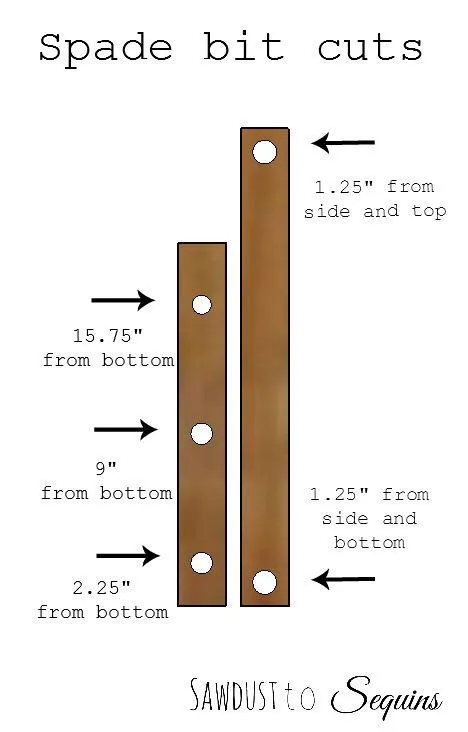
- Drill holes with a 3/8" spade bit in the (12) 19" boards and the (9) 25" boards. The picture shows the location of the holes.
2. Drill pocket holes
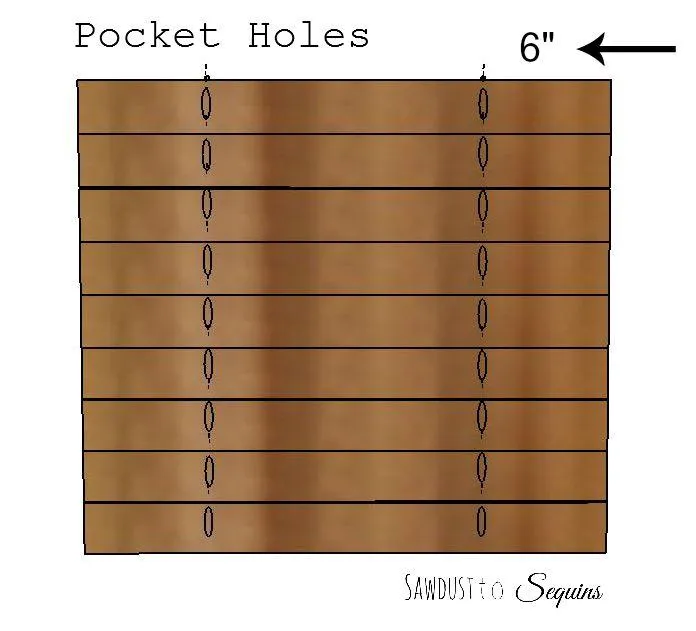
Drill pocket holes in the 25” boards. They should be 6” from the edge of each side.
3. Sand or Paint Boards
Completely sand your boards and paint or stain. This is very difficult to do once the table is assembled.
4. Assemble Shelves
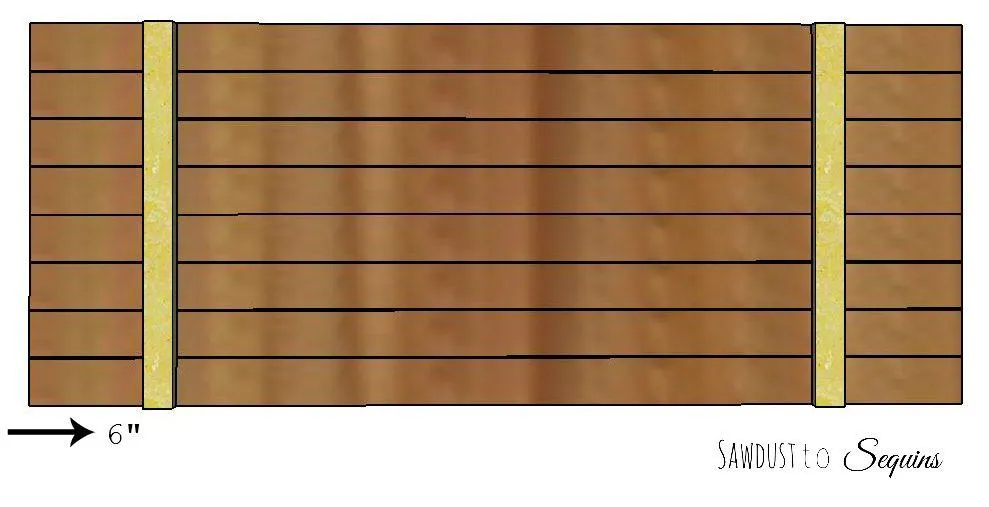
- Place two of the 18” 1x2 boards across eight of your 48” 1x3 boards and screw in with 1 ¼” wood screws.
- Repeat until you have three shelf units. 1x2 boards should be placed 6” from each edge.
5. Assemble Legs of Table
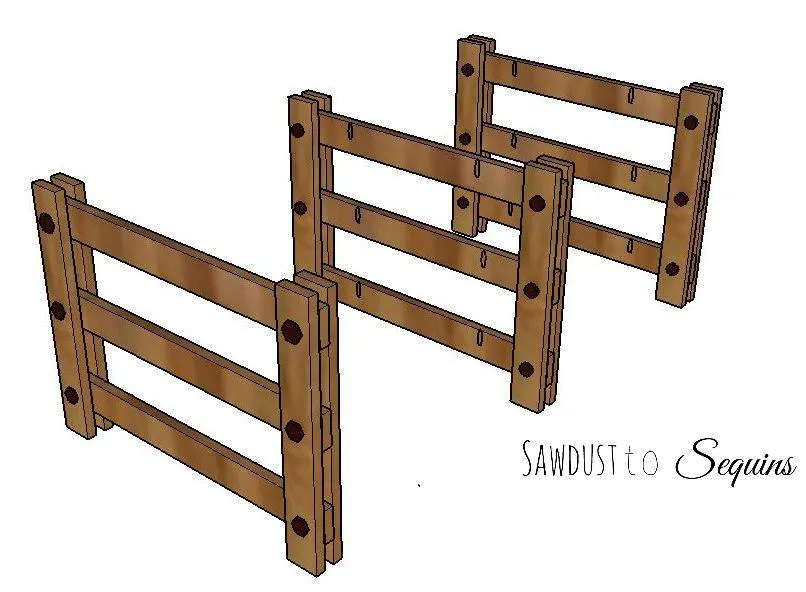
Place 3 – 1x3 @ 25” between 3- 1x3 @ 19”. Secure with a bolt, washer, and hex nut. The holes drilled with the spade bit will be the placement of the boards. Tighten the nuts to ensure the stability of the table. Make three of these.
6. Install Shelf Units to Legs
Attach the shelf units you assembled in step 4 to the leg supports with pocket hole screws.