 Notch
Notch- Difficulty
- Intermediate
- Time
- 5.3–10.3 hours
- Cost
- $$
About this build
This Rolling Pull-Out Trash Can Cabinet is perfect for your outdoor patio. It comes loaded with two sets double waste containers perfect for Hosting Outdoor Events!
Tools
Essential
- Drill / Driver
- Miter Saw
- Random Orbit Sander
- Router
- Table Saw
- Track Saw
Optional / nice to have
- Bar / Pipe Clamps
- Combination Square
Materials
| Item | Qty |
|---|---|
| Cedar Boards, 1x6 96" | 7 board |
| Cedar Planking, 1/4" Cedar Planking 96" | 2 board |
| Casters | 4 each |
| Rev-A-Shelf - 53WC-2150SCDM-217 - Double 50 Qt | 2 each |
Overall cost: $$. Lumber prices vary by region, species, and season, so we give a band rather than a figure we would only be pretending to know.
Cut list
| Part | Qty | T × W × L |
|---|---|---|
| Cabinet Sides | 2 | 3/4" × 22" × 28" |
What to buy
Buy 1 board at 8 ft.
3/4" × 22"
1 board
Assumes 8 ft stock, a 1/8" saw kerf, and buying each part at its own width. Change the board size or kerf on the full board plan →
Instructions
1Complete Cut List
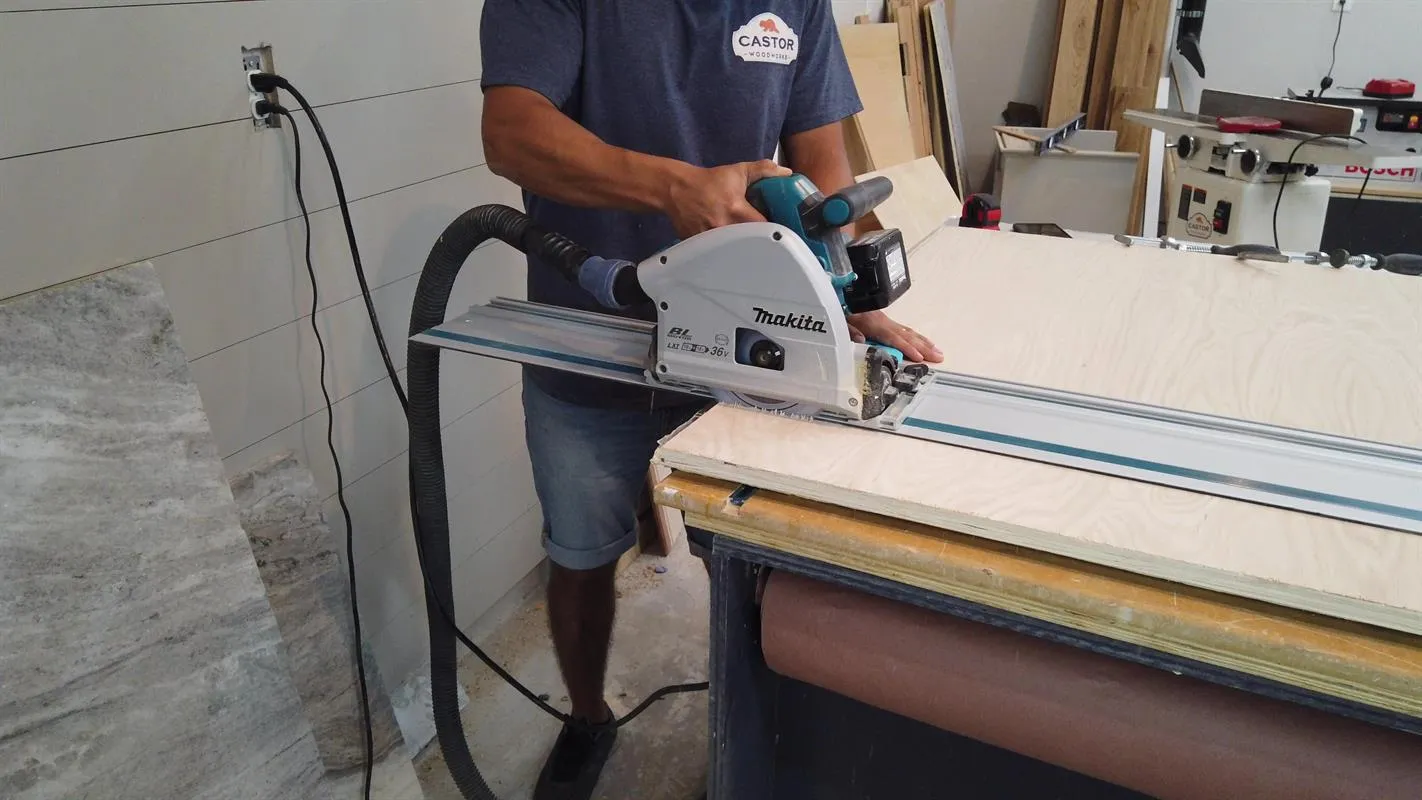
Use the cut-list to break down 3/4" plywood to the specified dimensions. Use a circlular/track saw to cut your pieces down to manageable pieces then cut to final size on the table saw.
2Drill Pocket Holes
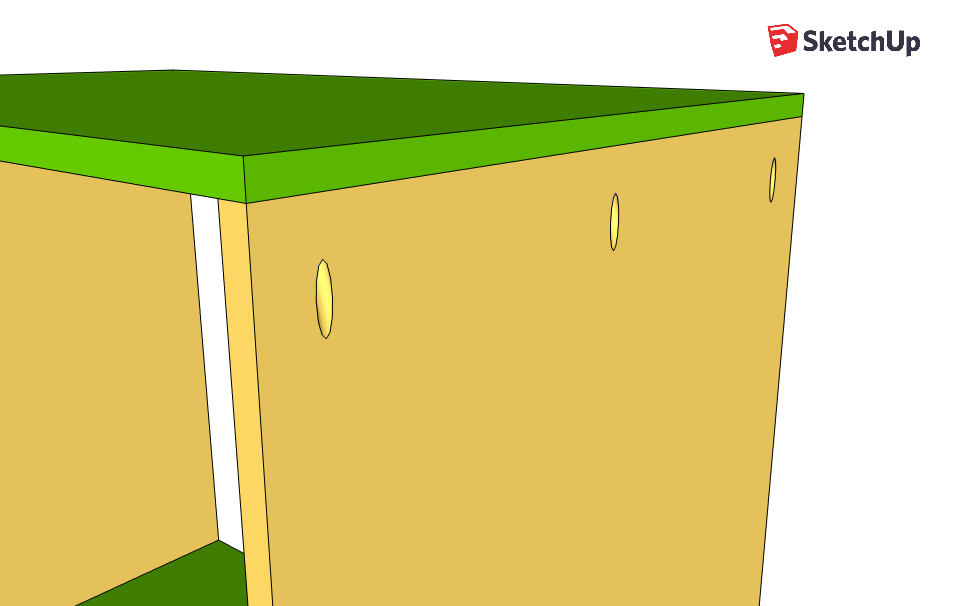
Drill pocket holes on each end of the Cabinet Sides. Space them out every 6" or so.
3Assemble Cabinet
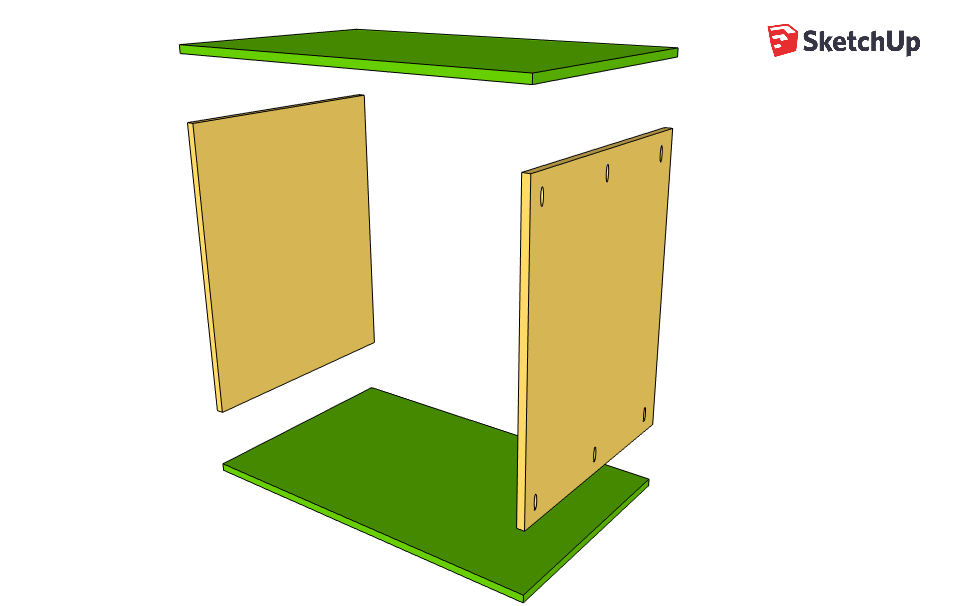
Attach the Sides to the Top and Bottom pieces uses 1 1/4" pocket screws. Make sure the joints are square during assembly.
4Add Stretchers
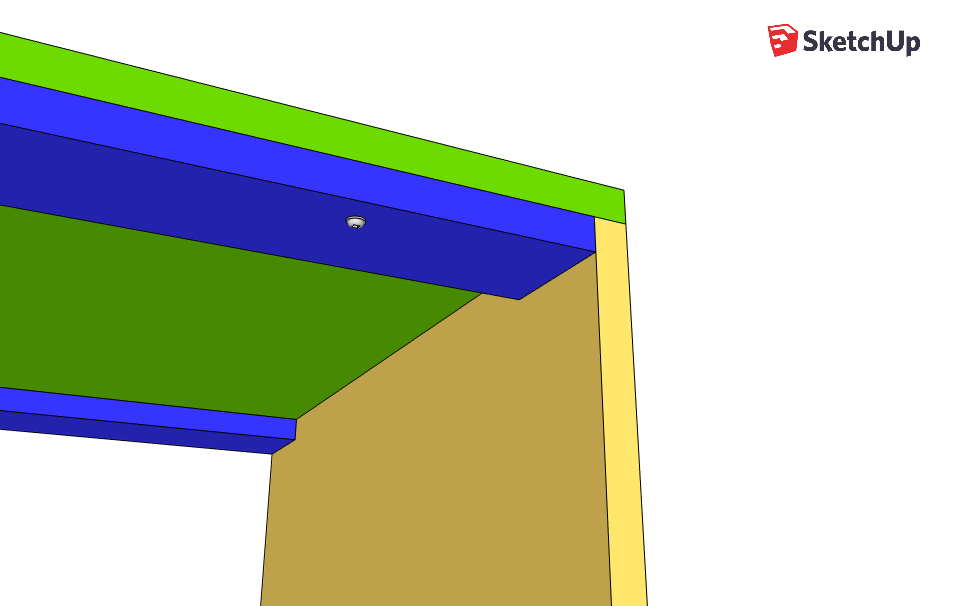
Add Two Stretchers to the Top of the cabinet along the front and back sides. Use 1 1/4" Pocket Screws to secure them in place.
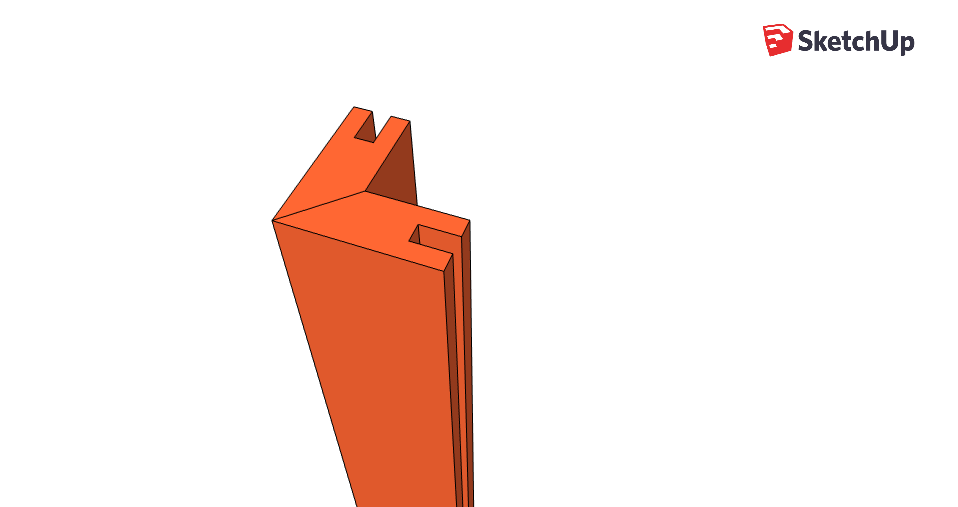
5Mitered Corner Frames
- Start off by running your corner stiles through your table saw at 45 degrees.
- Once all your bevels are cut you are going to run them through your router table using a tongue and groove bit. After all your groves are cut, glue both pieces together to make a 90 degree corner.
6Cut Tongues on Side Rails
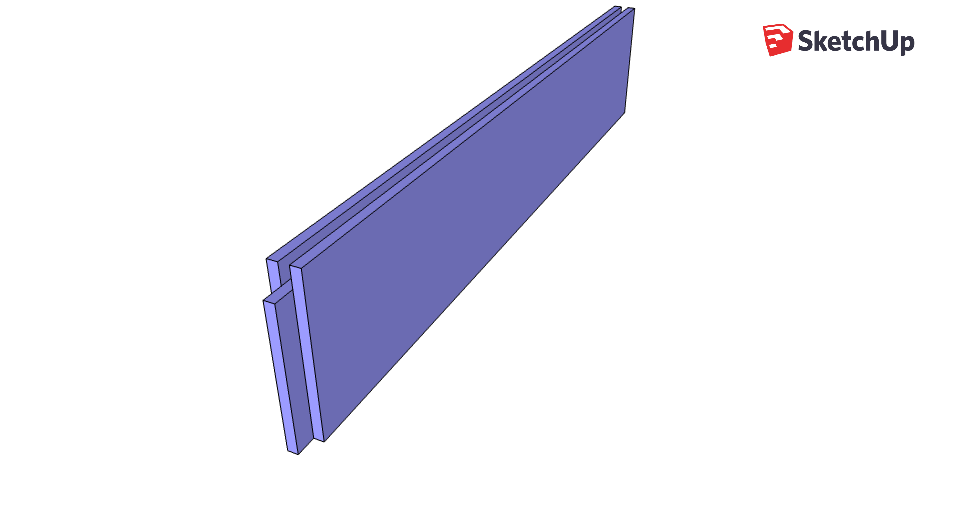
Cut a groove in your Side Panel Rails so that it can accept a 1/4" panel. Next use your grove bit to make a tongue for face frame assembly.
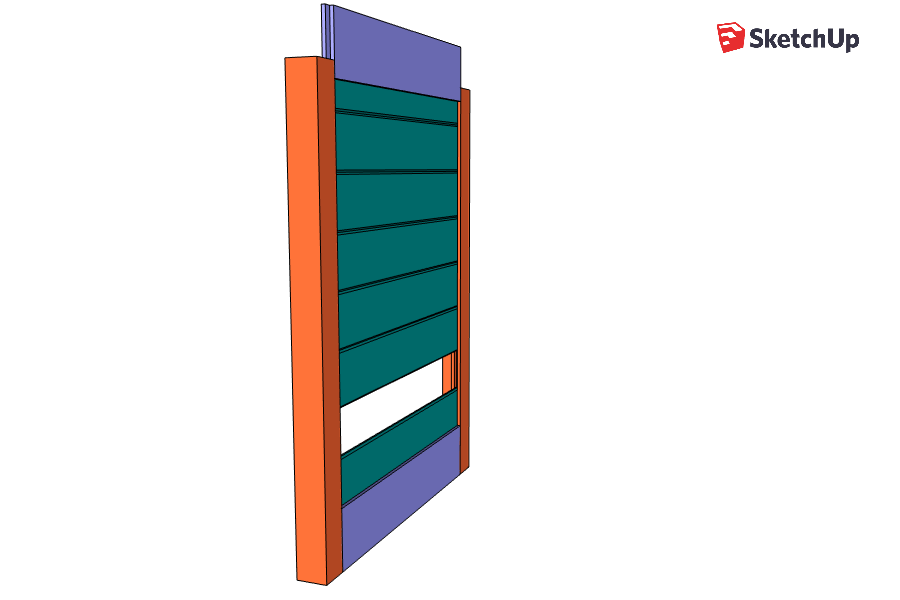
7Side Panel Assembly
- Start by installing the bottom Side Rail to your Corner Stiles with wood glue.
- Slide your Side Panels in one by one until you get to the last one. The top side panel will most likely have to be trimmed before you can install the Top Rail.
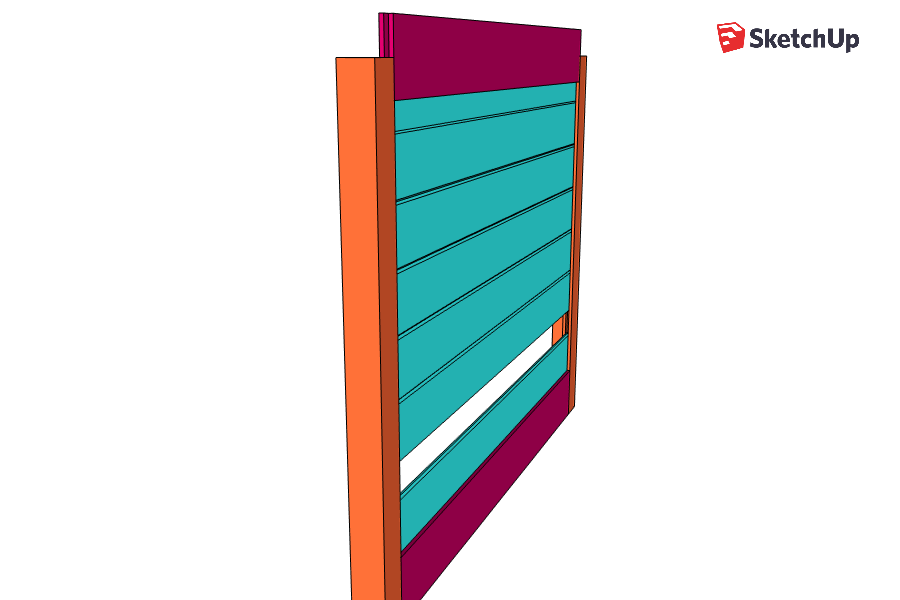
8Back Panel Assembly
Repeat Step 7 for your Back Rails and Back Panels.
9Attach Face frame pieces
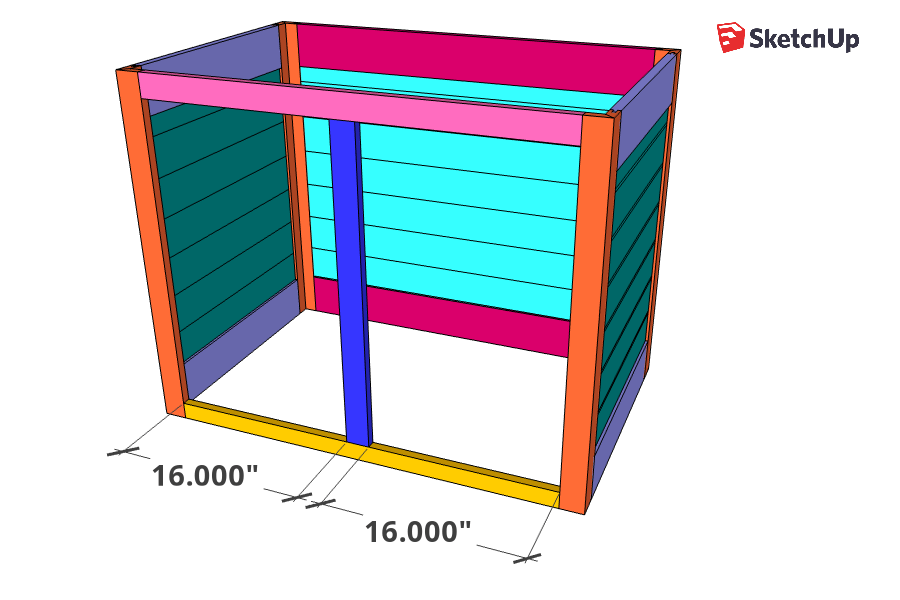
Attach your Top and Bottom Rails to the frame using 1 1/4" pocket screws. Add the Center Stile to the front frame making sure you have 16" gap on both sides.
10Drop in Face Frame
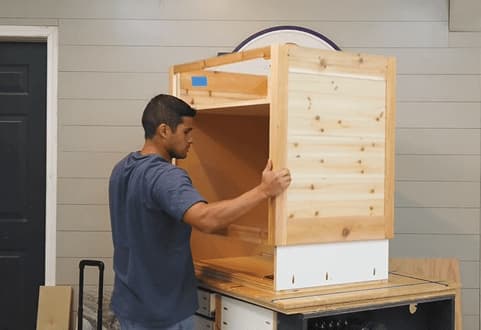
Flip the carcass upside down and drop in the frame slowly. Once the frame is dropped in secure the carcass to the sides with a few 1 1/4" screws where the rails are.
11Flip Frame Upright
Once your frame has been secured to the carcass flip it back over to begin making the doors.
12Make the doors
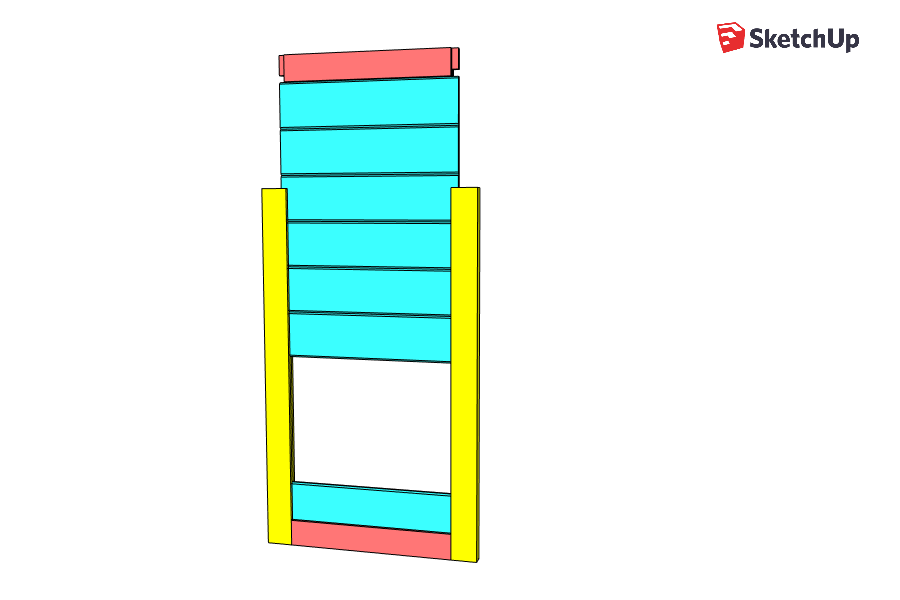
- Start glue-ing up your door by taking one of the rails and adding wood glue to both of the tongues.
- Clamp your bottom rail to both of your stiles and begin placing center panels in until the door is complete. Drop in the top rail and let the door dry for about an hour.
13Attach the Doors
Use the provided instructions from Rev-A-Shelf to attach the doors to the hardware brackets.
14Overview
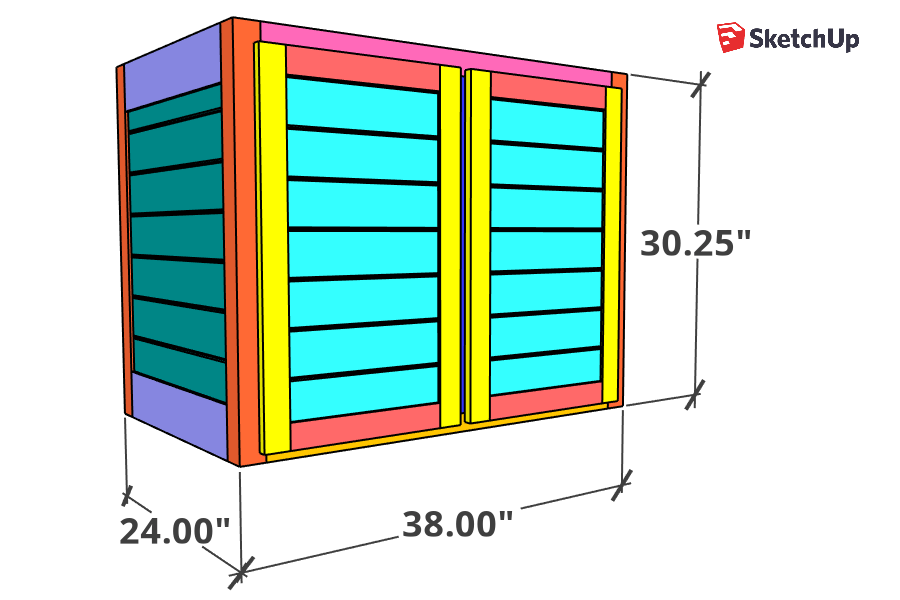
At this point your cabinet is ready for Hardware and Sanding/finishing. Attached cabinet pulls/knobs to each door and secure the casters to the bottom of the carcass.
15Prep for Sanding/Finish
Sand the frame and doors to 150 and apply your favorite stain. Once its dry add two coats of Poly and the cabinet is ready!
16Attach the Top
I made my cabinet with a granite top so i just drop it in place. If you are making a wood top, secure it to the carcass with some wood screws.
Tags
- Built Ins and Cabinets
- Intermediate
Reviews & builds
No reviews yet
Sign in to review this plan or share your build.
No reviews yet. Be the first to build this.